DIY Fire Pit: A Step-by-Step Guide to Building Your Backyard Haven
Creating a fire pit in your backyard can be a fantastic way to enjoy evenings outdoors, adding both warmth and ambiance to your space. Whether you're roasting marshmallows, telling stories, or simply enjoying the crackling flames, a DIY fire pit is a rewarding project that can be completed in a weekend. Here’s a comprehensive guide to building your very own fire pit.
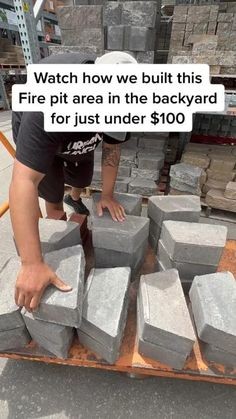
Materials Needed
Shovel
Tape measure
Level
Tamper
Gravel
Sand
Fire bricks
Concrete blocks or pavers
Construction adhesive
Metal fire pit ring (optional)
Work gloves
Wheelbarrow (optional)
Step-by-Step Instructions
1. Choose the Location
Select a flat, open area in your backyard. Ensure it's at least 10 feet away from any structures, trees, or flammable materials. Check local regulations or HOA guidelines regarding fire pit placement and construction.
2. Mark the Pit Area
Decide on the size of your fire pit. A typical fire pit has a diameter of 3-4 feet. Use a stake and string or a spray paint to mark the circle on the ground.
3. Dig the Pit
Excavate the marked area to a depth of about 6-8 inches. Ensure the hole has straight sides and a level bottom. This will provide a stable foundation for your fire pit.
4. Create the Base
Add a 2-3 inch layer of gravel to the bottom of the hole for drainage. Use a tamper to compact the gravel evenly. On top of the gravel, add a 1-2 inch layer of sand, leveling it out smoothly.
5. Lay the First Row of Blocks
Start placing the concrete blocks or pavers in a circle on top of the sand base. Ensure they are level and tightly fitted together. Use a level to check each block. This first row will be the foundation of your fire pit, so take your time to make it perfect.
6. Build Up the Walls
Continue stacking the blocks or pavers, staggering the seams for stability. Depending on the height you desire, typically 3-4 rows will suffice. Use construction adhesive between the layers for added stability.
7. Insert the Fire Bricks
Line the interior of the fire pit with fire bricks. These bricks are specially designed to withstand high temperatures. Arrange them vertically around the inner wall of your pit. If using a metal fire pit ring, place it inside the pit first, then line the interior with fire bricks around it.
8. Fill the Gaps
Fill any gaps between the fire bricks and the outer wall with sand. This helps to stabilize the bricks and insulate the pit. Ensure the top row of fire bricks is flush with or slightly above the top of the outer wall.
9. Final Touches
Check the entire structure for stability and make any necessary adjustments. Remove any excess sand or debris from around the pit. If you want, you can add decorative stones or gravel around the perimeter of the fire pit for a polished look.
10. Enjoy Your Fire Pit
Your fire pit is now ready for use. Gather some firewood, start a fire, and enjoy your new backyard feature. Always keep a bucket of water or a fire extinguisher nearby for safety, and never leave the fire unattended.
Maintenance Tips
Regularly remove ashes and debris from the pit to maintain airflow.
Inspect the fire bricks and blocks for any signs of wear or damage and replace them if necessary.
Keep the area around the fire pit clean and free from flammable materials.
Conclusion
Building a DIY fire pit is a fulfilling project that enhances your outdoor living space. With some basic tools and materials, you can create a cozy and inviting spot for family and friends to gather. Enjoy your fire pit safely, and it will become a cherished feature in your backyard for years to come.