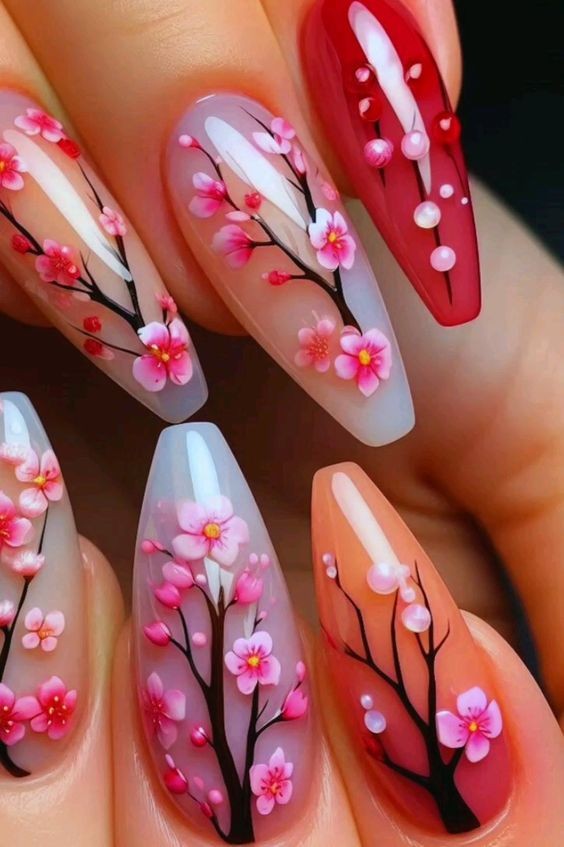
Cherry Blooming Reddish Nail Art 🍒🍒
Nail art has taken the beauty world by storm, and one of the most enchanting and popular designs is the Cherry Blooming Reddish Nail Art. This delightful design not only captures the essence of springtime with its vibrant red hues and delicate cherry blossoms but also adds a touch of elegance and whimsy to your look. Whether you are a nail art novice or a seasoned pro, this design is sure to make your nails the center of attention.
The Inspiration Behind Cherry Blooming Reddish Nail Art
The Cherry Blooming Reddish Nail Art draws inspiration from the beautiful cherry blossoms that bloom in the spring. These blossoms are a symbol of renewal and beauty, and their fleeting nature reminds us to appreciate the present moment. The reddish hues represent the rich, deep colors of ripe cherries, adding a bold and passionate touch to the design. Together, these elements create a stunning and sophisticated look that celebrates the beauty of nature.
Materials Needed
Before you start creating your Cherry Blooming Reddish Nail Art, make sure you have the following materials:
Base coat
Red nail polish (various shades)
White nail polish
Green nail polish
Nail art brushes
Dotting tool
Top coat
Nail polish remover
Cotton swabs
Step-by-Step Guide to Cherry Blooming Reddish Nail Art
1. Prepare Your Nails
Start by cleaning your nails and removing any old polish. Trim and file your nails to your desired shape. Push back your cuticles gently and apply a nourishing cuticle oil. This will ensure that your nails are healthy and ready for the polish.
2. Apply the Base Coat
Apply a thin layer of base coat to each nail. This will protect your natural nails from staining and create a smooth surface for the polish to adhere to. Allow the base coat to dry completely before moving on to the next step.
3. Paint the Base Color
Choose a rich red nail polish as the base color for your design. Apply two thin coats, allowing each coat to dry completely before applying the next. This will create a deep, vibrant red background that will make the cherry blossoms pop.
4. Create the Cherry Blossoms
Using a fine nail art brush and white nail polish, paint small, delicate cherry blossom petals on each nail. Start with a small dot in the center and add five to six petals around it. For a more detailed look, you can add tiny strokes at the edges of the petals to mimic the natural texture of cherry blossoms.
5. Add Cherry Details
With a dotting tool or the tip of a small nail art brush, use a darker red polish to add small dots at the center of each blossom to represent the cherries. This adds depth and dimension to your design, making the blossoms look more realistic.
6. Paint the Leaves
Using a fine nail art brush and green nail polish, add small leaves around the blossoms. This adds a touch of greenery to the design, enhancing the natural and fresh look of the cherry blossoms.
7. Finish with a Top Coat
Once your design is completely dry, apply a generous layer of top coat to seal and protect your Cherry Blooming Reddish Nail Art. This will add a glossy finish and extend the life of your manicure. Make sure to cover the edges of your nails to prevent chipping.
Tips for Perfecting Your Cherry Blooming Reddish Nail Art
Practice makes perfect: If you're new to nail art, practice the cherry blossom design on a piece of paper or a nail art mat before applying it to your nails.
Use a steady hand: Take your time and use a steady hand to create precise and delicate designs.
Clean as you go: Keep a small brush or cotton swabs dipped in nail polish remover handy to clean up any mistakes or excess polish.
Experiment with colors: While red and white are traditional colors for this design, don't be afraid to experiment with different shades and combinations to make the design your own.
Conclusion
The Cherry Blooming Reddish Nail Art is a stunning and elegant design that celebrates the beauty of cherry blossoms and the richness of red hues. With a little practice and patience, you can create this eye-catching look at home and enjoy a touch of springtime beauty on your nails all year round. So, gather your nail art supplies, unleash your creativity, and let your nails bloom with the charm and allure of cherries and blossoms.