Creating a Handmade Caramel Cat Eye Manicure: A Guide to Effortless Elegance
The allure of a caramel cat eye manicure lies in its subtle yet striking appearance, blending warmth and sophistication. This handmade nail art technique combines rich caramel hues with the mesmerizing depth of cat eye effects, resulting in nails that are both luxurious and versatile. Here’s how you can achieve this elegant look at home:
1. Understanding Caramel Cat Eye
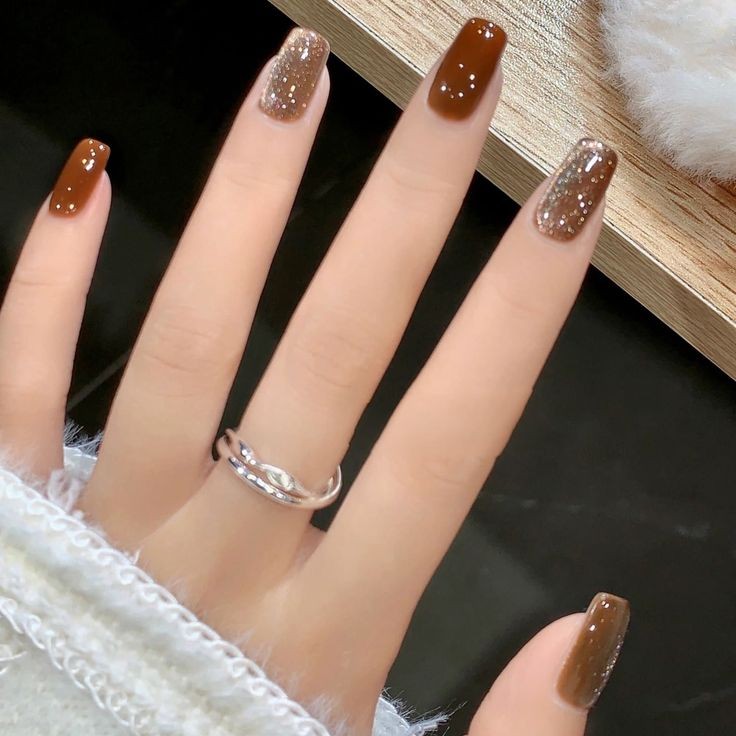
Caramel cat eye nails feature a base color reminiscent of creamy caramel or warm brown tones. The cat eye effect adds a touch of depth and dimension, resembling the iridescent shimmer seen in cat eye gemstones. This effect is achieved through the use of magnetic nail polish or gel, which creates a pattern that shifts with light and movement, much like a cat's eye.
2. Materials Needed
To create your handmade caramel cat eye manicure, gather the following materials:
Caramel or brown nail polish or gel
Magnetic nail polish or gel (if desired for cat eye effect)
Magnetic stick or tool (for cat eye effect)
Base coat and top coat
Nail art brush or dotting tool (optional for design accents)
Nail polish remover and cotton pads or Q-tips for cleanup
3. Step-by-Step Guide
Preparation:
Start with clean, trimmed nails. Push back cuticles and lightly buff the nail surface.
Apply a base coat to protect your natural nails and help the polish adhere better.
Base Color Application:
Apply 1-2 coats of caramel or brown nail polish/gel. Allow each coat to dry completely between applications.
If using magnetic polish/gel for the cat eye effect, apply it over the base color according to the product's instructions. Use the magnetic stick/tool to create the desired pattern before curing.
Creating the Cat Eye Effect (Optional):
Hold the magnetic stick/tool over the wet magnetic polish/gel for several seconds to create the cat eye effect. Experiment with different angles and pressures for varied effects.
Cure the polish/gel under a UV or LED lamp as per the manufacturer's instructions.
Final Steps:
Apply a clear top coat to seal and protect your manicure. This adds shine and extends the wear of your nail design.
Clean up any polish/gel that may have gotten on your skin with nail polish remover and a precision brush or Q-tip.
4. Customization and Variation
Add personalized touches like nail art decals, rhinestones, or glitter accents to enhance your caramel cat eye manicure.
Experiment with different base colors or mix shades to create unique caramel variations.
Adjust the intensity of the cat eye effect by varying the application technique and magnetic tool movements.
5. Maintenance
Maintain your caramel cat eye manicure by applying a fresh layer of top coat every few days to prolong its glossy finish.
Avoid harsh chemicals and excessive exposure to water to prevent premature chipping and peeling.
Remove your manicure using acetone-based nail polish remover when you're ready to change your look.
Conclusion
A handmade caramel cat eye manicure offers a blend of sophistication and warmth, making it a versatile choice for any occasion. Whether you're looking to add a touch of elegance to your everyday style or preparing for a special event, mastering this nail art technique allows you to express your creativity and elevate your manicure game. Embrace the allure of caramel cat eye nails and enjoy the luxurious, mesmerizing effects they bring to your fingertips.