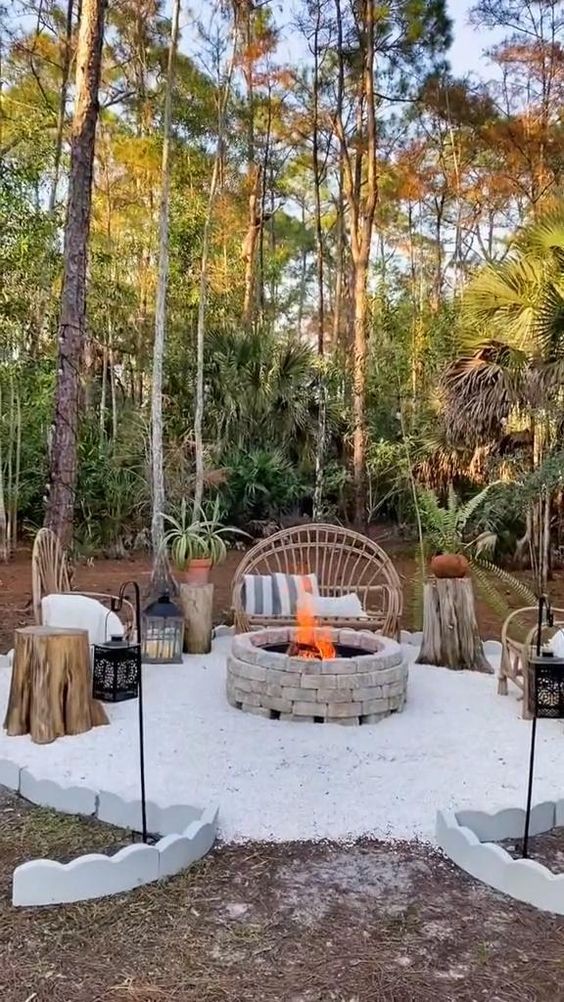
Creating a DIY Rustic Fire Pit in the Woods: A Step-by-Step Guide
There's nothing quite like the warm, inviting glow of a fire pit, especially when it's set amidst the serene backdrop of the woods. Whether you’re looking to enhance your outdoor living space or create a cozy spot for gatherings, a rustic fire pit can be the perfect addition. Here’s a comprehensive guide to help you build your very own DIY rustic fire pit in the woods.
Materials You Will Need:
Shovel
Gravel
Sand
Rocks or Bricks
Metal Fire Ring (optional)
Level
Measuring Tape
Stake and String
Step-by-Step Instructions:
Step 1: Choose the Perfect Spot
Location: Select a flat, open area at least 10-15 feet away from trees, bushes, and any other flammable materials. This ensures safety and reduces the risk of spreading fire.
Permits: Check with local authorities or park services to ensure you have the necessary permissions and that there are no fire bans in place.
Step 2: Measure and Mark the Area
Mark the Center: Drive a stake into the ground where you want the center of your fire pit to be.
Measure the Radius: Attach a string to the stake, measure out 2-3 feet (depending on how large you want your fire pit), and mark the circumference using the string as a guide.
Step 3: Dig the Fire Pit
Clear the Area: Remove any grass, roots, and debris from within the marked circle.
Dig: Dig down about 6-12 inches to create a bowl-shaped depression. This will help contain the fire and keep it from spreading.
Step 4: Create a Solid Base
Add Gravel: Pour a 2-3 inch layer of gravel at the bottom of the pit. This helps with drainage and provides a stable foundation.
Add Sand: On top of the gravel, add a 1-2 inch layer of sand to further stabilize the base and make it easier to level the stones or bricks.
Step 5: Build the Fire Pit Walls
Lay the First Layer: Arrange your rocks or bricks in a circle along the edge of the pit. Make sure they are snug and level. Use a level to ensure even placement.
Stack the Layers: Continue stacking layers of rocks or bricks, staggering the seams for stability. Aim for a height of 1-2 feet.
Metal Fire Ring (Optional): If you have a metal fire ring, place it inside the circle of rocks or bricks for added durability and safety.
Step 6: Finishing Touches
Secure the Rocks: Fill any gaps between the rocks or bricks with smaller stones or gravel to ensure they are stable.
Surrounding Area: Clear an additional 3-5 feet around the fire pit of any flammable materials, and consider adding a gravel or stone border for added safety and aesthetic appeal.
Safety Tips
Always Supervise: Never leave a fire unattended. Ensure someone is always keeping an eye on it.
Extinguish Properly: Have water or a fire extinguisher nearby. Fully extinguish the fire before leaving the site.
Weather Awareness: Avoid using the fire pit in high winds or extremely dry conditions.
Enjoying Your Rustic Fire Pit
Once your fire pit is complete, it’s time to enjoy it! Gather friends and family, bring out the marshmallows, and enjoy the rustic charm and warmth of your new outdoor feature. Whether you’re roasting s’mores, telling stories, or simply enjoying the ambiance, your DIY rustic fire pit is sure to be a beloved gathering spot for years to come.
Building a rustic fire pit in the woods is a rewarding project that combines functionality with natural beauty. With careful planning and a bit of effort, you can create a safe and inviting space that enhances your outdoor experience. So, grab your shovel and start building your dream fire pit today


