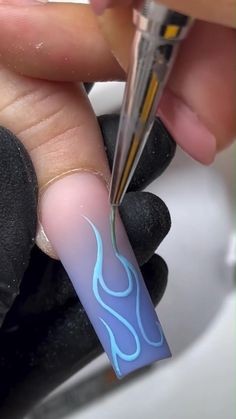
Flaming Nail Art Tutorial: Ignite Your Style
Nail art has evolved from a trend to an expressive form of personal style. One particularly striking design that's gaining popularity is flaming nail art. This fiery design not only adds a touch of drama but also showcases your creativity. Whether you're preparing for a special occasion or just want to spice up your everyday look, here's a step-by-step tutorial to achieve stunning flaming nails:
Materials You'll Need:
Base coat: To protect your nails and create a smooth surface.
Nail polish colors: Red, orange, yellow, and black are essential.
Fine nail art brush: For precision in drawing flames.
Top coat: To seal and protect your design.
Step-by-Step Tutorial:
Step 1: Prep Your Nails
Start by cleaning and shaping your nails. Apply a base coat to each nail and let it dry completely.
Step 2: Base Colors
Apply a white or light-colored base polish. This will make the flames stand out vividly. Let it dry thoroughly.
Step 3: Painting Flames
Using your fine nail art brush, dip into the red polish. Start at the tip of your nail and create a flickering flame shape. Flames are asymmetrical, so don't worry about perfect symmetry. Repeat with orange and yellow, overlaying them slightly to create depth and dimension.
Vary the lengths and shapes of the flames across your nails for a natural, fiery effect.
Step 4: Adding Detail
With the fine brush dipped in black polish, outline the flames to define their shapes. Add thin lines inside the flames to create a realistic, flickering effect.
Step 5: Finishing Touches
Once the design is dry, apply a top coat to seal in your artwork and add a glossy finish. This will also protect your nails and make your fiery design last longer.
Step 6: Clean Up
Use a small brush dipped in nail polish remover to clean up any mistakes around your nails and achieve a polished look.
Tips for Success:
Practice Makes Perfect: Don't be discouraged if your first attempt isn't flawless. Nail art takes practice!
Experiment: Play with different color combinations and flame shapes to find a style that suits you best.
Patience: Let each layer dry completely before moving on to the next to avoid smudges and smears.
Flaming nail art is a bold statement that can be customized to fit any mood or occasion. Whether you're aiming for subtle flames or a blazing inferno, this tutorial provides a solid foundation to ignite your creativity and showcase your unique style. Flaunt your fiery nails with confidence and watch heads turn wherever you go!


