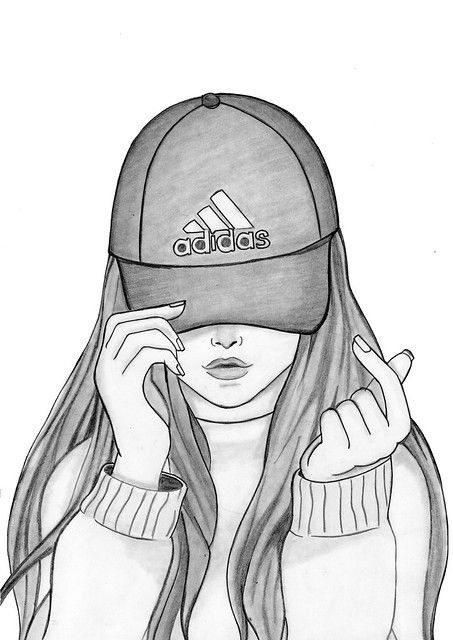
How to Draw a Girl with a Cap: A Step-by-Step Guide
Drawing a character can be a fun and rewarding experience, and capturing a girl wearing a cap adds a stylish touch to your artwork. Whether you're a beginner or looking to refine your skills, this guide will walk you through the process of drawing a girl with a cap, step by step.
1. Gather Your Materials
Before you start, make sure you have the following materials:
Pencils (preferably a range from 2H to 6B for varying shades)
Eraser
Paper
Fine-tipped pen (optional, for inking)
Colored pencils or markers (optional, for coloring)
2. Start with Basic Shapes
Begin by sketching the basic shapes that will form the foundation of your drawing:
Head: Draw a simple oval or circle to represent the head.
Guidelines: Lightly sketch a vertical line down the center of the face and a horizontal line where the eyes will be positioned. These guidelines help keep the features symmetrical.
Body: Add a basic outline of the body by sketching a rectangle or a series of shapes to represent the torso, arms, and legs.
3. Outline the Face and Hair
Facial Features: Draw the eyes along the horizontal guideline, adding the nose and mouth. For a more realistic look, place the eyes halfway down the face, the nose a bit below the eyes, and the mouth further down.
Hair: Sketch the hairline and the overall shape of the hair. Since the girl is wearing a cap, draw the hair either tucked underneath the cap or peeking out from beneath it.
4. Draw the Cap
Cap Shape: Draw the basic shape of the cap on top of the head. Start with a slightly curved line for the brim and a rounded shape for the crown of the cap. Make sure the cap sits naturally on the head.
Details: Add details such as the brim of the cap, any logos or patterns, and the cap’s closure at the back if visible. The brim should cast a shadow over the eyes, so add a slight curve to indicate this.
5. Refine the Facial Features and Hair
Eyes and Expressions: Refine the eyes, adding pupils and eyelashes if desired. Adjust the eyebrows to match the expression you want.
Hair: Add details to the hair, showing how it interacts with the cap. Add texture and volume by drawing individual strands or sections.
6. Draw the Body and Clothing
Clothing: Sketch the clothes, ensuring they fit naturally with the cap. You might choose to draw a casual outfit like a T-shirt or hoodie that complements the cap.
Pose and Details: Refine the pose and details of the body, including the arms, hands, and legs. Pay attention to how the clothing folds and drapes.
7. Add Details and Shading
Cap Details: Add texture and shading to the cap to give it a more realistic appearance. Use cross-hatching or soft shading to create depth.
Shading the Face and Hair: Add shading to the face and hair to enhance the three-dimensional effect. Consider the light source and add shadows accordingly.
8. Inking and Final Touches
Inking: If you want to make your drawing stand out, go over your pencil lines with a fine-tipped pen. This step is optional but can give your artwork a cleaner look.
Coloring: Use colored pencils or markers to add color to your drawing. Pay attention to the colors of the cap, hair, and clothing. Blend the colors to create a smooth and realistic finish.
9. Review and Edit
Final Review: Take a step back and review your drawing. Make any final adjustments or add any missing details.
Erase Guidelines: Gently erase any remaining pencil guidelines that are no longer needed.
10. Practice and Experiment
Drawing takes practice, so don’t be discouraged if your first attempt isn’t perfect. Experiment with different styles, poses, and types of caps to develop your skills further.
By following these steps, you’ll be able to create a charming and stylish drawing of a girl with a cap. Keep practicing, and soon you'll find your own unique approach to capturing characters in your art!


