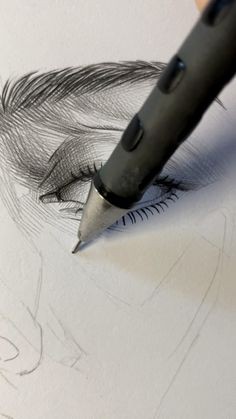
How to Draw a Portrait: A Comprehensive Guide
Drawing a portrait is a fascinating and rewarding challenge that allows artists to capture the essence of a person through lines, shapes, and shading. Whether you're a beginner or looking to refine your skills, understanding the fundamental techniques of portrait drawing can significantly enhance your abilities. This guide will take you through the process step-by-step, from initial sketches to final touches, providing tips and techniques to help you create lifelike and expressive portraits.
1. Understanding Facial Proportions
Before diving into drawing, it's essential to understand the basic proportions of the human face. The face can be divided into several key areas:
Overall Shape: Start with the basic shape of the head, which is often an oval or egg-like form. The shape can vary depending on the individual’s features, so adjust accordingly.
Guidelines: Draw a vertical line down the center of the oval. This line helps in aligning facial features symmetrically. Then, draw a horizontal line halfway down the oval. This line will serve as a reference for placing the eyes.
Eyes: The width of the face can be divided into five equal parts, with the eyes typically occupying the second and fourth sections. The distance between the eyes is usually the width of one eye.
Nose and Mouth: The bottom of the nose is usually halfway between the eyes and the chin. The mouth typically sits a third of the way between the nose and the chin.
Ears: The top of the ears usually aligns with the eyes, and the bottom aligns with the nose.
2. Sketching the Basic Outline
With the proportions in mind, begin your portrait by sketching a light outline:
Draw the Head Shape: Using a pencil, lightly sketch the oval shape for the head.
Add Guidelines: Draw the vertical and horizontal guidelines for the facial features. Ensure these lines are light so they can be easily erased later.
Place the Features: Begin sketching the eyes, nose, and mouth along the guidelines. Pay attention to their size and placement relative to each other.
3. Refining Facial Features
Once the basic outline is in place, start refining the features:
Eyes: Draw the almond shape of the eyes, including the iris and pupils. Add details like eyelashes and eyebrows. Remember, the eyes should be expressive and capture the essence of the subject.
Nose: Refine the nose by adding nostrils and defining its shape. Pay attention to the shadows and highlights to give it dimension.
Mouth: Draw the lips with attention to their shape and curvature. Notice the subtle differences in the upper and lower lips and the way they interact with the surrounding skin.
Ears: Add the details of the ears, such as the outer shape and the inner structure (the ear canal and folds).
4. Adding Hair and Other Details
Hair can significantly affect the likeness of a portrait:
Sketch Hair: Begin by outlining the hair’s general shape and flow. Draw the hair in sections, following the natural direction of the strands.
Detail the Hair: Add details such as texture and individual strands. Use varying pressure on your pencil to create different tones and textures.
Additional Details: Include any additional features such as glasses, facial hair, or distinctive marks. These details can add personality and uniqueness to the portrait.
5. Shading and Texture
Shading is crucial for adding depth and realism to your portrait:
Light Source: Determine the direction of the light source. This will guide where you place shadows and highlights.
Apply Base Shading: Lightly shade the areas of the face that are away from the light source. Use a soft pencil or blending tool to create smooth transitions between light and dark areas.
Add Depth: Gradually build up layers of shading to enhance depth. Pay attention to the areas around the eyes, nose, and mouth where shadows are more pronounced.
Highlight: Leave areas where the light hits directly untouched or use an eraser to add highlights. This contrast will make the portrait more three-dimensional.
6. Final Touches and Refinement
After the main elements are complete, review your portrait and make any necessary adjustments:
Refine Lines: Go over the lines of your sketch to make them clean and defined. Erase any unnecessary guidelines or smudges.
Check Proportions: Compare your drawing with the reference or original photo to ensure that proportions and features are accurate.
Final Details: Add any final details and textures that enhance the portrait. Pay attention to small areas that can make a big difference in the overall look.
7. Practice and Patience
Drawing portraits is a skill that improves with practice. Each portrait you draw will help you understand the nuances of facial features and expressions better. Be patient with yourself and persistent in practicing different aspects of portrait drawing.
Conclusion
Drawing a portrait requires a blend of technical skill and artistic intuition. By understanding facial proportions, refining features, and mastering shading techniques, you can create portraits that capture the essence and individuality of your subjects. Remember, each artist has their unique style, so while these guidelines provide a foundation, feel free to experiment and develop your personal approach to portrait drawing. With practice and dedication, you’ll be able to produce portraits that are both lifelike and expressive.


