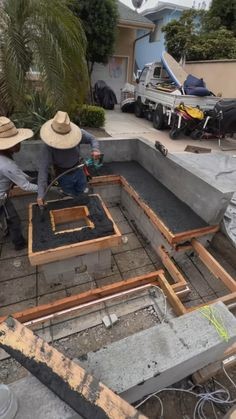
Creating a Budget-Friendly Sunken Fire Pit Area
A sunken fire pit area can transform your outdoor space into a cozy, inviting gathering spot, perfect for evenings spent with family and friends. While the concept might seem expensive, creating a sunken fire pit area on a budget is entirely feasible with some creative planning and resourcefulness. Here’s a comprehensive guide to designing and building a budget-friendly sunken fire pit area.
1. Planning and Design
1.1 Assess Your Space
Begin by evaluating the area where you want to place your sunken fire pit. Consider factors such as size, shape, and proximity to your home. A small to medium-sized space is ideal for a budget project. Mark out the area using stakes and string or chalk to visualize the layout.
1.2 Design Considerations
Decide on the shape and depth of your sunken fire pit. A circular or octagonal design often works well. Aim for a depth of about 18-24 inches to ensure it’s sunken enough to provide a cozy feel without being too deep. Sketch out your design, including the fire pit, seating area, and any additional features you want, such as lighting or landscaping.
2. Materials
2.1 Choosing Materials
Opt for cost-effective materials that still offer durability and aesthetic appeal. Here are some suggestions:
Fire Pit: Concrete blocks or bricks are affordable and easy to work with. You can also use pre-made fire pit kits available at home improvement stores.
Seating: Use inexpensive materials like wooden pallets or cinder blocks to create seating. For a more refined look, consider DIY cushions or recycled materials.
Flooring: Gravel or crushed stone is a budget-friendly option for the base. For a more polished finish, you can use patio pavers or even repurpose old bricks or tiles.
2.2 Sourcing Materials
Check local classified ads, salvage yards, and online marketplaces for second-hand materials. Many people sell surplus or leftover building materials at a fraction of the cost. Don’t hesitate to ask for discounts or negotiate prices.
3. Construction
3.1 Excavation
Start by digging out the area for your sunken fire pit. Use a shovel or a rented mini-excavator for larger projects. Remove the topsoil and dig to the desired depth. Ensure the base is level to avoid any unevenness in your fire pit area.
3.2 Building the Fire Pit
Base Layer: Lay down a layer of gravel or crushed stone to create a stable foundation and improve drainage.
Fire Pit Walls: Stack your chosen materials (concrete blocks, bricks) to form the walls of the fire pit. Use a masonry adhesive if needed to secure the blocks in place.
Fire Pit Base: For safety, place a fire-resistant base at the bottom of the pit, such as fire bricks or a metal fire pit insert.
3.3 Creating Seating
Option 1: Arrange wooden pallets or cinder blocks around the fire pit to create seating. Secure them together and add cushions for comfort.
Option 2: Construct simple bench seating using pressure-treated lumber or recycled materials.
3.4 Adding Flooring
Spread a layer of gravel or crushed stone over the bottom of the sunken area. This will provide a stable, low-maintenance surface. If using pavers or bricks, lay them out in a pattern that suits your design and fill gaps with sand.
4. Finishing Touches
4.1 Landscaping
Add some greenery around your fire pit area to enhance its appearance. Use budget-friendly plants or shrubs and mulch to create a natural look. You can also incorporate inexpensive outdoor lighting, such as string lights or solar-powered lanterns, to add ambiance.
4.2 Safety Features
Ensure your fire pit is safe by keeping it away from flammable materials and providing a fire extinguisher or water source nearby. Consider adding a fire pit cover or screen to prevent embers from escaping.
4.3 Personalization
Add personal touches to your sunken fire pit area, such as DIY décor, outdoor rugs, or handmade lanterns. Personalizing the space will make it feel unique and inviting.
5. Maintenance
5.1 Regular Upkeep
Maintain your sunken fire pit area by regularly cleaning the fire pit and removing any debris. Check for any signs of wear or damage and address them promptly. Refresh the gravel or stones as needed to keep the area looking its best.
5.2 Seasonal Preparation
Prepare your fire pit area for different seasons by covering it during the winter to protect it from the elements. In spring and summer, clean and inspect the area to ensure it’s ready for use.
Conclusion
Creating a sunken fire pit area on a budget is a rewarding project that can enhance your outdoor living space without breaking the bank. By carefully planning, choosing cost-effective materials, and employing DIY techniques, you can build a cozy and stylish fire pit area that’s perfect for enjoying warm evenings with loved ones. With a little creativity and effort, your budget-friendly sunken fire pit will become the centerpiece of many memorable gatherings.


