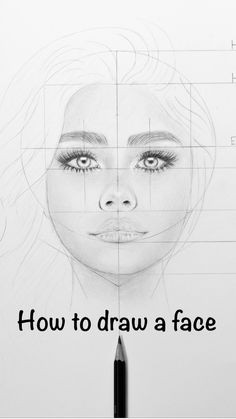
How to Draw a Face: A Quick and Comprehensive Guide
Drawing a face can seem daunting, but with a step-by-step approach, it becomes an achievable and rewarding skill. Whether you’re a beginner or looking to refine your technique, this guide will walk you through the essentials of face drawing, from basic shapes to adding details.
1. Start with Basic Shapes
Begin by sketching a simple oval for the face. This will act as your foundation. Draw a vertical line down the middle and a horizontal line across the center. These lines will help you place the facial features symmetrically.
2. Outline the Facial Structure
Next, define the jawline and chin. Adjust the shape of the oval if necessary, making it more angular or rounded based on the desired face shape. Remember, faces come in various shapes, so feel free to modify this basic shape to suit different faces.
3. Place the Facial Features
Eyes: Divide the face horizontally into three equal parts. The eyes should be placed along the top line of these divisions. Each eye is roughly the width of one eye apart, with the inner corners aligned with the vertical line.
Eyebrows: Position the eyebrows slightly above the eyes, following the natural curve. The shape and thickness of eyebrows vary, so adjust accordingly.
Nose: The bottom of the nose typically aligns with the middle horizontal line. Draw a small vertical line and add nostrils on either side. For a more realistic look, add shading to define the nose's structure.
Mouth: The mouth should be placed between the nose and chin. The corners of the mouth align roughly with the pupils of the eyes. Sketch a gentle curve for the upper lip and a slightly fuller curve for the lower lip.
4. Add Hair and Ears
Hair: Start with a general outline of the hairline, which typically begins around the top of the forehead and follows the shape of the head. Sketch the hair in loose, flowing strokes, keeping the natural direction of hair growth in mind.
Ears: Position the ears on the sides of the face, aligning them roughly between the eyes and the bottom of the nose. Ears can be detailed with curves and folds for a realistic appearance.
5. Refine and Add Details
Eyes: Add pupils and irises, and detail the eyelids and eyelashes. Use shading to give the eyes depth and realism.
Nose and Mouth: Add shading and texture to the nose and mouth to enhance their features. Pay attention to light and shadow to create a three-dimensional effect.
Face Shape: Refine the face shape, adjusting the jawline, chin, and cheeks to add more realism.
6. Shade and Highlight
Use shading to create depth and dimension. Lightly shade areas such as under the chin, around the nose, and beneath the eyebrows. Highlight areas where light naturally falls, like the forehead and cheekbones.
7. Final Touches
Review your drawing for any inconsistencies or areas that need adjustment. Clean up unnecessary lines and enhance details where needed. Adding a bit of background or context can also make your drawing stand out.
Conclusion
Drawing a face involves understanding basic shapes, symmetry, and the placement of features. With practice, you’ll develop a keen eye for detail and improve your ability to capture the essence of different faces. Keep experimenting and refining your technique, and most importantly, enjoy the process of creating art!


