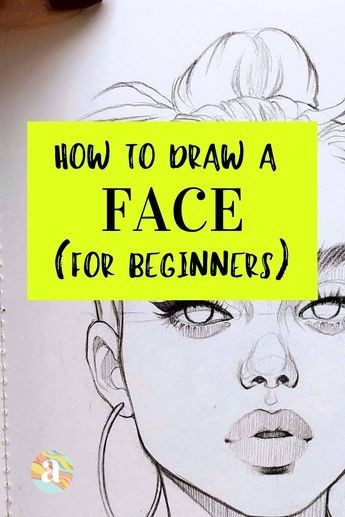
Drawing a face can be a rewarding and creative endeavor, whether you're a beginner or an experienced artist. Faces convey emotion, personality, and character, making them a captivating subject. This article will guide you through the process of drawing a face step by step, providing tips and techniques to help you create a realistic and proportionate portrait.
Materials You Will Need
Before you start, gather the following materials:
Pencil: A good quality pencil (HB or 2 for sketching.
Eraser: For correcting mistakes.
Paper: Any sketch paper or drawing pad will work.
Ruler: To help with measuring proportions (optional).
Fine-liner or pen: For inking your final drawing (optional).
Colored pencils or markers: If you want to add color to your drawing.
Step 1: Basic Shape of the Head
Draw an Oval: Start by sketching a light oval shape. This will be the basic structure of the head. The oval should be slightly wider at the top and taper towards the chin.
Divide the Oval: Draw a vertical line down the center of the oval and a horizontal line across the middle. This will help you align the facial features later.
Step 2: Guidelines for Facial Features
Mark the Eyes: Divide the lower half of the oval into two equal parts by drawing another horizontal line. This line represents where the eyes will be located. The eyes are typically one eye-width apart.
Position the Nose: The bottom of the nose is usually located about halfway between the eyes and the chin. Draw a small horizontal line to mark this point.
Add the Mouth: The mouth usually sits about one-third of the way down from the nose to the chin. Draw another horizontal line to represent the mouth's position.
Step 3: Outline the Face
Refine the Shape: Using the guidelines, start shaping the face. Add cheekbones and define the jawline. You can make adjustments based on the face shape you want to depict (e.g., round, square, oval).
Draw the Hairline: Sketch a light line to indicate where the hair will begin. The hairline varies from person to person, so feel free to experiment with different styles.
Step 4: Draw the Eyes
Shape the Eyes: Start by drawing the almond shape of the eyes along the eye line. Remember that the outer corners should be slightly higher than the inner corners.
Add Eyelids and Iris: Outline the eyelids and add circles for the irises. You can draw smaller circles within the irises for the pupils.
Details: Add eyelashes and any desired details like eyebrows above the eyes. Eyebrows typically follow the shape of the eye and can vary in thickness and style.
Step 5: Draw the Nose
Outline the Nose: Using the guideline you created, start shaping the nose. A simple way to draw a nose is to create a triangular shape for the bridge and round off the tip.
Add Nostrils: Draw two small curves at the base of the nose for the nostrils. Ensure that they are proportionate to the rest of the face.
Step 6: Draw the Mouth
Shape the Lips: Start with a light line to outline the center of the lips. Draw the upper lip, which is generally thinner than the lower lip, and then draw the lower lip.
Details: Add definition to the lips by sketching subtle curves. Remember that lips have shadows and highlights, which you can emphasize later.
Step 7: Add the Ears
Position the Ears: The top of the ears typically aligns with the eyes, while the bottom aligns with the nose. Draw a curve on each side of the head for the ears.
Details: Add inner ear details by drawing additional curves and shapes within the outline of the ears.
Step 8: Define the Hair
Sketch the Hair: Start by outlining the shape of the hair based on your desired hairstyle. Use flowing lines to mimic the natural fall of hair.
Add Texture: Include details such as individual strands or clumps of hair to give it volume and movement. Pay attention to light and shadow to create depth.
Step 9: Refine and Add Details
Clean Up Guidelines: Erase any unnecessary guidelines and sketch marks, keeping only the final outlines of the face and features.
Shading: Add shading to create depth. Use a pencil to shade areas under the chin, around the nose, and beneath the eyebrows. Lightly shade the cheeks and forehead for a more three-dimensional look.
Step 10: Final Touches
Inking (Optional): If you want to finalize your drawing, go over the outlines with a fine-liner or pen. Be careful not to smudge the pencil beneath.
Color (Optional): If you choose to add color, use colored pencils or markers to fill in the skin tone, hair, and features. Blend colors for a smooth finish.
Additional Tips
Practice Regularly: The more you practice drawing faces, the better you'll become. Experiment with different angles, expressions, and styles.
Study References: Look at photographs or artwork for inspiration. Pay attention to proportions, angles, and light.
Use Different Tools: Try using charcoal, pastels, or digital tools for a different drawing experience.
Be Patient: Drawing a face takes time and practice. Don't be discouraged by initial attempts. Keep refining your skills.
Conclusion
Drawing a face step by step is an enjoyable process that combines observation, technique, and creativity. By following these steps and practicing regularly, you'll be able to capture the uniqueness and beauty of human expressions in your artwork. Remember to be patient and enjoy the journey of artistic growth!


