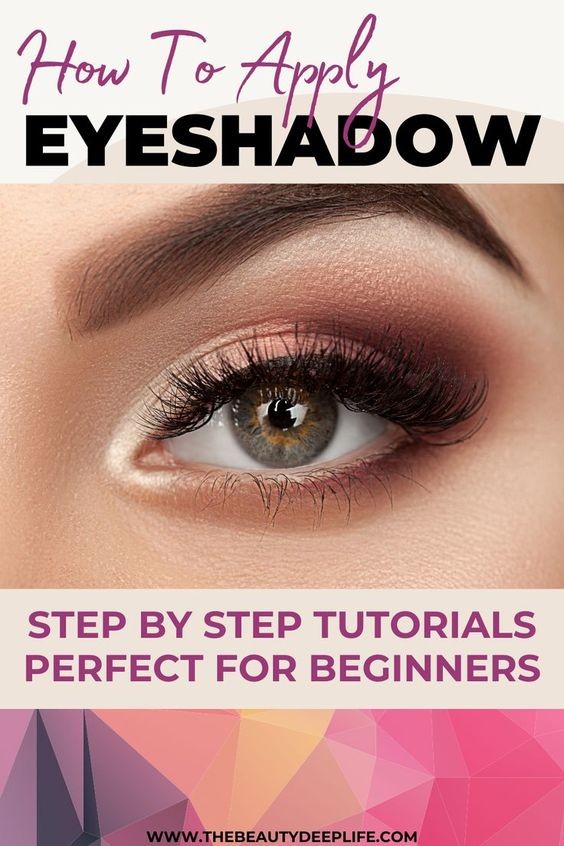
**Master Eyeshadow Application: 6 Pro Techniques for Beginners and Tips for All Eye Shapes**
Eyeshadow is the ultimate tool for transforming your eye makeup from ordinary to extraordinary. Whether you’re a makeup newbie or looking to refine your skills, mastering eyeshadow application can elevate your beauty routine and give you a polished, professional look. Here’s your step-by-step guide to six pro techniques, along with tips for different eye shapes and sizes, so you can take your eye makeup game to the next level!
### **1. Halo Eye Look**
The halo eye is all about creating a stunning, three-dimensional effect with your eyeshadow. It draws attention to the center of your eyelid, making your eyes appear larger and more captivating.
**Steps*
1. **Prime Your Lids* Start with an eyeshadow primer to ensure your makeup stays put.
2. **Apply a Base Color* Sweep a neutral shade over your entire lid.
3. **Create the Halo Effect* Apply a medium-toned eyeshadow to the outer and inner corners of your lid, leaving the center bare.
4. **Add a Pop* Pack a shimmer or metallic shade onto the center of your lid for a bright, eye-catching halo.
5. **Blend* Blend the edges where the colors meet for a seamless transition.
**Tip* This look is perfect for all eye shapes, but if you have hooded eyes, apply the halo effect slightly above your natural crease to make it visible when your eyes are open.
### **2. Contouring the Eyes**
Eye contouring adds depth and dimension, making your eyes look more defined and sculpted. This technique is especially useful for creating a dramatic, smoky effect.
**Steps*
1. **Prime and Base* Apply an eyeshadow primer and a base color over your entire lid.
2. **Apply a Dark Shade* Use a dark eyeshadow in the crease and along the outer corner of your eye. Blend it well.
3. **Lighten the Lid* Apply a lighter shade to the center of your eyelid.
4. **Highlight* Apply a shimmery highlight to the brow bone and inner corner of your eye.
5. **Blend* Blend all the colors together to ensure there are no harsh lines.
**Tip* This technique works well for deep-set eyes, as it enhances their natural contours. For more rounded eyes, focus contouring on the outer corners to elongate the eyes.
### **3. Gradient Look**
A gradient eyeshadow creates a smooth transition of colors from light to dark, giving your eyes a blended, soft look.
**Steps*
1. **Prime Your Lids* Apply an eyeshadow primer.
2. **Apply a Light Shade* Start with a light color on the inner part of your eyelid.
3. **Layer Darker Shades* Gradually apply progressively darker shades towards the outer corners of your eye.
4. **Blend* Use a blending brush to blend the shades together for a seamless gradient effect.
**Tip* This look suits every eye shape, but if you have smaller eyes, stick to lighter shades to avoid overwhelming them.
### **4. Cut Crease**
A cut crease is a bold look that defines the crease of your eye, creating a sharp line that separates the lid and crease.
**Steps*
1. **Prime and Set* Apply an eyeshadow primer and a neutral base color over your lid.
2. **Define the Crease* Use a small, angled brush and a dark eyeshadow to define your crease. Follow the natural line of your crease or create a higher line if you want more drama.
3. **Cut the Crease* Apply concealer or a light eyeshadow to the lid area below the crease, creating a clean line.
4. **Set with Color* Apply a bright or metallic eyeshadow over the concealer for a dramatic effect.
5. **Blend* Blend the edges where the dark and light colors meet.
**Tip* This technique is ideal for hooded eyes as it makes your crease more visible and creates an illusion of larger eyes.
### **5. Smoky Eye**
The smoky eye is a classic look that adds sultriness and drama to your makeup.
**Steps*
1. **Prime Your Lids* Start with an eyeshadow primer.
2. **Apply a Base Shade* Use a neutral color over your entire lid.
3. **Create Depth* Apply a dark shade, like black or deep brown, to the outer corners and into the crease.
4. **Blend* Use a blending brush to soften the dark shade and blend it into the lighter base color.
5. **Highlight* Apply a lighter, shimmery shade to the inner corner and brow bone.
**Tip* This look is versatile for all eye shapes. For smaller eyes, keep the dark shade closer to the lash line and blend upwards for a more open-eyed effect.
### **6. Winged Eyeshadow**
A winged eyeshadow creates a dramatic, lifted look that’s perfect for special occasions.
**Steps*
1. **Prime and Base* Apply an eyeshadow primer and a base shade.
2. **Create the Wing* Use a dark eyeshadow to draw a winged shape extending from the outer corner of your eye.
3. **Fill in the Wing* Apply the same dark shade across the wing and blend it into the crease.
4. **Blend* Use a lighter shade to blend the edges of the wing and soften the transition.
5. **Highlight* Apply a highlighter to the inner corner and brow bone.
**Tip* This technique works well for almond-shaped eyes and helps create the illusion of a lifted eye.
### **Tips for All Eye Shapes*
- **Use the Right Brushes* Invest in quality brushes for precise application and blending.
- **Blend Well* Blending is key to achieving a seamless look. Take your time to blend each layer.
- **Adjust Techniques* Adapt these techniques to your specific eye shape for the best results.
With these pro techniques and tips, you’re ready to master eyeshadow application and elevate your makeup game. Practice these looks and find what works best for you, and soon you’ll be applying eyeshadow like a true pro!
**Get started today and transform your eye makeup looks into stunning works of art!** 🌟👁️💫