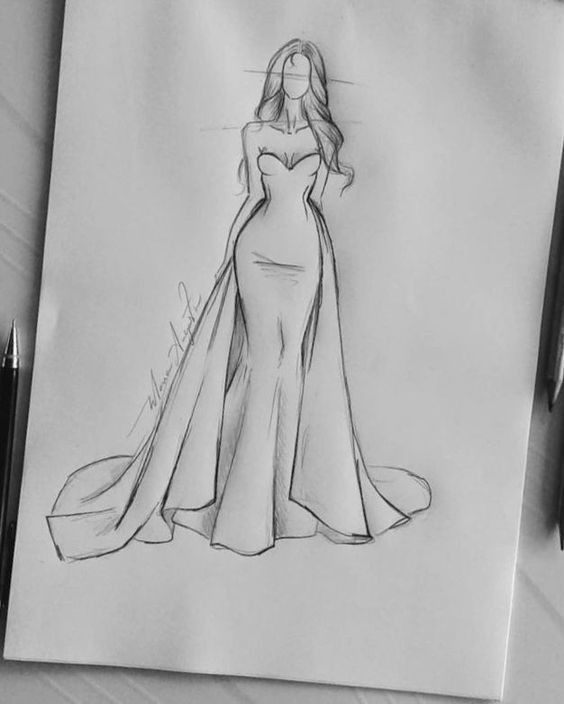
How to Draw a Stunning Dress: A Comprehensive Guide
Drawing a stunning dress can be a fulfilling and creative endeavor, whether you're a fashion enthusiast, a student, or a professional designer. This guide will walk you through the essential steps and techniques needed to create a captivating dress illustration. From conceptualization to execution, you'll learn how to bring your design ideas to life on paper.
1. Understanding Dress Design
Before you put pencil to paper, it's crucial to understand the fundamentals of dress design. Familiarize yourself with different styles, fabrics, and silhouettes. Research fashion history, contemporary trends, and various dress forms, such as:
A-line dresses: Fitted at the waist and flaring out towards the hem, creating a flattering silhouette.
Ball gowns: Characterized by a fitted bodice and a full skirt, often used for formal occasions.
Sheath dresses: Form-fitting and tailored, these dresses follow the body's natural shape.
Maxi dresses: Long dresses that flow to the ankles, ideal for casual and summer wear.
Studying these styles will help you identify what inspires you and what you want to create.
2. Gather Inspiration
Inspiration is key to any creative process. Here are some ways to gather ideas for your dress design:
Fashion magazines: Browse through current fashion magazines for trending styles and designs.
Online platforms: Websites like Pinterest, Instagram, and fashion blogs are excellent resources for discovering unique ideas.
Nature and art: Look at colors, patterns, and textures found in nature or art. These can inspire your color palette and fabric choices.
Compile a mood board with images, colors, and textures that resonate with your vision.
3. Choose Your Materials
The tools you use can significantly impact your drawing process. Here's a list of materials you may need:
Sketchbook or drawing paper: Choose high-quality paper suitable for your drawing medium.
Pencils: Use a range of pencils (HB, 2B, 4 for sketching and shading.
Eraser: A kneaded eraser works well for precision and detail.
Markers or colored pencils: For adding color and depth to your design.
Ruler: To help with straight lines and proportions.
French curves: Useful for drawing smooth curves and intricate details.
4. Start with Basic Shapes
Begin your drawing by sketching basic shapes to represent the dress's silhouette. This step will help you establish the overall form and proportions. Follow these guidelines:
Draw the mannequin: Start with a simple outline of the body, focusing on the waist, hips, and shoulders.
Add the basic dress shape: Sketch the outline of the dress over the mannequin, keeping in mind the chosen style (A-line, sheath, etc.). Use geometric shapes (triangles, rectangles) to define the dress's volume and flow.
5. Refine the Silhouette
Once you have the basic shapes in place, refine the silhouette by adding details:
Bodice: Define the neckline, sleeves, and any other design features. Consider adding darts or seams for structure.
Skirt: Shape the skirt according to the dress style, ensuring it flows naturally. Pay attention to how it drapes around the body.
Length: Decide on the dress length, whether it’s a mini, midi, or maxi, and adjust your drawing accordingly.
6. Add Details and Textures
With the refined silhouette, you can now start adding intricate details:
Folds and creases: Draw folds to represent how the fabric drapes. Study how fabric behaves in real life, and replicate that in your drawing.
Embroidery and patterns: Add decorative elements like embroidery, lace, or prints. These details can significantly enhance the dress’s appeal.
Accessories: Consider adding accessories like belts, jewelry, or shoes that complement the dress.
7. Incorporate Color and Shading
Color brings your dress illustration to life. Here’s how to effectively use color and shading:
Choose a color palette: Select colors that align with your design concept. You can use color theory principles to create harmonious combinations.
Apply base colors: Fill in the main areas of the dress with your chosen colors. Use light, even strokes to create a smooth finish.
Add shading: Identify the light source in your drawing. Shade the areas that would naturally be darker, such as under folds or around the waist, to create depth.
Blend colors: Use blending techniques to create smooth transitions between different shades, enhancing the overall look.
8. Final Touches
Once you're satisfied with the design, it’s time to add the finishing touches:
Outline: Use a fine-tipped pen or darker pencil to outline the main features and details, making your drawing stand out.
Highlighting: Add highlights where the light would naturally hit the fabric, enhancing the three-dimensional effect.
Background: Consider adding a simple background to contextualize your dress, such as a runway setting or a solid color that complements the design.
9. Seek Feedback and Iterate
Sharing your work with others can provide valuable insights. Consider:
Joining a community: Participate in art or fashion forums to get feedback from fellow artists and designers.
Taking critiques: Be open to constructive criticism and use it to improve your skills. Don’t hesitate to revisit and refine your design based on the feedback you receive.
10. Practice Regularly
Like any skill, drawing takes practice. Dedicate time to sketch regularly and experiment with different styles and techniques. Set challenges for yourself, such as designing dresses for specific occasions or themes.
Conclusion
Drawing a stunning dress is an artistic journey that combines creativity, technique, and a passion for fashion. By understanding dress design, gathering inspiration, and honing your drawing skills, you can create beautiful and captivating illustrations. Remember that the key to improvement lies in consistent practice and a willingness to learn. So grab your sketchbook, unleash your creativity, and start bringing your dress designs to life!


