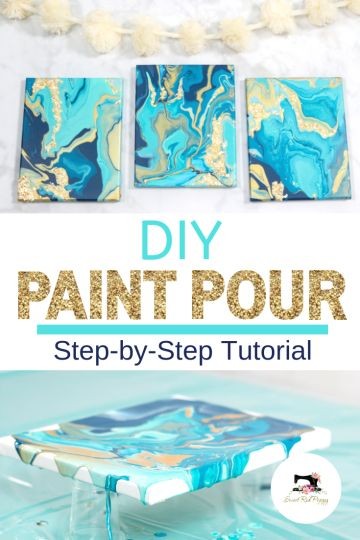
DIY Pour Painting with JOANN: Creative Crafts with Sweet Red Poppy
Pour painting, also known as acrylic pouring, is a vibrant and exciting art technique that turns simple acrylic paints into dazzling abstract creations. With a bit of guidance and the right materials, anyone can master this technique and create stunning artworks. In this guide, we’ll walk you through a DIY pour painting project using supplies from JOANN, featuring tips and tricks from Sweet Red Poppy to ensure your project is a success.
### What You’ll Need
Before you start, gather the following materials from JOANN:
1. **Acrylic Paints**: Choose a range of colors for a dynamic effect. JOANN offers a wide selection of high-quality acrylic paints.
2. **Pouring Medium**: This is essential for achieving the right consistency in your paints. Look for acrylic pouring medium available at JOANN.
3. **Canvas or Art Panels**: Select the size that fits your project. JOANN has various canvases and art panels to choose from.
4. **Plastic Cups and Stir Sticks**: For mixing your paint and pouring medium.
5. **Gloves**: To keep your hands clean while working.
6. **Drop Cloth or Plastic Sheeting**: To protect your workspace.
7. **Torch or Heat Gun**: Optional, but useful for creating cells and removing air bubbles.
### Step-by-Step Guide to Pour Painting
#### 1. **Prepare Your Workspace**
**Why It Matters* Protecting your work area helps in easy cleanup and prevents accidental spills.
**Tip* Lay down a plastic drop cloth or old newspapers on your work surface. Wear gloves and old clothes to keep paint off your skin.
#### 2. **Mix Your Paints**
**Why It Matters* Properly mixed paints ensure smooth application and vibrant colors.
**Tip* Pour a small amount of acrylic paint into a plastic cup. Add an equal part of pouring medium and mix thoroughly with a stir stick. Aim for a consistency similar to heavy cream. Test the consistency by allowing a small amount to drip from the stir stick—if it flows easily and leaves a smooth trail, you’re ready to go.
#### 3. **Prepare Your Canvas**
**Why It Matters* A clean and prepped canvas helps the paint adhere better and creates a smoother finish.
**Tip* If your canvas isn’t pre-primed, apply a layer of acrylic gesso and let it dry completely. This step ensures better paint adhesion.
#### 4. **Pour Your Paint**
**Why It Matters* How you pour the paint influences the final design and effects.
**Tip* Use a clean plastic cup to layer different colors of paint. You can either pour the colors directly onto the canvas or use the “dirty pour” method by pouring the colors into a single cup and then onto the canvas. Experiment with different pouring techniques such as straight pouring, tilting, or using a funnel for various effects.
#### 5. **Tilt and Spread**
**Why It Matters* Tilting helps the paint cover the canvas and creates interesting patterns.
**Tip* Gently tilt your canvas to spread the paint and create unique patterns. Move the canvas slowly to control the flow and ensure even coverage. Let the paint move and interact naturally for the best results.
#### 6. **Create Cells (Optional)**
**Why It Matters* Cells add texture and visual interest to your painting.
**Tip* To create cells, lightly torch the wet paint or use a heat gun. The heat will cause the paint to react and form cells. Be careful not to overheat or burn the paint.
#### 7. **Let It Dry**
**Why It Matters* Proper drying time ensures your painting sets correctly and maintains its appearance.
**Tip* Allow your painting to dry completely in a dust-free area. Drying times can vary based on paint thickness and environmental conditions. Be patient and avoid moving the canvas until it’s fully dry.
#### 8. **Finish and Display**
**Why It Matters* Proper finishing protects your artwork and enhances its longevity.
**Tip* Once your painting is dry, you can apply a clear acrylic sealer or varnish to protect it and add a glossy finish. Frame your artwork or display it as-is to show off your beautiful creation.
### Tips from Sweet Red Poppy
**Experiment with Color Combinations* Don’t be afraid to mix and match colors. Bold, contrasting colors often create striking effects, while harmonious colors can produce a more subtle, blended look.
**Practice Makes Perfect* Pour painting is as much about experimentation as it is about technique. Don’t get discouraged if your first few attempts aren’t perfect. Each pour is a learning experience and an opportunity to refine your skills.
**Enjoy the Process* The beauty of acrylic pouring is in the unpredictability and creativity. Embrace the process and have fun watching your artwork come to life.
### Conclusion
DIY pour painting is a fantastic way to express your creativity and produce stunning abstract art. With the right materials from JOANN and some guidance from Sweet Red Poppy, you can create beautiful, professional-looking pieces right from your home. So gather your supplies, follow these steps, and let your artistic journey begin!
---
Ready to dive into the world of pour painting? Grab your supplies from JOANN and start creating stunning artworks with these expert tips! 🎨✨ #pourpaintingdiy #artwithsweetredpoppy #creativecrafts


