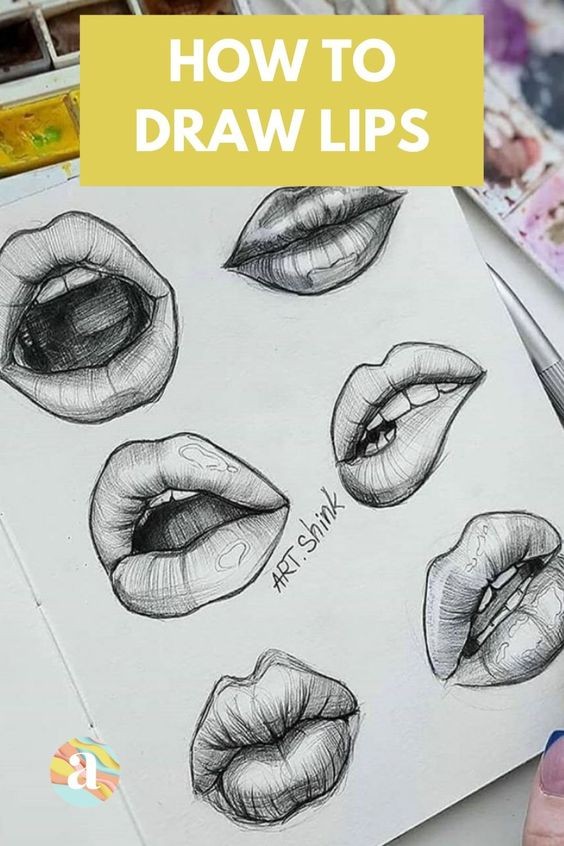
Master the Art of Drawing Mouths: A Step-by-Step Guide for Beginners
Drawing mouths can be one of the trickiest parts of portraiture, but with a bit of practice and the right techniques, you can achieve professional-looking results. Whether you're an aspiring artist or just looking to improve your skills, this step-by-step guide will help you draw mouths like a pro.
Step 1: Understand the Anatomy
Before you start drawing, it's essential to understand the basic anatomy of the mouth. The mouth consists of several key components:
Lips: The upper and lower lips, which have a natural curve.
Teeth: When the mouth is open, the teeth are visible, and they help define the shape of the mouth.
Corners of the Mouth: The points where the upper and lower lips meet.
Step 2: Sketch the Basic Shape
Draw a Horizontal Line: Start by drawing a horizontal line where you want the mouth to be. This line will act as a guide for the placement of the lips.
Outline the Lips: Draw an elongated "M" shape for the upper lip and a "U" shape for the lower lip. The upper lip is usually more curved, while the lower lip is slightly fuller.
Step 3: Add Details
Refine the Lip Shape: Smooth out the lines of the lips, ensuring that they have a natural curve. The upper lip often has a slight dip in the middle, known as the Cupid's bow.
Define the Corners: Add small lines or curves at the corners of the mouth to indicate where the lips meet. These lines should be subtle but help in creating a realistic appearance.
Add the Teeth: If the mouth is open, lightly sketch the teeth inside. Remember to keep the teeth proportionate and avoid drawing each tooth individually; instead, focus on the general shape.
Step 4: Add Shading and Texture
Shade the Lips: Use light shading to add dimension to the lips. The upper lip is often darker than the lower lip, so apply more shading to the upper lip. Blend the shading to create a smooth, realistic look.
Highlight the Lips: Add highlights to the center of the lips where light naturally hits. This will make them look fuller and more three-dimensional.
Step 5: Final Touches
Erase Unnecessary Lines: Gently erase any guidelines or sketch lines that are no longer needed.
Refine the Details: Go over the mouth with a fine-tipped pencil or pen to add final details and ensure everything looks polished.
Quick Tips for Success
Practice Different Expressions: Experiment with various mouth shapes and expressions to improve your skills and add versatility to your drawings.
Use References: Study photos or real-life references to understand how the mouth changes with different expressions and angles.
Be Patient: Drawing realistic mouths takes time and practice, so be patient with yourself and keep refining your technique.
By following these steps and practicing regularly, you'll develop a keen eye for detail and improve your ability to draw mouths like a pro. Happy drawing!