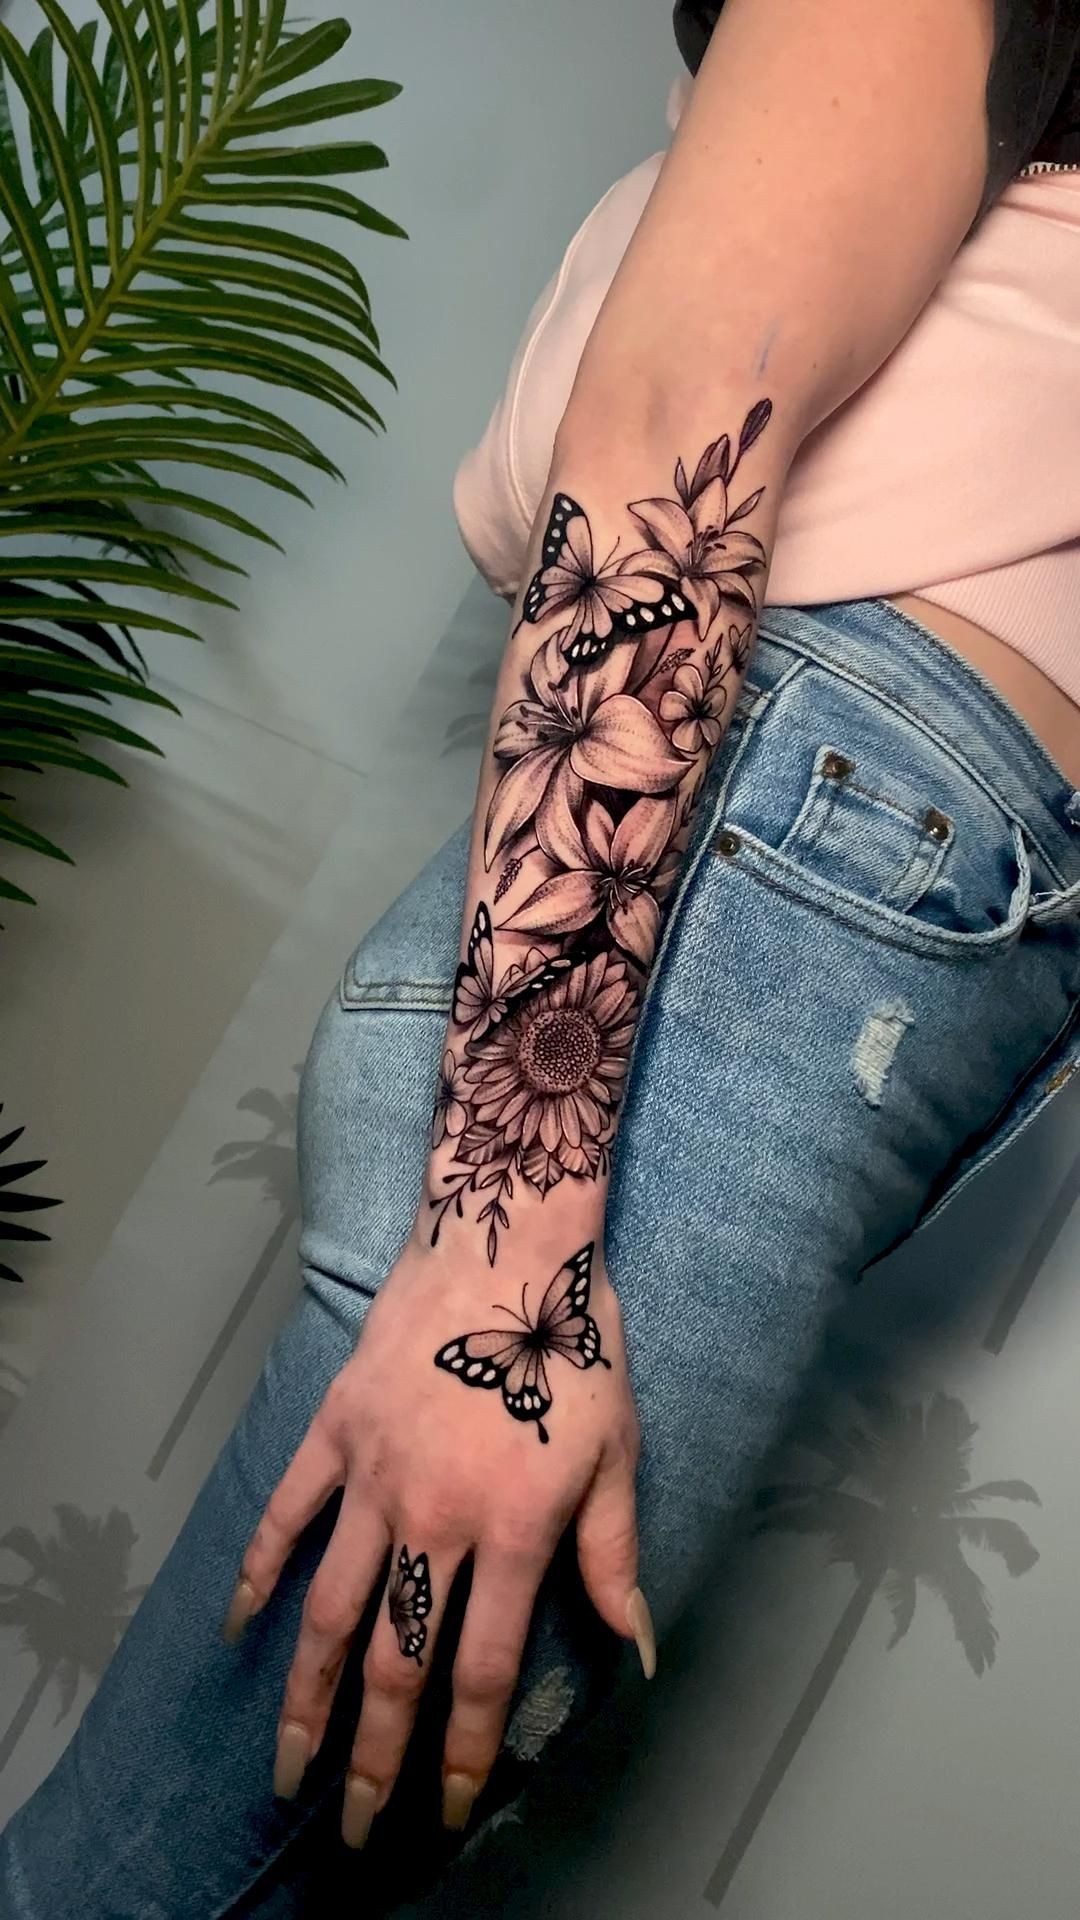
**Butterfly Sleeve Arm Tattoo Tutorial: Step-by-Step Guide to Creating Stunning Floral Ink Art**
Tattoos have long been a form of self-expression and art, and butterfly sleeve arm tattoos are a particularly elegant and captivating choice. These designs, characterized by their detailed and flowing patterns, combine the grace of butterflies with the vibrancy of floral elements to create a stunning visual statement. If you’ve ever dreamed of getting a butterfly sleeve arm tattoo or want to understand the process behind these intricate designs, this guide will walk you through each step of creating your very own masterpiece.
### **Step 1: Conceptualizing Your Design**
The first and most crucial step in getting a butterfly sleeve arm tattoo is conceptualizing your design. This stage involves thinking about what you want your tattoo to represent and how you want it to look. Consider the following:
- **Butterfly Types**: Choose the type of butterflies you want. Each species has its own unique patterns and colors. For example, Monarch butterflies have vivid orange and black markings, while Swallowtail butterflies are known for their striking blue and yellow hues.
- **Floral Elements**: Decide which flowers you want to include. Popular choices include roses, peonies, and lotuses. Each flower has its own symbolism, so select ones that resonate with you.
- **Placement and Flow**: Visualize how the tattoo will flow on your arm. Butterfly sleeve tattoos typically cover the entire arm, wrapping around from the shoulder to the wrist. Consider how the design will integrate with your arm’s natural shape.
### **Step 2: Finding the Right Tattoo Artist**
Choosing the right tattoo artist is essential for bringing your vision to life. Look for an artist who specializes in detailed, floral, and butterfly tattoos. Check their portfolio to ensure their style aligns with your vision. You might also want to schedule a consultation to discuss your ideas and see if the artist understands your concept.
### **Step 3: Designing the Tattoo**
Once you’ve chosen your artist, it’s time to work on the design. Here’s how this typically unfolds:
- **Initial Sketch**: Your tattoo artist will start by sketching a preliminary design based on your ideas and preferences. This sketch will serve as the foundation for your tattoo.
- **Feedback and Revisions**: Review the initial sketch and provide feedback. Don’t hesitate to request changes if something doesn’t look right. This is the time to ensure the design is perfect.
- **Final Design**: Once you’re satisfied with the sketch, the artist will create a final design, which will be used as a stencil for the tattooing process.
### **Step 4: Preparing for the Tattoo**
Before the tattooing begins, there are a few preparatory steps to consider:
- **Skin Preparation**: Ensure your skin is clean and well-moisturized. Avoid sun exposure and exfoliation before your appointment to prevent irritation.
- **Comfort Measures**: Wear comfortable clothing and consider bringing a friend for support. Depending on the size and complexity of the tattoo, sessions can be long.
### **Step 5: The Tattooing Process**
The tattooing process involves several stages:
- **Stencil Application**: The artist will apply the stencil of your design to your arm to guide the tattooing.
- **Outline**: The first step in tattooing is to outline the design with a black or dark ink.
- **Shading and Coloring**: After the outline, the artist will proceed to add shading and colors. This step brings the design to life, adding depth and dimension.
- **Detailing**: The final touches include adding intricate details to enhance the overall appearance of the tattoo.
### **Step 6: Aftercare and Healing**
Proper aftercare is crucial to ensure your tattoo heals well and looks its best:
- **Cleaning**: Keep the tattoo clean by gently washing it with mild soap and water. Avoid soaking it in water for extended periods.
- **Moisturizing**: Apply a fragrance-free moisturizer or tattoo aftercare ointment as recommended by your artist.
- **Avoiding Sunlight**: Keep your tattoo out of direct sunlight to prevent fading and irritation.
- **Avoiding Scratching**: Do not scratch or pick at your tattoo as it heals. This can cause scarring and affect the final result.
### **Step 7: Enjoying Your Tattoo**
Once your tattoo is fully healed, it’s time to enjoy and show off your new artwork. Butterfly sleeve tattoos are eye-catching and symbolic, making them a great conversation piece and a personal expression of your style and personality.
### **Conclusion**
Creating a butterfly sleeve arm tattoo is an exciting journey that combines creativity, artistry, and personal significance. By following these steps, from conceptualizing your design to enjoying your tattoo, you’ll be well on your way to having a stunning piece of body art that you'll cherish for years to come. Whether you’re drawn to the delicate beauty of butterflies or the intricate detail of floral designs, this tattoo style offers a unique and elegant way to express yourself.


