Easy-Greasy Hair: Simple Hairstyles for Every Day
Easy-Greasy Hair: Simple Hairstyles for Every Day
Dealing with greasy hair can be a daily struggle, especially when you’re short on time. Fortunately, there are plenty of quick and stylish hairstyles that can transform your oily locks into a chic and polished look. Whether you’re looking to mask oil or simply embrace a low-maintenance approach, these easy hairstyles are perfect for every day. Here’s a guide to simple hairstyles that work wonders for greasy hair.
1. The Classic Top Knot
What You Need: Hair tie, bobby pins.
How To:
Gather your hair into a high ponytail.
Twist the ponytail into a bun and secure it with a hair tie.
Use bobby pins to pin any loose strands in place.
Why It Works: The top knot is a go-to style for greasy hair because it pulls all your hair up and away from your face, hiding any oil and creating a sleek look.
2. Messy Bun
What You Need: Hair tie, bobby pins.
How To:
Gather your hair into a loose ponytail at the back of your head.
Twist the ponytail and wrap it around the base to form a loose bun.
Secure with a hair tie and bobby pins.
Why It Works: The messy bun is great for disguising greasy roots while giving you a relaxed, effortless style. It’s also perfect for days when you want a laid-back look with minimal effort.
3. Sleek Low Ponytail
What You Need: Hair tie, comb.
How To:
Smooth out your hair with a comb or brush.
Gather your hair into a low ponytail at the nape of your neck.
Secure with a hair tie and wrap a small section of hair around the base to hide the hair tie.
Why It Works: The sleek low ponytail hides greasy roots and gives a polished, professional appearance. It’s ideal for work or more formal settings.
4. Braided Crown
What You Need: Hair elastics, bobby pins.
How To:
Create two small braids on either side of your head.
Wrap the braids around the back of your head, pinning them in place with bobby pins.
Why It Works: The braided crown not only masks greasy roots but also adds a touch of elegance. It’s a great option for special occasions or when you want to look put-together.
5. Side Braid
What You Need: Hair tie, bobby pins.
How To:
Sweep all your hair to one side.
Braid the hair loosely and secure the end with a hair tie.
Pin any stray strands in place with bobby pins.
Why It Works: The side braid is a simple yet stylish way to manage greasy hair. It keeps your hair contained while providing a neat and charming look.
6. Headband Trick
What You Need: Headband or scarf.
How To:
Place a headband or scarf over your hair, positioning it to cover your greasy roots.
Tuck any stray hairs under the headband for a polished finish.
Why It Works: Using a headband or scarf is a quick and effective way to conceal greasy hair while adding a fashionable touch to your outfit. It’s perfect for a fast and easy fix.
7. Faux Bob
What You Need: Hairpins.
How To:
Create loose waves or curls in your hair (optional).
Tuck the ends of your hair under and pin them at the nape of your neck, creating the illusion of a shorter bob.
Why It Works: The faux bob hides greasy ends and gives you a sophisticated look without the need for constant washing.
8. Pin-Up Roll
What You Need: Hairpins, comb.
How To:
Roll a section of your hair away from your face and pin it in place.
Repeat with other sections until you achieve the desired look.
Why It Works: The pin-up roll is a retro-inspired style that hides greasy roots and gives a polished, vintage appearance.
9. Twisted Halo
What You Need: Hair elastics, bobby pins.
How To:
Twist sections of your hair and pin them around your head to create a halo effect.
Secure with bobby pins.
Why It Works: The twisted halo is a creative way to disguise greasy hair while adding a whimsical and elegant touch to your look.
10. Low Bun with Scarf
What You Need: Hair tie, scarf.
How To:
Gather your hair into a low bun.
Tie a scarf around the base of the bun for added flair and to conceal any oily roots.
Why It Works: The low bun with a scarf not only hides greasy roots but also adds a stylish accessory to your hairstyle, making it perfect for days when you want to elevate your look.
Final Thoughts
Greasy hair doesn’t have to be a hassle. With these easy hairstyles, you can quickly and effectively manage oily locks while looking stylish and put-together. From the classic top knot to the elegant braided crown, these simple solutions are perfect for every day, making it easy to maintain a polished appearance without the need for frequent washes. Embrace these easy-greasy hair styles and enjoy a chic, hassle-free look all week long!
発見する 投稿


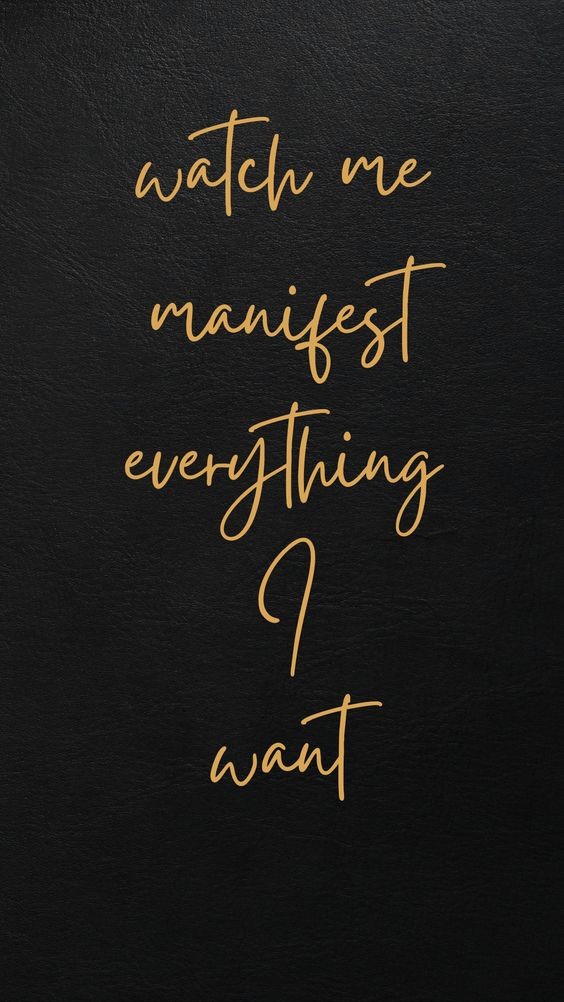
### Elevate Your Day with Motivational iPhone Wallpaper from Etsy
In today’s fast-paced world, staying motivated can be a challenge. A simple yet effective way to keep your spirits high is by surrounding yourself with positivity. One easy and stylish way to do this is by using motivational iPhone wallpaper, available on Etsy.
**Why Motivational iPhone Wallpaper?**
Your iPhone is something you use daily, making it the perfect canvas for daily motivation. Motivational iPhone wallpapers provide constant reminders to stay focused, positive, and inspired. Each time you unlock your phone, you’ll be greeted with an uplifting message or inspiring quote, setting a positive tone for your day.
**Why Etsy?**
Etsy is known for its unique and handmade items, and motivational iPhone wallpapers are no exception. The platform offers a wide range of designs, from minimalist quotes to vibrant, artistic creations. By shopping on Etsy, you’re supporting independent artists and finding one-of-a-kind wallpapers that resonate with your personal style.
**How to Choose the Right Wallpaper**
1. **Consider Your Aesthetic* Choose a wallpaper that aligns with your personal style. Whether you prefer something sleek and minimalistic or bold and colorful, Etsy has a variety of options.
2. **Pick an Inspiring Quote* Look for wallpapers featuring quotes or affirmations that speak to you. This personal touch makes the motivational message even more impactful.
3. **Support Independent Artists* Etsy is a great platform for finding unique designs by independent creators. By purchasing a wallpaper from Etsy, you’re supporting small businesses and getting a special product.
**Get Started**
Ready to transform your iPhone into a source of daily inspiration? Explore the vast selection of motivational iPhone wallpapers on Etsy and find the perfect one to keep you motivated.
#motivationalwallpaper #iphonewallpapers #etsyfinds #dailyinspiration #supportsmallbusiness
Upgrade Your Bedroom with the Btmway Queen Upholstered Bed Frame - Stylish Comfort Without a Box Spring
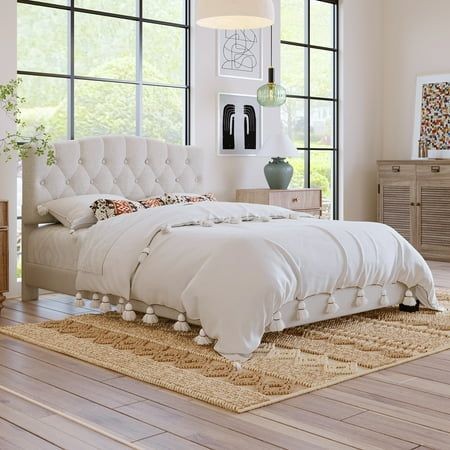
Your bedroom is more than just a place to sleep—it's a sanctuary, a space where you can unwind, recharge, and express your personal style. If you're looking to upgrade your bedroom and create a cozy, modern retreat, the Btmway Queen Upholstered Bed Frame is an ideal choice. With its sleek design, durable construction, and no need for a box spring, this bed frame offers both style and comfort in one perfect package.
A Blend of Modern Design and Timeless Elegance
The Btmway Queen Upholstered Bed Frame is designed with a modern aesthetic that easily complements various bedroom styles. The bed's clean lines and subtle beige upholstery create an elegant and understated look that can be dressed up or down, depending on your decor preferences. Whether your style is minimalist, contemporary, or classic, this bed frame provides a versatile canvas to build upon.
Upholstered Headboard for Added Comfort
One of the standout features of this bed frame is its upholstered headboard. Padded and covered in soft fabric, the headboard adds a touch of luxury to your bedroom. It's perfect for those who enjoy reading or watching TV in bed, offering a comfortable backrest while enhancing the overall look of your room. The neutral beige color of the upholstery blends seamlessly with any bedding, making it easy to update your look without needing to change your bed frame.
Sturdy Construction for Long-Lasting Support
The Btmway Queen Bed Frame is more than just a pretty piece of furniture—it's built to last. Crafted with a solid wood frame, this bed provides robust support, ensuring it can withstand years of use. The wooden slats are designed to support your mattress directly, eliminating the need for a box spring. This not only simplifies setup but also gives your bed a lower profile, contributing to a sleek, modern appearance.
No Box Spring Needed
One of the most convenient features of the Btmway Queen Upholstered Bed Frame is that it doesn’t require a box spring. The sturdy wooden slats provide all the support your mattress needs, offering a firm and even sleeping surface. This design feature not only saves you money but also reduces the overall height of the bed, making it easier to get in and out of, especially in smaller spaces or for those who prefer a lower bed.
Easy Assembly
We know that assembling furniture can sometimes be a daunting task, but the Btmway Queen Bed Frame makes it simple. The bed comes with all the necessary tools and instructions for a quick and hassle-free assembly. In no time, you'll have a stylish and comfortable bed set up and ready for use.
Perfect for Teens and Adults Alike
The Btmway Queen Upholstered Bed Frame is versatile enough to fit in both teen and adult bedrooms. Its neutral design appeals to a wide range of tastes, making it a great choice for a master bedroom, guest room, or even a teen’s room. The bed's queen size offers ample space for a restful night’s sleep, ensuring comfort for both solo sleepers and couples.
Why Choose the Btmway Queen Upholstered Bed Frame?
Choosing the right bed frame is crucial for creating a comfortable and stylish bedroom, and the Btmway Queen Upholstered Bed Frame ticks all the boxes. It combines modern design with durable construction, offers a comfortable upholstered headboard, and eliminates the need for a box spring—all at an affordable price. This bed frame is not just a piece of furniture; it's an investment in your comfort and the overall aesthetic of your bedroom.
Final Thoughts
Upgrading your bedroom doesn’t have to involve a complete overhaul. Sometimes, all it takes is the right piece of furniture to transform your space. The Btmway Queen Upholstered Bed Frame is that piece—a stylish, comfortable, and practical addition that can elevate your bedroom to a new level of sophistication and comfort. Say goodbye to the old box spring and hello to a modern, elegant bed frame that will enhance your sleep experience for years to come.
Shop Now
Ready to upgrade your bedroom? Discover the Btmway Queen Upholstered Bed Frame today and experience the perfect blend of style, comfort, and convenience. #bedroomupgrade #homedecor #modernliving #stylishcomfort #bedframeessentials
Everyday Heatless Hairstyle by @beautybyemilyelizabeth
Everyday Heatless Hairstyle by @beautybyemilyelizabeth
In the hustle and bustle of daily life, finding a quick and easy hairstyle that doesn’t require heat can be a game changer. Luckily, @beautybyemilyelizabeth has crafted the perfect solution with her everyday heatless hairstyle, designed to keep you looking effortlessly stylish while saving your hair from the damage of heat tools. Here’s a step-by-step guide to achieving this chic and practical look.
Why Choose a Heatless Hairstyle?
Heatless hairstyles are not only kinder to your hair, helping prevent damage and breakage, but they’re also typically quicker and easier to achieve. By avoiding heat, you preserve your hair’s natural texture and health, making heatless styles a great option for those busy mornings or for maintaining the integrity of your hair.
Step-by-Step Guide to the Everyday Heatless Hairstyle
Step 1: Start with Clean, Damp Hair
Begin with clean, damp hair. If your hair is dry, lightly mist it with water or apply a leave-in conditioner to make it easier to work with. Using a light styling cream or mousse can also add texture and help hold the style.
Step 2: Create Loose Twists or Braids
Divide your hair into several sections, depending on how defined you want your waves or curls to be. Twist or braid each section loosely. For more natural-looking waves, keep the braids or twists larger and looser. Secure the ends with small hair elastics.
Pro Tip: For tighter curls, create smaller sections and tighter twists or braids.
Step 3: Let It Dry
Allow your hair to air-dry completely. If you’re short on time, you can also speed up the drying process by using a hair dryer on the cool setting. If you braided or twisted your hair the night before, simply leave the braids or twists in overnight.
Pro Tip: For best results, keep the twists or braids in for several hours or overnight to ensure well-defined waves or curls.
Step 4: Unravel and Style
Once your hair is completely dry, gently unravel the twists or braids. Use your fingers to separate and loosen the curls or waves for a natural, bouncy look. Avoid using a brush, as this can lead to frizz and disrupt the curl pattern.
Step 5: Define and Set
For extra definition, you can use a light-hold hairspray or curl-refreshing spray. Gently scrunch your hair to enhance the curls or waves. If you prefer, you can also use a small amount of styling cream or serum to tame any frizz and add shine.
Pro Tip: If you have bangs or shorter layers, you can use a small curling wand or flat iron to style them if needed, but this is optional.
Why This Hairstyle Works for Everyday
This heatless hairstyle is perfect for everyday wear because it’s simple, versatile, and suits all hair types and lengths. It’s ideal for creating natural-looking waves or curls without the need for daily heat styling, making it a time-saving and hair-friendly option.
Additional Tips
Experiment with Sizes: The size of your braids or twists will affect the size of your curls or waves. Larger sections will give you looser waves, while smaller sections create tighter curls.
Protective Measures: If you’re braiding or twisting your hair overnight, use a silk or satin pillowcase to reduce friction and prevent frizz.
Enhance Your Look: Add hair accessories like clips, headbands, or decorative pins to personalize and elevate your style.
Final Thoughts
With @beautybyemilyelizabeth’s everyday heatless hairstyle, you can achieve a beautiful, natural look without the need for heat tools. This style is not only easy to create but also helps maintain the health and vitality of your hair. Embrace this effortless, heat-free hairstyle and enjoy a chic, daily look that keeps your hair looking great and feeling healthy.
Effortless Heatless Hairstyle for Church by @beautybyemilyelizabeth
Effortless Heatless Hairstyle for Church by @beautybyemilyelizabeth
When it comes to getting ready for church, finding the perfect hairstyle that’s both elegant and easy can be a challenge—especially if you want to avoid heat styling. Thankfully, @beautybyemilyelizabeth has shared an effortless heatless hairstyle that’s perfect for church, giving you a polished and sophisticated look without damaging your hair.
Why Go Heatless?
Heat styling tools like curling irons, flat irons, and blow dryers can cause significant damage to your hair over time, leading to dryness, split ends, and breakage. By opting for heatless hairstyles, you can keep your hair healthy and strong while still achieving beautiful, styled looks. Plus, heatless styles are often quicker and easier to achieve, making them ideal for those busy Sunday mornings when you’re short on time.
The Step-by-Step Guide to the Effortless Heatless Hairstyle
Here’s how you can recreate @beautybyemilyelizabeth’s stunning heatless hairstyle for church in just a few simple steps:
Step 1: Prep Your Hair
Start with clean, damp hair. If your hair is already dry, lightly mist it with water or a leave-in conditioner to make it easier to work with. Applying a lightweight styling mousse or curl-enhancing cream can also help add texture and hold to your style.
Step 2: Create Loose Braids
Divide your hair into two equal sections and create loose braids on each side. The key is to braid your hair loosely so that the final look is soft and romantic, rather than tight and structured. Secure the ends of each braid with a small hair elastic.
Step 3: Twist and Pin
Once your braids are complete, gently pull them back and twist them together at the nape of your neck. Secure the twist with bobby pins, making sure to tuck in any loose ends. This creates a beautiful, low chignon that looks sophisticated and elegant.
Step 4: Add Volume
For added volume, gently tug on the braids and twist to loosen them slightly. This will create a fuller, more voluminous look that’s perfect for a church setting. If you have shorter layers or bangs, you can leave a few face-framing pieces out for a softer finish.
Step 5: Accessorize
To elevate your look, consider adding a decorative hairpin, barrette, or even a small ribbon to the chignon. This simple addition can make your hairstyle feel more special and put-together, perfect for a church service.
Tips for a Lasting Style
Set Your Style: Finish your hairstyle with a light-hold hairspray to keep everything in place without weighing it down. Avoid heavy products that can make your hair look greasy or flat.
Prep the Night Before: If you’re really pressed for time in the morning, you can prep this hairstyle the night before by braiding your hair before bed. In the morning, simply twist and pin your braids, and you’re good to go!
Adjust for Hair Length: This hairstyle works well for medium to long hair, but if you have shorter hair, you can adapt it by creating smaller braids or twists.
Why This Hairstyle Works for Church
This effortless heatless hairstyle is ideal for church because it strikes the perfect balance between simplicity and elegance. It’s polished enough for a formal setting, yet relaxed enough to feel comfortable and natural. Plus, by avoiding heat, you’re ensuring that your hair stays healthy and vibrant, even with regular styling.
Final Thoughts
With @beautybyemilyelizabeth’s easy tutorial, you can achieve a beautiful, heatless hairstyle that’s perfect for church or any other formal occasion. This style is not only gentle on your hair but also quick and simple to create, making it a go-to option for those busy Sunday mornings. So, the next time you’re getting ready for church, skip the heat tools and try out this elegant, effortless look—you’ll feel confident and chic, all while keeping your hair healthy and strong.
Top 10 Adorable Curly Hairstyles for a Stunning Look
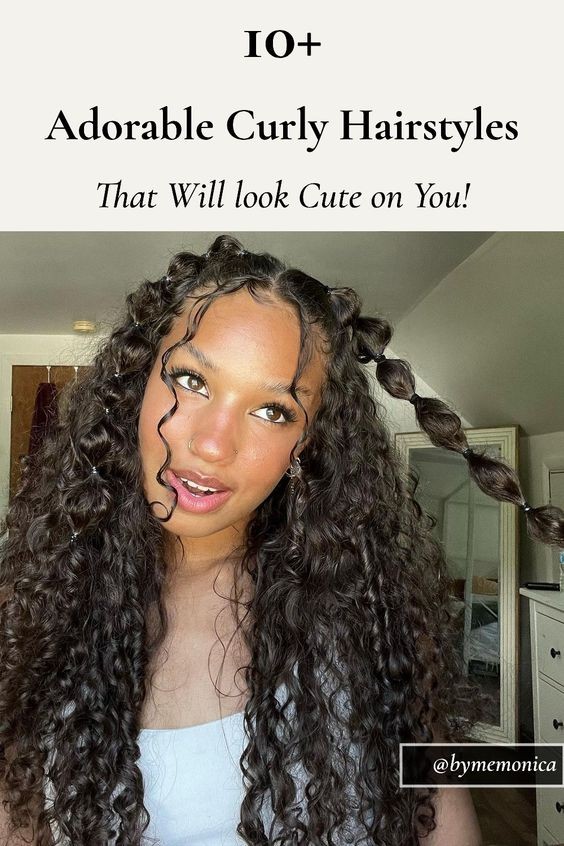
Curly hair is full of personality and charm, making it perfect for creating stunning hairstyles that turn heads. Whether you’re looking to embrace your natural curls or want to try something new, these top 10 adorable curly hairstyles will have you feeling confident and beautiful. From everyday styles to special occasion looks, here’s a roundup of hairstyles that will highlight your curls and leave you looking stunning.
1. Voluminous Curly Fro
The curly fro is a timeless and bold hairstyle that’s all about embracing the volume and texture of your curls. This look works best with shorter to medium-length hair, and it’s perfect for those who love to let their natural curls take center stage.
Pro Tip: Use a pick or wide-tooth comb to fluff out your curls and create even more volume. A lightweight curl-defining cream can help keep your fro looking defined and frizz-free.
2. Half-Up, Half-Down
The half-up, half-down style is a versatile and easy way to show off your curls while keeping your hair out of your face. Simply gather the top half of your hair and secure it with a clip, hair tie, or scrunchie, leaving the rest of your curls to cascade down your shoulders.
Pro Tip: For a playful twist, create a small bun or top knot with the top section of your hair, or add a cute hair accessory like a bow or barrette.
3. Curly Pineapple
The pineapple is a go-to hairstyle for curly-haired girls, especially for those with longer curls. This style involves gathering all of your curls at the top of your head and securing them with a loose hair tie. The result is a fun, bouncy ponytail that keeps your curls intact.
Pro Tip: This style is also perfect for preserving your curls overnight—just wrap a satin scarf around your head to protect your hair while you sleep.
4. Curly Space Buns
For a playful and trendy look, try curly space buns. This style involves creating two buns on either side of your head, with the curls adding extra volume and texture. It’s a fun and youthful hairstyle that’s perfect for casual outings or festivals.
Pro Tip: To add some flair, leave a few face-framing curls out, or use glitter gel or colored hair accessories to make your space buns stand out even more.
5. Side-Swept Curls
Side-swept curls are a glamorous and romantic hairstyle that’s perfect for special occasions. This look involves sweeping all of your curls to one side of your head, creating a dramatic and elegant effect.
Pro Tip: Use bobby pins to secure your curls on one side and add a decorative hair clip or comb for an extra touch of elegance.
6. Curly Bangs
Curly bangs are a chic and modern way to frame your face and highlight your curls. Whether you opt for full bangs or wispy side-swept bangs, this style adds a fresh and youthful vibe to any look.
Pro Tip: Keep your bangs hydrated with a leave-in conditioner or curl cream to prevent frizz and keep them looking defined.
7. Curly High Ponytail
A curly high ponytail is a sleek and stylish way to keep your curls off your face and showcase their natural beauty. This look is perfect for both casual and formal occasions and can be easily dressed up or down.
Pro Tip: Wrap a small section of hair around the base of the ponytail to conceal the hair tie and add a polished finish to your look.
8. Curly Top Knot
The curly top knot is a chic and sophisticated hairstyle that’s perfect for both day and night. This style involves twisting your curls into a high bun on the top of your head, creating a sleek and elegant look that highlights your curls’ texture.
Pro Tip: For a softer, more romantic look, leave a few curls out around your face to frame it and add a touch of whimsy.
9. Curly Updo
For a more formal occasion, a curly updo is a stunning choice. This style involves pinning your curls up at the back of your head, creating a voluminous and elegant look that’s perfect for weddings, proms, or any special event.
Pro Tip: Use a combination of bobby pins and hair clips to secure your curls in place, and finish with a light-hold hairspray to keep your updo intact all day (or night) long.
10. Curly Bob
The curly bob is a trendy and flattering hairstyle that’s perfect for those with shorter curls. This look is all about embracing the natural shape and bounce of your curls, creating a chic and effortless style that’s perfect for any occasion.
Pro Tip: To add some extra volume and definition, use a diffuser when blow-drying your curls, and finish with a curl-enhancing mousse or gel.
Final Thoughts
Curly hair offers endless possibilities for creating stunning and unique hairstyles. Whether you prefer something simple like a high ponytail or something more intricate like a curly updo, these top 10 adorable curly hairstyles are sure to highlight your natural beauty and keep you looking fabulous. So, embrace your curls and try out these gorgeous styles to find the perfect look for you!
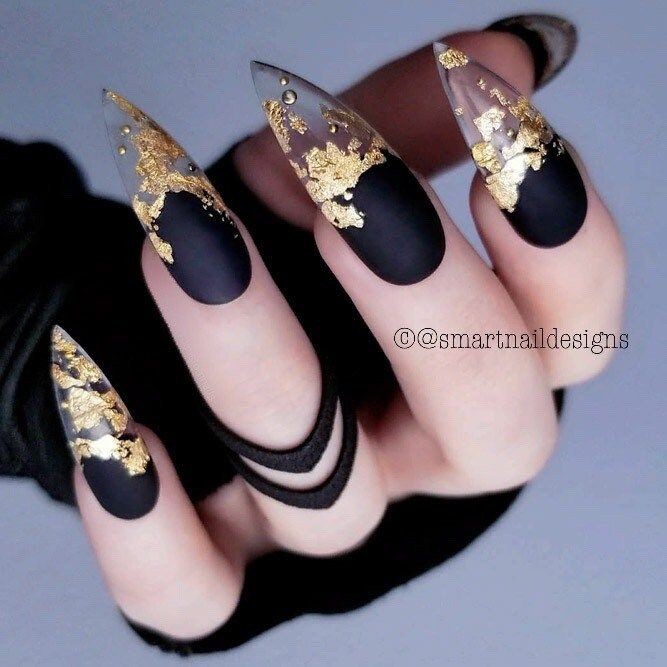
Matte Tiffin Long Stiletto Press-On Nails: A Bold Statement for Your Style.
If you’re looking to make a dramatic statement with minimal effort, the Matte Tiffin Long Stiletto Press-On Nails are your perfect choice. These press-on nails combine elegance with edge, thanks to their striking matte tiffin color and long stiletto shape.
The matte finish offers a contemporary twist on traditional glossy nails, giving you a sophisticated look that’s both stylish and versatile. Whether you're dressing up for a special occasion or simply want to elevate your everyday style, these press-on nails are an excellent choice.
Each set includes easy-to-apply, durable nails that adhere securely to your natural nails, making them ideal for anyone who loves a polished look without the hassle of salon appointments. The long stiletto shape adds a touch of glamour and boldness to your appearance, making these nails perfect for those who love to stand out.
In addition to their aesthetic appeal, these press-on nails are designed for convenience. They come with everything you need for quick application and removal, allowing you to effortlessly switch up your look as often as you like.
Upgrade your nail game with the Matte Tiffin Long Stiletto Press-On Nails and enjoy a chic, modern look that’s perfect for any occasion. #mattetiffinnails #stilettopressonnails #nailart #fashionnails
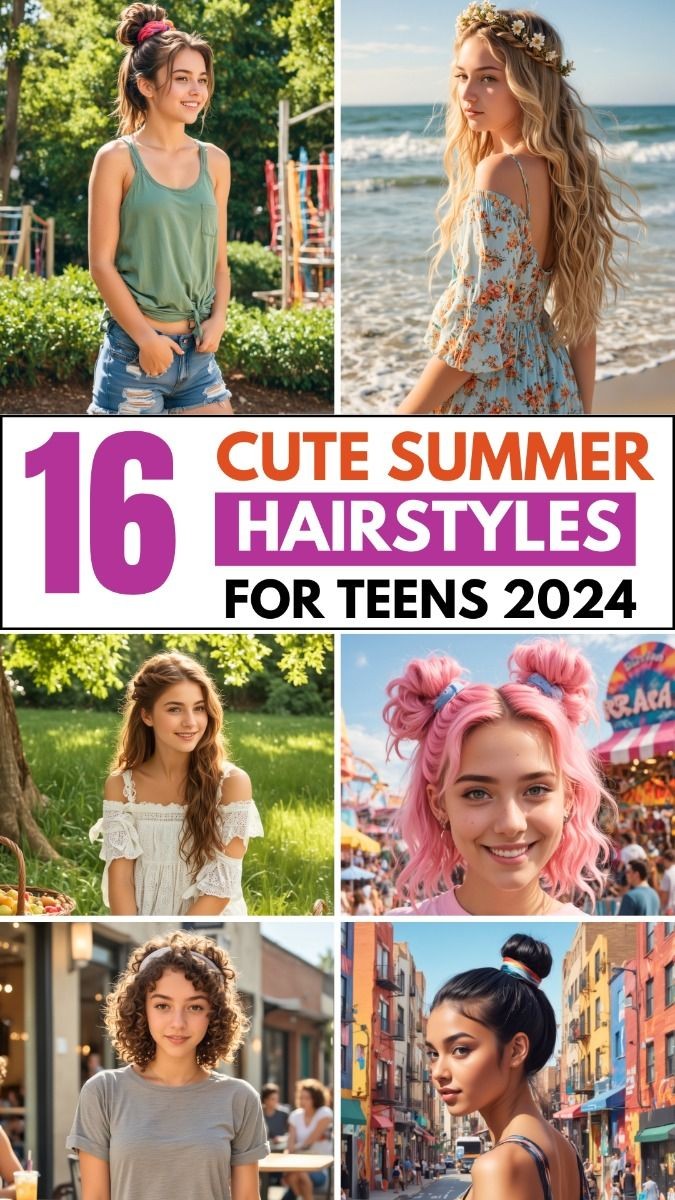
16 Adorable Summer Hairstyles for Teens
Summer is the perfect time to experiment with new hairstyles that are both cute and practical. Whether you’re heading to the beach, hanging out with friends, or just relaxing at home, these 16 adorable summer hairstyles for teens will keep you looking cool and stylish all season long.
1. Beachy Waves
Nothing says summer like effortless beachy waves. This carefree style is perfect for those sunny days and can be achieved with a curling wand or by braiding damp hair and letting it dry. The result is a tousled, windswept look that’s ideal for any casual summer outing.
Pro Tip: Use a sea salt spray to enhance the texture and give your waves that just-off-the-beach vibe.
2. Messy Bun
The messy bun is a go-to summer hairstyle that’s both cute and functional. It’s perfect for keeping your hair off your neck during hot days while still looking effortlessly chic. Whether you’re at the pool or running errands, the messy bun is a versatile style that works for any occasion.
Pro Tip: Pull out a few face-framing strands to soften the look and add a laid-back, casual feel.
3. Half-Up, Half-Down
The half-up, half-down hairstyle strikes the perfect balance between casual and stylish. It’s a great way to keep your hair out of your face while still showing off your locks. You can add a cute clip or scrunchie to give the style a fun, personalized touch.
Pro Tip: Create loose waves in the bottom half of your hair for added volume and texture.
4. Braided Crown
The braided crown is a stunning summer hairstyle that’s perfect for festivals, beach days, or any time you want to feel like a summer goddess. This hairstyle involves creating two braids and wrapping them around your head like a crown.
Pro Tip: Add small flowers or hair accessories to the braids for a boho-inspired look.
5. Sleek High Ponytail
A sleek high ponytail is a simple yet elegant summer hairstyle that works for both casual and dressy occasions. It’s great for keeping your hair out of your face and off your neck during those hot summer days. This style is also perfect for showcasing statement earrings or a bold makeup look.
Pro Tip: Wrap a small section of hair around the base of the ponytail to hide the hair tie and give your ponytail a polished finish.
6. Fishtail Braid
The fishtail braid is a stylish twist on the classic braid and is perfect for summer. This intricate-looking braid is surprisingly easy to create and works well with both casual and formal outfits. It’s also a great way to keep your hair neat and tidy on windy days.
Pro Tip: Gently pull on the edges of the braid to make it look fuller and more voluminous.
7. Space Buns
Space buns are a fun and playful hairstyle that’s perfect for summer festivals, concerts, or just hanging out with friends. This hairstyle involves creating two buns on either side of your head for a cute and quirky look.
Pro Tip: Add glitter or colored hair gel to the buns for a festival-ready style.
8. Low Braided Bun
The low braided bun is a sophisticated summer hairstyle that’s perfect for more formal occasions. This style involves braiding your hair and then wrapping it into a low bun at the nape of your neck. It’s elegant, easy to create, and keeps your hair securely in place.
Pro Tip: Leave a few loose strands around your face for a soft, romantic look.
9. Top Knot
The top knot is a trendy and practical summer hairstyle that’s perfect for hot days. It keeps your hair off your face and neck while still looking stylish. The top knot is also great for showing off your summer tan and statement accessories.
Pro Tip: Add a headband or scarf around the base of the knot for a fun and fashionable twist.
10. Bubble Ponytail
The bubble ponytail is a fun and unique hairstyle that’s perfect for summer. This style involves creating a regular ponytail and then adding hair ties at intervals down the length of the ponytail to create “bubbles.”
Pro Tip: Use brightly colored hair ties for a playful, summery look.
11. Side Braid
The side braid is a simple and sweet summer hairstyle that’s perfect for any occasion. It’s a great way to keep your hair neat and out of your face while still looking cute. This style works well with both straight and wavy hair.
Pro Tip: For a more relaxed look, gently pull on the braid to loosen it and create a softer, more voluminous style.
12. Slicked-Back Wet Look
The slicked-back wet look is a bold and edgy summer hairstyle that’s perfect for making a statement. This style is great for pool parties or beach days, as it looks effortlessly cool and keeps your hair in place.
Pro Tip: Use a strong-hold gel to keep your hair slicked back and in place all day long.
13. Loose Curls
Loose curls are a classic summer hairstyle that’s both glamorous and effortless. Whether you use a curling wand or natural waves, this style is perfect for any summer event, from beach parties to family barbecues.
Pro Tip: Use a lightweight hairspray to keep your curls in place without weighing them down.
14. French Braid Pigtails
French braid pigtails are a cute and playful summer hairstyle that’s perfect for outdoor activities. This style is great for keeping your hair secure while adding a touch of charm to your look.
Pro Tip: Add ribbons or bows at the end of each braid for an extra dose of cuteness.
15. Headband Braid
The headband braid is a creative way to keep your hair off your face while still looking stylish. This style involves braiding a section of hair along your hairline to create a “headband” effect.
Pro Tip: Combine this style with loose waves or a low ponytail for a romantic, boho-inspired look.
16. Pin-Back with Clips
For a quick and easy summer hairstyle, try pinning back your hair with cute clips or barrettes. This style is perfect for adding a touch of personality to your look while keeping your hair out of your face.
Pro Tip: Use clips in fun shapes or bright colors to add a playful element to your hairstyle.
Final Thoughts
Summer is the perfect time to get creative with your hair and try out new styles. Whether you prefer something simple like a messy bun or want to go all out with a braided crown, these adorable summer hairstyles for teens are sure to keep you looking stylish all season long. So, grab your hair tools and accessories, and get ready to have some fun with your summer hair!
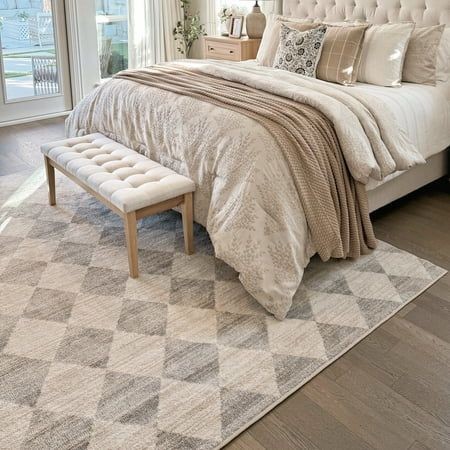
Elevate Your Space with the Stylish My Texas House Grey Geometric Area Rug - Perfect for Any Room!
When it comes to home decor, few elements can transform a room as effortlessly as a well-chosen area rug. The right rug not only adds warmth and texture to your space but also serves as a focal point, tying together the various design elements in your room. If you're looking to refresh your home with a touch of elegance and modern sophistication, the My Texas House Grey Geometric Area Rug is the perfect choice.
A Rug That Makes a Statement
The My Texas House Grey Geometric Area Rug features a striking geometric pattern that adds a contemporary flair to any room. The intricate design, coupled with the neutral grey tones, creates a balanced look that is both visually appealing and versatile. Whether your home boasts a modern, traditional, or eclectic style, this rug seamlessly blends in while making a subtle yet impactful statement.
Perfectly Sized for Any Room
One of the standout features of this rug is its versatile size. Measuring 7'10" x 9'10", it's large enough to anchor a living room, dining area, or bedroom, yet perfectly sized to fit comfortably in smaller spaces without overwhelming them. The generous dimensions allow the rug to define a space, making it ideal for open-concept homes where you want to create distinct zones.
Quality You Can Feel
Crafted from high-quality materials, the My Texas House Grey Geometric Area Rug is as durable as it is beautiful. The rug is made with a plush, soft texture that feels luxurious underfoot, providing comfort in addition to style. Its sturdy construction ensures it can withstand the daily wear and tear of busy households, making it a practical choice for high-traffic areas.
Easy to Maintain
A stylish rug should also be easy to care for, and this rug delivers on that front. Its stain-resistant properties make it a breeze to clean, so you can enjoy its beauty without worrying about spills or messes. Simply vacuum regularly to keep it looking fresh, and spot-clean any spills with a mild detergent and water.
Versatility in Design
The beauty of the My Texas House Grey Geometric Area Rug lies in its versatility. The neutral grey palette works with a wide range of color schemes, allowing you to easily update your decor without needing to replace the rug. Pair it with bold, vibrant accessories for a pop of color, or keep things understated with neutral tones and minimalist decor—the choice is yours.
Why Choose My Texas House?
My Texas House is a brand known for its commitment to quality, style, and affordability. Each product is thoughtfully designed to bring a touch of Texas charm and elegance to homes across the country. The Grey Geometric Area Rug is no exception, offering a blend of timeless design and modern appeal that will elevate your home for years to come.
Final Thoughts
If you're looking to elevate your home decor with a piece that combines style, comfort, and durability, the My Texas House Grey Geometric Area Rug is a perfect choice. Its elegant design, versatile size, and easy maintenance make it a must-have for any room in your home. Don’t miss out on the opportunity to enhance your space with this stylish and functional rug—it's the finishing touch your home has been waiting for.
Shop Now
Ready to transform your space? Shop the My Texas House Grey Geometric Area Rug today and discover how a simple addition can make a big impact on your home decor. #homedecor #interiordesign #mytexashouse #stylishliving #arearugs
### The Rise of Chinese Jelly Nail Art: Trends, Techniques, and Tips for Stunning Nails
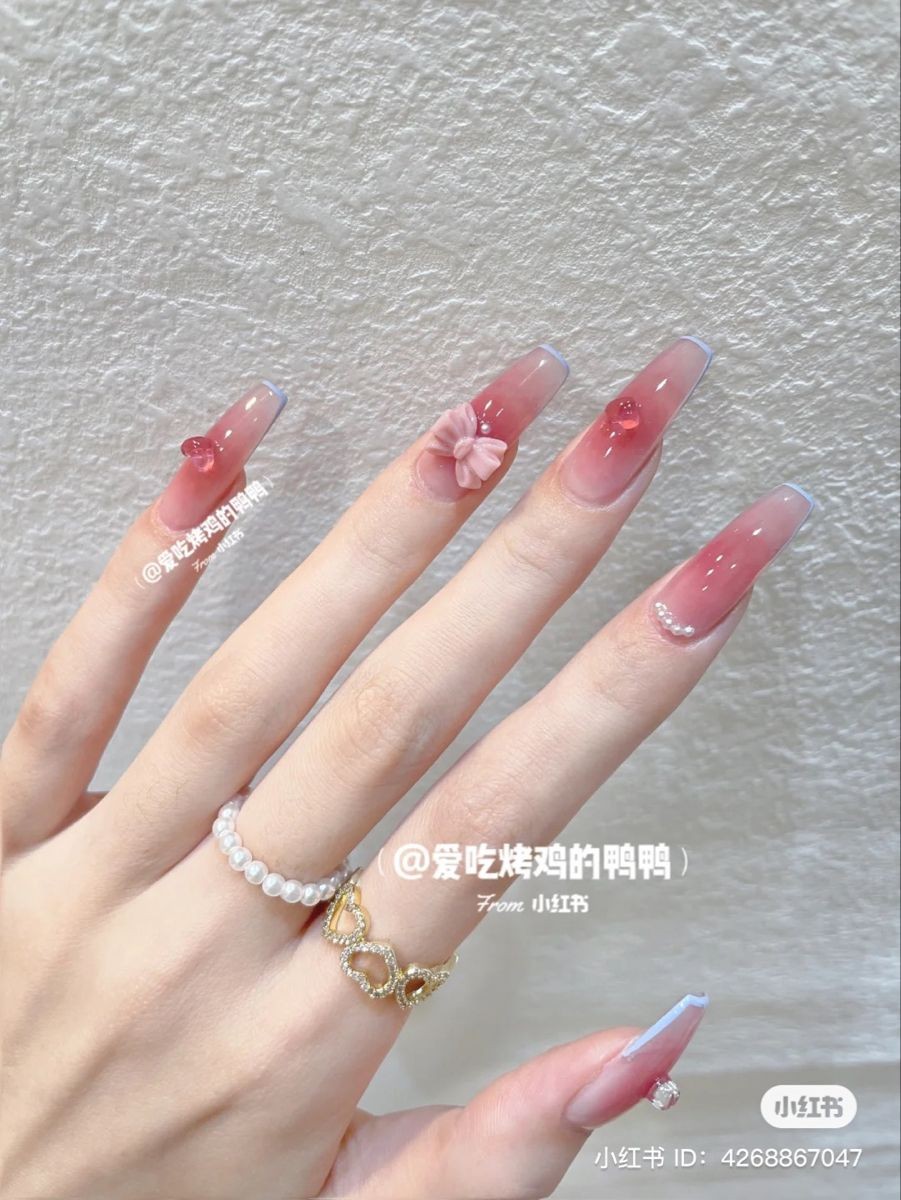
Chinese Jelly Nail Art is an exciting and vibrant trend that has captivated nail enthusiasts around the world. Known for its glossy, translucent appearance and playful use of color, this style brings a fresh, modern twist to traditional nail art. In this comprehensive guide, we’ll dive into the origins of Chinese Jelly Nails, explore popular techniques, and provide tips to help you master this stunning nail art trend.
#### **1. Understanding Chinese Jelly Nail Art**
**a. What Are Jelly Nails?**
Chinese Jelly Nails are characterized by their translucent, gel-like finish that mimics the appearance of jelly. This style is renowned for its glossy, almost squishy look, which creates a unique depth and shine. Unlike opaque nail polishes, jelly nails allow light to pass through, giving them a distinctive, three-dimensional effect.
**b. Historical Context and Popularity**
The concept of jelly nails can be traced back to the early 2000s in Asia, where it quickly became a popular trend due to its innovative and eye-catching aesthetic. Chinese nail art, in particular, has gained global recognition for its intricate designs and use of high-quality products. The jelly nail trend reflects a broader fascination with glossy, playful, and customizable nail styles.
#### **2. Popular Chinese Jelly Nail Designs**
**a. Classic Jelly Colors**
Classic jelly nails typically feature vibrant, translucent shades like pink, red, blue, and green. These colors are often applied in several layers to build up the desired depth and intensity. The result is a bold, glossy finish that’s perfect for making a statement.
**b. Gradient and Ombre Effects**
Gradient and ombre effects are popular in jelly nail art due to their ability to create a seamless transition between colors. By blending two or more jelly shades, you can achieve a smooth, color-shifting effect that adds dimension and sophistication to your nails.
**c. Embedded Designs**
One of the most exciting aspects of jelly nails is the ability to embed designs within the translucent layers. This can include anything from glitter and foil to small nail decals or dried flowers. The embedded designs appear as if they’re floating within the jelly, creating a stunning visual effect.
**d. French Tip Variations**
The classic French manicure gets a modern update with jelly nails. Instead of the traditional white tips, try using pastel or neon jelly shades to give your French tips a fun, contemporary twist. This approach maintains the elegance of the classic style while adding a playful, colorful edge.
**e. 3D Jelly Art**
For a more extravagant look, 3D jelly nail art incorporates elements like small rhinestones, pearls, and even tiny charms. These embellishments can be placed strategically to create eye-catching designs that stand out against the glossy jelly base.
#### **3. Techniques for Creating Chinese Jelly Nails**
**a. Preparing Your Nails**
Proper preparation is key to achieving a flawless jelly nail look. Start by cleaning and trimming your nails, then apply a base coat to protect your natural nails and create a smooth surface for the jelly polish. Make sure your nails are completely dry before moving on to the next steps.
**b. Applying Jelly Polish**
To achieve the perfect jelly finish, apply your jelly polish in thin, even layers. Begin with a base layer and allow it to dry completely before applying additional coats. The number of layers will depend on the intensity of the color you want to achieve. For a more translucent look, apply fewer layers; for a deeper color, build up the layers gradually.
**c. Creating Gradient Effects**
To create a gradient effect, use a makeup sponge to apply the different jelly shades. Dab the sponge in the various colors and gently press it onto your nails, blending the colors together. This technique allows for a smooth transition and can be customized to your preferred color palette.
**d. Embedding Designs**
If you’re embedding designs, apply a thin layer of jelly polish, then place your chosen elements (glitter, foil, etc.) onto the wet polish. Once the design is in place, apply another layer of jelly polish on top to encapsulate the design. This technique gives the appearance of floating designs within the jelly layers.
**e. Finishing with a Top Coat**
To enhance the longevity and shine of your jelly nails, apply a top coat. A glossy top coat will further intensify the jelly effect and protect your design from chipping or fading. For a matte finish, choose a matte top coat instead.
#### **4. Tips for Perfecting Your Jelly Nail Art**
**a. Choose High-Quality Products**
Invest in high-quality jelly polishes and tools to ensure the best results. Premium products offer better pigmentation, consistency, and durability, which are essential for achieving a professional-looking jelly nail design.
**b. Practice Layering Techniques**
Layering is a crucial aspect of jelly nails. Practice applying thin, even layers to avoid streaks and ensure a smooth, glossy finish. Patience is key—allow each layer to dry completely before adding the next.
**c. Experiment with Colors**
Don’t be afraid to experiment with different jelly colors and combinations. The translucent nature of jelly nails allows for endless creativity, so feel free to mix and match shades to find your perfect look.
**d. Take Your Time**
Creating intricate jelly nail designs can be time-consuming, so be prepared to invest some time into your nail art. Take your time with each step to ensure precision and avoid mistakes.
**e. Maintain Your Nails**
To keep your jelly nails looking their best, practice good nail care. Regularly moisturize your cuticles, avoid using your nails as tools, and ensure that your nails are well-nourished and strong.
#### **5. Where to Find Inspiration and Tutorials**
There are numerous resources available for finding inspiration and learning new techniques for Chinese Jelly Nail Art. Platforms like Pinterest, Instagram, and YouTube offer a wealth of tutorials and design ideas. Follow nail art influencers and artists to stay updated on the latest trends and techniques.
Additionally, consider joining nail art communities and forums where you can share your creations, seek advice, and gain insights from other enthusiasts.
### **Conclusion**
Chinese Jelly Nail Art is a captivating trend that combines the allure of translucent finishes with the creativity of modern nail design. By mastering the techniques and experimenting with different colors and designs, you can achieve stunning jelly nails that reflect your unique style. Whether you're a seasoned nail artist or a curious beginner, exploring the world of jelly nails offers endless opportunities for creativity and self-expression. Dive in, get inspired, and let your nails shine with the glossy, vibrant beauty of Chinese Jelly Nail Art!
#cutenails