Good and Bad People Good and Bad People
    #technology #business #usa #innovation #seo
    Avanceret søgning
  • Log på
  • Tilmeld

  • Dagstilstand
  • © 2025 Good and Bad People
    Om • Vejviser • Kontakt os • Udviklere • Fortrolighedspolitik • Vilkår for brug • Tilbagebetale • Referral Terms • Acceptable Use Policy • Community Guidelines • Write for Us

    Vælg Sprog

  • Arabic
  • Bengali
  • Chinese
  • Croatian
  • Danish
  • Dutch
  • English
  • Filipino
  • French
  • German
  • Hebrew
  • Hindi
  • Indonesian
  • Italian
  • Japanese
  • Korean
  • Persian
  • Portuguese
  • Russian
  • Spanish
  • Swedish
  • Turkish
  • Urdu
  • Vietnamese

Holde øje

Holde øje Hjul

Begivenheder

Gennemse begivenheder Mine begivenheder

Blog

Gennemse artikler

Marked

Seneste produkter

sider

Mine sider Synes godt om sider

Mere

Udforske Populære opslag Jobs Tilbud Finansiering
Hjul Holde øje Begivenheder Marked Blog Mine sider Se alt

Opdage indlæg

Posts

Brugere

sider

Gruppe

Blog

Marked

Begivenheder

Jobs

Finansiering

Pennys Pretty Projects
1 Y ·Oversætte

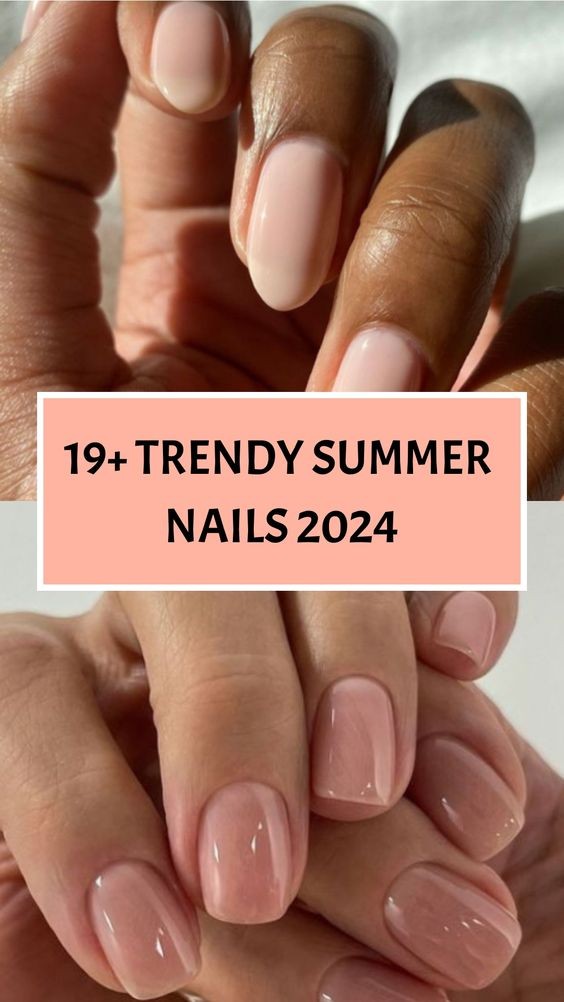
19+ Trendy Summer Nails 2024: Embrace the Season with Style

As the summer of 2024 rolls in, it’s time to bid adieu to muted tones and embrace the vibrant hues and playful designs that define this season's nail trends. Whether you’re lounging by the poolside, attending a rooftop party, or simply enjoying a sunny day, your nails can be your ultimate accessory. From bold colors to intricate patterns, here are 19+ trendy summer nail designs that will elevate your style game:

1. Neon Pop:
Neon shades are making a comeback this summer, from electric blues to neon pinks and greens. These eye-catching colors will surely make your nails stand out.

2. Tropical Vibes:
Think lush palm leaves, exotic fruits, and vibrant florals. Tropical nail art featuring bold patterns and bright colors like turquoise and coral will transport you to a tropical paradise.

3. Gradient Bliss:
Create a gradient effect using complementary colors or shades of the same hue. This technique adds depth and dimension to your nails, perfect for a summer sunset-inspired look.

4. Beachy Blues:
Shades of aqua, seafoam green, and deep navy evoke the tranquility of the ocean. Add some seashell or wave designs for a beach-ready manicure.

5. Fruit Salad:
Incorporate fruity motifs like watermelons, pineapples, or strawberries into your nail art. These playful designs are both fun and refreshing for the summer months.

6. Pastel Delight:
Soft pastel shades like lavender, mint, and peach are always a hit in summer. Combine them with floral accents or geometric shapes for a chic and delicate look.

7. Geometric Patterns:
Bold geometric shapes in contrasting colors add a modern touch to your nails. Try squares, triangles, or even abstract designs for a contemporary flair.

8. Marble Magic:
Marble nails continue to be popular, offering a sophisticated yet edgy look. Experiment with different color combinations or add metallic accents for extra glam.
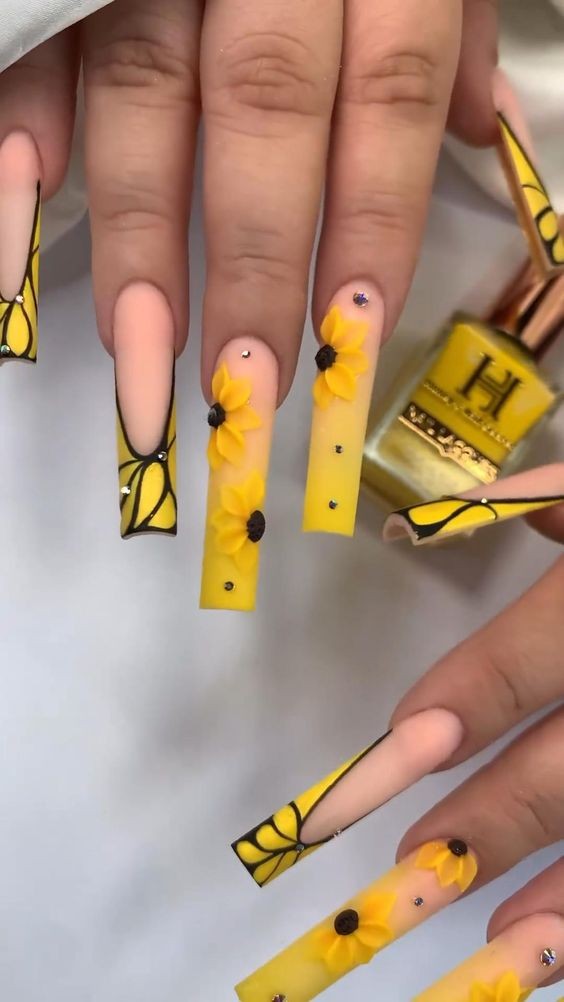
9. Sunshine Yellow:
Yellow is the color of happiness and sunshine, making it ideal for summer nails. Opt for shades ranging from soft buttercup to bold mustard for a cheerful manicure.

10. Boho Chic:
Channel your inner bohemian with dreamy designs like feathers, dreamcatchers, or intricate mandalas. Earthy tones paired with metallic accents create a whimsical vibe.

11. Nautical Stripes:
Classic navy and white stripes are timeless for summer. Add a twist with gold accents or anchor motifs for a chic maritime-inspired manicure.

12. Pop Art:
Bold and graphic designs inspired by pop art are a statement-making choice. Think comic book bursts, polka dots, or Warhol-inspired prints for a playful look.
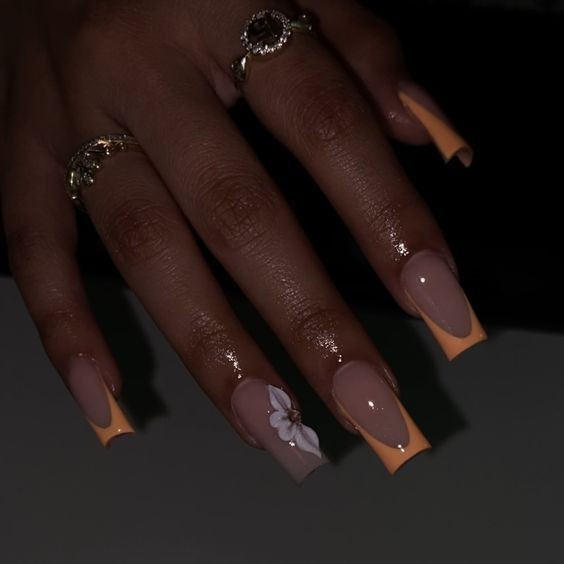
13. French Twist:
Give the classic French manicure a modern twist by using unconventional colors or adding embellishments like glitter or tiny pearls to the tips.

14. Minimalist Elegance:
Less is more with minimalist nail art. Opt for simple designs like a single stripe, tiny dots, or a subtle ombré effect in muted tones for understated elegance.

15. 3D Accents:
Add texture and dimension with 3D elements like studs, beads, or tiny decals. These embellishments can elevate any nail design from basic to fabulous.

16. Floral Fantasies:
Floral patterns are synonymous with summer. Choose bright blooms like sunflowers, daisies, or roses for a fresh and feminine manicure.

17. Cosmic Cool:
Embrace the cosmos with celestial-themed nail art featuring stars, moons, and galaxies. Dark blues, purples, and holographic glitters create a mesmerizing effect.

18. Artistic Splatter:
Create an abstract masterpiece with splatter paint nail art. Use a combination of colors and techniques to achieve a unique and artsy look.

19. Glitter Glam:
Nothing says summer sparkle like glitter. Whether you opt for a full glitter nail or just accents, shimmering shades add instant glam to any summer ensemble.

20. Fun with Foils:
Metallic foils in silver, gold, or rose gold are perfect for adding a luxe finish to your nails. Experiment with foiling techniques or combine with other designs for a dazzling effect.

Conclusion:
This summer, let your nails do the talking with these trendy and creative nail art ideas. Whether you prefer bold and bright or subtle and sophisticated, there’s a design to suit every style and occasion. So, get ready to show off your manicure and embrace the sunny vibes of summer 2024 with flair!

image
Synes godt om
Kommentar
Del
Pennys Pretty Projects
1 Y ·Oversætte

30+ Trending Summer Coffin Nails of 2024

As the summer of 2024 heats up, so do the trends in nail art, with coffin nails leading the charge as the go-to style for fashion-forward individuals. Known for their sleek and tapered shape that resembles a coffin or a ballerina slipper, coffin nails offer a canvas for creativity and expression. From vibrant colors to intricate designs, here’s a roundup of the hottest trends in summer coffin nails this year.

Neon Brights: Neon shades like electric orange, hot pink, and lime green are making a bold statement this summer. Perfect for those who want their nails to pop under the sun.

Pastel Ombré: Soft gradients transitioning from one pastel hue to another create a dreamy and ethereal look that’s ideal for summer vibes.

Tropical Patterns: Think palm leaves, hibiscus flowers, and exotic fruits like pineapples and coconuts. These motifs bring the vacation spirit right onto your fingertips.

Marble Accents: Marble designs continue to be popular, with soft swirls and veins of color adding a touch of elegance and sophistication.

Fruit-Inspired Art: Watermelon slices, citrus fruits, and strawberries are adorning nails, bringing a fresh and juicy feel to your manicure.

Metallic Finishes: Shimmering gold, silver, and bronze add a glamorous touch that catches the sunlight and turns heads.

Shellac Shells: Tiny crushed seashells embedded in clear polish create a beachy and textured effect that’s perfect for seaside vacations.

Tie-Dye Delights: Psychedelic swirls of color reminiscent of tie-dye t-shirts are a fun and playful choice for the free-spirited.

Graphic Lines: Geometric patterns and sharp lines in contrasting colors make a modern and edgy statement.

French Tips Reinvented: Traditional French manicures get an update with colorful tips and unexpected twists, such as negative space or glitter accents.

Floral Flourishes: Delicate flower patterns in soft pastels or bold hues add a touch of femininity and charm.

Beachy Vibes: Sand and surf inspire nail art featuring waves, seashells, and starfish, bringing a bit of the beach wherever you go.

Sky Blue Shades: Serene and calming shades of blue evoke clear summer skies and tranquil seas.

Abstract Art: Splashes of color, asymmetrical designs, and avant-garde patterns showcase your artistic side.

Pearly Whites: Classic white nails get an upgrade with pearlescent finishes that shimmer with every movement.

Sunset Colors: Gradient nails in shades of orange, pink, and purple mimic the breathtaking hues of a summer sunset.

Minimalist Elegance: Simple yet sophisticated designs with muted colors or delicate embellishments.

Animal Prints: Leopard spots, zebra stripes, and snake prints add a touch of the wild side to your manicure.

Matte Magic: Matte finishes in bold colors or subtle neutrals provide a modern and understated look.

Glitter Galore: Sparkling glitter in various sizes and colors adds dazzle and drama to your nails.

Festival Ready: Boho-inspired designs with feathers, dreamcatchers, and tribal motifs celebrate the festival spirit.

Gingham Glam: Checkered patterns in bright hues or classic black and white give a playful twist to your nails.

Luxe Gems: Rhinestones, pearls, and tiny jewels create a luxurious and eye-catching effect.

Mermaid Scales: Iridescent scales and shimmering blues and greens create a mystical and enchanting manicure.

Pop Art: Bold colors and comic book-inspired graphics make a vibrant and energetic statement.

Futuristic Chrome: Mirror-like chrome finishes in silver, gold, or iridescent colors reflect a forward-looking style.

Monochrome Magic: Black and white designs with stripes, polka dots, or abstract shapes offer a timeless yet modern look.

Gradient Glows: Nails that transition from one color to another with a glowing effect reminiscent of a sunset or sunrise.

Terrazzo Trend: Inspired by the popular flooring material, nails feature speckled designs in a variety of colors and shapes.

Nautical Nods: Anchors, ropes, and sailor stripes bring a touch of maritime charm to your manicure.

Jewel Tones: Rich and deep colors like emerald green, sapphire blue, and amethyst purple add a regal and sophisticated touch.

Each of these trends showcases the diversity and creativity in summer coffin nails for 2024. Whether you prefer bold and vibrant designs or subtle and sophisticated styles, there’s a manicure trend to suit every personality and occasion this season. Experiment, have fun, and let your nails be the ultimate accessory to your summer style!

image
Synes godt om
Kommentar
Del
Pennys Pretty Projects
1 Y ·Oversætte

Summer Acrylic Nail Inspirations: Embrace the Season with Style

As the sun rises higher and the days grow longer, it's time to shed the layers and embrace the vibrant energy of summer. For fashionistas and trendsetters alike, one of the most exciting ways to usher in the season is through stunning acrylic nails. Summer acrylic nail inspirations offer a canvas for creativity, allowing you to express your personality and embrace the hottest trends of the season.

1. Bold and Bright Colors

Summer is all about embracing bold and bright colors that reflect the warmth and vibrancy of the season. Think shades of coral, electric blue, sunny yellow, and tropical greens. These colors not only pop against sun-kissed skin but also add a playful and cheerful touch to your overall look. Consider opting for a gradient effect or mixing contrasting colors for a statement-making manicure.

2. Tropical and Floral Designs

Bring a touch of paradise to your fingertips with tropical and floral-inspired acrylic nail designs. Palm leaves, hibiscus flowers, and exotic fruits like pineapples can instantly transport you to a beachside retreat. These designs are perfect for summer vacations or simply lounging by the pool, adding a whimsical and refreshing twist to your nails.

3. Nautical Themes

Celebrate the maritime spirit of summer with nautical-themed acrylic nails. Navy blues, whites, and reds paired with anchors, stripes, and sailor knots evoke a sense of adventure and relaxation by the sea. Whether you're sailing on a yacht or strolling along the boardwalk, nautical nails are a timeless choice that never goes out of style.

4. Glitter and Metallic Accents

Add a touch of sparkle to your summer look with glitter and metallic accents on your acrylic nails. Gold and silver flakes, holographic glitter, and shimmering metallic finishes can elevate any design, from simple geometric patterns to intricate nail art. These accents catch the sunlight and create a dazzling effect that's perfect for summer parties and evening events.

5. Minimalist Chic

For those who prefer a more understated look, minimalist chic acrylic nails are the way to go. Opt for nude shades, soft pastels, or sheer finishes that enhance your natural nails while adding a touch of elegance. Geometric shapes, negative space designs, and delicate line work can add a modern twist to classic summer nails, keeping your look fresh and sophisticated.

6. Fruit-Inspired Delights

Channel the sweetness of summer fruits with nail designs inspired by your favorite treats. Watermelons, strawberries, lemons, and oranges can adorn your nails in fun and creative ways. These designs not only look adorable but also capture the essence of summertime bliss and fruity indulgence.

7. Ocean-Inspired Hues

Capture the mesmerizing hues of the ocean with acrylic nails in shades of turquoise, seafoam green, and deep azure. Add seashell decals, pearls, and iridescent finishes to evoke the serene beauty of the sea. These nails are perfect for beach lovers and anyone who dreams of dipping their toes in crystal-clear waters.

8. Neon Vibrance

Make a bold statement with neon acrylic nails that command attention wherever you go. Neon pinks, yellows, greens, and oranges are perfect for those who love to stand out in a crowd. Combine neon colors with graphic designs, abstract patterns, or even fluorescent animal prints for a high-energy manicure that exudes summer fun.

Tips for Summer Acrylic Nails:

Maintenance: Keep your acrylic nails looking fresh by moisturizing your cuticles regularly and applying a top coat every few days to prevent chipping.

Protection: Remember to use sunscreen on your hands to protect your acrylic nails from sun damage, especially if you spend a lot of time outdoors.

Hydration: Stay hydrated to maintain healthy nails and prevent them from becoming brittle or dry in the summer heat.

This summer, let your acrylic nails be a reflection of your vibrant spirit and adventurous style. Whether you prefer bold and bright colors, whimsical designs, or minimalist elegance, there's a summer acrylic nail inspiration that's perfect for you. Embrace the season with confidence and creativity, and let your nails tell a story of sun-soaked days and endless possibilities.

image
Synes godt om
Kommentar
Del
UK Management Assignment Help
UK Management Assignment Help  ændrede sit profilbillede
1 Y

image
Synes godt om
Kommentar
Del
Pennys Pretty Projects
1 Y ·Oversætte

Chicken Kebabs: A Delicious and Weight-Loss Friendly Snack
\
Chicken kebabs are a versatile, delicious, and healthy option for those looking to enjoy a tasty meal while keeping an eye on their weight. Perfect as a snack or a main dish, chicken kebabs can be easily incorporated into various dietary plans, including weight loss programs. This article will explore the benefits of chicken kebabs, their suitability for weight watchers, and provide a simple, easy-to-follow recipe for making your own at home.

The Benefits of Chicken Kebabs
Chicken kebabs offer several benefits, making them an excellent choice for anyone looking to maintain a healthy diet:

High in Protein: Chicken is a great source of lean protein, which is essential for muscle repair and growth. Protein also helps keep you feeling full longer, reducing the likelihood of overeating.

Low in Calories: Skinless chicken breast, commonly used in kebabs, is low in calories. This makes it a great option for those on a calorie-restricted diet.

Versatile: Chicken kebabs can be flavored in countless ways, allowing for variety and preventing meal fatigue. They can be grilled, baked, or cooked on a stovetop, and can be paired with various vegetables and marinades.

Convenient: Kebabs are easy to prepare and cook, making them a convenient option for busy individuals or those who prefer quick and simple meals.

Weight-Loss Friendly Chicken Kebabs
For weight watchers, chicken kebabs are a fantastic option. By selecting the right ingredients and cooking methods, you can enjoy a flavorful meal without compromising your weight loss goals.

Key Tips for Weight-Loss Friendly Kebabs:

Choose Lean Cuts: Opt for skinless chicken breast or thigh meat, which are lower in fat.
Control Portions: Use smaller pieces of chicken and lots of vegetables to create a satisfying, low-calorie meal.
Use Healthy Marinades: Avoid sugary sauces and opt for marinades made with herbs, spices, lemon juice, and a small amount of olive oil.
Grill or Bake: Grilling or baking the kebabs is healthier than frying, as it reduces the amount of added fat.
Easy Chicken Kebab Recipe
Here’s a simple, delicious recipe for chicken kebabs that you can make at home:

Ingredients:

2 boneless, skinless chicken breasts, cut into 1-inch cubes
1 red bell pepper, cut into 1-inch pieces
1 yellow bell pepper, cut into 1-inch pieces
1 red onion, cut into 1-inch pieces
1 zucchini, cut into 1-inch slices
2 tablespoons olive oil
2 tablespoons lemon juice
2 garlic cloves, minced
1 teaspoon dried oregano
1 teaspoon paprika
Salt and pepper to taste
Instructions:

Prepare the Marinade: In a bowl, mix olive oil, lemon juice, minced garlic, oregano, paprika, salt, and pepper.
Marinate the Chicken: Add the chicken cubes to the marinade, ensuring they are well-coated. Cover and refrigerate for at least 30 minutes (up to 2 hours for more flavor).
Assemble the Kebabs: Thread the marinated chicken cubes, bell peppers, onion, and zucchini onto skewers, alternating between the chicken and vegetables.
Preheat the Grill: Preheat your grill to medium-high heat.
Grill the Kebabs: Place the kebabs on the grill and cook for about 10-15 minutes, turning occasionally, until the chicken is fully cooked and the vegetables are tender and slightly charred.
Serve: Remove from the grill and let rest for a few minutes before serving. Enjoy your kebabs with a side salad or a whole grain like quinoa or brown rice.

Conclusion
Chicken kebabs are a delightful and healthful option for those watching their weight or simply seeking a nutritious meal. With their high protein content, low calorie count, and ease of preparation, they make for a perfect snack or main course. By following the tips and recipe provided, you can enjoy flavorful, weight-loss friendly chicken kebabs any time. Happy cooking!

image
Synes godt om
Kommentar
Del
Pennys Pretty Projects
1 Y ·Oversætte

Chicken with Garlic Mushroom Sauce: A Delectable Culinary Deligh

When it comes to crafting a meal that balances rich flavors with simple preparation, Chicken with Garlic Mushroom Sauce stands out as a timeless classic. This dish marries the tender succulence of chicken with the earthy, umami-rich taste of mushrooms, all enveloped in a luscious garlic-infused sauce. Whether you're a seasoned home cook or a novice in the kitchen, this recipe promises to impress and delight.

Ingredients
To create this culinary masterpiece, you will need the following ingredients:

4 boneless, skinless chicken breasts
2 tablespoons olive oil
1 tablespoon butter
1 medium onion, finely chopped
3-4 cloves garlic, minced
1 pound mushrooms (button, cremini, or a mix), sliced
1 cup chicken broth
1 cup heavy cream
1 teaspoon dried thyme (or 1 tablespoon fresh thyme)
Salt and pepper to taste
Fresh parsley, chopped (for garnish)
Instructions
Prepare the Chicken: Begin by seasoning the chicken breasts with salt and pepper. Heat the olive oil in a large skillet over medium-high heat. Once hot, add the chicken breasts and cook for 5-7 minutes on each side, or until golden brown and cooked through. Remove the chicken from the skillet and set aside.

Sauté the Aromatics: In the same skillet, add the butter. Once melted, add the chopped onion and sauté until it becomes translucent, about 3-4 minutes. Add the minced garlic and cook for an additional 1 minute, being careful not to let it burn.

Cook the Mushrooms: Add the sliced mushrooms to the skillet. Sauté until they release their juices and begin to brown, about 5-7 minutes.

Create the Sauce: Pour in the chicken broth, scraping up any browned bits from the bottom of the skillet. Allow the broth to simmer for about 3 minutes to reduce slightly. Stir in the heavy cream and thyme. Reduce the heat to medium and let the sauce simmer until it thickens, about 5-10 minutes.

Combine and Finish: Return the chicken breasts to the skillet, nestling them into the sauce. Spoon some of the sauce over the chicken and let it simmer for another 5 minutes to heat through and meld the flavors.

Garnish and Serve: Sprinkle the dish with freshly chopped parsley before serving. This adds a vibrant color and a hint of freshness that complements the rich sauce.

Serving Suggestions
Chicken with Garlic Mushroom Sauce pairs beautifully with a variety of sides. Consider serving it over a bed of fluffy mashed potatoes, buttery egg noodles, or steamed rice to soak up the delectable sauce. For a lighter option, a side of roasted vegetables or a crisp green salad would be equally delightful.

Tips for Success
Mushroom Variety: Feel free to experiment with different types of mushrooms. While button and cremini mushrooms are common choices, shiitake or porcini mushrooms can add a more intense flavor.
Cream Consistency: If you prefer a thicker sauce, let it simmer a bit longer. Conversely, for a thinner sauce, you can add a splash more broth or cream.
Herb Substitutions: Fresh thyme adds a wonderful aroma, but dried thyme works just as well. You can also experiment with other herbs like rosemary or tarragon.

Final Thoughts
Chicken with Garlic Mushroom Sauce is a dish that embodies comfort and sophistication. Its rich, creamy sauce is deeply flavorful without being overwhelming, making it a perfect choice for a family dinner or an intimate gathering with friends. The simplicity of its preparation ensures that anyone can make this dish with confidence, while its complex flavors make it a memorable culinary experience. Enjoy the delightful journey of creating and savoring this classic dish.

image
Synes godt om
Kommentar
Del
Vic Club
Vic Club  ændrede sit profilbillede
1 Y

image
Synes godt om
Kommentar
Del
Pennys Pretty Projects
1 Y ·Oversætte

Sausage Alfredo Rigatoni Casserole Pasta Bake: A Comfort Food Delight

If there’s one dish that brings comfort, warmth, and satisfaction to the dinner table, it’s a hearty pasta bake. Among the many variations, the Sausage Alfredo Rigatoni Casserole stands out as a favorite for its rich, creamy texture and robust flavors. This casserole combines the classic elements of Italian cuisine with a touch of American comfort food, making it a go-to recipe for family dinners, potlucks, or any occasion that calls for a deliciously indulgent meal.

Ingredients
To prepare this delightful casserole, you will need the following ingredients:

1 lb rigatoni pasta
1 lb Italian sausage (mild or spicy, according to your preference)
2 cups Alfredo sauce (store-bought or homemade)
1 cup heavy cream
1 cup shredded mozzarella cheese
1/2 cup grated Parmesan cheese
1 cup ricotta cheese
1 onion, finely chopped
3 cloves garlic, minced
1 cup fresh spinach (optional, for added nutrition)
1 tablespoon olive oil
Salt and pepper to taste
1 teaspoon Italian seasoning
Fresh parsley for garnish
Instructions
Preheat the Oven:
Preheat your oven to 375°F (190°C).

Cook the Pasta:
Bring a large pot of salted water to a boil. Add the rigatoni and cook until al dente, following the package instructions. Drain and set aside.

Prepare the Sausage Mixture:
In a large skillet, heat the olive oil over medium heat. Add the chopped onion and cook until softened, about 5 minutes. Add the minced garlic and cook for another minute until fragrant.

Cook the Sausage:
Add the Italian sausage to the skillet, breaking it up with a wooden spoon. Cook until the sausage is browned and cooked through. If you’re using spinach, stir it in now and cook until wilted. Season with salt, pepper, and Italian seasoning.

Mix the Cheeses:
In a large bowl, combine the Alfredo sauce, heavy cream, ricotta cheese, half of the mozzarella cheese, and half of the Parmesan cheese. Mix until smooth and creamy.

Combine the Ingredients:
In a large mixing bowl, combine the cooked rigatoni, sausage mixture, and the creamy cheese mixture. Stir until the pasta is well coated and all ingredients are evenly distributed.

Assemble the Casserole:
Transfer the pasta mixture to a greased 9x13-inch baking dish. Sprinkle the remaining mozzarella and Parmesan cheeses evenly over the top.

Bake:
Cover the baking dish with aluminum foil and bake in the preheated oven for 20 minutes. Remove the foil and bake for an additional 10-15 minutes, or until the top is golden brown and bubbly.

Garnish and Serve:
Once out of the oven, let the casserole sit for a few minutes to set. Garnish with freshly chopped parsley before serving.

Tips for a Perfect Casserole
Homemade Alfredo Sauce: If you have the time, making your own Alfredo sauce from scratch can elevate the dish. A simple sauce made with butter, garlic, heavy cream, and Parmesan cheese will add a rich and authentic flavor.
Cheese Variations: Feel free to experiment with different cheeses. Gruyère, fontina, or even a bit of blue cheese can add unique flavors to the casserole.
Vegetable Additions: Besides spinach, you can add other vegetables like mushrooms, bell peppers, or zucchini for extra nutrition and flavor.
Spicy Kick: If you like a bit of heat, use spicy Italian sausage or add a pinch of red pepper flakes to the sausage mixture.
Conclusion
Sausage Alfredo Rigatoni Casserole Pasta Bake is the epitome of comfort food. It’s creamy, cheesy, and packed with the savory flavors of Italian sausage and garlic. This dish is perfect for those nights when you crave something warm and satisfying. Plus, it’s easy to prepare and can be made ahead of time, making it a convenient option for busy weeknights or when entertaining guests. Give this recipe a try, and it’s sure to become a favorite in your household!

image
Synes godt om
Kommentar
Del
Pennys Pretty Projects
1 Y ·Oversætte

🍋 Bright & Zesty Lemon Herb Chicken with Spring Vegetables

Spring is a season of renewal, bursting with fresh flavors and vibrant produce. It’s the perfect time to enjoy meals that are light yet satisfying, bursting with the taste of the season. One such dish that embodies the essence of spring is the Bright & Zesty Lemon Herb Chicken with Spring Vegetables. This recipe combines the tangy zest of lemons with aromatic herbs and a medley of fresh spring vegetables, creating a meal that is not only delicious but also visually appealing.

Ingredients
For the Chicken:

4 boneless, skinless chicken breasts
2 lemons (zested and juiced)
3 cloves of garlic (minced)
2 tablespoons olive oil
1 tablespoon fresh rosemary (chopped)
1 tablespoon fresh thyme (chopped)
Salt and pepper to taste
For the Vegetables:

1 bunch of asparagus (trimmed and cut into 2-inch pieces)
1 cup cherry tomatoes (halved)
1 cup baby carrots (halved lengthwise)
1 cup sugar snap peas
2 tablespoons olive oil
Salt and pepper to taste
Instructions
Step 1: Marinate the Chicken

In a bowl, combine the lemon zest, lemon juice, minced garlic, olive oil, chopped rosemary, chopped thyme, salt, and pepper.
Place the chicken breasts in a resealable plastic bag or a shallow dish. Pour the marinade over the chicken, ensuring each piece is well-coated. Seal the bag or cover the dish and refrigerate for at least 30 minutes, or up to 2 hours for a more intense flavor.
Step 2: Prepare the Vegetables

Preheat the oven to 400°F (200°C).
In a large mixing bowl, toss the asparagus, cherry tomatoes, baby carrots, and sugar snap peas with olive oil, salt, and pepper.
Spread the vegetables in a single layer on a large baking sheet lined with parchment paper or a silicone baking mat.
Step 3: Cook the Chicken and Vegetables

Remove the chicken from the marinade and place it on another baking sheet lined with parchment paper.
Place both baking sheets (one with the chicken and one with the vegetables) in the preheated oven.
Roast the vegetables for about 20-25 minutes, until they are tender and slightly caramelized.
Roast the chicken for 25-30 minutes, or until the internal temperature reaches 165°F (74°C) and the chicken is golden brown.
Step 4: Serve and Enjoy

Once cooked, let the chicken rest for a few minutes before slicing.
Arrange the roasted spring vegetables on a serving platter.
Slice the chicken breasts and place them on top of the vegetables.
Garnish with extra lemon zest and a sprinkle of fresh herbs if desired.
Tips and Variations
Herb Variations: Feel free to experiment with different herbs such as basil, parsley, or oregano to suit your taste preferences.
Vegetable Additions: Other spring vegetables like radishes, fennel, or new potatoes can be added to the mix for extra flavor and variety.
Grill Option: If you prefer a grilled version, cook the marinated chicken on a preheated grill over medium-high heat for about 6-7 minutes per side, until fully cooked. Grill the vegetables in a grill basket or on skewers.
The Perfect Spring Meal
The Bright & Zesty Lemon Herb Chicken with Spring Vegetables is a testament to the beauty of spring cooking. The combination of juicy, flavorful chicken and a colorful array of fresh vegetables makes this dish a feast for both the eyes and the palate. Whether you’re hosting a spring dinner party or looking for a wholesome family meal, this recipe is sure to impress and satisfy. Enjoy the vibrant tastes and aromas of spring with every bite!

image
Synes godt om
Kommentar
Del
Zeel Clothing
Zeel Clothing  ændrede sit profilcover
1 Y

image
Synes godt om
Kommentar
Del
Showing 6937 out of 8488
  • 6933
  • 6934
  • 6935
  • 6936
  • 6937
  • 6938
  • 6939
  • 6940
  • 6941
  • 6942
  • 6943
  • 6944
  • 6945
  • 6946
  • 6947
  • 6948
  • 6949
  • 6950
  • 6951
  • 6952

Rediger tilbud

Tilføj niveau


Vælg et billede
Slet dit niveau
Er du sikker på, at du vil slette dette niveau?

Anmeldelser

For at sælge dit indhold og dine indlæg, start med at oprette et par pakker. Indtægtsgenerering

Betal med tegnebog

Betalingsadvarsel

Du er ved at købe varerne, vil du fortsætte?

Anmod om tilbagebetaling