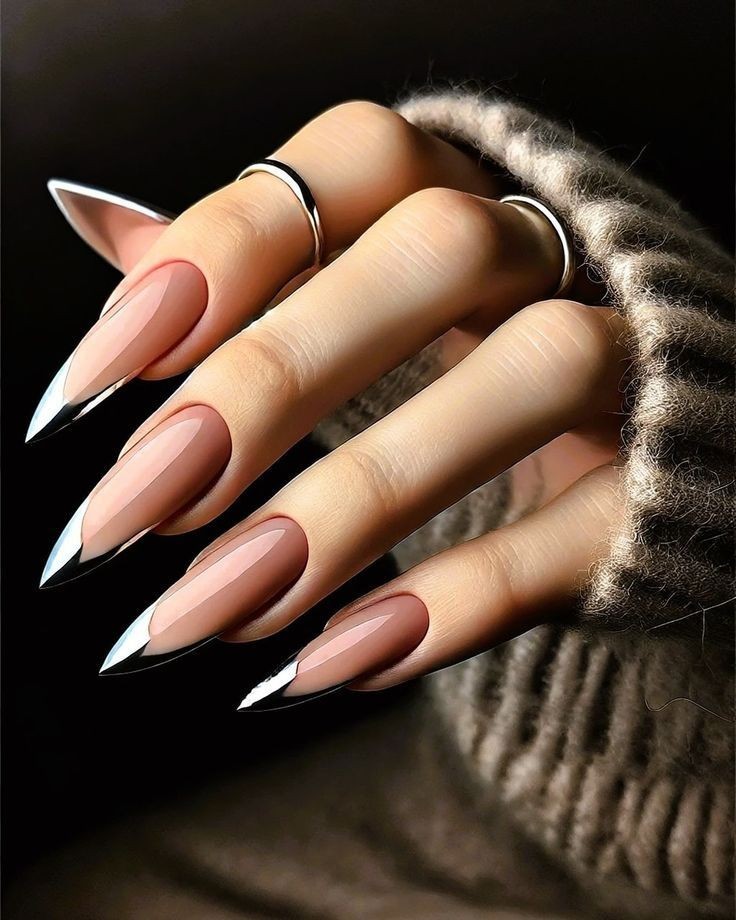
Glow Globes: The Ultimate Ice Roller for Radiant Skin
Glow Globes: The Ultimate Ice Roller for Radiant Skin
In the world of skincare, tools that offer simple yet effective solutions are always in high demand. Enter Glow Globes, the innovative ice rollers designed to refresh and revitalize your skin effortlessly. Whether you're dealing with morning puffiness or seeking a youthful glow, Glow Globes are the perfect addition to your beauty routine. Let's explore the numerous benefits and uses of this remarkable skincare tool.
1. What Are Glow Globes?
Glow Globes are handheld, spherical ice rollers crafted specifically for facial massage and skincare enhancement. Filled with a special cooling liquid, these globes retain cold temperatures effectively, providing a soothing and therapeutic experience for your skin. Their ergonomic design allows for easy maneuvering across different facial contours, ensuring a comfortable and efficient treatment.
2. Benefits of Using Glow Globes
a. Reduces Puffiness and Inflammation
The cold temperature of Glow Globes helps constrict blood vessels, effectively reducing facial puffiness, especially around the eyes.
It soothes inflammation and redness caused by acne, rosacea, or other skin irritations.
b. Enhances Circulation and Promotes Glow
Gently massaging your face with Glow Globes stimulates blood circulation, delivering more oxygen and nutrients to the skin.
Improved circulation results in a natural, healthy glow and revitalized complexion.
c. Tightens and Firms Skin
Regular use can help tighten pores and improve skin elasticity, giving you a firmer and more youthful appearance.
The cooling effect also helps to reduce the appearance of fine lines and wrinkles over time.
d. Alleviates Headaches and Sinus Pressure
Rolling the globes over your temples and forehead can provide relief from headaches and migraines.
It also helps ease sinus pressure by reducing inflammation and promoting drainage.
e. Enhances Product Absorption
Using Glow Globes after applying serums or moisturizers can help your skin absorb these products more effectively.
The cold temperature seals in the products, maximizing their benefits and leaving your skin nourished.
3. How to Use Glow Globes
Step 1: Chill the Globes
Place your Glow Globes in the refrigerator or a bowl of ice water for at least 10-15 minutes before use.
Avoid placing them in the freezer, as extreme cold can damage the globes and be too harsh on the skin.
Step 2: Cleanse Your Face
Start with a clean face to ensure maximum benefits.
You can apply your favorite serum or moisturizer before using the globes for enhanced absorption.
Step 3: Begin the Massage
Gently roll the Glow Globes over your face in upward and outward motions.
Focus on areas prone to puffiness, such as under the eyes, cheeks, and jawline.
Spend about 5-10 minutes massaging your face, adjusting pressure as needed for comfort.
Step 4: Clean and Store
After use, clean the globes with a mild soap and water, then dry them thoroughly.
Store them back in the refrigerator or a cool, dry place until the next use.
4. Tips for Maximizing Results
Consistency is Key: Use Glow Globes regularly, preferably in the morning to reduce overnight puffiness and kickstart your day with a fresh glow.
Combine with Masks: Enhance your facial treatments by using the globes over sheet masks for deeper penetration and added cooling effect.
Customize the Experience: For an aromatherapy boost, chill the globes in a bowl with water infused with essential oils like lavender or eucalyptus.
Suitable for All Skin Types: Whether your skin is oily, dry, or sensitive, Glow Globes are gentle and beneficial for all skin types.
5. Why Choose Glow Globes?
High-Quality Materials: Made with durable, skin-safe materials that ensure longevity and effective performance.
Easy to Use: Their simple design makes them accessible for both skincare beginners and enthusiasts.
Portable: Compact and lightweight, making it easy to incorporate into your travel skincare routine.
Cost-Effective: A one-time investment that provides spa-like benefits from the comfort of your home.
Conclusion
Glow Globes offer a refreshing and invigorating way to enhance your skincare routine. With their multitude of benefits—from reducing puffiness and tightening skin to promoting a radiant glow—they are an indispensable tool for achieving and maintaining healthy skin. Incorporate Glow Globes into your daily regimen and experience the transformative effects of this simple yet powerful beauty essential.
#glowglobes #iceroller #skincareessential #radiantskin #beautytools #glowingcomplexion #facialmassage #skincaretips #beautyroutine
Phát hiện bài viết


Perfect Duo: Prickly Pear Seed Face Oil Gua Sha for Glowing Skin
Perfect Duo: Prickly Pear Seed Face Oil & Gua Sha for Glowing Skin
Achieving radiant, youthful skin often comes down to finding the right combination of products and tools. The Perfect Duo of Prickly Pear Seed Face Oil and Gua Sha is a match made in skincare heaven, offering a powerful, natural way to nourish and rejuvenate your skin. Here’s why this dynamic duo should be an essential part of your beauty routine.
1. Deeply Nourishes and Hydrates
Prickly Pear Seed Face Oil is packed with essential fatty acids, vitamins, and antioxidants that deeply nourish and hydrate the skin. This luxurious oil helps to lock in moisture, leaving your skin soft, smooth, and radiant. It’s particularly beneficial for dry or mature skin, as it combats dryness and restores a healthy glow.
2. Enhances the Effects of Gua Sha
When paired with a Gua Sha tool, the Prickly Pear Seed Face Oil enhances the benefits of your facial massage. The oil provides the perfect glide, allowing the Gua Sha to move smoothly over the skin without tugging. This combination helps to stimulate circulation, promote lymphatic drainage, and reduce puffiness, leading to a more sculpted and lifted appearance.
3. Brightens and Evens Skin Tone
The powerful antioxidants in Prickly Pear Seed Oil, including vitamin E and polyphenols, work to brighten and even out your skin tone. Regular use of this oil can help fade dark spots, reduce redness, and improve overall skin clarity. When massaged into the skin with a Gua Sha tool, the oil’s benefits are amplified, giving you a radiant, glowing complexion.
4. Reduces Fine Lines and Wrinkles
Both the Prickly Pear Seed Face Oil and the Gua Sha tool are effective in reducing the appearance of fine lines and wrinkles. The oil’s hydrating properties plump the skin, making lines less noticeable, while the Gua Sha’s lifting and contouring actions promote a firmer, more youthful look. Together, they help you maintain a smooth, youthful complexion.
5. A Relaxing Self-Care Ritual
Using the Prickly Pear Seed Face Oil and Gua Sha as part of your skincare routine isn’t just beneficial for your skin—it’s also a relaxing self-care ritual. The gentle massage with the Gua Sha tool, combined with the soothing properties of the oil, helps to reduce stress and tension, leaving you feeling calm and refreshed. It’s the perfect way to unwind after a long day.
Conclusion
The Perfect Duo of Prickly Pear Seed Face Oil and Gua Sha offers a holistic approach to skincare that nourishes, brightens, and rejuvenates your skin. By incorporating this dynamic pair into your routine, you can achieve a glowing, youthful complexion while enjoying the benefits of a relaxing self-care ritual. Embrace the power of nature and transform your skin with this unbeatable combination.
#pricklypearoil #guasha #skincareroutine #naturalbeauty #glowingskin #facialmassage #youthfulskin #skincaretips #beautyhacks
The Vitality Qi White Jade Gua Sha Sculpting Tool for Radiant Skin
The Vitality Qi White Jade Gua Sha Sculpting Tool for Radiant Skin
Gua Sha, an ancient beauty practice, has taken the modern skincare world by storm. The Vitality Qi White Jade Gua Sha Sculpting Tool is at the forefront of this trend, offering a luxurious way to enhance your natural beauty and achieve radiant skin. Here’s why this sculpting tool is a must-have for your skincare routine.
1. Lifts and Contours Your Face
The Vitality Qi White Jade Gua Sha Sculpting Tool is expertly designed to lift and contour your face, giving you a more defined and youthful appearance. The smooth edges of the white jade glide effortlessly over your skin, helping to sculpt your facial features by stimulating blood circulation and encouraging lymphatic drainage.
2. Promotes Radiant, Glowing Skin
Regular use of this Gua Sha tool can lead to visibly brighter and more radiant skin. By promoting better blood flow and reducing toxins, the tool enhances your skin’s natural glow. It also helps to reduce the appearance of dark circles and puffiness, leaving your complexion looking fresh and revitalized.
3. Reduces Tension and Stress
Not only does the Gua Sha tool benefit your skin, but it also serves as a relaxing, stress-relieving ritual. The gentle, soothing motion of the tool across your face can help to relieve tension in the muscles, particularly in the jawline, forehead, and temples. This calming practice can be the perfect way to unwind at the end of a busy day.
4. Enhances Absorption of Skincare Products
When used in combination with your favorite serums and oils, the Vitality Qi White Jade Gua Sha Sculpting Tool helps enhance the absorption of these products. By massaging them into your skin with the Gua Sha, you ensure that the active ingredients penetrate more deeply, making your skincare routine more effective.
5. Made from Genuine White Jade
The Vitality Qi Gua Sha tool is crafted from genuine white jade, known for its cooling properties and spiritual significance. White jade is believed to promote peace, harmony, and balance, adding an extra layer of wellness to your skincare ritual. Its natural, non-porous surface is also easy to clean and maintain.
Conclusion
Incorporating the Vitality Qi White Jade Gua Sha Sculpting Tool into your skincare routine can transform your beauty regimen. From lifting and contouring to promoting glowing skin and reducing stress, this tool offers a holistic approach to skincare that enhances both your appearance and your well-being. Discover the ancient art of Gua Sha and unlock the secrets to radiant skin with this beautiful tool.
#guasha #whitejade #skincaretools #facialmassage #glowingskin #beautyroutine #naturalbeauty #skincaretips #wellness
Glow Globes: The Ultimate Ice Roller for Your Face
Glow Globes: The Ultimate Ice Roller for Your Face
In the quest for radiant, youthful skin, ice rollers have become a must-have beauty tool. Among the best of them is the Glow Globes ice roller, designed to rejuvenate your face and leave your skin looking fresh and vibrant. Here’s why Glow Globes should be a staple in your skincare routine.
1. Reduces Puffiness and Inflammation
One of the most immediate benefits of using Glow Globes is the reduction of puffiness and inflammation. The cold temperature constricts blood vessels and reduces swelling, making it perfect for those early mornings when you wake up with puffy eyes or a bloated face. Just a few minutes of rolling can make a noticeable difference.
2. Tightens and Firms the Skin
Regular use of the Glow Globes ice roller helps tighten and firm the skin. The cooling effect stimulates circulation and boosts collagen production, leading to a more toned and youthful complexion. Whether you’re looking to reduce the appearance of fine lines or prevent them, this tool is a game-changer.
3. Enhances Product Absorption
Applying your skincare products right after using the Glow Globes can enhance their effectiveness. The cold helps to lock in moisture and ensures that your serums and creams penetrate deeper into the skin. This means you get more out of your skincare routine with less effort.
4. Soothes Irritated Skin
If you have sensitive or irritated skin, the Glow Globes can provide much-needed relief. The cool temperature calms redness, soothes irritation, and can even help with conditions like rosacea. It’s a gentle way to pamper your skin without any harsh chemicals or treatments.
5. Easy to Use and Incorporate into Your Routine
Glow Globes are incredibly easy to use. Simply store them in your freezer, and they’re ready whenever you need a quick pick-me-up. Use them in the morning to wake up your skin or at night to wind down after a long day. Their portability also makes them a great travel companion, ensuring you can maintain your skincare routine on the go.
Conclusion
Glow Globes are more than just an ice roller; they’re a powerful tool for achieving glowing, healthy skin. By reducing puffiness, tightening skin, enhancing product absorption, soothing irritation, and being easy to use, these ice rollers are an essential addition to any skincare regimen. Give your face the pampering it deserves and watch your skin transform with Glow Globes.
#glowglobes #iceroller #skincareroutine #glowingskin #beautytools #facialmassage #skincaretips #beautyhacks #youthfulskin
Valentine's Heart Nail Art with 3D Glitter Stickers: A Sparkling Touch of Romance
As Valentine's Day approaches, it's the perfect time to show some love to your nails with a romantic and glamorous manicure. If you're looking to add a little extra sparkle to your look, 3D glitter stickers are your new best friend. These easy-to-use nail decals are a fun and effortless way to create stunning Valentine's-themed nail art that will make your nails stand out.
Why 3D Glitter Stickers?
Nail art has become increasingly popular, but not everyone has the time or skill to paint intricate designs by hand. This is where 3D glitter stickers come in. They’re perfect for:
Quick and Easy Application: These stickers can be applied in minutes, giving you a professional-looking manicure without the hassle.
Versatility: 3D glitter stickers can be used on their own or combined with other nail art techniques for a custom look.
Durability: When applied correctly and sealed with a top coat, these stickers can last for days, keeping your nails looking fabulous.
Choosing the Perfect Valentine's Day Stickers
When it comes to Valentine's Day, nothing says "love" like hearts and glitter. Here’s how to choose the best 3D glitter stickers for your Valentine’s manicure:
Heart Shapes: Look for stickers that feature different sizes and styles of hearts. Whether they’re bold and big or tiny and delicate, hearts are the quintessential symbol of love.
Red and Pink Hues: Valentine's Day is all about red, pink, and white. Choose stickers in these shades to keep your nails on theme. You can also mix in gold or silver for an extra touch of luxury.
Glitter Accents: The glitter adds a glamorous sparkle to your nails. Opt for stickers with glittery elements that catch the light and draw attention.
3D Effects: 3D stickers provide a raised effect, adding texture and dimension to your manicure. This creates a more interesting and dynamic look compared to flat designs.
How to Apply 3D Glitter Stickers for Valentine's Day Nail Art
Here’s a step-by-step guide to achieving a stunning Valentine's Day manicure with 3D glitter stickers:
What You’ll Need:
A base color (red, pink, or nude works best)
3D glitter heart stickers
A clear top coat
Tweezers
Steps:
Prep Your Nails: Start by cleaning your nails and applying a base coat. This will protect your natural nails and create a smooth surface for the stickers.
Apply the Base Color: Once your base coat is dry, apply your chosen nail polish color. Red, pink, or nude shades are perfect for Valentine's Day. Let the polish dry completely before moving on to the next step.
Place the 3D Stickers: Using tweezers, carefully peel the 3D glitter stickers off their backing and place them onto your nails. You can arrange the stickers however you like—whether it’s one heart per nail or a combination of sizes and styles. Press down gently to ensure they adhere well.
Seal with a Top Coat: Finish off your manicure with a clear top coat to seal in the stickers and add a glossy shine. This will also help your manicure last longer and prevent the stickers from lifting.
Admire Your Work: Take a moment to admire your beautiful, love-inspired nails! You’re now ready to celebrate Valentine's Day in style.
Creative Ideas for Valentine's Day Nail Art
Want to take your Valentine's nail art to the next level? Here are some creative ideas to inspire you:
Accent Nails: Use 3D glitter heart stickers on one or two accent nails while keeping the others simple with a solid color or subtle glitter.
Layering: Combine the 3D stickers with other nail art techniques like ombre or marble for a unique, multi-dimensional look.
Mix and Match: Play with different sticker designs, mixing hearts with other Valentine-themed elements like Cupid’s arrows or love letters.
French Tips with a Twist: Instead of the classic white French tip, use a red or pink base and add small 3D hearts along the tips for a romantic twist.
Nail Care Tips for Long-Lasting Manicures
To ensure your Valentine's Day nail art lasts as long as possible, follow these tips:
Avoid Harsh Chemicals: Wear gloves when doing household chores to protect your manicure from chemicals and water.
Moisturize: Keep your hands and cuticles moisturized with hand cream and cuticle oil to prevent your nails from drying out.
Touch Up: If your top coat starts to wear off, apply a fresh layer to keep your nails shiny and your stickers secure.
Conclusion
Valentine's Day is the perfect occasion to indulge in some festive nail art, and 3D glitter stickers make it easier than ever to achieve a stunning look. Whether you're going for a subtle touch of sparkle or a full-on romantic design, these stickers are the ideal way to celebrate love in style. So, grab your favorite polish and stickers, and get ready to create a manicure that’s sure to steal hearts this Valentine's Day!
How to Grow Your Nails in Just 2 Weeks
How to Grow Your Nails in Just 2 Weeks
Long, strong nails can add a touch of elegance to your hands, but growing them quickly can sometimes feel impossible. However, with the right care and routine, you can achieve noticeable nail growth in just 2 weeks! Here’s how you can accelerate your nail growth and get the length you desire.
1. Moisturize Your Nails Regularly
Hydration is key to nail growth. Keeping your nails and cuticles moisturized prevents them from becoming dry and brittle, which can lead to breakage. Use a nourishing oil, such as coconut oil, jojoba oil, or olive oil, and massage it into your nails and cuticles daily. This will not only keep your nails hydrated but also stimulate blood flow to the nail bed, promoting growth.
2. Take Biotin Supplements
Biotin, a B vitamin, is well-known for its ability to support nail growth. Consider adding a biotin supplement to your daily routine, or increase your intake of biotin-rich foods like eggs, nuts, seeds, and leafy greens. With consistent use, you may start to see stronger, longer nails in just a couple of weeks.
3. Protect Your Nails from Damage
To grow your nails quickly, it’s important to protect them from any damage that could slow down growth. Avoid using your nails as tools to open packages or pick at things, and always wear gloves when doing household chores. This will help prevent unnecessary breakage, allowing your nails to grow longer uninterrupted.
4. Maintain a Healthy Diet
What you eat plays a big role in the health and growth of your nails. A diet rich in vitamins and minerals, especially protein, iron, and zinc, will support faster nail growth. Incorporate foods like lean meats, fish, beans, and whole grains into your meals to ensure your nails are getting the nutrients they need to grow strong and fast.
5. Keep Your Nails Trimmed and Filed
While it might seem counterintuitive, keeping your nails trimmed and neatly filed can actually help them grow faster. Regular trimming prevents split ends and breakage, while filing keeps your nails strong and free from small tears. Remember to file your nails in one direction to avoid weakening them.
6. Use a Strengthening Nail Treatment
Applying a nail strengthener can help reinforce your nails, making them less prone to breaking. Look for products that contain keratin, a protein that strengthens nails and promotes growth. Apply the treatment regularly as directed to help your nails grow longer and stronger within weeks.
Conclusion
Growing your nails in just 2 weeks is possible with the right care and attention. By moisturizing regularly, taking biotin, protecting your nails, eating a balanced diet, trimming them properly, and using a strengthening treatment, you’ll see noticeable growth in no time. Stick to this routine, and soon you’ll have the long, beautiful nails you’ve always wanted.
#nailgrowth #longnails #nailtips #healthynails #nailcare #diybeauty #nailgoals #nailhealth #beautyhacks
Easy Ways to Strengthen Your Nails at Home
Easy Ways to Strengthen Your Nails at Home
Having strong, healthy nails not only looks great but also reflects good overall health. If your nails are prone to breaking or splitting, don't worry—there are plenty of simple and effective ways to strengthen them right at home. Here are some easy tips to help you achieve stronger nails.
1. Keep Your Nails Moisturized
Dry nails are more likely to become brittle and break. To prevent this, regularly moisturize your nails and cuticles with a nourishing oil or hand cream. Natural oils like jojoba oil, coconut oil, or vitamin E oil are excellent for keeping your nails hydrated. Massage the oil into your nails and cuticles daily to lock in moisture and promote healthy growth.
2. Avoid Harsh Chemicals
Exposure to harsh chemicals can weaken your nails, making them more susceptible to damage. To protect your nails, wear gloves when cleaning or doing dishes to avoid contact with chemicals in household cleaners. Additionally, choose nail polish removers that are acetone-free, as acetone can be very drying and damaging to your nails.
3. Incorporate a Balanced Diet
Your diet plays a significant role in nail health. Ensure you’re getting enough vitamins and minerals, particularly biotin, which is known for its nail-strengthening properties. Foods rich in biotin include eggs, nuts, seeds, and fish. A diet high in protein, iron, and zinc will also support stronger nails.
4. Take a Break from Nail Polish
Constantly wearing nail polish, especially gels and acrylics, can weaken your nails over time. Give your nails a break from polish every few weeks to let them breathe and recover. During this time, focus on nourishing your nails with oils and creams to help them regain strength.
5. Trim and File Regularly
Keeping your nails trimmed and filed helps prevent them from breaking or splitting. Use a gentle nail file to shape your nails, always filing in one direction to avoid causing micro-tears. Regular trims will keep your nails at a manageable length and reduce the risk of damage.
6. Avoid Using Your Nails as Tools
It can be tempting to use your nails to open packages or scrape off labels, but this can lead to breakage. Instead, use appropriate tools to avoid putting unnecessary stress on your nails. Protecting your nails from physical stress is key to maintaining their strength.
Conclusion
Strengthening your nails at home doesn’t have to be complicated. With regular care and a few simple lifestyle changes, you can achieve healthier, stronger nails. Incorporate these easy tips into your routine, and soon you’ll notice a significant improvement in the strength and appearance of your nails.
#nailcare #strongnails #healthynails #nailtips #athomeremedies #diybeauty #nailhealth #nailcareroutine #beautyhacks
Fall Nail Trends: Cozy Vibes with Deep Brown and Blue-Toned Burgundy
Fall Nail Trends: Cozy Vibes with Deep Brown and Blue-Toned Burgundy
Fall is the season of cozy sweaters, warm drinks, and, of course, stunning nail trends. This year, one combination that’s stealing the spotlight is the mix of deep brown with blue-toned burgundy. This pairing creates a rich, sophisticated look that perfectly captures the essence of autumn. Here’s why this color combo is a must-try for your fall manicure.
1. The Appeal of Deep Brown
Deep brown nails are a classic choice for fall. This rich, earthy tone exudes warmth and pairs beautifully with the changing colors of the season. Whether you opt for a matte or glossy finish, deep brown nails are versatile and can be dressed up or down depending on your outfit. They offer a neutral yet striking base that complements any style.
2. The Sophistication of Blue-Toned Burgundy
Burgundy is a fall favorite, but adding a blue undertone takes this classic color to a new level. The coolness of the blue balances the warmth of the brown, creating a chic and modern twist on traditional autumn colors. This shade of burgundy is perfect for those who want to make a statement with their nails while still embracing the cozy vibes of the season.
3. How to Mix Deep Brown with Blue-Toned Burgundy
To achieve the perfect fall manicure, start by painting your nails with a deep brown base. Once it’s dry, use the blue-toned burgundy to create accents or patterns. You can go for a classic French tip, geometric designs, or even a simple accent nail. The key is to let these two colors complement each other, creating a balanced and cohesive look.
4. Why This Combo Gives All the Cozy Vibes
The combination of deep brown and blue-toned burgundy is all about warmth and comfort, which are the hallmarks of fall. These colors evoke the feeling of cozy evenings by the fire, hot cocoa, and the soft glow of autumn leaves. Together, they create a manicure that’s not only stylish but also feels like a warm hug on a crisp autumn day.
5. Perfect for Any Fall Occasion
Whether you’re heading to a fall festival, a cozy dinner party, or just enjoying a quiet day at home, this nail color combination is perfect for any occasion. It’s versatile enough to wear with your favorite fall outfits, from chunky knits to tailored coats, making it a go-to choice for the entire season.
Conclusion
This fall, embrace the cozy vibes with a nail trend that’s both sophisticated and warm. The mix of deep brown and blue-toned burgundy is a match made in autumn heaven, offering a chic and comforting look that’s perfect for the season. Try this color combination for your next manicure and experience the ultimate in fall nail trends!
#fallnails #nailtrends #cozyvibes #autumnmanicure #nailinspo #nailart #burgundynails #fallfashion #nailstyle
The Ultimate Nail Design Guide: Trends, Tips, and Tutorials
Nail art has evolved into a major form of self-expression, transforming simple manicures into vibrant, intricate works of art. Whether you prefer classic designs or bold, experimental styles, the world of nail art is filled with endless possibilities. This guide will take you through the latest trends, essential tools, and step-by-step tutorials to help you achieve your dream manicure.
Latest Nail Design Trends
Staying ahead of the curve is key to keeping your nails fresh and stylish. Here are some of the hottest nail design trends taking over social media right now:
Minimalist Manicure: Simple, clean designs like thin lines, dots, and negative space are perfect for those who love subtle elegance. Minimalist nails are chic, easy to achieve, and versatile enough to match any outfit.
Abstract Art: Bold and unique, abstract nail art features irregular shapes, splashes of color, and unexpected patterns. This trend allows you to unleash your creativity and play with a variety of colors and textures.
3D Embellishments: From rhinestones to tiny charms, 3D nail art adds a new dimension to your manicure. These embellishments can be used sparingly for a touch of glamour or heavily for a dramatic effect.
Pastel Gradient: Soft, blended colors create a dreamy gradient effect that’s both eye-catching and soothing. Perfect for spring and summer, pastel gradients are a must-try for any nail enthusiast.
Animal Prints: Leopard spots, zebra stripes, and snake skin patterns are making a fierce comeback. These bold designs can be worn as a full set or as an accent nail to make a statement.
Essential Tools for Nail Art
Before diving into the world of nail design, it’s important to have the right tools on hand. Here’s a list of essentials every nail artist should have:
Nail Art Brushes: A set of fine brushes will allow you to create detailed designs and intricate patterns with ease.
Dotting Tools: Perfect for creating dots, swirls, and other small details, dotting tools are a must for any nail artist.
Nail Tape: Great for creating straight lines and geometric patterns, nail tape is a simple yet effective tool.
Stamping Kit: If you love intricate designs but don’t have a steady hand, a stamping kit can help you transfer detailed images onto your nails effortlessly.
Top Coat: A high-quality top coat will protect your design, add shine, and help your manicure last longer.
Step-by-Step Nail Design Tutorials
Ready to try your hand at nail art? Here are a few simple tutorials to get you started:
1. Minimalist Lines
What You’ll Need:
A base color (nude or light pink)
Black nail polish
A thin nail art brush
Steps:
Apply a base coat and let it dry completely.
Using the thin brush, dip it into the black polish and draw thin, vertical lines on each nail.
Seal with a top coat for a sleek finish.
2. Pastel Gradient
What You’ll Need:
Two or three pastel polishes
A makeup sponge
Steps:
Paint your nails with a white base coat to make the colors pop.
On the sponge, paint stripes of your chosen pastel colors.
Dab the sponge onto your nails, blending the colors together.
Clean up the edges and apply a top coat for a smooth gradient effect.
3. 3D Embellished Accent Nail
What You’ll Need:
Rhinestones or small charms
Clear nail polish
Tweezers
Steps:
Paint your nails with your desired color and let it dry.
Apply a clear coat where you want to place the rhinestones.
Using tweezers, carefully place the rhinestones or charms onto your nail.
Press down gently to secure and finish with another layer of top coat.
Nail Care Tips
Beautiful nail art starts with healthy nails. Here are a few tips to keep your nails in top shape:
Moisturize Regularly: Use cuticle oil and hand cream daily to keep your nails and surrounding skin hydrated.
Avoid Harsh Chemicals: Protect your nails by wearing gloves when using cleaning products or doing dishes.
Trim and File: Regularly trim and file your nails to prevent breakage and maintain a neat appearance.
Conclusion
With the Ultimate Nail Design Guide, you have everything you need to create stunning nail art at home. From following the latest trends to mastering essential tools and techniques, your nails are sure to stand out in any crowd. So grab your polish, unleash your creativity, and start experimenting with your own unique nail designs today!