Anthropologie Accessories: Trendy Green Summer Sunglasses E1
When it comes to fashion, Anthropologie is a brand that consistently delivers a perfect blend of bohemian charm and modern flair. This summer, they’ve introduced a new accessory that’s quickly becoming a must-have for fashion enthusiasts—the Trendy Green Summer Sunglasses E1. These sunglasses are more than just a stylish statement; they are a reflection of the season’s hottest trends.
### The Color: A Fresh Take on Summer Green
One of the first things you’ll notice about the E1 sunglasses is their unique green hue. Green is having a major moment in fashion, and these sunglasses capture the essence of this trend perfectly. The vibrant, yet earthy tone is reminiscent of lush summer foliage, making these shades a perfect match for the season’s outdoor adventures and sunny escapades.
The color green is not only versatile, but it also adds a refreshing pop to any outfit. Whether you’re pairing them with a crisp white dress, a floral romper, or your favorite denim, these sunglasses are designed to elevate your look instantly. The green tone strikes the right balance between bold and subtle, making it a flattering choice for all skin tones.
### The Design: Chic and Comfortable
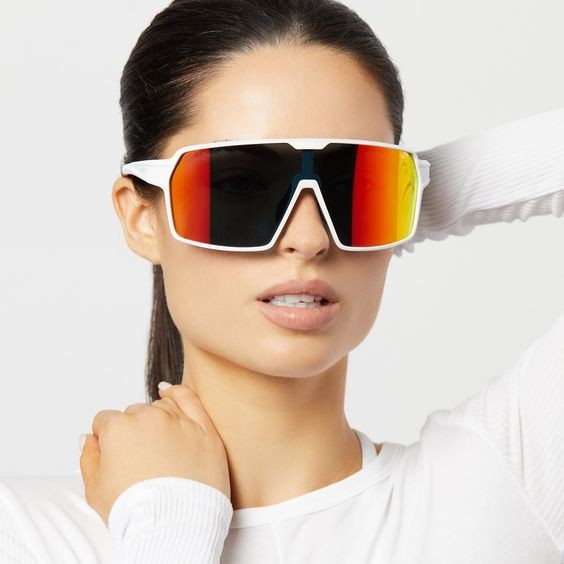
Anthropologie is known for its attention to detail, and the Trendy Green Summer Sunglasses E1 are no exception. The design features a classic yet contemporary shape that flatters various face shapes. The oversized lenses provide ample coverage from the sun, while the subtle cat-eye flair adds a touch of vintage glamor.
The frame is lightweight, ensuring that you can wear them comfortably all day long. The design also includes high-quality, durable materials that are made to withstand the wear and tear of summer activities. From beach days to city strolls, these sunglasses are your go-to accessory for every occasion.
### Why Green? The Psychology Behind the Color
Green is more than just a fashionable color; it’s also associated with a sense of calm, renewal, and connection to nature. In the hustle and bustle of everyday life, wearing green can be a subtle way to bring a sense of tranquility to your day. This psychological benefit, combined with the undeniable style factor, makes the Trendy Green Summer Sunglasses E1 a smart choice for anyone looking to refresh their wardrobe with both beauty and meaning.
### How to Style Your E1 Sunglasses
The beauty of the Trendy Green Summer Sunglasses E1 lies in their versatility. Here are a few styling tips to make the most of this chic accessory:
1. **Beach Ready* Pair your sunglasses with a flowing maxi dress, a wide-brimmed hat, and sandals for the ultimate beach look. The green hue will complement the natural colors of sand and sea, making you the style star of any seaside setting.
2. **Urban Chic* For a more city-ready vibe, wear the E1 sunglasses with high-waisted shorts, a tucked-in blouse, and platform sneakers. Add a crossbody bag to complete the look. The green frames will add just the right amount of edge to your outfit.
3. **Festival Fashion* Heading to a summer festival? Combine the sunglasses with a boho-chic ensemble—think fringe, floral prints, and layered jewelry. The green tones will enhance the free-spirited feel of your look.
4. **Casual Day Out* Keep it simple and stylish by pairing the sunglasses with a basic tee and distressed jeans. This laid-back outfit will get a serious upgrade with the pop of green from your sunglasses.