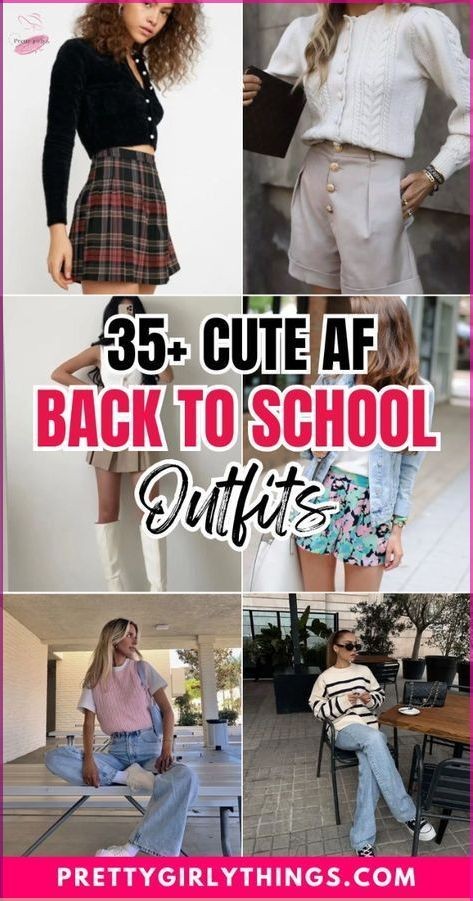
Stylish Back-to-School Outfits for Kids and Teens: Trendy Looks for a Confident Return
As the summer days draw to a close and the excitement of a new school year approaches, students everywhere are gearing up to make a stylish return to the classroom. For kids and teens, back-to-school shopping isn't just about filling their backpacks with notebooks and pencils—it's also about finding the perfect outfits that reflect their personalities and set the tone for a successful year. From trendy prints to comfy layers, the right wardrobe can boost confidence and make the transition from summer break to school days smoother and more fun. This article will explore some of the most stylish back-to-school outfit ideas for kids and teens, ensuring they start the year off on the right foot, both fashionably and comfortably.
1. The Importance of Comfort and Style
When selecting back-to-school outfits, it's essential to balance comfort and style. Kids and teens spend long hours in the classroom, so their clothing needs to be practical for sitting, walking, and participating in various activities. At the same time, these outfits should reflect their personal style, allowing them to feel confident and self-assured.
2. Trendy Prints and Patterns
One of the easiest ways to add flair to any back-to-school outfit is through prints and patterns. This season, bold prints like animal patterns, floral designs, and geometric shapes are all the rage. For younger kids, fun and playful prints featuring their favorite animals or cartoon characters can make getting dressed in the morning a more enjoyable experience. Teens, on the other hand, might gravitate towards more sophisticated patterns, such as plaid, stripes, or tie-dye.
Mixing and matching prints can also be a creative way to express individuality. For example, pairing a striped shirt with a floral skirt or combining different geometric patterns can result in a unique and eye-catching look. The key is to keep the color palette cohesive, so the outfit remains balanced despite the mix of prints.
3. Layering for Versatility
Layering is a fashion staple that offers both style and practicality, especially during the transitional months of late summer and early fall. Kids and teens can start their day with cooler temperatures and experience warmer weather by midday, making layers a perfect solution.
For younger children, a basic tee paired with a zip-up hoodie or a light jacket is a great option. The hoodie can be easily removed and tied around the waist or stuffed into a backpack if the day warms up. For teens, layering can be a bit more fashion-forward. Consider a graphic tee under a denim jacket or a flannel shirt worn open over a tank top. These pieces not only provide warmth but also add depth and interest to the outfit.
Cardigans, vests, and even lightweight scarves can also be part of a stylish layered look. The versatility of these pieces allows students to adjust their outfits throughout the day, staying comfortable and looking chic.
4. Denim: A Timeless Classic
Denim never goes out of style, and it's a must-have for any back-to-school wardrobe. Whether it's jeans, skirts, jackets, or overalls, denim pieces are incredibly versatile and can be dressed up or down depending on the occasion.
For a casual look, kids and teens can pair jeans with a simple t-shirt and sneakers. To elevate the outfit, they can add accessories like a statement belt, a cool hat, or a trendy pair of shoes. Denim skirts and overalls are also making a comeback, offering a fun and stylish alternative to regular jeans. For younger kids, overalls paired with a bright, patterned shirt can create an adorable and playful look, while teens might opt for a distressed denim skirt paired with a trendy top.
Denim jackets are another essential item that can be layered over almost any outfit. They add a touch of coolness to dresses, skirts, and pants alike, making them a versatile piece that can be worn throughout the school year.
5. Footwear: Combining Style and Comfort
No back-to-school outfit is complete without the right footwear. Kids and teens need shoes that are not only stylish but also comfortable enough to get them through a busy day of classes, recess, and after-school activities.
For younger kids, sneakers are always a popular choice. Brands like Converse, Nike, and Adidas offer a wide range of designs that are both durable and fashionable. Velcro straps are convenient for younger children who might struggle with laces, while older kids can enjoy the latest trends in sneaker designs, from bold colors to retro styles.
For teens, the footwear options expand even further. In addition to sneakers, they might consider ankle boots, slip-on loafers, or even trendy sandals, depending on their school's dress code. Platform shoes and chunky boots are particularly in vogue this season, offering a way to add height and style to any outfit.
When selecting footwear, it's important to consider both aesthetics and functionality. Shoes should fit well, provide adequate support, and be appropriate for the weather and school environment. Investing in high-quality shoes that can withstand daily wear and tear is always a smart choice.
6. Accessorizing for Personalization
Accessories are the finishing touch that can take a back-to-school outfit from ordinary to extraordinary. For kids and teens alike, accessories offer a way to express their unique style and make their outfits truly their own.
For younger children, backpacks with fun designs, colorful hair accessories, and playful jewelry can add a whimsical touch to their look. Hats, such as beanies or baseball caps, can also be a practical yet stylish addition.
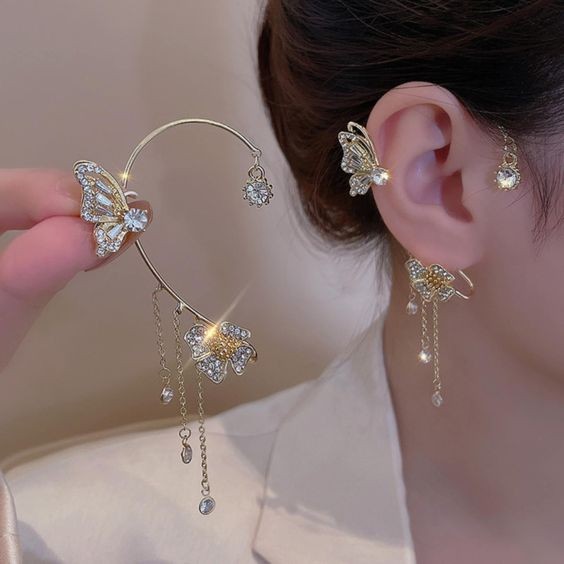
Teens might opt for more mature accessories, such as layered necklaces, stackable bracelets, and trendy earrings. Statement belts, watches, and stylish bags can also enhance their outfits. Sunglasses, although more of an outdoor accessory, can be a fashionable addition when heading to and from school.
Hair accessories are also gaining popularity this season. Scrunchies, headbands, and hair clips can add a pop of color and style to any outfit, while also keeping hair neatly in place during busy school days.
7. Back-to-School Outfit Ideas
Here are a few outfit ideas to inspire kids and teens as they prepare for their first day back:
For Younger Kids:
A colorful graphic tee paired with denim shorts, a lightweight hoodie, and sneakers.
A playful dress with a fun print, paired with leggings and a denim jacket.
Overalls with a striped long-sleeve shirt and a pair of comfortable slip-on shoes.
For Teens:
High-waisted jeans with a tucked-in graphic tee, a flannel shirt tied around the waist, and white sneakers.
A denim skirt paired with a cropped sweater and ankle boots.
Jogger pants with a fitted tank top, layered with a bomber jacket, and chunky sneakers.
8. Sustainable Fashion Choices
As awareness of environmental issues grows, many students are becoming more conscious of their clothing choices. Sustainable fashion is not only trendy but also a responsible way to approach back-to-school shopping.
Opting for eco-friendly brands that prioritize ethical production methods and use sustainable materials is a great way to support the environment. Thrifting and upcycling are also becoming popular among teens, offering a way to find unique pieces while reducing waste. Encouraging kids and teens to consider the impact of their fashion choices can lead to more mindful and sustainable shopping habits.
9. Expressing Individuality Through Fashion
At the end of the day, the most important aspect of any back-to-school outfit is that it allows the wearer to express their individuality. Fashion is a powerful form of self-expression, and kids and teens should feel free to experiment with different styles, colors, and trends to discover what makes them feel confident and comfortable.
Encouraging students to embrace their unique style can boost their self-esteem and help them feel more positive about the upcoming school year. Whether they prefer a sporty look, a boho vibe, or a classic preppy style, the key is to wear what makes them feel good.
Conclusion
As students head back to school, the right outfit can set the tone for a successful and confident start to the year. By balancing comfort with style, incorporating trendy prints and patterns, layering for versatility, and choosing the right footwear and accessories, kids and teens can create looks that are both fashionable and functional. Encouraging sustainable fashion choices and allowing students to express their individuality through their clothing will not only make them feel great but also prepare them to take on the challenges and opportunities of the new school year with style.