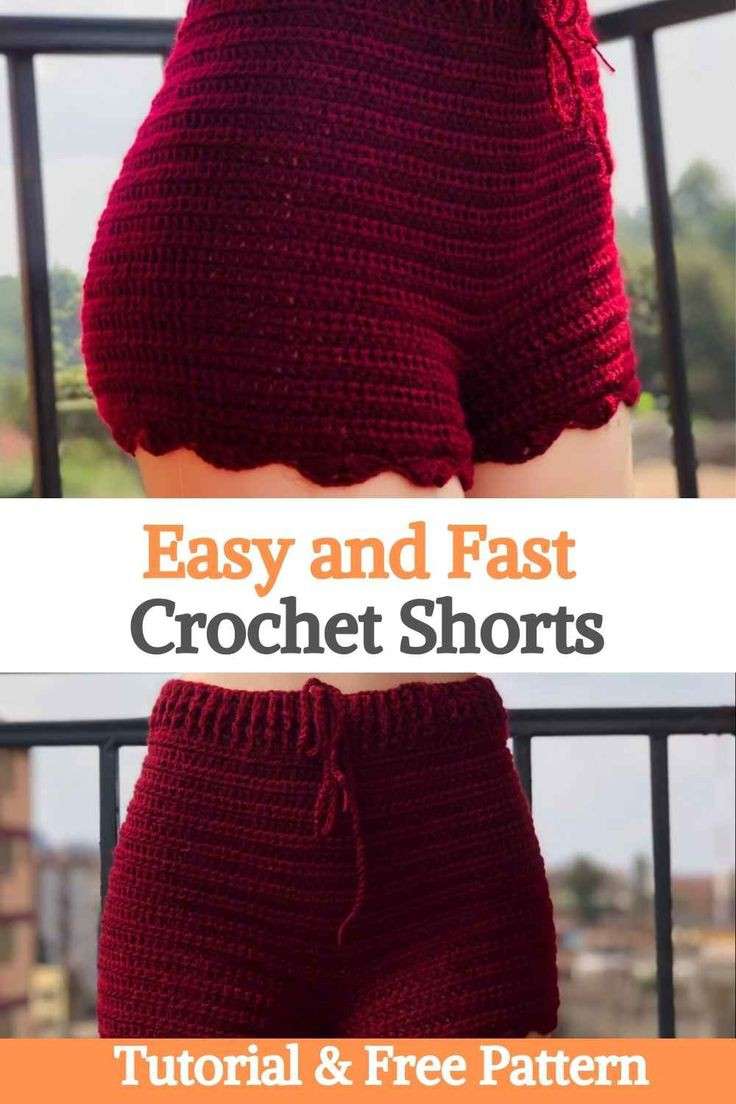
**Quick and Easy Crochet Shorts: Step-by-Step Tutorial and Free Pattern**
As the temperatures rise and summer approaches, it’s the perfect time to add some new pieces to your wardrobe. What better way to do that than by making your own stylish and comfortable crochet shorts? This project is ideal for both beginners and experienced crocheters, providing a fun and rewarding way to create something unique. Follow our step-by-step tutorial and take advantage of our free pattern to craft your own crochet shorts in no time.
### Materials Needed
- **Yarn* Choose a lightweight, breathable yarn such as cotton. The amount you need will depend on the size of the shorts.
- **Crochet Hook* Use a size recommended for your chosen yarn. Typically, a 3.5mm to 4.5mm hook works well for summer shorts.
- **Scissors* For cutting yarn.
- **Tapestry Needle* For weaving in ends.
- **Measuring Tape* To ensure accurate sizing.
- **Stitch Markers* Optional but helpful for marking rounds and stitches.
### Step-by-Step Instructions
#### 1. **Take Measurements**
Before you start, take your waist and hip measurements to determine the size of your shorts. Also, measure the desired length from your waist to where you want the shorts to end.
#### 2. **Create the Waistband**
- **Foundation Chain* Start with a foundation chain that matches your waist measurement. Ensure the chain length is a multiple of 4 for the ribbing pattern.
- **Ribbing* Use a simple ribbing pattern (e.g., half double crochet) for the waistband. Crochet in the back loops only to create a stretchy ribbed effect. Join the ends to form a loop and slip stitch to secure.
#### 3. **Crochet the Body**
- **Join and Work in Rounds* Join your yarn to the waistband and work in rounds to build the body of the shorts.
- **Increase for Hips* Gradually increase stitches as you work down to accommodate the hip measurement. Use a basic stitch like double crochet for the body.
- **Leg Holes* When you reach the desired length for the body, split the stitches into two equal parts to create leg holes. Use stitch markers to help with even division.
#### 4. **Crochet the Legs**
- **Leg Ribbing* Crochet the legs in rounds, adding ribbing at the ends if desired. For a neat finish, use a pattern like single crochet or slip stitch ribbing.
- **Repeat* Repeat for the second leg, ensuring both legs are the same length and width.
#### 5. **Finishing Touches**
- **Weave in Ends* Use a tapestry needle to weave in all loose ends securely.
- **Adjust Fit* Try on your shorts and adjust the fit as needed. You can add a drawstring to the waistband for additional security and style.
### Free Pattern
[Insert link to the free crochet shorts pattern here]
### Tips for Success
- **Choose the Right Yarn* Lightweight and breathable yarns like cotton or bamboo are perfect for summer shorts.
- **Check Your Gauge* Make a small swatch to check your gauge and ensure accurate sizing.
- **Customize* Feel free to customize your shorts with different stitch patterns, colors, or decorative elements like tassels or beads.
### Conclusion
Creating your own crochet shorts is a fun and practical way to enjoy your craft while adding something unique to your wardrobe. With our easy and fast tutorial and free pattern, you’ll have a stylish pair of shorts ready in no time. Perfect for lounging at home, hitting the beach, or pairing with your favorite summer tops, these crochet shorts are sure to become a staple in your summer collection.
### Hashtags
#crochetshorts #crochetpattern #diyfashion #crochettutorial #handmadeclothing #summerstyle #crochetcommunity #easycrochet #freepattern


