Vibrant and Refreshing: The Watermelon Nail Design Trend
In the world of nail art, trends come and go, but some manage to capture the essence of a season and become perennial favorites. One such trend is the watermelon nail design. With its bright colors and playful patterns, this design perfectly encapsulates the refreshing spirit of summer. Whether you’re hitting the beach, attending a picnic, or just wanting to add a splash of color to your look, watermelon nails are a delightful choice.
Why Watermelon?
Watermelon is synonymous with summer. Its juicy, sweet flesh and vibrant green rind evoke memories of sunny days and outdoor fun. Translating this iconic fruit into nail art brings a bit of that summer magic to your fingertips. The combination of red, green, and a hint of white or black seeds creates a visually striking effect that’s both whimsical and stylish.
Getting Started: Materials You’ll Need
Creating watermelon nail designs doesn’t require a professional artist. With a bit of patience and the right tools, anyone can achieve this fun look at home. Here’s what you’ll need:
Base Coat: To protect your natural nails and provide a smooth surface.
Green Nail Polish: For the rind of the watermelon.
Pink or Red Nail Polish: Representing the juicy flesh.
White Nail Polish: To create a realistic transition between the rind and flesh.
Black Nail Polish or Nail Art Pen: For the seeds.
Top Coat: To seal and protect your design.
Nail Art Brush or Dotting Tool: For detailing.
Step-by-Step Guide to Watermelon Nails
Prepare Your Nails: Start with clean, filed nails. Apply a base coat to protect them and ensure your design lasts longer.
Paint the Base Color: Apply two coats of pink or red nail polish to each nail. Allow the polish to dry completely between coats.
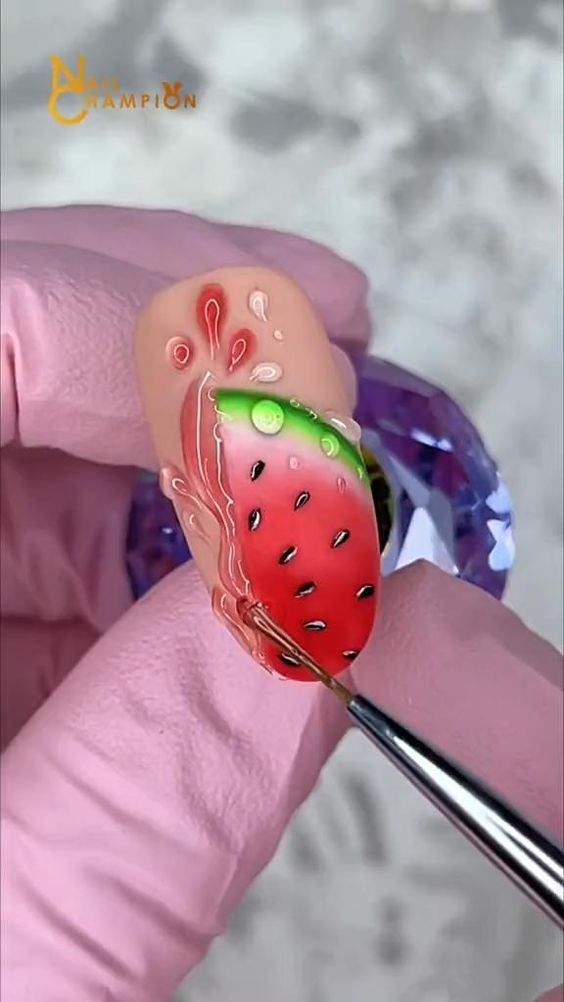
Create the Rind: Using the green polish, paint a thin strip along the tip of each nail. This will be the watermelon rind. For a more detailed look, you can add a wavy line to mimic the natural unevenness of watermelon rind.
Add White Stripe: With a white nail polish or a fine nail art brush, paint a thin line between the green rind and the pink/red flesh. This white line will make the transition look more realistic.
Draw the Seeds: Use a dotting tool or a fine nail art pen dipped in black polish to add small seeds on the pink/red area. Place them randomly but not too densely, mimicking the natural pattern of watermelon seeds.
Seal the Design: Once your design is dry, apply a generous layer of top coat. This will add shine and protect your artwork from chipping.
Creative Variations
While the classic watermelon design is always a hit, there are numerous ways to put a unique spin on this trend:
Ombre Effect: Create an ombre effect by blending the green and pink colors at the center of your nail, giving a more modern twist to the classic design.
Matte Finish: Opt for a matte top coat instead of a shiny one for a more sophisticated look.
Accent Nail: Paint only one or two nails with the watermelon design and keep the others in a complementary color like pink or green for a chic, understated style.
Glitter and Rhinestones: Add a touch of glam by incorporating glitter polish or small rhinestones as seeds.
Maintaining Your Watermelon Nails
To keep your watermelon nails looking fresh:
Avoid harsh chemicals and wear gloves when doing household chores.
Reapply top coat every few days to maintain shine and prevent chips.
Keep your hands and cuticles moisturized.
Conclusion
Watermelon nail designs are a delightful and refreshing way to embrace the summer season. Whether you choose to keep it classic or add your unique twist, these nails are sure to bring a smile to your face and catch the eye of everyone around you. So, grab your polishes and get ready to bring a slice of summer to your nails!