Crafting Spring Greeting Cards with DIY Paper Embroidery
Spring is a season of renewal and vibrant beauty, making it the perfect time to create handmade greeting cards that capture the essence of this lively time of year. DIY paper embroidery offers a delightful way to add texture, color, and a personal touch to your cards. Whether you're crafting cards for Easter, birthdays, or just to spread some springtime cheer, here's how you can embark on this creative journey:
Gathering Your Materials
To get started with DIY paper embroidery for spring greeting cards, gather the following materials:
Cardstock or heavy paper: Choose colors that evoke the freshness of spring, such as pastels or bright greens and yellows.
Embroidery thread: Opt for vibrant colors that complement your cardstock choices.
Embroidery needle: Use a needle with a sharp point suitable for piercing paper.
Scissors: To cut your paper and thread.
Pencil and eraser: For sketching out designs lightly on your paper.
Optional embellishments: Consider adding stickers, washi tape, or small flat-backed pearls for extra decoration.
Designing Your Spring-themed Cards
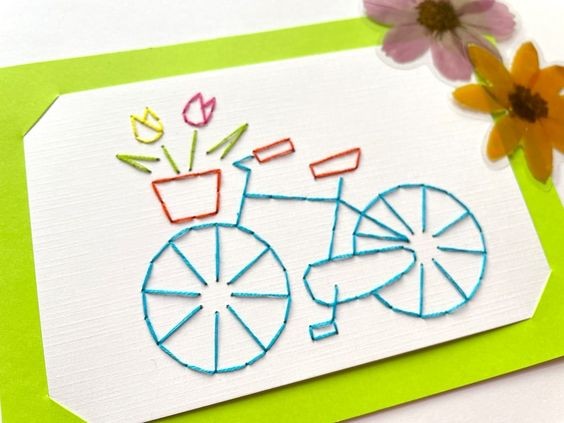
Choose Your Designs: Think of spring motifs like flowers, butterflies, birds, or even raindrops. Sketch these lightly on your cardstock using a pencil.
Preparing for Embroidery: Once you've outlined your designs, pierce the paper along the lines of your sketches using the embroidery needle. This creates small holes through which you'll pass the embroidery thread.
Embroidering Your Cards
Starting with Basic Stitches: Begin with simple stitches like the running stitch or backstitch to outline your designs. These stitches are easy to learn and create a neat, visible line on your card.
Adding Texture and Detail: Experiment with more advanced stitches like the satin stitch or French knots to add texture and detail to your spring motifs. These stitches can create the look of petals, leaves, or intricate patterns.
Mixing Techniques: Combine embroidery with other paper crafting techniques. For example, you can create a layered effect by adding cut-out paper shapes or using embossing tools for raised textures.
Finishing Touches and Presentation
Trimming and Mounting: Once your embroidery is complete, carefully trim any excess thread and paper edges to give your card a clean, polished look.
Personalizing Messages: Write personalized messages inside your cards to suit the occasion, whether it's a heartfelt birthday wish or a joyful spring greeting.
Sharing Your Handcrafted Creations
Spreading Joy: Share your DIY paper embroidery spring greeting cards with loved ones, friends, or even sell them at craft fairs or online markets to spread the joy of springtime creativity.
Exploring Variations: Experiment with different color combinations, stitches, and designs to create a variety of unique cards that celebrate the beauty of spring in your own artistic style.
Conclusion
Crafting spring greeting cards with DIY paper embroidery is not just a creative activity; it's a way to express your love for the season and share it with others. Whether you're a seasoned crafter or new to the world of embroidery, this hands-on approach allows you to create personalized cards that capture the essence of springtime's beauty. So, gather your materials, unleash your creativity, and let your handmade cards bloom with the colors and textures of spring.