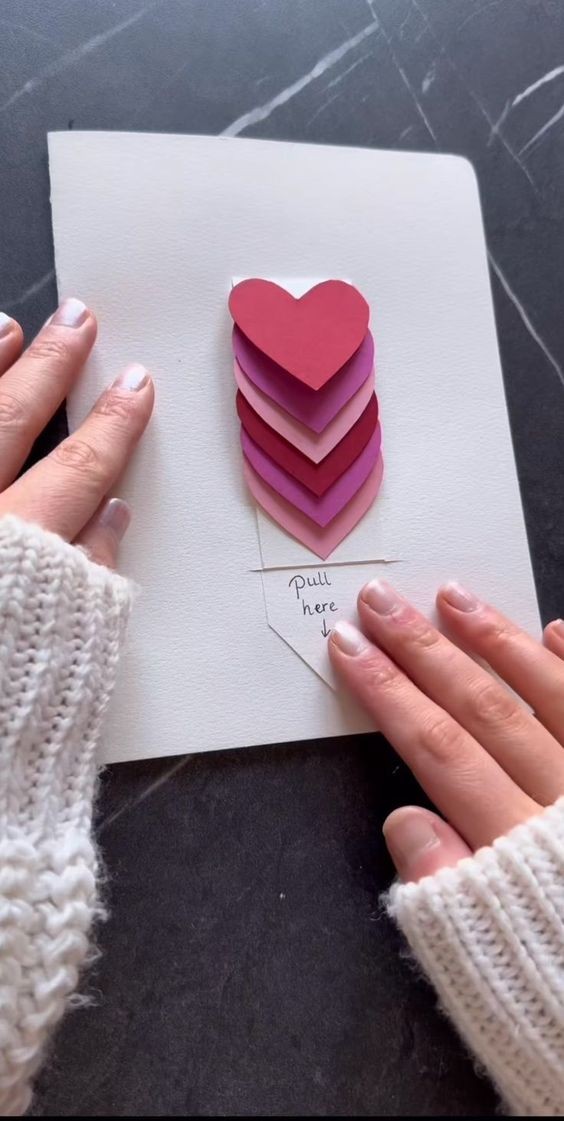
DIY Valentine's Day Waterfall Card: You Have My Whole HEART
Valentine’s Day is the perfect occasion to show your loved ones how much they mean to you. A handmade card adds a personal touch that store-bought cards often lack. One unique and interactive option is a waterfall card. This card features a cascading effect that reveals hidden messages as you pull on a tab. It’s surprisingly simple to make and sure to impress your Valentine. Here’s a step-by-step guide to creating your own DIY Valentine’s Day waterfall card.
Materials Needed:
Cardstock: Red, pink, and white are classic Valentine's Day colors.
Patterned paper: Hearts, flowers, or any romantic designs.
Adhesive: Double-sided tape or glue.
Scissors or a craft knife.
Ruler.
Pencil.
Decorative elements: Stickers, stamps, markers, or washi tape.
Brad fasteners or eyelets (optional).
Step-by-Step Instructions:
Prepare Your Base Card:
Cut a piece of cardstock to 5 x 10 inches. Fold it in half to create a 5 x 5-inch card base.
Create the Waterfall Mechanism:
Cut a strip of cardstock to 2 x 9 inches. This will be the pull tab.
Score this strip at 2 inches, 2.75 inches, 3.5 inches, and 4.25 inches. Fold along the score lines.
Make the Waterfall Panels:
Cut four pieces of cardstock or patterned paper to 2 x 2 inches. These will be the panels that reveal your messages.
Decorate each panel with your chosen designs. You can write messages, draw pictures, or use stickers and stamps.
Assemble the Waterfall Mechanism:
Adhere the first 2 x 2-inch panel to the bottom section of the pull tab (below the first score line).
Attach the second panel above the first, aligning it with the second section of the pull tab. Repeat this for the third and fourth panels.
Attach the Waterfall Mechanism to the Card Base:
Cut a strip of cardstock to 1 x 4 inches. Adhere this strip horizontally across the middle of your card base, securing only the ends. This will act as a guide for the pull tab.
Slide the pull tab under this strip and pull it through. Ensure the panels lie flat and can move freely.
Secure the Mechanism:
Apply adhesive to the back of the pull tab where it meets the guide strip to prevent it from sliding out completely.
Test the waterfall effect by pulling the tab. The panels should cascade one after the other, revealing your hidden messages.
Decorate the Card:
Add any additional decorations to the front and inside of the card. Use hearts, glitter, or romantic quotes to personalize it further.
If desired, use brad fasteners or eyelets to add a professional touch to the pull tab and guide strip.
Finishing Touches:
Write a heartfelt message inside the card to your Valentine.
Ensure all adhesive is secure and allow any glue to dry completely.
Tips and Tricks:
Color Coordination: Choose colors that complement each other and fit the Valentine’s Day theme.
Personalization: Add photos, ticket stubs, or other personal mementos to the panels for a special touch.
Practice: Before adhering everything, practice the waterfall mechanism to ensure smooth operation.
Creating a DIY Valentine’s Day waterfall card is a wonderful way to express your love and creativity. This interactive card is not only fun to make but also a delightful surprise for your Valentine. With a little effort and imagination, you can craft a memorable and heartfelt gift that will be cherished for years to come.