Lavender Floral Nail Art: The Ultimate Guide to Achieving Gorgeous Nails at Home
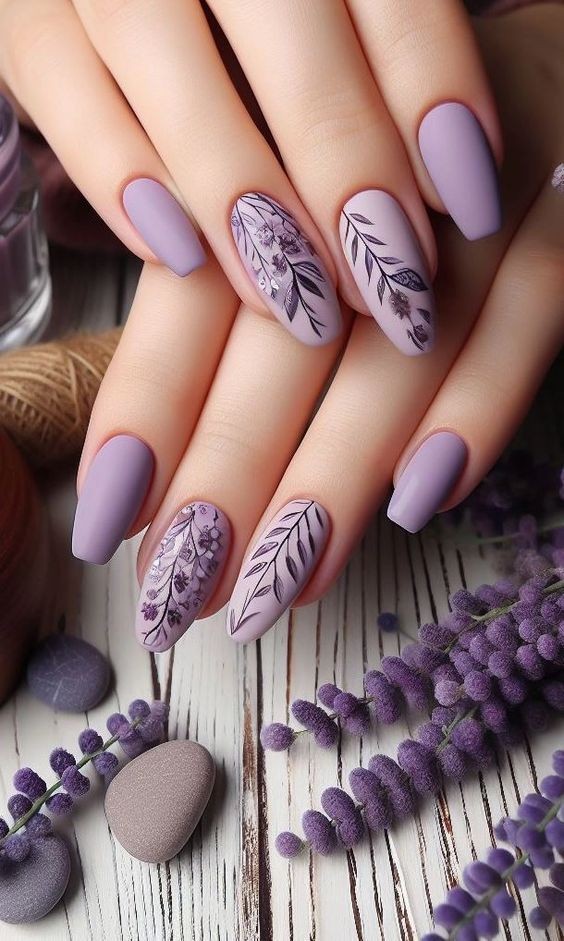
Lavender floral nail art is a beautiful and timeless design that adds a touch of elegance to your fingertips. Whether you're heading to a special event or simply want to treat yourself, these floral designs will surely make your nails stand out. In this guide, we’ll show you how to create stunning lavender floral nail art at home, step by step.
Why Choose Lavender Floral Nail Art?
Lavender is a soft, calming color that exudes sophistication and grace. Combined with delicate floral patterns, it creates a look that is both feminine and fashionable. Floral nail art is versatile and can be adapted to suit any occasion, from casual outings to formal events.
What You’ll Need
Before you start, make sure you have the following tools and materials:
- Lavender nail polish
- White nail polish
- Nail art brushes or dotting tools
- Top coat
- Base coat
- Nail polish remover (for any mistakes)
- Small gems or rhinestones (optional)
Step-by-Step Guide
1. **Prepare Your Nails**
- Start with clean, dry nails. Remove any old nail polish and file your nails to your desired shape.
- Apply a base coat to protect your natural nails and ensure the longevity of your nail art.
2. **Apply the Base Color**
- Apply two coats of lavender nail polish to your nails. Allow each coat to dry thoroughly before applying the next.
3. **Create the Floral Design**
- Using a fine nail art brush or dotting tool, create small white flowers on each nail. Start with five small dots in a circular pattern to form the petals.
- Add a tiny dot of lavender polish in the center of each flower for a cohesive look.
4. **Add Details**
- For added dimension, use a darker shade of purple or lavender to outline the petals or add additional details to the flowers.
- If desired, place small gems or rhinestones in the center of some flowers for extra sparkle.
5. **Seal the Design**
- Once your floral design is completely dry, apply a top coat to seal and protect your nail art. This will also give your nails a glossy finish and prevent chipping.
Tips for Perfect Lavender Floral Nail Art
- **Practice Makes Perfect**: If you're new to nail art, practice creating flowers on a piece of paper before applying them to your nails.
- **Use Thin Layers**: Applying thin layers of polish will help prevent smudging and ensure a smooth finish.
- **Be Patient**: Allow each layer of polish and design to dry completely before moving on to the next step to avoid any mishaps.
- **Clean Up as You Go**: Use a small brush dipped in nail polish remover to clean up any mistakes or polish that gets on your skin.
Inspiration and Variations
Lavender floral nail art is highly customizable. Here are a few variations to try:
- **Gradient Background**: Create a gradient effect with lavender and white polish as the base before adding your floral design.
- **Accent Nails**: Focus the floral design on one or two accent nails and paint the rest in solid lavender for a more understated look.
- **Mix and Match**: Combine lavender flowers with other floral colors for a vibrant, springtime look.
Conclusion
Lavender floral nail art is a beautiful way to express your creativity and add a touch of elegance to your nails. With the right tools and a bit of practice, you can achieve salon-quality results at home. So gather your supplies, follow these steps, and get ready to show off your stunning lavender floral nails!