Transforming Old CDs into Art: A Creative Guide to Painting on CDs
In the era of digital music and media, old CDs often become relics of the past, left to gather dust in a drawer. But what if you could breathe new life into these forgotten discs? Enter the creative world of painting on CDs. This innovative art form not only reuses old media but also turns them into stunning, personalized pieces of art. Here’s everything you need to know about this exciting and eco-friendly craft.
Why Paint on CDs?
Painting on CDs is more than just a quirky DIY project; it’s a way to repurpose old discs into beautiful, functional art. CDs have a unique reflective surface that catches light in intriguing ways, adding a distinctive flair to your artwork. Whether you’re looking to create eye-catching home decor, personalized gifts, or just enjoy a fun craft project, painting on CDs offers endless possibilities.
Supplies You’ll Need
Before diving into your CD painting adventure, gather the following supplies:
Old CDs: Clean, unused discs work best. If the CD has important data, consider making copies before starting.
Acrylic Paints: Choose vibrant, durable colors that will adhere well to the CD’s surface.
Paintbrushes: Various sizes for different details and effects.
Palette: For mixing colors.
Sealant: Clear acrylic spray or paint to protect your artwork and add a glossy finish.
Cotton Balls or Rubbing Alcohol: To clean the CD surface before painting.
Optional: Stencils, glitter, and other decorative elements for added flair.
Preparing the CD
Start by cleaning the CD to remove any dirt or oil. Use cotton balls and rubbing alcohol to wipe the surface thoroughly. Once clean, let the CD dry completely before starting your painting.
Painting Techniques
Base Coat: Apply a base coat of acrylic paint to cover the reflective surface. Choose a solid color or a gradient effect depending on your design. Allow it to dry completely.
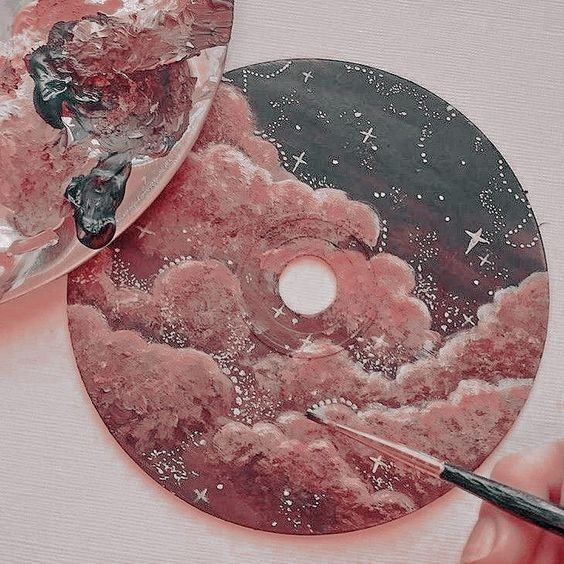
Designing: Once the base coat is dry, use fine brushes or stencils to create your design. From abstract patterns to detailed illustrations, the only limit is your imagination. The reflective quality of the CD will add a unique dimension to your artwork.
Layering: To add depth and texture, consider layering different colors and using techniques like sponging or dry brushing. This will give your painting a more dynamic and intricate look.
Adding Details: Use smaller brushes for intricate details and accents. Metallic or glitter paints can also be used to enhance the design and make it stand out.
Sealing Your Artwork
After your painting is complete and fully dried, apply a clear acrylic sealant to protect your artwork from damage and give it a glossy finish. This step is crucial for preserving the longevity of your painted CD.
Displaying Your Painted CDs
Once sealed and dried, your painted CDs are ready to be displayed. Here are a few ideas for showcasing your creations:
Wall Art: Frame your CDs or arrange them in a creative pattern on a wall.
Decorative Mobiles: Hang your CDs from a mobile or a decorative wire frame.
Unique Coasters: Use them as coasters for drinks, adding a touch of artistry to your table.
Gifts: Painted CDs make thoughtful and personalized gifts for friends and family.
Conclusion
Painting on CDs is a fun, eco-friendly way to transform old media into beautiful works of art. With a few simple supplies and a bit of creativity, you can turn discarded discs into stunning decorations or unique gifts. Whether you’re an experienced artist or just looking for a new craft project, painting on CDs offers a refreshing and inventive way to express yourself.
So, gather your supplies, let your imagination run wild, and give those old CDs a new lease on life with your artistic touch!