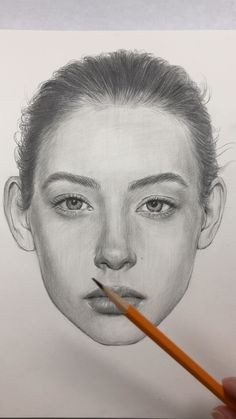
How to Draw a Front Face: Understanding Face Proportions
Drawing a front-facing portrait can be challenging, but understanding facial proportions is key to creating a realistic and balanced depiction. Here’s a step-by-step guide to help you master the proportions of a front face.
1. Starting with Basic Shapes
Begin by sketching an oval shape for the head. This oval should be slightly narrower at the top and wider at the bottom. Draw a vertical line down the center of the oval to help with symmetry. Then, add a horizontal line halfway down the oval, which will serve as a guideline for the eyes.
2. Dividing the Face
To accurately place facial features, divide the face into equal sections:
Horizontal Lines: Draw two more horizontal lines, one at the top of the oval (hairline) and one halfway between the eye line and the chin (bottom of the nose). These will help in placing the hairline and the nose.
Vertical Lines: Divide the face into three equal parts from the top of the head to the chin:
Top Third: From the hairline to the eyebrow line.
Middle Third: From the eyebrow line to the bottom of the nose.
Bottom Third: From the bottom of the nose to the chin.
These divisions help in accurately placing the eyes, nose, and mouth.
3. Placing Facial Features
Eyes: Eyes are typically positioned on the eye line, which is halfway down the face. The distance between the eyes is approximately the width of one eye. Sketch the eyes as almond-shaped ovals, and remember to include the upper and lower eyelids.
Eyebrows: The eyebrows generally start just above the eyes, about one eye width apart. Their shape and position can vary based on the expression or personality you want to convey.
Nose: The bottom of the nose aligns with the second horizontal guideline. Draw the nose as a simple shape, like a small oval or triangle, and then refine it with nostrils and a bridge.
Mouth: The mouth is placed halfway between the nose and the chin. It is roughly one eye width in length. The corners of the mouth should align vertically with the centers of the eyes.
4. Defining the Face Shape
Use the guidelines to sketch the outline of the face, adjusting the oval shape as needed. The face should taper slightly towards the chin. Add the jawline and cheekbones, keeping in mind the natural curves of the face.
5. Adding Hair and Ears
Hair: The hairline usually starts a little above the eyebrow line. Hair can be drawn in various styles, but ensure it flows naturally from the hairline.
Ears: Ears are positioned between the eye line and the bottom of the nose. They should align with the horizontal guidelines and curve around to follow the shape of the head.
6. Final Touches
Refine your drawing by smoothing out any rough lines and adding details. Pay attention to shading and highlights to give your face depth and dimension. Erase unnecessary guidelines and emphasize the features.
7. Practice and Observation
To master drawing front-facing portraits, practice regularly and observe real faces. Notice variations in proportions and how they change with different expressions and angles. Study photos or live subjects to understand how features align and interact.
Conclusion
Drawing a front face requires careful attention to proportions and placement. By starting with basic shapes, using guidelines, and refining your sketch, you can achieve a realistic and balanced portrait. Remember, practice is essential, and with time, your ability to capture the essence of the human face will improve. Keep observing and drawing, and enjoy the process of creating lifelike faces!


