### Discover the Art of Stunning Braided Hairstyles: Swedish Expert Shares DIY Tips!
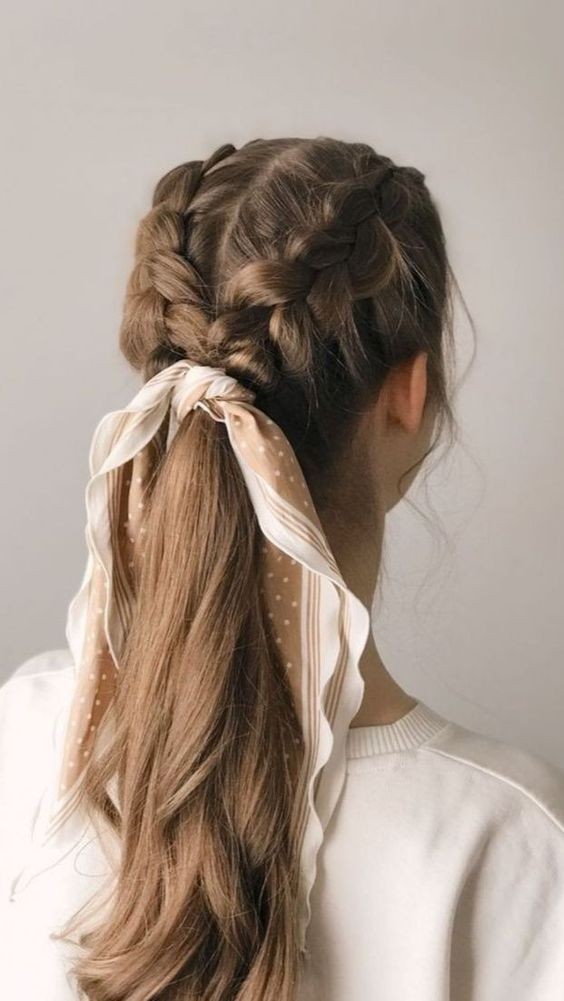
Braided hairstyles have long been a symbol of elegance and creativity, offering a versatile way to style hair for any occasion. If you’ve ever admired intricate braids and wished you could master them yourself, you’re in luck. A Swedish hairstylist, renowned for her breathtaking braided designs, is here to share her expert tips and techniques. Whether you're preparing for a special event or simply want to refresh your everyday look, these DIY tips will help you achieve stunning results.
#### Meet the Braiding Maestro
Swedish hairstylist Ingrid Larsson has become a sensation in the world of hair design, known for her innovative and stylish braided looks. With years of experience and a passion for creative expression, Ingrid has developed a signature style that combines classic techniques with modern twists. Her braiding tutorials are designed to be accessible for everyone, from beginners to seasoned stylists.
#### Essential Tools and Products
Before diving into the techniques, it’s crucial to have the right tools and products. Here’s what you’ll need:
1. **Hairbrush or Comb* To ensure smooth and tangle-free hair.
2. **Hair Elastics* Use clear or matching elastics to secure your braids.
3. **Bobby Pins* For securing loose ends and adding finishing touches.
4. **Texturizing Spray* Helps add grip and volume to your hair.
5. **Shine Serum* To add a glossy finish to your braids.
#### Step-by-Step Braiding Techniques
1. **Classic Three-Strand Braid**
- **Start with Clean, Dry Hair* Brush your hair to remove tangles.
- **Divide Hair into Three Sections* Hold them in your left hand.
- **Cross Sections Over Each Other* Start by crossing the right section over the middle, then the left section over the new middle.
- **Continue Braiding* Keep the braid tight and close to your scalp, securing with an elastic at the end.
2. **Fishtail Braid**
- **Divide Hair into Two Sections* Gather your hair into two equal parts.
- **Cross Small Sections from Each Side* Take a small section from the outer edge of one part and cross it over to the other part. Repeat on the other side.
- **Continue Until the End* Keep the braid tight, securing with an elastic.
3. **Dutch Braid**
- **Start with a Middle Part* Brush your hair and part it down the center.
- **Divide Hair into Three Sections* Begin braiding by crossing sections under each other, rather than over.
- **Add Hair as You Braid* Incorporate small sections of hair from each side into the braid as you go along.
- **Finish and Secure* Once you reach the end, secure with an elastic.
4. **Halo Braid**
- **Create a Side Part* Start by braiding one side of your hair into a Dutch braid.
- **Wrap the Braid Around Your Head* Once you reach the other side, pin it in place to form a halo effect.
- **Secure and Adjust* Use bobby pins to secure any loose strands and make adjustments for a polished look.
#### Pro Tips from Ingrid Larsson
- **Practice Makes Perfect* Don’t get discouraged if you don’t get it right on the first try. Braiding is a skill that improves with practice.
- **Use Texturizing Spray* This can help create a better grip and make your braids last longer.
- **Experiment with Accessories* Add beads, ribbons, or small flowers to personalize your braids.
- **Keep It Neat* Regularly brush and detangle your hair to ensure smooth braiding.
#### Embrace Your Inner Braider
Mastering the art of braiding can be a fun and rewarding experience. With these expert tips from Swedish hairstylist Ingrid Larsson, you can create stunning braided hairstyles that enhance your look and boost your confidence. Whether you’re preparing for a special event or simply want to elevate your everyday style, these DIY braiding techniques will help you achieve effortless beauty.
So grab your tools, follow these steps, and get ready to impress with your new braided hairstyles. Happy braiding! 🌟💁♀️
#hairideas


