Easy Hair Drawing: An Art Tutorial
Drawing hair can often be one of the most challenging aspects of portraiture and figure drawing. However, understanding a few fundamental techniques can simplify the process and make it enjoyable. This tutorial will guide you through easy methods for drawing hair, suitable for beginners and those looking to refine their skills.
Understanding Hair Structure
Before diving into the drawing process, it’s essential to understand the structure of hair. Hair consists of strands that can vary in thickness, texture, and style. Here are some key points to consider:
Strands vs. Volume: Hair is made up of many strands that can fall in various directions. It’s important to represent both the strands and the overall volume of hair.
Light and Shadow: Hair has a natural shine and can reflect light, creating highlights and shadows. Understanding how light interacts with hair can enhance the realism of your drawings.
Textures: Hair can be straight, wavy, or curly, and each texture has its own characteristics. Observing and practicing different textures will help you create more dynamic hair drawings.
Materials Needed
To get started, gather the following materials:
Pencils: A range of graphite pencils (2H to 6 for different shading and detailing.
Eraser: A kneaded eraser is ideal for subtle corrections.
Paper: Smooth drawing paper or sketch paper.
Blending Stumps: For smoothing out pencil strokes.
Reference Images: Photos or illustrations of hair for practice.
Step-by-Step Tutorial
Step 1: Sketch the Basic Shape
Start by lightly sketching the basic shape of the head and hair. Use simple shapes to define the outline:
Draw an oval for the head.
Add guidelines for the face to help position the features accurately.
Outline the shape of the hair, considering the hairstyle. Remember that hair typically extends beyond the skull.
Step 2: Divide the Hair into Sections
To make the hair drawing more manageable, divide it into sections:
Identify the main sections of hair (e.g., bangs, sides, back).
Use light lines to mark these sections, as they will guide your drawing.
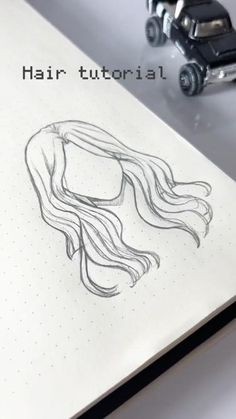
Step 3: Draw the Hair Strands
Now, it’s time to focus on drawing individual hair strands:
Use Curved Lines: Hair strands are rarely straight. Use gentle, curved lines to represent the flow of hair. Vary the direction of the curves to create a natural look.
Start with the Roots: Begin at the roots and draw outward. This technique helps to maintain the hair's volume and flow.
Overlap Strands: To add depth, overlap some strands over others. This technique creates the illusion of layers.
Step 4: Add Texture and Detail
Next, you’ll want to add texture and detail to the hair:
Vary Line Thickness: Use different pencil pressures to create thicker and thinner lines. Thicker lines can represent darker areas or shadow, while thinner lines can depict lighter strands.
Create Highlights and Shadows: Use an eraser to lift some graphite from areas where light hits the hair, creating highlights. Darken other areas to represent shadows, giving your drawing more depth.
Blend: If you’re using graphite pencils, blend the hair using a blending stump or your finger. This step will soften any harsh lines and give a more realistic appearance.
Step 5: Final Touches
Once you’re satisfied with the hair, it’s time for the final touches:
Refine Details: Go back and refine any areas that need more definition. This could include darkening shadows or adding more strands.
Review the Overall Composition: Step back and look at your drawing as a whole. Ensure the hair looks natural and complements the face.
Clean Up: Erase any unnecessary guidelines or smudges, and ensure your drawing looks clean.
Step 6: Practice Different Styles
To become proficient at drawing hair, practice various hairstyles and textures:
Straight Hair: Focus on smooth, flowing lines. Use fewer curves to represent the sleekness.
Curly Hair: Emphasize the spirals and volume. Curly hair often has more overlapping strands.
Wavy Hair: Use soft, undulating lines to convey the relaxed texture of wavy hair.
Experiment with different styles to build confidence and versatility in your hair drawing skills.
Additional Tips for Drawing Hair
Study Real Hair: Spend time observing real hair and how it behaves in different lighting conditions. Take photos or create studies to understand the nuances better.
Use References: Reference images are invaluable for understanding how hair looks in various styles and lighting. Use them to guide your drawings.
Practice Regularly: The more you practice, the better you’ll become. Set aside time each week to focus specifically on drawing hair.
Be Patient: Drawing hair can be time-consuming, especially when aiming for realism. Don’t rush the process; take your time to achieve the desired results.
Conclusion
Drawing hair doesn’t have to be intimidating. By breaking the process down into manageable steps and practicing various techniques, you can create beautiful and realistic hair in your art. Remember that practice is key, so keep experimenting with different styles and textures. With time and dedication, you’ll develop your unique approach to hair drawing, enhancing your overall artistic skills. Happy drawing!