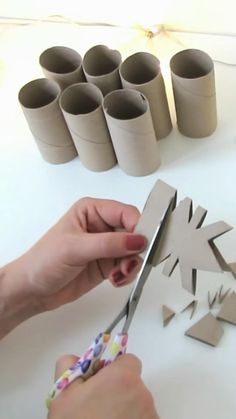
DIY Christmas Snowflake Ornament: A Step-by-Step Guide
The holiday season is a time for creativity, joy, and togetherness. One delightful way to embrace the spirit of Christmas is by making your own snowflake ornaments. These ornaments can adorn your tree, decorate your home, or serve as heartfelt gifts for loved ones. In this article, we’ll explore how to create beautiful DIY Christmas snowflake ornaments using various materials. Whether you’re crafting solo or with family and friends, these projects are sure to spread holiday cheer!
Why Snowflake Ornaments?
Snowflakes are a symbol of winter and are often associated with the magic of Christmas. Each snowflake is unique, much like the memories we create during the holiday season. By making your own ornaments, you can personalize your decorations and create lasting memories. Plus, crafting is a wonderful way to relax and enjoy the festive atmosphere.
Materials You’ll Need
Depending on the type of snowflake ornament you want to create, here are some materials you might consider:
For Paper Snowflake Ornaments:
White or colored cardstock (or scrapbook paper)
Scissors
Pencil
Ruler
Craft glue or double-sided tape
Glitter (optional)
String or ribbon for hanging
Hole punch (optional)
For Salt Dough Snowflake Ornaments:
2 cups all-purpose flour
1 cup salt
1 cup water
Mixing bowl
Rolling pin
Cookie cutter (snowflake shape or any other shape you prefer)
Baking sheet
Acrylic paint (for decorating)
Paintbrushes
Clear sealant spray (optional)
For Beaded Snowflake Ornaments:
Assorted beads (clear, white, silver, or any colors you like)
Wire (26-30 gauge works well)
Wire cutters
Pliers
Jewelry findings (for hanging)
Step-by-Step Instructions
Let’s dive into the detailed steps for each type of snowflake ornament.
1. Paper Snowflake Ornaments
Step 1: Prepare Your Materials
Gather all your materials and choose a clean workspace.
Step 2: Create Your Snowflake Template
Fold the Paper: Start with a square piece of cardstock. Fold it in half diagonally to form a triangle. Fold it in half again to create a smaller triangle.
Make a Third Fold: Fold the triangle into thirds. You can visually divide it into three equal sections.
Draw Your Design: Using a pencil, draw your snowflake design along the folded edges. You can create various shapes such as triangles, curves, or zig-zags.
Step 3: Cut Out the Snowflake
Using scissors, carefully cut along the lines you’ve drawn. Be mindful to leave the center intact so that it remains connected.
Step 4: Unfold Your Snowflake
Gently unfold the paper to reveal your unique snowflake design. If you want to add glitter, lightly brush glue on the edges and sprinkle glitter over them.
Step 5: Add a Hanging Loop
Use a hole punch to make a hole at the top of the snowflake. Thread a string or ribbon through the hole to create a loop for hanging.
2. Salt Dough Snowflake Ornaments
Step 1: Prepare the Dough
In a mixing bowl, combine 2 cups of flour and 1 cup of salt.
Gradually add 1 cup of water, mixing until a dough forms.
Knead the dough for about 5 minutes until it’s smooth.
Step 2: Roll Out the Dough
Using a rolling pin, roll the dough out to about 1/4 inch thick on a floured surface.
Step 3: Cut Out Snowflake Shapes
Use a snowflake cookie cutter to cut out shapes from the rolled dough. If you don’t have a cookie cutter, you can create your own templates using paper.
Place the cut-out shapes on a baking sheet lined with parchment paper.
Step 4: Make a Hole for Hanging
Before baking, use a straw or a toothpick to poke a hole at the top of each snowflake for hanging.
Step 5: Bake the Ornaments
Preheat your oven to 200°F (93°C) and bake the ornaments for about 2-3 hours or until they are completely dry and hard.
Step 6: Decorate Your Ornaments
Once cooled, paint your snowflakes with acrylic paint in colors of your choice. You can also add glitter or other embellishments for extra sparkle.
Step 7: Seal the Ornaments
(Optional) Spray a clear sealant over the painted ornaments to protect the paint and give them a shiny finish.
Step 8: Add a Hanging Loop
Thread string or ribbon through the hole and tie a knot to create a loop for hanging.
3. Beaded Snowflake Ornaments
Step 1: Gather Your Beads and Wire
Choose a selection of beads in various sizes and colors. Cut a piece of wire about 24 inches long.
Step 2: Create the Center of the Snowflake
Thread several beads onto the wire and position them near the center.
Twist the wire tightly to secure the beads in place, forming a small circle.
Step 3: Create the Arms of the Snowflake
Thread additional beads onto the wire to create “arms” extending from the center. You can make each arm unique by varying the bead sizes and shapes.
For a classic look, aim for six arms extending from the center.
Step 4: Secure the Ends
Once you have created your desired snowflake shape, twist the wire ends securely to hold everything in place.
Step 5: Add a Hanging Loop
Make a loop at the top of the snowflake using the wire and cut off any excess. Your beaded snowflake ornament is now ready to hang!
Tips for Crafting Snowflake Ornaments
Get Creative: Experiment with different colors, shapes, and embellishments. Your ornaments can reflect your style and personality.
Involve the Family: Invite family members to join in the crafting fun. It’s a great way to bond and create memories together.
Use Recycled Materials: Consider using old wrapping paper, magazines, or other recycled materials to make eco-friendly ornaments.
Conclusion
Making DIY Christmas snowflake ornaments is a wonderful way to embrace the holiday spirit and unleash your creativity. Whether you choose to make paper snowflakes, salt dough ornaments, or beaded designs, each piece will add a personal touch to your holiday decorations. So gather your materials, invite some friends or family, and get crafting! Happy holidays!


