The Ultimate Guide to Acrylic Nail Art: Trends, Techniques, and Tips for Stunning Nails
Acrylic nail art has evolved from a niche beauty trend to a global sensation, capturing the imagination of millions with its versatility, durability, and limitless design possibilities. Whether you're a seasoned nail artist or a newcomer looking to explore the vibrant world of acrylics, this comprehensive guide will take you through everything you need to know about acrylic nail art—from its history and benefits to the latest trends and techniques.
The History of Acrylic Nails
Acrylic nails, as we know them today, have their roots in the mid-20th century. The first acrylic nails were invented by a dentist, Frederick Slack, in 1954, who used dental acrylics to fix a broken nail. This sparked the development of acrylic nails, leading to the creation of a product that could be used by women everywhere. Over the decades, acrylic nails have evolved significantly, becoming a staple in the beauty industry and a canvas for intricate and creative designs.
Why Acrylic Nails?
Acrylic nails are loved for their durability and strength, making them an excellent choice for those who want long-lasting nails that can withstand daily wear and tear. They are also highly customizable, offering a range of shapes, lengths, and designs that can be tailored to individual preferences.
Benefits of Acrylic Nails:
Durability: Acrylic nails are known for their strength, making them ideal for those with weak or brittle nails.
Versatility: They can be shaped into various styles, including stiletto, coffin, square, or almond, and can be as long or short as desired.
Design Flexibility: The acrylic surface is perfect for intricate nail art, from simple patterns to elaborate 3D designs.
Long-Lasting: When properly maintained, acrylic nails can last up to six weeks before needing a fill.
Popular Acrylic Nail Art Trends
Acrylic nail art trends are constantly evolving, influenced by fashion, pop culture, and individual creativity. Here are some of the most popular trends currently making waves in the nail art world.
1. Ombré Nails Ombré nails have become a go-to style for many, offering a smooth gradient of colors that can be subtle or bold. This style works well with any color palette and can be enhanced with glitter or rhinestones for added flair.
2. 3D Embellishments 3D nail art has taken the world by storm, with artists creating intricate designs using acrylics, gems, pearls, and other embellishments. From delicate flowers to edgy spikes, the possibilities are endless.
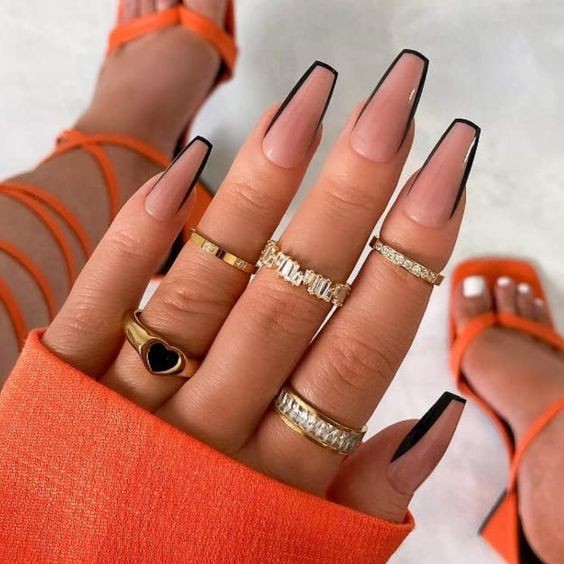
3. French Tips with a Twist The classic French manicure has been reimagined in countless ways. Acrylics allow for a modern twist on this timeless style, with colorful tips, glittery edges, or even inverted designs.
4. Geometric Patterns Bold lines, shapes, and patterns are perfect for those looking to make a statement. Geometric nail art on acrylics offers a clean and modern look that can be personalized with different colors and shapes.
5. Matte Finish Matte acrylic nails offer a sophisticated and chic alternative to the traditional glossy finish. This trend is particularly popular in darker shades, giving nails a velvety appearance.
6. Metallics and Foils Metallic nails are all the rage, with shiny finishes and foil accents adding a touch of glamour. Gold, silver, and chrome are popular choices, often paired with minimalist designs for a luxurious look.
Essential Tools and Materials for Acrylic Nail Art
Creating beautiful acrylic nails requires the right tools and materials. Here’s a rundown of the essentials:
1. Acrylic Powder and Liquid Monomer The foundation of acrylic nails, these two components are mixed to form a malleable paste that hardens into a durable extension.
2. Nail Forms or Tips Nail forms are used to sculpt acrylic nails directly onto the natural nail, while tips are pre-made extensions that are glued onto the nail before applying acrylic.
3. Brushes A good quality acrylic brush is crucial for applying the acrylic mixture smoothly and precisely. Brushes come in various sizes, with Kolinsky sable brushes being the preferred choice among professionals.
4. Nail Files and Buffers These tools are used to shape the acrylic nails and smooth the surface before applying polish or other decorations.
5. UV/LED Lamp While acrylics themselves do not require a UV lamp, many nail artists use gel polish over acrylics, which needs to be cured under a UV or LED light.
6. Nail Art Supplies Depending on the design, you may need rhinestones, glitter, stickers, stamping tools, or 3D embellishments. Nail art pens and striping brushes are also useful for detailed work.
Step-by-Step Guide to Creating Acrylic Nails
Creating acrylic nails is a detailed process that requires patience and practice. Here's a basic step-by-step guide:
1. Prep the Nails Start by cleaning and sanitizing your hands and nails. Push back the cuticles and file the nails to your desired shape.
2. Apply the Tips or Forms If using tips, glue them to the natural nail and trim them to the desired length. If using forms, place them under the natural nail to create the base for the acrylic.
3. Mix Acrylic Powder and Liquid Dip your brush into the liquid monomer, then into the acrylic powder, forming a small bead. The consistency should be similar to wet dough.
4. Apply the Acrylic Apply the acrylic bead to the nail, starting near the cuticle and moving towards the tip. Shape and smooth the acrylic as you go, adding more beads as needed.
5. Shape and Buff Once the acrylic has hardened, file the nails to your desired shape and buff the surface to smooth out any imperfections.
6. Add Polish or Nail Art Apply your chosen nail polish or start creating your nail art. This is where you can get creative with colors, patterns, and decorations.
7. Seal and Finish Seal the design with a top coat to protect the artwork and add shine. If using gel polish, cure the nails under a UV or LED lamp.
Maintenance Tips for Acrylic Nails
To keep your acrylic nails looking their best, regular maintenance is essential. Here are some tips:
1. Avoid Excessive Water Exposure Prolonged exposure to water can weaken the adhesive bond of the acrylics, leading to lifting. Wear gloves when washing dishes or cleaning.
2. Moisturize Keep your cuticles and hands moisturized to prevent dryness and cracking around the nails.
3. Regular Fills As your natural nails grow, the gap between the cuticle and the acrylic will become visible. Schedule fills every 2-3 weeks to maintain a seamless look.
4. Be Gentle Avoid using your nails as tools to open or pry things, as this can cause breakage or lifting.
5. Visit a Professional If you're unsure about removing or repairing your acrylic nails, it's best to visit a professional to avoid damaging your natural nails.
Conclusion
Acrylic nail art is more than just a beauty trend—it's a form of self-expression that allows you to showcase your creativity and style. Whether you prefer a subtle design or something bold and eye-catching, acrylic nails offer endless possibilities. By understanding the techniques, trends, and maintenance involved, you can achieve stunning nails that make a statement. So, why not dive into the world of acrylic nail art and let your nails become your canvas?