Unlock the Beauty of Floral Henna Designs: A Step-by-Step Guide
Are you ready to elevate your henna skills and impress with intricate floral designs? Whether you're preparing for a special event or simply want to explore the world of henna art, floral patterns offer endless possibilities for creativity and beauty. In this guide, we'll walk you through the essentials of creating stunning floral henna designs that are sure to turn heads.
#### **Why Choose Floral Henna?**
Floral henna designs are not just visually appealing; they also carry deep cultural significance in many traditions. Flowers symbolize beauty, growth, and new beginnings, making them a perfect choice for various occasions such as weddings, festivals, or personal milestones. Moreover, floral patterns allow for a lot of creativity, letting you mix and match different styles and elements.
#### **What You’ll Need*
- **Henna Paste* Freshly prepared or store-bought. Ensure it’s made with natural ingredients for the best results.
- **Applicator Cone* For precise control over your designs.
- **Stencil (Optional)* If you prefer a guide to start with.
- **Essential Oils* Like eucalyptus or lavender, which help darken the stain.
- **Cotton Swabs and Lemon Sugar Mix* To care for the henna after application.
#### **Step-by-Step Guide to Creating Floral Henna Designs**
**1. Preparation*
Before you start, ensure that the skin is clean and free from oils or lotions. Apply a thin layer of lemon sugar mix to the area where you'll be applying henna. This helps the paste adhere better and improves the stain.
**2. Choose Your Design*
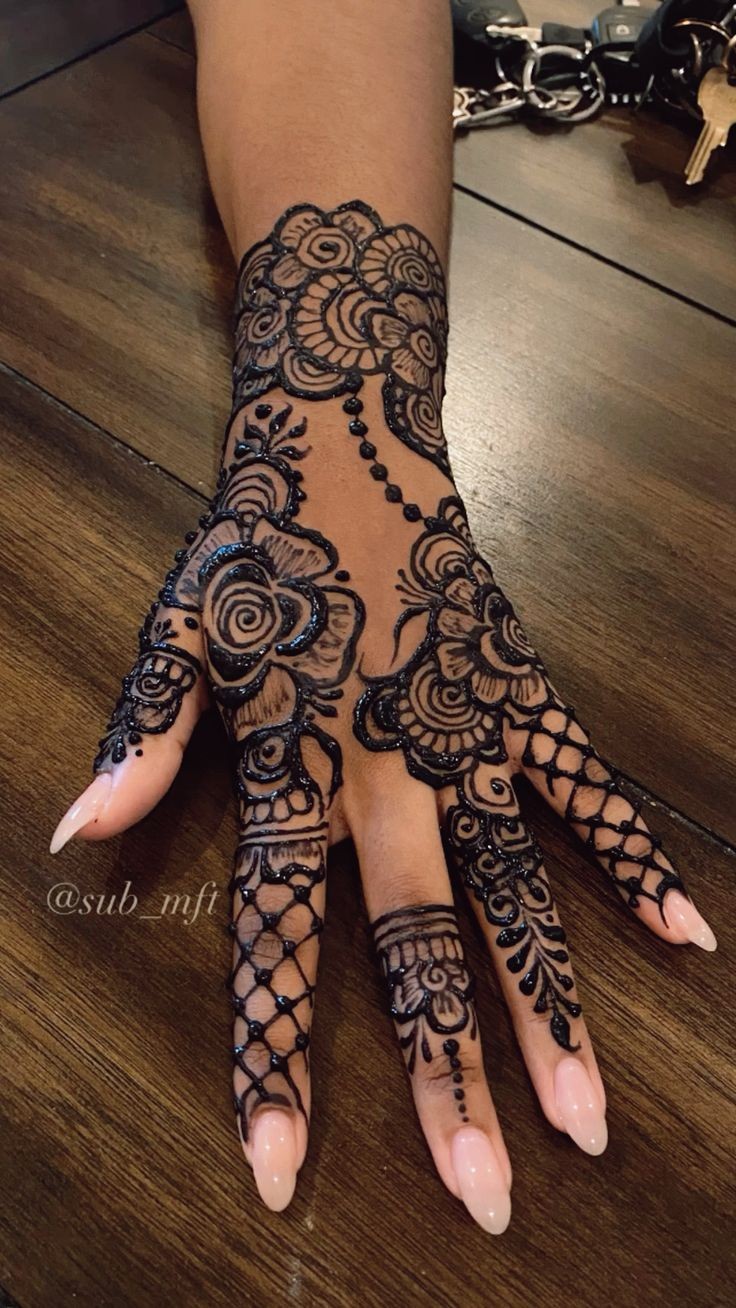
Decide on the floral pattern you want to create. Simple flowers like roses, lotuses, or sunflowers are great for beginners, while more complex designs like mandalas with floral elements can challenge advanced artists.
**3. Draw the Outline*
Using the henna applicator cone, gently draw the outline of your chosen floral design. Start with the central flower and work your way outwards, adding leaves and additional details as you go. If you're using a stencil, place it on the skin and trace around it with the henna paste.
**4. Fill in the Design*
Once the outline is complete, fill in the petals, leaves, and other elements of your design with henna paste. For a more intricate look, add smaller details like dots or swirls. Be patient and allow the paste to dry naturally; this helps in achieving a rich, dark stain.
**5. Let It Dry*
Allow the henna paste to dry completely. This can take from 30 minutes to 2 hours, depending on the thickness of the application. Avoid touching or disturbing the paste during this time.
**6. Remove the Paste*
Once the paste is dry, gently scrape it off using a blunt object like a spoon or your fingernail. Avoid using water to remove it, as this can affect the stain quality. For the best results, leave the henna on for several hours or overnight before removing.
**7. Aftercare*
To ensure the henna stain lasts longer, apply a mixture of lemon juice and sugar to the design. This helps in darkening the stain and prolonging its duration. Avoid scrubbing or washing the area too frequently.
#### **Tips for Perfecting Your Floral Henna Designs**
- **Practice* The more you practice, the better your control and technique will become. Start with simple designs and gradually try more complex patterns.
- **Experiment with Colors* While traditional henna is brown, you can use colored henna or add glitter for a more vibrant look.
- **Seek Inspiration* Browse through henna art books, online galleries, or social media platforms for design ideas and techniques.
#### **Conclusion**
Floral henna designs are a beautiful way to express creativity and enhance your look for any occasion. With practice and patience, you can master the art of creating stunning floral patterns that will leave a lasting impression. So grab your henna cone, choose your design, and let your artistic flair bloom!
**Ready to dive into the world of henna art? Share your floral creations with us and tag #hennaart for a chance to be featured! 🌸✨**
---
By following these steps, you'll be well on your way to creating beautiful, intricate floral henna designs that captivate and delight. Happy hennaing!