Good and Bad People Good and Bad People
    #ootd #diy #travel #streetstyle #luxuryliving
    Ricerca avanzata
  • Entra
  • Iscriviti

  • Modalità giorno
  • © 2025 Good and Bad People
    Su di noi • Direttorio • Contattaci • Sviluppatori • Privacy Policy • Condizioni d'uso • Rimborso • Referral Terms • Acceptable Use Policy • Community Guidelines • Write for Us

    Selezionare Lingua

  • Arabic
  • Bengali
  • Chinese
  • Croatian
  • Danish
  • Dutch
  • English
  • Filipino
  • French
  • German
  • Hebrew
  • Hindi
  • Indonesian
  • Italian
  • Japanese
  • Korean
  • Persian
  • Portuguese
  • Russian
  • Spanish
  • Swedish
  • Turkish
  • Urdu
  • Vietnamese

Orologio

Orologio Bobine

eventi

Sfoglia gli eventi I miei eventi

blog

Sfoglia gli articoli

Mercato

Gli ultimi prodotti

Pagine

Mie Pagine Pagine piaciute

Più

Esplorare Post popolari Lavori offerte finanziamenti
Bobine Orologio eventi Mercato blog Mie Pagine Vedi tutti
Sarah Thompson
User Image
Trascinare per riposizionare la copertura
Sarah Thompson

Sarah Thompson

@SarahThompson
  • Sequenza temporale
  • Gruppi
  • Mi piace
  • Following 29
  • Followers 30
  • Foto
  • Video
  • Bobine
  • Prodotti
29 Following
30 Followers
13 messaggi
Femmina
Residente a Stati Uniti
image
image
image
image
image
image
Sarah Thompson
Sarah Thompson
17 ore ·Tradurre

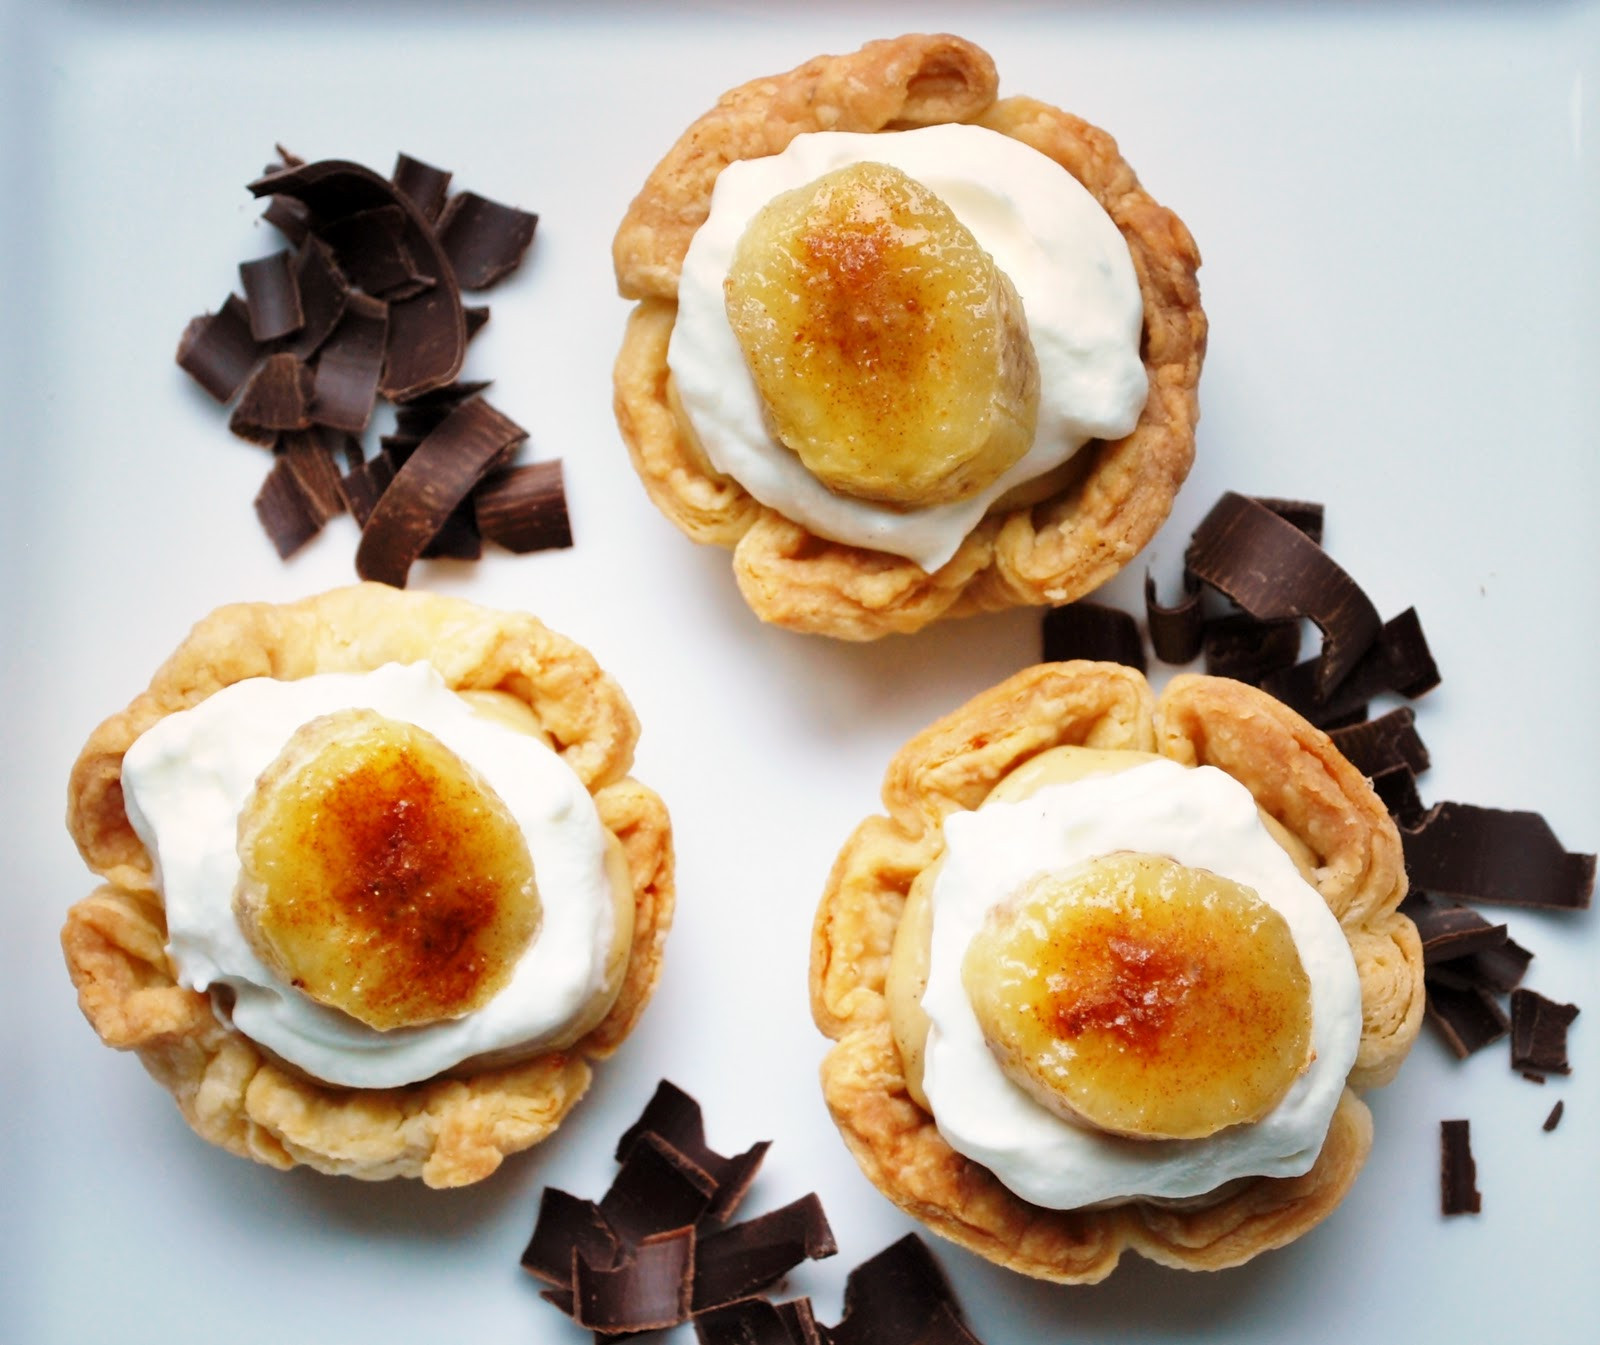
**Mini Banana Cream Pies – No Oven Needed!**


*Creamy, dreamy, and irresistibly easy – the ultimate no-bake treat for banana lovers!*

---

When you're craving something sweet, creamy, and nostalgic — without the hassle of turning on the oven — **Mini Banana Cream Pies** are the perfect solution. These bite-sized delights combine a buttery crust, silky banana custard, and a generous topping of whipped cream. Best of all? They're completely no-bake and come together in under 30 minutes!

Whether you're planning a summer party, a family dessert night, or just want a fun way to use up ripe bananas, these no-bake mini pies are a guaranteed crowd-pleaser. In this article, we’ll show you how to make them step by step, share flavor variations, storage tips, and more.

---

### Why You’ll Love These No-Bake Mini Banana Cream Pies

* **No oven required** – perfect for warm weather or quick prep
* **Mini size = maximum fun** – great for parties, picnics, and portion control
* **Simple ingredients** – everything you need is probably already in your kitchen
* **Kid-friendly** – fun to make and even more fun to eat
* **Customizable** – easy to switch up crusts, fillings, or toppings

---

### Ingredients You’ll Need

These pies are made up of three main layers: crust, banana pudding filling, and whipped topping.

#### For the Crust:

* 1½ cups graham cracker crumbs (or crushed vanilla wafers)
* ¼ cup granulated sugar
* 6 tablespoons unsalted butter, melted

#### For the Filling:

* 2 ripe bananas, mashed
* 1 (3.4 oz) box instant banana or vanilla pudding mix
* 1½ cups cold milk
* ½ cup heavy cream
* ½ teaspoon vanilla extract

#### For the Topping:

* 1 cup heavy whipping cream
* 2 tablespoons powdered sugar
* Banana slices, crushed cookies, or chocolate shavings (optional for garnish)

---

### Tools You’ll Need

* Mixing bowls
* Electric mixer or whisk
* Muffin tin or mini tart pans
* Cupcake liners (optional for easy cleanup)
* Piping bag (or zip-top bag) for whipped cream

---

### Step-by-Step Instructions

#### **Step 1: Make the No-Bake Crust**

1. In a bowl, combine graham cracker crumbs and sugar.
2. Stir in melted butter and mix until the crumbs are evenly coated.
3. Press about 1½ tablespoons of the mixture into the bottom of each muffin cup or mini tart pan.
4. Use the back of a spoon to firmly press down and shape the crust.
5. Chill the crusts in the fridge for at least 15–20 minutes while you make the filling.

> **Pro Tip* Want a different flavor? Try chocolate cookie crumbs, vanilla wafers, or even crushed shortbread for the crust.

---

#### **Step 2: Make the Banana Cream Filling**

1. In a large bowl, whisk together the pudding mix and cold milk until thickened (about 2 minutes).
2. Add mashed bananas, heavy cream, and vanilla extract.
3. Mix until smooth and creamy.
4. Spoon or pipe the filling into the chilled crusts, filling each mini pie almost to the top.

> **Optional* For added banana goodness, place a thin banana slice on the crust before adding the pudding mixture.

---

#### **Step 3: Whip the Topping**

1. In a cold bowl, beat the heavy whipping cream and powdered sugar until stiff peaks form.
2. Spoon or pipe the whipped cream over each mini pie.
3. Garnish with banana slices, cookie crumbles, or a sprinkle of cinnamon, if desired.

---

#### **Step 4: Chill & Serve**

Refrigerate your mini banana cream pies for at least 1–2 hours before serving to let them set. Serve chilled and enjoy the creamy, cool deliciousness!

---

### Flavor Variations to Try

* **Nutella Swirl**: Add a spoonful of Nutella on top of the crust before pouring in the filling.
* **Coconut Twist**: Fold in shredded coconut and top with toasted coconut flakes.
* **Peanut Butter Banana**: Mix in a few tablespoons of creamy peanut butter into the filling for a nutty flavor.
* **Chocolate Lovers’ Delight**: Use chocolate pudding instead of banana and top with mini chocolate chips.
* **Boozy Banana Cream**: Add a splash of banana liqueur or rum to the filling for an adults-only version.

---

### Storage Tips

* **Refrigerator**: Store mini banana cream pies in an airtight container in the fridge for up to 3 days.
* **Freezer**: You can freeze them without the whipped cream topping for up to 1 month. Thaw in the fridge before serving and add fresh whipped cream before enjoying.

> **Note* Bananas can darken over time, so add fresh banana slices on top just before serving for the best look and flavor.

---

### Serving Suggestions

These no-bake mini banana cream pies are perfect for:

* **Baby showers or birthday parties**
* **Bridal brunches or tea time**
* **After-dinner desserts**
* **Summer BBQs and picnics**
* **Snack-sized lunchbox treats**

Serve them in cupcake liners for grab-and-go ease or dress them up in mini glass cups or jars for a fancier presentation.

---

### Why No-Bake Desserts Are a Game-Changer

No-bake recipes like these mini banana cream pies are perfect for busy families, beginner bakers, or anyone who wants a delicious dessert without the oven. They’re also ideal for warmer months when you’d rather keep your kitchen cool.

The best part? They’re just as satisfying as baked treats — maybe even more so, thanks to their creamy, chilled texture and fresh banana flavor.

---

### Final Thoughts

**Mini Banana Cream Pies – No Oven Needed!** is more than just a recipe — it’s a no-fuss, all-flavor dessert that’s guaranteed to impress. With a crunchy graham cracker base, luscious banana cream filling, and fluffy whipped topping, each bite is a perfect mix of textures and tastes.

Whether you’re entertaining a crowd or just treating yourself, these mini pies are a breeze to make and impossible to resist. Keep this recipe on hand for any time you want a sweet fix — minus the heat!

image
Mi piace
Commento
Condividi
Sarah Thompson
Sarah Thompson
17 ore ·Tradurre

**19 Eye-Catching Patio Roof Extensions for a Beautiful Backyard Upgrade**


Looking to give your backyard a fresh new look while creating a cozy space to relax or entertain? A patio roof extension might be just what you need. These stylish and functional additions not only provide shade and shelter, but also add a visual upgrade that boosts curb appeal and increases your home’s value.

From modern pergolas to rustic timber covers, there’s a wide range of ideas to suit every style and budget. In this article, we’re sharing **19 eye-catching patio roof extensions** that can transform your outdoor area into a true backyard retreat.

---

### 1. **Modern Pergola with Slatted Roof**

A sleek, slatted pergola made of wood or metal adds a touch of sophistication to your backyard. The slats allow filtered sunlight to pour through, creating a beautiful interplay of light and shadow — perfect for lounging or outdoor dining.

---

### 2. **Retractable Canopy Roof**

For those who want flexibility, a retractable canopy roof is a great option. You can open it up for stargazing on clear nights or close it during rain or intense sunlight. Fabric options come in various colors and patterns, adding a decorative element too.

---

### 3. **Clear Polycarbonate Panels**

Transparent polycarbonate roof panels provide shelter from the rain while allowing natural light to flow in. They’re ideal for plant lovers who want to maintain a bright environment or anyone who enjoys a naturally lit patio.

---

### 4. **Rustic Wood Beam Extension**

Go for a natural, rustic look with chunky wood beams and a traditional gable roof. This design adds warmth and charm to any backyard, especially when paired with stone features or vintage-style outdoor furniture.

---

### 5. **Covered Roof with Skylights**

Want the best of both worlds — shade and sunlight? A solid patio roof with strategically placed skylights allows light to shine through while still offering protection from the elements. It’s a great way to brighten up a shaded area.

---

### 6. **Green Living Roof**

Add an eco-friendly twist by installing a green living roof. These are flat or gently sloped roofs covered with grass, succulents, or other low-maintenance plants. Not only are they beautiful, but they also help insulate your space and support local biodiversity.

---

### 7. **Thatched Roof Extension**

Bring a touch of tropical paradise to your backyard with a thatched roof patio cover. Whether styled like a tiki hut or a beach cabana, it adds instant vacation vibes — ideal for poolside patios.

---

### 8. **Sail Shade Canopy**

If you love a minimalist, modern aesthetic, try a sail shade. These tensioned fabric panels are stretched between posts or anchored to walls, creating artistic shapes and dynamic shadows. They’re easy to install and adjust seasonally.

---

### 9. **Corrugated Metal Roof**

For an industrial or farmhouse-style vibe, corrugated metal sheets make a bold statement. They’re durable, cost-effective, and great for rustic-themed patios. Pair them with reclaimed wood and Edison string lights for extra charm.

---

### 10. **Extended Roofline from House**

One seamless way to cover your patio is to extend the existing roofline of your home. It creates a cohesive look, provides strong protection from weather, and can be matched to your home’s exterior style and materials.

---

### 11. **Louvered Roof System**

A motorized louvered roof system gives you complete control over your outdoor space. Adjust the slats to allow sunshine or block it, or even close them completely during rain. High-tech and stylish, it’s a luxury option worth considering.

---

### 12. **Glass Roof Panels**

Sleek and contemporary, glass roof extensions offer full weather protection while keeping the space airy and bright. Frosted or tinted glass can help reduce glare and heat. It’s ideal for modern homes or garden-view patios.

---

### 13. **Canvas Awning Roof**

Retractable or fixed canvas awnings are a budget-friendly option with lots of flexibility. Choose bold colors or striped patterns for a pop of personality and retro flair. They’re also easy to maintain and replace when needed.

---

### 14. **Traditional Shingled Roof**

A classic shingled roof matches your home’s architecture and provides maximum shelter. This is a great choice if you want your patio to feel like a true outdoor room — complete with ceiling fans and lighting.

---

### 15. **Arched Roof Design**

An arched or barrel-shaped roof adds architectural interest and an open, airy feeling to your space. It’s an eye-catching structure that draws attention and gives your patio a more dynamic design.

---

### 16. **Trellis-Style Roof with Vines**

A wooden trellis offers partial shade and is perfect for training climbing plants like wisteria or jasmine. Over time, your patio will become a blooming garden oasis with a fragrant canopy of greenery overhead.

---

### 17. **Freestanding Gazebo Roof**

If your patio is located away from your house, a freestanding roof structure like a gazebo or pavilion can be ideal. It creates a dedicated, covered outdoor area for entertaining, dining, or relaxing in the garden.

---

### 18. **Industrial Steel Frame with Wooden Slats**

Combine raw steel frames with warm wooden slats for a modern, industrial-chic design. This combo adds visual contrast and works beautifully in both urban and suburban backyards.

---

### 19. **Solar Panel Patio Roof**

Go green and save energy by installing a patio roof that doubles as a solar panel system. It protects your space from the sun while generating electricity — ideal for eco-conscious homeowners.

---

## Choosing the Right Roof Extension for Your Patio

When deciding on the best patio roof extension for your space, consider these key factors:

* **Climate**: Do you need protection from sun, rain, wind, or all of the above?
* **Budget**: Options range from affordable fabric canopies to high-end automated systems.
* **Aesthetics**: Match your roof to your home’s style — rustic, modern, coastal, or traditional.
* **Functionality**: Will the space be used for dining, lounging, gardening, or entertaining?
* **Maintenance**: Some materials, like thatch or wood, require more upkeep than others.

---

## Final Thoughts

A patio roof extension can dramatically enhance your backyard, making it more beautiful, comfortable, and usable year-round. Whether you’re dreaming of a sleek modern retreat, a cozy rustic escape, or a lush garden hideaway, there’s a perfect roof style out there for you.

With these **19 eye-catching ideas**, you’re just a step away from creating a stunning outdoor space that fits your lifestyle — and leaves a lasting impression.

---

**Ready to upgrade your backyard?** Pin your favorite ideas, gather some inspiration, and start planning the patio of your dreams today!

image
Mi piace
Commento
Condividi
Sarah Thompson
Sarah Thompson
17 ore ·Tradurre

**Family-Favorite Cowboy Butter Steak Sliders**


*The Ultimate Recipe for Juicy, Flavor-Packed Mini Sandwiches Everyone Will Love*

---

When it comes to comfort food that brings everyone to the table with big smiles and empty plates, **Cowboy Butter Steak Sliders** are in a league of their own. Juicy, seared steak slices smothered in rich, garlicky cowboy butter, nestled between soft slider buns — it’s a flavor explosion that’s hard to resist. Whether you’re serving them for game day, a family dinner, or a backyard BBQ, these sliders will become an instant hit.

In this article, we’ll walk you through everything you need to know to make these **family-favorite Cowboy Butter Steak Sliders** — from ingredients and preparation tips to serving ideas and variations.

---

### What Is Cowboy Butter?

Cowboy butter is a savory compound butter loaded with bold, zesty ingredients. It’s typically made with:

* Melted butter
* Garlic
* Dijon mustard
* Lemon juice
* Fresh herbs (like parsley and chives)
* Red pepper flakes
* Smoked paprika
* Salt and black pepper

The result is a rich, spicy, herby butter that pairs perfectly with grilled meats, especially steak. It takes these steak sliders to a whole new level, giving them that addictive “just one more” taste.

---

### Ingredients for Cowboy Butter Steak Sliders

Here’s what you’ll need to whip up a batch of these mouthwatering sliders:

#### For the Steak:

* 1½ lbs ribeye or sirloin steak, thinly sliced
* 1 tbsp olive oil
* Salt and pepper, to taste
* 1 tsp garlic powder
* 1 tsp smoked paprika

#### For the Cowboy Butter:

* ½ cup unsalted butter
* 4 cloves garlic, minced
* 1 tbsp Dijon mustard
* 1 tbsp fresh lemon juice
* 2 tbsp fresh parsley, chopped
* 1 tbsp fresh chives, chopped (optional)
* ½ tsp red pepper flakes
* ½ tsp smoked paprika
* Salt and pepper to taste

#### For the Sliders:

* 12 slider buns or Hawaiian rolls
* 6 slices provolone or Swiss cheese, halved
* Optional toppings: caramelized onions, pickles, arugula, or crispy fried onions

---

### How to Make Cowboy Butter Steak Sliders

#### 1. **Prep the Steak**

Start by seasoning your steak slices with salt, pepper, garlic powder, and smoked paprika. Let the meat sit at room temperature for about 15–20 minutes. This helps it cook more evenly and enhances flavor.

#### 2. **Sear the Steak**

Heat a large skillet or grill pan over medium-high heat. Add olive oil and sear the steak in batches to avoid overcrowding the pan. Cook each batch for about 2–3 minutes per side until browned and slightly crispy on the edges. Remove and set aside.

#### 3. **Make the Cowboy Butter**

In a small saucepan over low heat, melt the butter. Add minced garlic and cook for 1–2 minutes until fragrant (not browned). Stir in Dijon mustard, lemon juice, parsley, chives, red pepper flakes, smoked paprika, salt, and pepper. Mix well and remove from heat. Taste and adjust seasonings as desired.

#### 4. **Toss Steak in Cowboy Butter**

Add the cooked steak to a bowl and pour the cowboy butter over it. Toss until every juicy piece is coated in that irresistible buttery sauce.

#### 5. **Assemble the Sliders**

Preheat your oven to 350°F (175°C). Slice the buns in half horizontally (keeping the bottom halves attached if using Hawaiian rolls) and place them on a baking sheet. Lay the steak evenly over the bottom buns, then top with cheese slices. Add any optional toppings you like (caramelized onions are amazing here!).

Place the top buns on and brush with a little melted butter or leftover cowboy butter. Cover loosely with foil and bake for 10–15 minutes, until the cheese is melted and the sliders are warmed through.

---

### Tips for Perfect Sliders

* **Choose the Right Cut**: Ribeye adds richness and tenderness, but sirloin or flank steak also work great if sliced thin against the grain.
* **Don’t Overcook the Steak**: Quick searing ensures it stays juicy and tender inside the sliders.
* **Use a Serrated Knife**: When cutting sliders after baking, a serrated knife prevents tearing the soft buns.
* **Add Crunch**: A handful of crispy onions or pickles adds a great textural contrast.

---

### Serving Ideas

These sliders are incredibly versatile and can be served in many ways:

* **Game Day Snack**: Perfect finger food for watching sports with family and friends.
* **Family Dinner**: Pair with roasted veggies or a fresh green salad.
* **Party Platter**: Serve with dipping sauces like chipotle mayo, BBQ sauce, or extra cowboy butter.
* **Lunchbox Favorite**: Wrap in foil and pack for a hearty, satisfying lunch on the go.

---

### Make-Ahead and Storage

* **Make-Ahead Tip**: You can prep the steak and cowboy butter a day in advance. Just warm them up slightly before assembling the sliders.
* **Storing Leftovers**: Store in an airtight container in the fridge for up to 3 days. Reheat in the oven or air fryer for best results.

---

### Cowboy Butter Variations

You can tweak the cowboy butter to suit your family’s taste:

* **Spicy Kick**: Add a touch of hot sauce or more red pepper flakes.
* **Creamy Twist**: Mix in a bit of cream cheese or sour cream for a smoother sauce.
* **Herb Swap**: Try thyme or rosemary for a more earthy flavor.
* **Lemon Zest**: Add lemon zest for extra brightness.

---

### Why Your Family Will Love These Sliders

There’s something undeniably satisfying about the combo of juicy steak, bold butter, and soft buns. These sliders are small but mighty — packed with flavor and super fun to eat. They’re also customizable for picky eaters or adventurous foodies in the family.

Whether you make them for a weekend treat, a holiday gathering, or just because it’s Tuesday, these Cowboy Butter Steak Sliders are guaranteed to earn a spot in your regular recipe rotation.

---

**In Summary*

* Cowboy Butter Steak Sliders combine juicy steak, bold buttery sauce, and melty cheese on soft buns.
* Perfect for any occasion — game day, family meals, or parties.
* Easy to make and endlessly customizable.
* A guaranteed family favorite you’ll make again and again.

Ready to wow your crew? Fire up the skillet and get those buns ready — these sliders are about to steal the show!

---

image
Mi piace
Commento
Condividi
Sarah Thompson
Sarah Thompson
1 d ·Tradurre

Glazed Honey BBQ Chicken – Juicy & Oven-Baked


Few things are as satisfying as biting into a piece of perfectly glazed chicken—crispy on the outside, juicy on the inside, and coated with a sweet and smoky barbecue sauce that hits every craving. If you’re looking for a dish that’s simple to make, incredibly flavorful, and a surefire hit at the dinner table, Glazed Honey BBQ Chicken – Juicy & Oven-Baked is it.

Whether you're cooking for your family, meal-prepping for the week, or hosting a laid-back weekend dinner, this baked chicken recipe is about to become your go-to comfort food.

Why You’ll Love This Honey BBQ Chicken
This dish strikes the perfect balance between sticky-sweet and smoky-savory. The honey adds a natural sweetness that caramelizes beautifully in the oven, while the barbecue sauce adds depth, tang, and just a touch of spice. Because it’s baked—not fried or grilled—it’s also easy, less messy, and ideal for weeknights when you want something hearty and wholesome without the fuss.

Here’s what makes it stand out:

No need to fire up the grill – the oven does all the work.

Incredibly juicy thanks to a low-and-slow bake.

Perfect glaze that clings to every bite.

Family-friendly and customizable in spice level.

Easy to pair with sides like mashed potatoes, coleslaw, or corn on the cob.

Ingredients You’ll Need
For this recipe, you’ll need simple pantry staples:

Chicken – Bone-in or boneless thighs and drumsticks work best, but you can also use breasts if preferred.

Honey – Adds natural sweetness and helps the glaze thicken.

BBQ Sauce – Use your favorite store-bought brand or make your own for a personal twist.

Garlic powder – Adds a warm, savory kick.

Onion powder – Enhances the barbecue flavor.

Smoked paprika – For a rich, smoky note.

Salt & pepper – Classic seasoning to bring everything together.

Olive oil or butter – For a richer flavor and juicier bake.

Optional extras:

A splash of apple cider vinegar to balance the sweetness.

A pinch of chili flakes or cayenne pepper for heat.

Fresh parsley or chives for garnish.

How to Make Glazed Honey BBQ Chicken
Here’s a step-by-step breakdown of how to prepare this delicious baked dish:

1. Preheat and Prepare
Set your oven to 375°F (190°C) and line a baking tray with foil or parchment paper for easy cleanup. Lightly oil the surface to prevent sticking.

2. Season the Chicken
Pat your chicken dry with paper towels. This helps the skin or surface get a light crisp during baking. Then, season with salt, pepper, garlic powder, onion powder, and smoked paprika. Rub the spices into the meat to ensure even coverage.

3. Bake the Chicken
Place the seasoned chicken on the tray and bake uncovered for about 25–30 minutes for boneless pieces or 35–40 minutes for bone-in.

While the chicken is baking, prepare the glaze.

4. Make the Honey BBQ Glaze
In a saucepan over medium heat, combine:

1 cup BBQ sauce

1/4 cup honey

Optional: 1 tbsp apple cider vinegar or hot sauce

Stir continuously for 4–5 minutes until the sauce thickens slightly and becomes glossy. Remove from heat and set aside.

5. Glaze and Bake Again
Remove the chicken from the oven. Brush the honey BBQ glaze generously over each piece, coating it thoroughly. Return the chicken to the oven and bake for another 10–15 minutes, or until the glaze is caramelized and sticky.

6. Broil for Finish (Optional)
For an extra-glossy and slightly charred finish, switch the oven to broil for the last 2–3 minutes. Watch carefully to avoid burning.

7. Garnish and Serve
Once out of the oven, let the chicken rest for 5 minutes. Sprinkle with chopped parsley or chives for a burst of color and freshness.

Tips for the Juiciest Oven-Baked Chicken
Use dark meat (thighs or drumsticks) for maximum juiciness.

Don’t overbake – use a meat thermometer to ensure the internal temp is 165°F (74°C).

Let the chicken rest before serving to keep all the juices locked in.

Double the glaze if you love extra sauce on the side for dipping!

Serving Ideas
This honey BBQ chicken pairs beautifully with classic sides. Here are some tasty options:

Comfort Food Sides
Creamy mashed potatoes

Baked mac and cheese

Sweet corn on the cob

Fresh & Crunchy Options
Coleslaw with a vinegar or creamy dressing

Garden salad with balsamic vinaigrette

Roasted vegetables (carrots, Brussels sprouts, bell peppers)

Southern-Style Pairings
Buttermilk biscuits

Cornbread muffins

Baked beans

You can also shred the chicken and use it in wraps, sandwiches, or on top of salads for a lighter twist.

Make-Ahead & Storage
This dish is great for meal prep and leftovers!

Make-ahead tip: Season the chicken and prepare the glaze the night before to save time.

Store leftovers in an airtight container in the fridge for up to 4 days.

Reheat in the oven at 350°F for 10–15 minutes, brushing with extra glaze if needed.

Custom Variations
Want to switch it up? Try these tasty variations:

Spicy Kick: Add sriracha, hot sauce, or chili powder to the glaze.

Smoky Maple BBQ: Replace honey with pure maple syrup and add extra smoked paprika.

Asian-Inspired: Use hoisin sauce with honey and a splash of soy sauce for a fusion twist.

Low-Sugar: Use sugar-free BBQ sauce and swap honey for a sugar-free substitute like monk fruit syrup.

Final Thoughts
Glazed Honey BBQ Chicken – Juicy & Oven-Baked is everything you want in a weeknight dinner: it’s flavorful, satisfying, easy to make, and completely crowd-pleasing. With its tender meat, caramelized glaze, and that perfect balance of sweet and smoky, it’s a recipe you’ll find yourself making again and again.

Whether served with homestyle sides or used in creative meal prep bowls, this chicken dish will never disappoint. So preheat your oven and get ready for the ultimate comfort food experience — sticky fingers, full bellies, and lots of compliments included!

image
Mi piace
Commento
Condividi
Sarah Thompson
Sarah Thompson
1 d ·Tradurre

Graceful in Bloom: Romantic Fall Outfit with a Floral Skirt


As the crisp air and golden hues of fall settle in, fashion lovers everywhere begin reaching for richer tones, cozy textures, and timeless prints. One standout look this season? A romantic ensemble that pairs a wine-colored knit top with a delicate floral midi skirt — an outfit that whispers grace, warmth, and charm. “Graceful in Bloom” is more than just a fall outfit idea; it’s an effortless statement of feminine elegance.

The Allure of Fall Fashion
Fall is a favorite season for many fashion enthusiasts, and for good reason. It’s the perfect time to blend comfort with chic — where soft knits, layered looks, and earthy palettes dominate wardrobes. This season is all about embracing nature’s transition with outfits that are warm yet light, structured yet flowing.

And when it comes to romantic fall fashion, few combinations rival the magic of a well-fitted sweater and a beautiful midi skirt. The contrast between the snug top and flowing bottom creates a flattering silhouette that’s as timeless as it is trendy.

The Knit Top: A Touch of Cozy Sophistication
Let’s begin with the top. A wine-colored knit sweater with three-quarter sleeves and a soft, square neckline is the epitome of understated elegance. The rich burgundy hue channels the spirit of fall — reminiscent of ripe cranberries, autumn leaves, and a glass of red wine by the fire.

This kind of top hugs the upper body just right, creating a streamlined shape without sacrificing comfort. The neckline adds a touch of sophistication, exposing just enough collarbone to balance warmth with femininity.

Whether you’re heading to a café or a weekend outing, a well-structured knit in a deep tone like wine or plum is versatile and refined. It’s also a flattering color for many skin tones, offering warmth and vibrancy.

The Floral Midi Skirt: Feminine, Flowing, and Timeless
Now, enter the star of the show — the floral midi skirt. A soft beige or grayish base with a burgundy floral print mirrors the tones of the knit top, tying the outfit together in a seamless harmony of color and texture.

Midi skirts are beloved for a reason. Their length is modest yet stylish, and the gentle flare adds movement and grace with every step. A floral pattern keeps things romantic and soft, a nod to the lingering blooms of late summer meeting the coziness of fall.

In this outfit, the floral print isn’t too bold or overpowering — it enhances the overall look with just enough visual interest. The print features large, abstract florals in the same wine shade as the top, creating a beautifully cohesive ensemble.

Styling the Look: Accessories and Details
The beauty of this look lies in its simplicity, but the right accessories can take it to the next level.

Earrings & Jewelry
Delicate drop earrings or pearl studs add a polished finish. A dainty necklace that matches the neckline or even a minimalist gold chain can subtly enhance the outfit without stealing the spotlight.

Shoes
For footwear, opt for nude or beige heels to elongate the legs and maintain the outfit’s soft, romantic tone. Ankle boots in a matching wine tone also work well for cooler days. Ballet flats or classic loafers in a neutral shade could offer a more casual yet chic touch.

Bag
A small clutch or crossbody bag in beige, taupe, or burgundy will complete the look. If you prefer a slightly more structured option, go for a mini handbag in a complementary tone with gold hardware.

Outerwear
Need a layer? A tailored beige trench coat or a cropped knit cardigan can add both warmth and style. A camel or cream-toned wool coat would also elevate the ensemble for more formal settings.

When to Wear It
This romantic fall outfit is incredibly versatile. Here are a few perfect occasions to wear it:

Brunch with friends: Light, feminine, and effortlessly pretty.

Date night: The combination of cozy and romantic is perfect for an evening stroll or dinner.

Family gatherings: The modesty and elegance make it ideal for get-togethers.

Outdoor photoshoots: The floral flow and soft tones photograph beautifully in natural light.

Work or meetings: Add a blazer for a professional yet fashionable edge.

Why It Works: The Balance of Contrast and Harmony
What makes “Graceful in Bloom” such a compelling outfit is its balance. It pairs textures (knit and chiffon), tones (deep wine and soft neutrals), and silhouettes (fitted and flowing) in a way that flatters every body type.

Texture contrast: The cozy knit top balances the light, airy skirt.

Color harmony: Matching tones in both pieces create unity without being too matchy.

Silhouette balance: Fitted top + voluminous skirt = timeless hourglass effect.

It’s a formula that works again and again — classic, romantic, and endlessly wearable.

Transitioning the Look Through the Seasons
While this outfit is perfect for fall, with a few tweaks, you can transition it into other seasons:

Spring: Swap the wine knit for a blush pink or lavender top and switch to lighter accessories.

Winter: Layer with tights, boots, and a structured coat. Opt for a turtleneck knit for added warmth.

Summer (cool evenings): Wear the skirt with a light blouse or cap-sleeved top and sandals.

Final Thoughts: Feminine Fashion That Feels Like You
The "Graceful in Bloom" outfit isn’t about chasing trends — it’s about embracing personal style that’s romantic, polished, and seasonally inspired. It brings together the best of fall: warmth, beauty, and a touch of nostalgia.

Whether you’re dressing up for a special occasion or just want to feel beautiful on a crisp afternoon, this look is a go-to that will never go out of style. In a world where fast fashion often dominates, embracing timeless elegance in outfits like these allows you to celebrate your femininity with poise and purpose.

image
Mi piace
Commento
Condividi
Carica piu notizie

Unfriend

Sei sicuro di voler disapprovare?

Segnala questo utente

Migliora la tua immagine del profilo

Saldo disponibile

0

immagini

Modifica offerta

Aggiungi Tier.


Selezionare unimmagine
Elimina il tuo livello
Sei sicuro di voler cancellare questo livello?

Recensioni

Per vendere i tuoi contenuti e i tuoi post, inizia creando alcuni pacchetti. Monetizzazione

Pagare con il portafoglio

Avviso di pagamento

Stai per acquistare gli articoli, vuoi procedere?

Richiedere un rimborso