پسندیدن
اظهار نظر
اشتراک گذاری


Delight Your Taste Buds with BBQ Chicken Skewer Salad
Summer is synonymous with outdoor gatherings, vibrant flavors, and refreshing meals. Among the plethora of culinary delights that the season offers, BBQ Chicken Skewer Salad stands out as a quintessential dish, blending smoky, char-grilled goodness with fresh, crisp vegetables. This harmonious medley not only tantalizes the taste buds but also provides a wholesome and satisfying meal. Here's everything you need to know to create this delectable dish at home.
Ingredients
For the BBQ Chicken Skewers:
Chicken Breast or Thighs: 1 lb, cut into bite-sized pieces
BBQ Sauce: 1 cup (store-bought or homemade)
Olive Oil: 2 tablespoons
Garlic Powder: 1 teaspoon
Paprika: 1 teaspoon
Salt and Pepper: To taste
Skewers: Wooden (soaked in water for 30 minutes) or metal
For the Salad:
Mixed Greens: 4 cups (spinach, arugula, romaine, etc.)
Cherry Tomatoes: 1 cup, halved
Cucumber: 1, sliced
Red Onion: 1/2, thinly sliced
Bell Pepper: 1, thinly sliced
Avocado: 1, sliced
Corn Kernels: 1 cup (grilled or fresh)
Feta Cheese: 1/2 cup, crumbled
Fresh Herbs: Chopped cilantro, parsley, or basil for garnish
For the Dressing:
Olive Oil: 1/4 cup
Lemon Juice: 2 tablespoons
Honey: 1 tablespoon
Dijon Mustard: 1 teaspoon
Salt and Pepper: To taste
Instructions
Preparing the BBQ Chicken Skewers:
Marinate the Chicken: In a bowl, combine the olive oil, garlic powder, paprika, salt, and pepper. Add the chicken pieces and toss to coat. Let it marinate for at least 30 minutes to enhance the flavors.
Thread the Chicken: Skewer the marinated chicken pieces onto the pre-soaked wooden or metal skewers.
Grill the Chicken: Preheat your grill to medium-high heat. Grill the skewers for about 10-15 minutes, turning occasionally, until the chicken is fully cooked and has a nice char. Brush with BBQ sauce during the last few minutes of grilling for a sticky, flavorful glaze.
Assembling the Salad:
Prepare the Vegetables: While the chicken is grilling, prepare your salad ingredients. In a large bowl, combine mixed greens, cherry tomatoes, cucumber, red onion, bell pepper, avocado, and corn kernels.
Make the Dressing: In a small bowl, whisk together olive oil, lemon juice, honey, Dijon mustard, salt, and pepper until emulsified.
Toss the Salad: Drizzle the dressing over the salad and toss gently to coat all the ingredients evenly.
Bringing it All Together:
Serve the Salad: Divide the salad among plates or arrange it on a large platter for a family-style presentation.
Top with Chicken Skewers: Place the BBQ chicken skewers on top of the salad. Sprinkle with crumbled feta cheese and fresh herbs for a burst of flavor and color.
Tips for the Perfect BBQ Chicken Skewer Salad
Marination Time: For deeper flavor, marinate the chicken overnight.
Vegetable Variations: Feel free to add or substitute vegetables based on seasonal availability and personal preferences. Grilled zucchini, roasted sweet potatoes, or pickled jalapeños can add unique twists.
Dressing Diversity: Experiment with different dressings like a tangy balsamic vinaigrette or a creamy ranch to suit your taste.
Serving Suggestions: This salad pairs wonderfully with crusty garlic bread or a light quinoa side dish.
Why BBQ Chicken Skewer Salad?
This dish is a nutritional powerhouse, offering a balanced mix of protein, fiber, vitamins, and healthy fats. The BBQ chicken provides a satisfying smoky flavor, while the fresh vegetables add crunch and vitality. It's perfect for those who are health-conscious yet crave something indulgent and flavorful.
In conclusion, BBQ Chicken Skewer Salad is not just a meal; it's an experience. It's a celebration of summer, a tribute to fresh ingredients, and a testament to the joy of outdoor cooking. Whether you're hosting a barbecue or looking for a light yet hearty dinner, this salad is sure to impress and satisfy. So, fire up the grill and savor the delightful fusion of flavors in every bite.

Which Right Hand? 🏰👇
Do you agree??
7 Dumbbell Exercises to Sculpt Your Core and Arms Fast!
Are you ready to take your fitness routine to the next level? Whether you're a seasoned gym-goer or just starting your fitness journey, incorporating dumbbells into your workouts can provide a challenging and effective way to tone your core and arms. Here are seven powerful dumbbell exercises that will help you achieve a sculpted physique in no time!
### 1. Dumbbell Russian Twists
**Target Muscles* Obliques, Core
**How to Do It*
1. Sit on the floor with your knees bent and feet flat.
2. Hold a dumbbell with both hands and lean back slightly.
3. Twist your torso to the right, bringing the dumbbell beside your hip.
4. Return to the center and twist to the left.
5. Repeat for 3 sets of 15-20 reps on each side.
### 2. Dumbbell Renegade Rows
**Target Muscles* Back, Biceps, Core
**How to Do It*
1. Start in a plank position with a dumbbell in each hand.
2. Keeping your body straight, row one dumbbell towards your hip.
3. Lower it back to the ground and repeat with the other arm.
4. Perform 3 sets of 10-12 reps per arm.
### 3. Dumbbell Shoulder Press
**Target Muscles* Shoulders, Triceps, Core
**How to Do It*
1. Stand with feet shoulder-width apart, holding a dumbbell in each hand at shoulder height.
2. Press the dumbbells overhead until your arms are fully extended.
3. Slowly lower the dumbbells back to shoulder height.
4. Complete 3 sets of 12-15 reps.
### 4. Dumbbell Woodchoppers
**Target Muscles* Obliques, Core, Shoulders
**How to Do It*
1. Stand with feet shoulder-width apart, holding one dumbbell with both hands.
2. Start with the dumbbell above your right shoulder.
3. Swing it diagonally across your body to your left hip, twisting your torso.
4. Return to the starting position.
5. Perform 3 sets of 12-15 reps on each side.
### 5. Dumbbell Curl to Press
**Target Muscles* Biceps, Shoulders, Core
**How to Do It*
1. Stand with feet shoulder-width apart, holding a dumbbell in each hand.
2. Curl the dumbbells up to shoulder height.
3. Without pausing, press the dumbbells overhead.
4. Reverse the movement to return to the starting position.
5. Complete 3 sets of 10-12 reps.
### 6. Dumbbell Plank Rows
**Target Muscles* Back, Core, Shoulders
**How to Do It*
1. Get into a plank position with a dumbbell in each hand.
2. Row one dumbbell towards your hip while maintaining a strong plank.
3. Lower the dumbbell and repeat on the other side.
4. Aim for 3 sets of 8-10 reps per arm.
### 7. Dumbbell Side Bends
**Target Muscles* Obliques, Core
**How to Do It*
1. Stand with feet shoulder-width apart, holding a dumbbell in your right hand.
2. Place your left hand on your hip and bend sideways to the right.
3. Return to the starting position.
4. Perform 3 sets of 15-20 reps on each side.
### Tips for Success:
- **Warm Up* Always start with a 5-10 minute warm-up to get your muscles ready.
- **Form First* Prioritize proper form over heavy weights to avoid injury.
- **Progress Gradually* Increase weights gradually as you become more comfortable with each exercise.
- **Stay Consistent* Aim to perform these exercises 2-3 times a week for optimal results.
By integrating these dumbbell exercises into your routine, you'll not only strengthen your core and arms but also enhance your overall fitness. Remember, consistency and proper form are key to seeing results. Get started today and watch your body transform!
---
### FAQs
**Q: How heavy should the dumbbells be?**
A: Start with a weight that challenges you but still allows you to maintain proper form. As you get stronger, gradually increase the weight.
**Q: Can I do these exercises if I'm a beginner?**
A: Absolutely! These exercises are great for all fitness levels. Just make sure to start with lighter weights and focus on your form.
**Q: How often should I do these exercises?**
A: Aim for 2-3 times a week, allowing at least one day of rest between sessions for muscle recovery..
20 Stunning Spring Nail Designs for 2024: Pastels & Petals Galore
As spring approaches, it’s time to ditch the winter blues and embrace the vibrant hues of the season with your nail art. From soft pastels to intricate floral patterns, the latest nail trends for 2024 are all about expressing freshness and joy. Whether you’re heading to a garden party or simply want to brighten up your everyday look, these 20 stunning spring nail designs will inspire your next manicure.
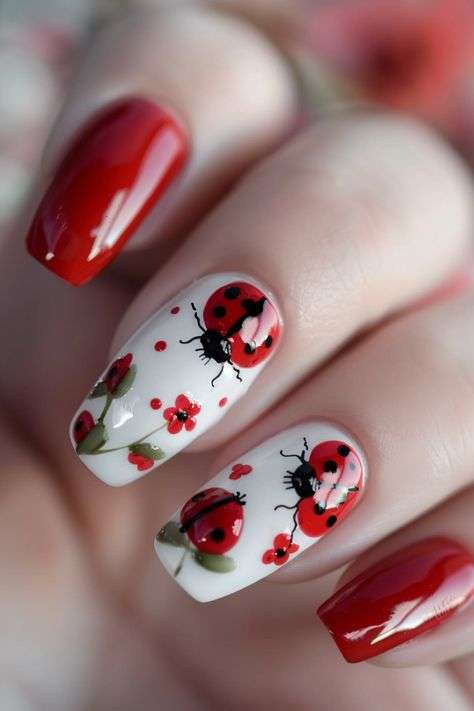
1. Blooming Beauties
Embrace the essence of spring with delicate floral designs. Think dainty roses, cherry blossoms, or wildflowers adorning your nails. These designs evoke the beauty of nature in full bloom.
2. Pastel Ombre
Blend soft pastel shades like lavender, mint green, and baby pink into a dreamy ombre effect. This gradient style is perfect for capturing the gentle transition from winter to spring.
3. Butterfly Whimsy
Flutter into spring with butterfly-inspired nail art. Opt for colorful wings in shades of turquoise, coral, and yellow to add a whimsical touch to your nails.
4. Petal Power
Create a garden on your fingertips with petals scattered across a neutral base. This minimalist yet elegant design brings a touch of springtime serenity to your look.
5. Cherry Blossom Elegance
Celebrate the season of cherry blossoms with delicate pink blooms delicately painted onto your nails. This design captures the fleeting beauty of spring.
6. Sunshine Yellow
Brighten up your day with a sunny yellow manicure. Whether solid or accented with playful designs like polka dots or stripes, yellow nails embody the spirit of spring.
7. Tropical Vibes
Transport yourself to a tropical paradise with palm leaf designs or exotic floral patterns. These bold prints are perfect for making a statement this spring.
8. Easter Egg Delight
Embrace the festive spirit with nail art inspired by colorful Easter eggs. Think intricate patterns and bright hues that capture the joy of the season.
9. Fresh French Tips
Update the classic French manicure with pastel tips or floral accents. This timeless style gets a springtime makeover that’s both chic and sophisticated.
10. Rainbow Bright
Go bold with a rainbow manicure featuring vibrant stripes or colorful geometric shapes. This cheerful design is sure to lift your spirits on gloomy days.
11. Garden Party Glam
Add a touch of sparkle to your nails with glitter accents or shimmering metallics. These glamorous designs are perfect for spring soirées and special occasions.
12. Pastel Marble
Combine soft pastel shades with marble patterns for a modern twist on nail art. This sophisticated design adds depth and texture to your manicure.
13. Blossoming Romance
Express your romantic side with nail art featuring hearts, bows, or lace details. These delicate designs are ideal for date nights or weddings this spring.
14. Nature’s Canvas
Take inspiration from nature’s palette with earthy tones like sage green, sky blue, or sandy beige. These understated hues reflect the tranquil beauty of the season.
15. Neon Pop
Make a bold statement with neon nails in shades of electric pink, lime green, or neon orange. These eye-catching hues are perfect for springtime fun.
16. Watercolor Dreams
Achieve an artistic look with watercolor-inspired nail art. Blend soft pastels together for a dreamy, ethereal effect that’s perfect for spring.
17. Fruit Fiesta
Celebrate the season’s bounty with fruity designs like strawberries, pineapples, or lemons. These playful motifs add a touch of whimsy to your nails.
18. Abstract Art
Let your creativity shine with abstract nail art featuring geometric shapes or bold brush strokes. This avant-garde style is perfect for trendsetters.
19. Spring Stripes
Add a pop of color with striped nail art in spring shades. Whether vertical, horizontal, or diagonal, stripes are a timeless choice for any occasion.
20. Petal Tips
Finish off your spring look with petal-shaped tips in pastel hues. This subtle yet charming design adds a unique twist to your classic French manicure.
Spring is the perfect time to experiment with new nail trends and embrace the beauty of nature-inspired designs. Whether you prefer delicate florals, vibrant colors, or minimalist elegance, these 20 stunning nail designs for 2024 will inspire you to express yourself creatively this season. Get ready to show off your manicure and welcome spring with style! #nails #summernails #nailart