Good and Bad People Good and Bad People
    #socialmedia #technology #usa #digitalmarketer #seoservice
    Uitgebreid zoeken
  • Inloggen
  • Registereren

  • Nachtstand
  • © 2025 Good and Bad People
    About • Directory • Contact Us • Developers • Privacy Policy • Terms of Use • Terugbetaling • Referral Terms • Acceptable Use Policy • Community Guidelines • Write for Us

    kiezen Language

  • Arabic
  • Bengali
  • Chinese
  • Croatian
  • Danish
  • Dutch
  • English
  • Filipino
  • French
  • German
  • Hebrew
  • Hindi
  • Indonesian
  • Italian
  • Japanese
  • Korean
  • Persian
  • Portuguese
  • Russian
  • Spanish
  • Swedish
  • Turkish
  • Urdu
  • Vietnamese

Horloge

Horloge Rollen

Evenementen

Bladeren door evenementen Mijn gebeurtenissen

blog

Blader door artikelen

Markt

nieuwste producten

Pagina's

Mijn pagina's Liked Pages

Meer

Onderzoeken populaire posts Jobs Aanbiedingen financieringen
Rollen Horloge Evenementen Markt blog Mijn pagina's alles zien

Ontdekken posts

Posts

Gebruikers

Pagina's

Groep

blog

Markt

Evenementen

Jobs

financieringen

Scarletts Style Journey
1 y ·Vertalen

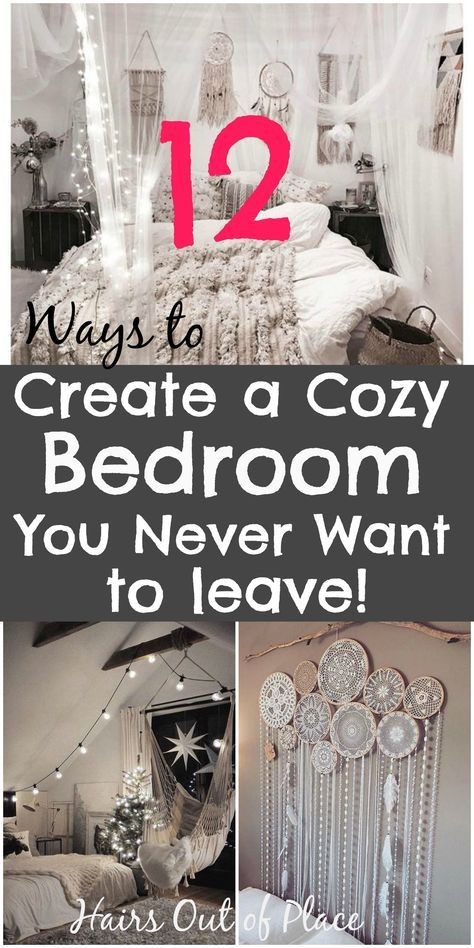
**Small Bedroom Decorating Ideas with Faux Fur, Pillows, Tapestries, and Lights**

Transform your small bedroom into a stylish and cozy retreat with these creative decorating ideas. By incorporating faux fur, plush pillows, vibrant tapestries, and charming lights, you can make even the smallest space feel inviting and comfortable. Here’s how to use these elements to enhance your bedroom decor:

**1. Faux Fur Rugs**

Add a touch of luxury to your small bedroom with a faux fur rug. Place it next to your bed or in the center of the room to create a soft, cozy area that feels warm underfoot. Choose a neutral color for a versatile look or go bold with a vibrant hue to make a statement.

**2. Layered Pillows**

Elevate your bed with a variety of pillows in different textures and sizes. Mix faux fur pillows with patterned or solid-color cushions to add depth and comfort to your bed. Layering pillows not only makes your bed look inviting but also provides extra support for lounging.

**3. Statement Tapestries**

Use a colorful or patterned tapestry as a focal point on one wall. A tapestry can add visual interest and warmth to your room without taking up floor space. Choose a design that complements your color scheme and adds personality to your space.
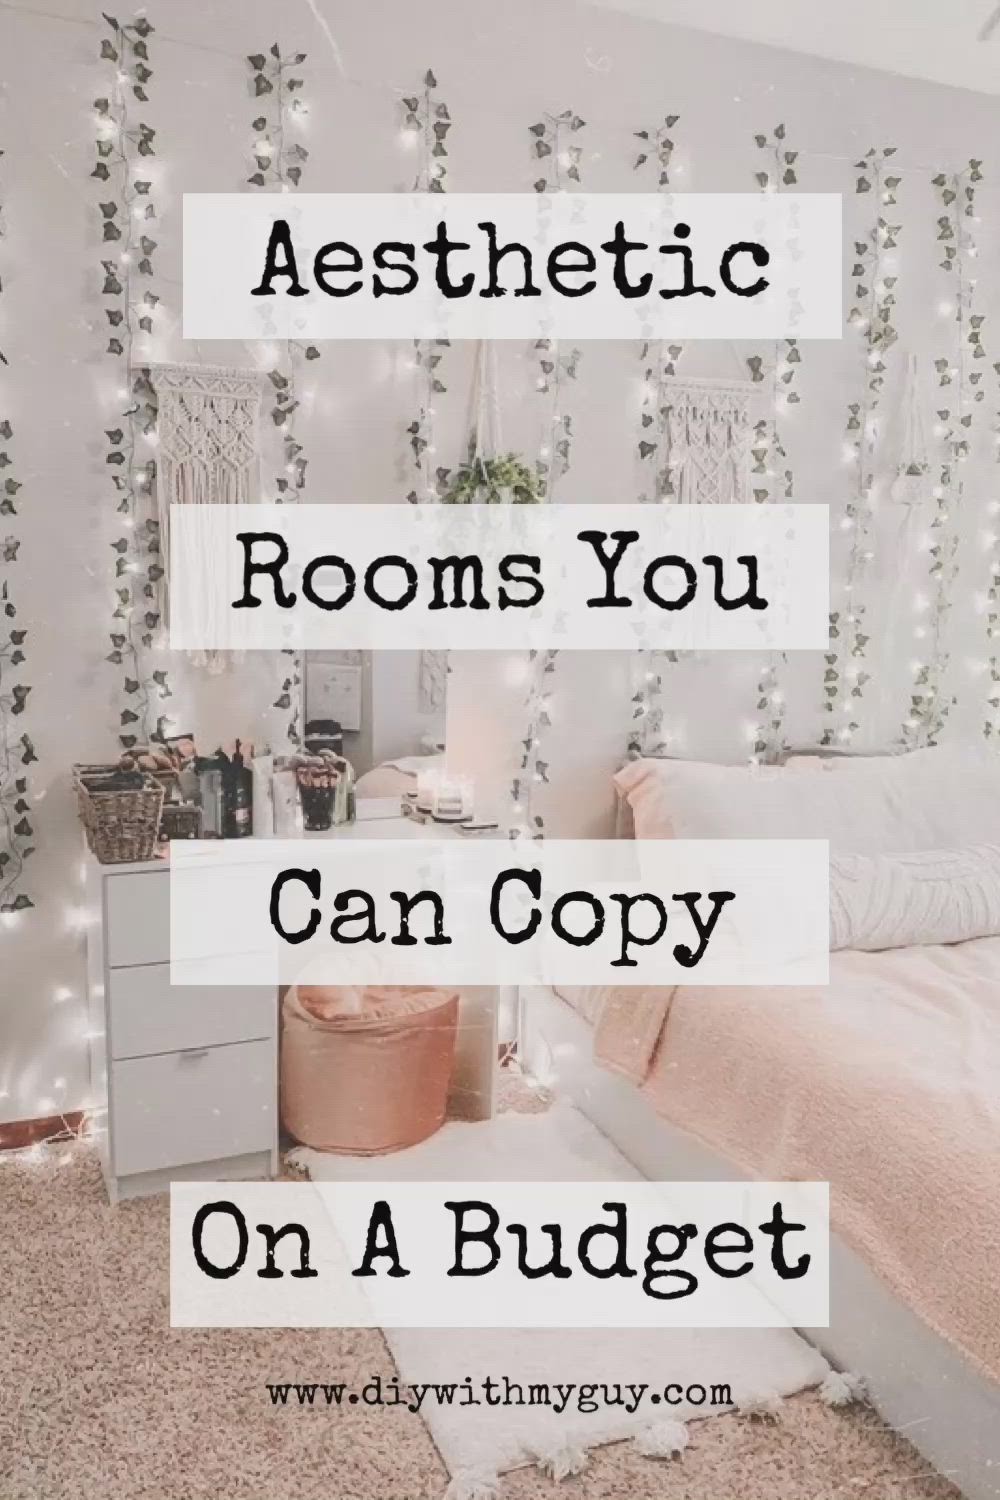
**4. String Lights**

Create a cozy ambiance with string lights. Drape them along your headboard, around your windows, or across the ceiling. They add a soft, warm glow that’s perfect for relaxing or setting a calming mood.

**5. Faux Fur Throws**

Drape a faux fur throw over your bed or a chair to add a touch of elegance and comfort. This simple addition can instantly make your space feel more inviting and warm.

**6. Decorative Wall Art**

Incorporate wall art that matches your style, such as framed prints, quotes, or artwork. Combine this with a tapestry for a layered look. Choose pieces that reflect your personality and add a pop of color or texture to your walls.

**7. Accent Lighting**

Use accent lighting to highlight specific areas of your room. A small, stylish lamp on your bedside table or a floor lamp in a corner can provide additional light and enhance the cozy atmosphere.

**8. Cozy Bedding**

Invest in high-quality, cozy bedding to make your bed a comfortable retreat. Choose soft fabrics like flannel or brushed cotton, and layer with faux fur throws and decorative pillows for added comfort.

**9. Wall Decals**

Add wall decals or stickers for a quick and easy way to personalize your space. Opt for designs that complement your overall decor, such as floral patterns or geometric shapes.

**10. Floating Shelves**

Install floating shelves to display decorative items, such as framed photos, small plants, or candles. Shelves are a great way to utilize wall space and keep your bedroom organized while adding visual interest.

**11. Mirrored Accents**

Incorporate mirrored or metallic accents to reflect light and make your room feel larger. Consider adding a small mirrored nightstand or decorative metal accents to enhance the overall decor.

**12. Layered Textures**

Combine different textures to create a cozy and inviting atmosphere. Mix faux fur with soft fabrics, like knit throws or velvet pillows, to add warmth and visual interest.

**13. Customized Headboard**

Make a statement with a custom headboard. Use fabric, paint, or wallpaper to create a unique look that complements your room’s style. Adding a faux fur or upholstered panel can make your bed area stand out.

**14. Indoor Plants**

Incorporate small indoor plants to add a touch of nature to your space. Plants like succulents or ferns can thrive in small pots and add a fresh, green element to your decor.

**15. Creative Storage Solutions**

Use stylish storage solutions, like decorative baskets or boxes, to keep your small bedroom organized. Store extra blankets, pillows, or personal items out of sight while adding to the overall decor.

By incorporating these elements, you can create a small bedroom that’s both stylish and comfortable. Faux fur, plush pillows, vibrant tapestries, and charming lights are all you need to make your space feel cozy and inviting.

🛏️✨ #smallbedroomdecor #cozyspaces #fauxfur #goodandbad

image
Respect!
Kommentar
Delen
Scarletts Style Journey
1 y ·Vertalen

**27 Dollar Store Fall Decor Ideas You Can DIY**

Transform your home for fall without breaking the bank with these 27 DIY Dollar Store decor ideas. With a little creativity and a few affordable supplies, you can create stylish and festive autumn decorations that will make your space feel warm and inviting. Here’s a collection of easy and budget-friendly projects to get you started:

**1. Autumn Wreath**

Craft a beautiful fall wreath using a foam ring, faux leaves, and decorative accents from the dollar store. Simply glue the leaves around the ring and add a bow or other embellishments for a welcoming touch on your front door.

**2. Pumpkin Centerpieces**

Create charming pumpkin centerpieces by painting or decorating foam pumpkins. Arrange them in a basket or on a tray, and add some faux autumn leaves for an extra touch of seasonal flair.

**3. DIY Leaf Garland**

Make a festive leaf garland by stringing together faux leaves with twine or ribbon. Drape it across your mantel, windows, or around your door frame for a touch of fall color.

**4. Decorative Mason Jars**

Turn mason jars into fall-themed vases or candle holders. Paint the jars in autumn colors, add some twine, and fill them with faux flowers or candles for a cozy touch.

**5. Pumpkin Planters**

Use small faux pumpkins as planters for autumn flowers or succulents. Simply cut the tops off the pumpkins, scoop out the insides, and place a small pot or floral foam inside.

**6. DIY Table Runner**

Create a fall-themed table runner using burlap or a seasonal fabric from the dollar store. Add some stenciled leaves or other fall motifs to give your dining table a festive look.

**7. Fall Scented Candles**

Enhance the autumn ambiance with DIY fall-scented candles. Use plain candles from the dollar store and add a few drops of essential oil, or wrap them in autumn-themed fabric for a decorative touch.

**8. Autumn Jar Lanterns**

Make glowing autumn lanterns by decorating mason jars with fall-themed paper or paint. Insert battery-operated tealights inside for a warm and inviting glow.

**9. DIY Tabletop Signs**

Create cute fall tabletop signs using small wooden or cardboard signs from the dollar store. Paint or write fall-themed messages like “Give Thanks” or “Harvest Time” for a seasonal touch.

**10. Leafy Table Decor**

Add a touch of fall to your table with faux leaf placemats or coasters. Simply arrange faux leaves on the table and cover them with clear adhesive to create a unique and easy table decor.

**11. Pumpkin Wall Art**

Craft a simple pumpkin-themed wall art using canvas or poster board from the dollar store. Paint or glue on pumpkin shapes and autumn leaves for a festive piece of wall decor.

**12. DIY Fall Pillows**

Update your throw pillows with fall-themed covers. Use fabric from the dollar store to sew or glue on patterns like pumpkins, leaves, or cozy fall sayings.

**13. Autumn-Themed Centerpieces**

Make a centerpiece for your dining table using a mix of faux pumpkins, pinecones, and autumn leaves arranged in a decorative bowl or tray.

**14. Pumpkin Garland**

Create a playful pumpkin garland by painting small foam pumpkins in different colors and stringing them together with twine. Hang it across your fireplace or along your walls.

**15. Fall-Themed Frames**

Decorate picture frames with fall-themed paper or paint. Add seasonal photos or autumn quotes to create custom decor that reflects the season.

**16. DIY Door Hangers**

Make seasonal door hangers using foam shapes or wooden cutouts. Decorate them with fall colors and designs like pumpkins, acorns, or leaves.

**17. Autumn Leaf Bouquets**

Assemble faux autumn leaf bouquets using dollar store flowers and leaves. Arrange them in a vase or jar for a beautiful and budget-friendly fall floral arrangement.

**18. DIY Pumpkin Garland**

Create a charming pumpkin garland by painting foam pumpkins in various shades of orange and stringing them together with twine or ribbon.

**19. Fall-Themed Coasters**

Make fall-themed coasters using cork or wooden coasters from the dollar store. Decorate them with paint or mod podge and seasonal designs.

**20. Faux Pumpkin Candles**

Transform faux pumpkins into candle holders by cutting out the tops and inserting battery-operated candles. Place them on your mantel or table for a cozy glow.

**21. Fall Tree Display**

Create a mini fall tree display using branches from the dollar store. Decorate with faux leaves, mini pumpkins, and small fall-themed ornaments.

**22. DIY Leaf Suncatchers**

Make colorful leaf suncatchers by decorating clear plastic sheets or old CD cases with faux leaves and fall-colored markers. Hang them in your windows for a vibrant fall display.

**23. Pumpkin Votive Holders**

Transform small pumpkins into votive candle holders by hollowing them out and placing candles inside. Use these as table centerpieces or around your home.

**24. Fall-Themed Banners**

Craft fall-themed banners using burlap or felt from the dollar store. Add stenciled or painted letters and designs to create festive banners for your home.

**25. DIY Fall Vase Fillers**

Fill vases with a mix of faux autumn leaves, acorns, and small pumpkins. These make great decorations for tables, mantels, or shelves.

**26. Seasonal Wall Decals**

Decorate your walls with seasonal wall decals from the dollar store. Choose designs like pumpkins, leaves, or fall sayings to add a touch of autumn to any room.

**27. Fall-Themed Picture Collage**

Create a fall-themed picture collage by decorating a bulletin board or corkboard with autumn-colored paper and adding photos or seasonal printables.

These 27 DIY Dollar Store fall decoration ideas are perfect for adding festive touches to your home on a budget. With a bit of creativity and some affordable materials, you can create a warm and inviting fall atmosphere that reflects the season’s charm.

🍁🎨 #dollarstoredecor #falldiy #budgetfriendly #goodandbad

image
Respect!
Kommentar
Delen
Scarletts Style Journey
1 y ·Vertalen

**20 DIY Bedroom Projects to Create a Cozy and Comfy Retreat – Craftsonfire**

Transform your bedroom into a relaxing haven with these 20 DIY projects that add both style and comfort. Whether you’re looking to refresh your decor or create a more inviting space, these projects are designed to make your room feel like a true sanctuary. Dive into these creative ideas and get inspired to enhance your bedroom with a personal touch.

**1. DIY Upholstered Headboard**

Craft a custom upholstered headboard to add a touch of luxury to your bed. Use foam, fabric, and a wooden frame to create a headboard that matches your style and adds comfort.

**2. Cozy Knit Throw Blanket**

Create a plush knit throw blanket using chunky yarn and simple knitting techniques. This project adds warmth and texture to your bed or seating area.

**3. Personalized Wall Art**

Design your own wall art with paint, canvas, and stencils. Create abstract patterns, motivational quotes, or nature-inspired designs to personalize your space.

**4. DIY Decorative Pillows**

Sew or embellish decorative pillows to complement your bedroom decor. Use fabric scraps, iron-on transfers, or embroidery to create unique designs.

**5. Floating Nightstands**

Install floating nightstands for a sleek and modern look. Use wall-mounted shelves or custom-built units to keep essentials within easy reach while saving floor space.

**6. Handmade Bedside Lamps**

Upgrade your bedside lighting with handmade lamps. Customize lamp bases with paint, fabric, or decorative elements, and add a stylish lampshade for a personal touch.

**7. Macramé Wall Hanging**

Add texture and style to your walls with a DIY macramé wall hanging. Use cotton cord and simple knots to create intricate patterns that bring a bohemian vibe to your room.

**8. DIY Fabric Storage Bins**

Organize your space with DIY fabric storage bins. Use fabric, a sewing machine, and cardboard to create bins that match your decor and keep your items neatly stored.

**9. Customized Curtain Panels**

Refresh your windows with customized curtain panels. Choose fabric that complements your room and use a sewing machine or fabric glue to create panels that add style and privacy.

**10. DIY Bed Skirt**

Make a bed skirt to hide under-bed storage and add a finished look to your bed. Use fabric that coordinates with your bedding and attach it with velcro or fabric tape.

**11. Upcycled Furniture**

Give old furniture a new lease on life with a fresh coat of paint or new hardware. Transform dressers, nightstands, or chairs to fit your bedroom’s style.

**12. DIY Wall Sconces**

Create your own wall sconces to add ambiance to your room. Use wood, metal, or glass to craft sconces that hold candles or LED lights for a warm glow.

**13. Decorative Bed Tray**

Craft a decorative bed tray to use for breakfast in bed or as a stylish accessory. Use wood or acrylic and add a custom paint job or decorative handles.

**14. DIY String Light Canopy**

Enhance your bed with a DIY string light canopy. Drape string lights over a curtain rod or ceiling hooks to create a magical and cozy atmosphere.

**15. Fabric Headboard Panels**

Create fabric-covered headboard panels to add a touch of elegance. Use batting and fabric to cover wooden or foam panels and mount them behind your bed.

**16. Personalized Photo Display**

Showcase your favorite memories with a DIY photo display. Use wire, clips, and decorative elements to create a unique gallery wall for your photos.

**17. DIY Rug**

Make your own rug using fabric scraps or yarn. Create a braided rug, a woven mat, or even a painted rug to add color and comfort to your floor.

**18. Wall-Mounted Jewelry Organizer**

Keep your jewelry organized and accessible with a wall-mounted organizer. Use frames, hooks, and fabric to create a stylish display for your accessories.

**19. DIY Cozy Reading Nook**

Design a cozy reading nook with a comfortable chair, plush pillows, and a DIY bookshelf. Add soft lighting and a blanket for a perfect spot to unwind.

**20. DIY Headboard Shelf**

Add functionality to your headboard with a DIY shelf. Use wood or metal to create a shelf that attaches to your headboard, providing space for books, plants, or decorative items.

These 20 DIY bedroom projects are perfect for creating a space that’s both cozy and stylish. With a bit of creativity and some hands-on crafting, you can transform your bedroom into a comfortable retreat that reflects your personal taste.

🛏️🖼️ #cozybedroom #diyprojects #homecomfort #craftsonfire

image
Respect!
Kommentar
Delen
Charlotte Chic Nomad
1 y ·Vertalen

Neon Lime Green & Pink Floral Press-On Nails: The Ultimate Summer Trend

Ready to elevate your summer style with a burst of vibrant color? Look no further than our Neon Lime Green & Pink Floral Press-On Nails. These eye-catching press-ons combine bold neon hues with playful floral designs to deliver a manicure that's perfect for the sunny season. Here’s why these press-on nails are the must-have accessory for your summer look.

Why You’ll Love These Neon Floral Press-Ons

**1. Vibrant Neon Colors

Stand out with the dazzling neon lime green and pink hues that are perfect for summer. These bright colors are designed to make a statement and complement your sun-kissed skin. Whether you're heading to the beach or attending a summer party, these nails are sure to catch eyes and garner compliments.

**2. Playful Floral Designs

Embrace the fun of summer with charming floral patterns. The combination of neon colors and vibrant floral prints creates a lively and festive look, adding a touch of whimsy to your manicure. These designs are perfect for those who love to incorporate a bit of fun into their style.

**3. Handmade Quality

Each set of press-on nails is meticulously handcrafted by expert nail technicians, ensuring high-quality and attention to detail. This handmade craftsmanship not only guarantees a unique look but also ensures durability and a perfect fit.

**4. On-Trend Design

Neon and floral designs are major trends for summer, making these press-ons a fashionable choice. By choosing these nails, you’re embracing the latest styles and showing off your trend-savvy side.

**5. Effortless Application

Enjoy a salon-quality manicure without the hassle of traditional nail services. These press-ons are designed for easy application—simply press them onto your natural nails for an instant upgrade. They’re perfect for those who want a stunning look with minimal effort.

**6. Versatile Use

Whether you're preparing for a summer festival, a weekend getaway, or just want to brighten up your daily look, these press-on nails are versatile enough to suit any occasion. Their bold colors and designs make them a fun accessory for any summer outfit.

How to Apply Your Press-On Nails

Prep Your Nails: Start with clean, dry nails. Remove any old polish and ensure your nails are free from oils and residue. Lightly buff your natural nails for the best adhesion.

Select the Right Size: Choose the press-on nails that best fit your natural nails. The set includes a variety of sizes to ensure a perfect match.

Apply the Press-Ons: Peel off the backing from each nail and press it firmly onto your natural nail. Hold in place for a few seconds to ensure a secure fit.

Enjoy Your Look: Once applied, your nails are ready to shine! Enjoy a vibrant, summer-ready manicure that’s sure to turn heads.

Removal: When you’re ready for a change, gently peel off the press-on nails. If needed, use a nail remover to ensure no residue is left behind.

Final Thoughts

Our Neon Lime Green & Pink Floral Press-On Nails are the perfect way to add a splash of color and fun to your summer style. With their vibrant hues, playful designs, and expert craftsmanship, these press-ons offer an easy and fashionable solution for achieving a stunning manicure. Whether you’re embracing the latest trends or just want to brighten up your look, these press-on nails are a must-have for your summer beauty routine. Embrace the season with a bold, beautiful manicure that’s sure to make a statement.

image
Respect!
Kommentar
Delen
Charlotte Chic Nomad
1 y ·Vertalen

24-Piece Long Coffin Ballerina Press-On Nail Set: Full-Cover French Fake Nails

Elevate your nail game with the 24-piece Long Coffin Ballerina Press-On Nail Set. Designed for effortless style and stunning results, this set features full-cover French fake nails in a sleek long coffin shape. Perfect for anyone looking to achieve a glamorous manicure without the hassle of salon appointments, here’s why this press-on nail set is a must-have for your beauty routine.

Why You'll Love This Press-On Nail Set

1. Sleek Long Coffin Shape

The long coffin (or ballerina) shape is one of the most sought-after nail styles. Its tapered, square-ended design provides a sophisticated and elongated look, making your fingers appear slimmer and more elegant. This shape is perfect for those who love a bold yet refined manicure.

2. Full-Cover French Design

The classic French manicure is given a modern twist with these full-cover press-on nails. The clean, white tips combined with a natural base offer a timeless and chic look that’s perfect for any occasion, from everyday wear to special events.

3. Easy Application

Achieve a professional-quality manicure at home with ease. These press-on nails are designed for quick and simple application. Just peel off the backing and press each nail onto your natural nails. No mess, no fuss—just flawless nails in minutes!

4. Durable and Long-Lasting

Crafted from high-quality materials, these press-on nails are built to last. They offer a strong, secure fit that withstands daily wear and tear, ensuring your manicure remains pristine and beautiful for days.

5. Versatile Style

Whether you’re preparing for a formal event, a night out, or simply want to add a touch of elegance to your everyday look, these nails provide the perfect solution. Their versatile French design complements a wide range of outfits and styles.

6. Complete Set

This set includes 24 press-on nails in various sizes, ensuring a perfect fit for every nail. The variety of sizes allows for customization, so you can find the ideal nail for each finger, ensuring a seamless and natural look.

How to Apply Your Press-On Nails

Prep Your Natural Nails: Start with clean, dry nails. Remove any old polish and ensure your nails are free from oils or residue. For best results, lightly buff your natural nails to create a smooth surface.

Select the Right Size: Choose the press-on nails that best fit your natural nails. The set includes multiple sizes to ensure a perfect fit.

Apply the Press-On Nails: Peel off the backing from each press-on nail and press it firmly onto your natural nail. Hold in place for a few seconds to ensure a secure bond.

Finishing Touches: Once applied, check for any adjustments needed. Your nails are now ready to shine!

Removal: When it’s time for a new look, gently peel off the press-on nails. If necessary, use a nail remover to ensure no residue is left behind.

Final Thoughts

The 24-piece Long Coffin Ballerina Press-On Nail Set offers a perfect blend of style, convenience, and durability. With its elegant coffin shape and classic French design, this set provides an effortless way to achieve a sophisticated and polished manicure at home. Whether for a special occasion or everyday elegance, these press-on nails are designed to enhance your style with minimal effort. Embrace the ease of press-on nails and enjoy a flawless, salon-quality look that’s always ready to impress.

image
Respect!
Kommentar
Delen
Charlotte Chic Nomad
1 y ·Vertalen

Light Pink Short Almond Press-On Nails with White Bows: A Chic Nail Art Revolution

If you're looking for a stylish and effortless way to enhance your nail game, the Light Pink Short Almond Press-On Nails with White Bows are your perfect solution. This 24-piece set combines elegance and convenience, providing a glamorous manicure in minutes. Here’s why these press-on nails are a must-have for your nail art collection.

Why You'll Love These Press-On Nails

1. Elegant Light Pink Shade

The soft, light pink color of these press-on nails offers a timeless and versatile look. This subtle hue is perfect for any occasion, whether you’re going for a casual day out or attending a formal event. It complements various outfits and enhances your overall style with a touch of sophistication.

2. Adorable White Bow Accents

Adding a playful and feminine touch to your manicure, the white bows on each nail bring a charming detail that stands out. These delicate bows are perfect for adding a bit of flair to your look without being overly bold, making them ideal for both everyday wear and special occasions.

3. Short Almond Shape

The short almond shape provides a flattering and practical design that suits a variety of nail beds. This shape is perfect for those who prefer a classic and elegant look without the commitment of longer nails. It offers a chic and streamlined appearance that's easy to maintain.

4. Glossy Full-Cover Finish

Achieve a sleek, polished look with the glossy full-cover finish of these press-on nails. The high-shine surface adds a professional touch to your manicure, giving your nails a salon-quality appearance with minimal effort.

5. Easy Application

One of the biggest advantages of press-on nails is their ease of application. These nails come with an adhesive backing that ensures a secure fit without the need for messy glue. Simply press them onto your natural nails, and you’re good to go. This makes them perfect for busy individuals who want a quick and flawless manicure.

6. Durable and Long-Lasting

Crafted from high-quality materials, these press-on nails are designed to stay in place and look beautiful for days. With proper care, you can enjoy a stunning manicure that withstands daily activities and retains its polished appearance.

7. Versatile Use

Whether you’re a nail art enthusiast or a newcomer to press-ons, this set is versatile and user-friendly. It's suitable for both women and girls, offering a stylish and polished look for any age. Perfect for those who want to quickly change up their look or add a touch of elegance to their everyday style.

How to Apply Your Press-On Nails

Prepare Your Natural Nails: Start with clean, dry nails. Remove any old polish and ensure your nails are free from oils and residue. For best results, lightly buff your natural nails to create a smooth surface.

Select the Right Size: Choose the press-on nails that best fit your natural nails. The set comes with various sizes to ensure a perfect fit for every nail.

Apply the Press-On Nails: Simply peel off the backing from each press-on nail and press it firmly onto your natural nail. Hold for a few seconds to ensure a secure bond. Repeat for all nails.

Finishing Touches: Once applied, check for any gaps or adjustments needed. Your nails are now ready to shine!

Remove with Care: When you're ready to change your look, gently peel off the press-on nails. If necessary, use a nail remover to ensure no residue is left behind.

Final Thoughts

The Light Pink Short Almond Press-On Nails with White Bows offer a perfect blend of elegance, style, and convenience. This 24-piece set is ideal for anyone looking to achieve a polished, chic look effortlessly. With their gorgeous light pink color, adorable white bow accents, and glossy finish, these nails are a fantastic addition to your beauty routine. Embrace the ease and sophistication of press-on nails and enjoy a flawless manicure that enhances your style in minutes.

image
Respect!
Kommentar
Delen
Charlotte Chic Nomad
1 y ·Vertalen

32 Gorgeous Autumn 2022 Nail Trends to Try: Sage Green French Tips and More

Autumn is the perfect time to refresh your nail style with rich, seasonal hues and sophisticated designs. This fall, nail trends are all about embracing warm, earthy tones and unique accents that capture the essence of the season. Among the hottest trends for Autumn 2022, sage green French tips are making a major splash. But that’s not all—there’s a whole array of stunning nail ideas to explore. Here’s a roundup of 32 fabulous autumn nail trends you’ll want to try this season.

1. Sage Green French Tips

Start your fall manicure journey with the chicest twist on the classic French manicure—sage green French tips. This muted, earthy green adds a modern touch to the timeless design, offering a fresh and sophisticated look that’s perfect for autumn.

2. Deep Burgundy

Embrace the richness of autumn with deep burgundy nails. This bold, wine-inspired shade is perfect for adding a touch of elegance and warmth to your look, making it a staple for fall.

3. Mustard Yellow

Add a pop of warmth to your fall style with mustard yellow nails. This vibrant, golden hue pairs beautifully with autumn’s natural palette, offering a cheerful contrast to the cooler tones of the season.

4. Olive Green

Olive green nails are a must-try for a chic, understated look. This versatile color complements a range of autumnal outfits and adds a touch of sophistication to your nail game.

5. Chocolate Brown

For a rich and decadent look, opt for chocolate brown nails. This deep, neutral shade is perfect for fall and pairs well with cozy sweaters and earthy tones.

6. Copper Metallic

Shine bright with copper metallic nails. The reflective, warm tones add a touch of glamour and can be used to create stunning accent nails or full-on metallic manicures.

7. Terracotta

Capture the essence of fall with terracotta nails. This warm, reddish-brown shade is perfect for adding a natural, earthy vibe to your autumn style.

8. Forest Green

Channel the beauty of the autumn forest with forest green nails. This deep, rich color offers a dramatic and sophisticated look that’s perfect for the season.

9. Pumpkin Spice

Get into the fall spirit with pumpkin spice nails. This warm, orange hue is reminiscent of autumn’s favorite flavor and adds a fun, festive touch to your manicure.

10. Matte Finishes

Embrace the trend of matte finishes with your autumn nails. Matte topcoats offer a chic, sophisticated look that pairs beautifully with fall colors and designs.

11. Rust Orange

Opt for rust orange nails to bring a warm, cozy feel to your fall manicure. This rich, earthy hue is perfect for complementing your autumn wardrobe.

12. Plaid Patterns

Add a touch of autumn fashion with plaid nail patterns. Use a mix of fall colors to create plaid designs that evoke the classic checkered patterns of cozy fall scarves and blankets.

13. Marble Effect

Create a sophisticated look with marble effect nails. The swirling, natural patterns in shades of gray, brown, and white evoke the elegance of fall.

14. Gold Accents

Add a touch of luxury to your fall nails with gold accents. Use gold foil or glitter to create elegant designs that catch the light and add a bit of sparkle to your manicure.

15. Berry Tones

Berry-toned nails offer a rich, vibrant option for fall. Shades like raspberry, plum, and cranberry provide a pop of color that’s both bold and elegant.

16. Navy Blue

Deep navy blue nails are a sophisticated choice for fall. This dark, cool shade provides a perfect contrast to autumn’s warm palette and adds a touch of elegance to your style.

17. Creamy Beige

Opt for creamy beige nails for a subtle, sophisticated look. This neutral shade complements a range of fall outfits and provides a classic, polished finish.

18. Dark Teal

Dark teal nails offer a unique twist on traditional fall colors. This deep, greenish-blue hue is perfect for adding a touch of mystery and sophistication to your manicure.

19. Charcoal Gray

For a chic, modern look, try charcoal gray nails. This dark, versatile shade pairs well with both casual and formal fall outfits.

20. Burgundy with Gold Leaf

Combine burgundy with gold leaf accents for a luxurious and festive look. The contrast between the deep red and shimmering gold creates a stunning and eye-catching manicure.

21. Holographic Glitter

Shimmer and shine with holographic glitter nails. The multi-dimensional sparkle adds a touch of magic to your fall style, perfect for special occasions or nights out.

22. Eggplant Purple

Eggplant purple nails offer a rich, deep color that’s perfect for autumn. This sophisticated shade adds a touch of drama and elegance to your fall manicure.

23. Smoky Quartz

Embrace the elegance of smoky quartz with nails in shades of gray and brown. This muted, sophisticated color adds a chic touch to your fall look.

24. Soft Taupe

Opt for soft taupe nails for a subtle and elegant manicure. This neutral shade complements a variety of fall colors and adds a refined touch to your style.

25. Olive and Gold Combo

Combine olive green with gold accents for a chic, luxurious look. The rich green paired with warm gold creates a stunning contrast that’s perfect for autumn.

26. Textured Designs

Add interest to your fall nails with textured designs. Incorporate elements like velvet, suede, or textured polish for a unique and stylish touch.

27. Autumn Leaves

Celebrate the season with autumn leaves nail art. Use fall colors to create delicate leaf designs that capture the beauty of falling foliage.

28. Brick Red

Brick red nails offer a warm, earthy option for fall. This versatile shade pairs well with both casual and formal outfits and adds a cozy touch to your manicure.

29. Black and Gold

For a bold and sophisticated look, try black and gold nails. The dramatic contrast between these two colors creates a striking and elegant manicure.

30. Cinnamon Brown

Opt for cinnamon brown nails for a warm and spicy touch. This rich, reddish-brown hue adds a cozy feel to your fall style.

31. Muted Mauve

Muted mauve nails provide a soft and elegant option for fall. This subtle shade adds a touch of sophistication to your manicure.

32. Copper and Green Combo

Combine copper with green for a striking and unique fall manicure. The warm copper and cool green create a beautiful contrast that’s perfect for the season.

How to Achieve These Fall Nail Trends

Prepare Your Nails: Start with clean, trimmed nails. Remove any old polish and ensure your nails are free from oils and residue.

Choose Your Design: Select the fall nail trend that best suits your style and gather your nail art tools.

Apply the Base Color: Apply your chosen base color evenly and allow it to dry completely before adding any additional details.

Create the Design: Use your nail art tools to create the desired design. Take your time to ensure precision and achieve the perfect look.

Seal with a Topcoat: Finish with a clear topcoat to protect your design and add shine. This step helps to prolong the life of your manicure.

Final Thoughts

Autumn 2022 is all about embracing rich, warm hues and sophisticated designs. From sage green French tips to deep burgundy and gold accents, these 32 fall nail trends offer something for everyone. Whether you prefer classic colors or trendy patterns, these ideas will help you achieve a stylish and seasonal manicure. So, get creative and let your nails reflect the beauty and elegance of autumn!

image
Respect!
Kommentar
Delen
Scarletts Style Journey
1 y ·Vertalen

**40+ Stylish and Budget-Friendly Dorm Room Ideas – DIY with My Guy**

Transforming your dorm room into a stylish and cozy haven doesn’t have to cost a fortune. With a little creativity and some DIY spirit, you can create a space that’s both functional and aesthetically pleasing. Here’s a roundup of 40+ budget-friendly dorm room ideas to help you make the most of your space while staying on budget.

**1. Wall Art Gallery**

Create a chic gallery wall using inexpensive frames and prints. Mix and match art, photos, and inspirational quotes to personalize your space. You can even print your own artwork or use free printables.

**2. DIY Tapestry**

Make a statement with a DIY tapestry. Use a drop cloth or an old sheet and add paint, fabric markers, or tie-dye for a custom look. Hang it with adhesive hooks or a decorative rod.

**3. Floating Shelves**

Maximize wall space with floating shelves. They’re perfect for displaying books, plants, and decorative items. Install them with brackets or adhesive strips for a simple upgrade.

**4. Cozy Throw Pillows**

Add comfort and style with DIY throw pillows. Use fabric scraps or old clothes to sew or glue pillow covers. Personalize them with fun patterns or quotes.

**5. Under-Bed Storage**

Utilize the space under your bed with storage bins or drawers. They’re ideal for keeping your room tidy and organized. Choose clear bins to easily find what you need.

**6. DIY Desk Organizer**

Keep your study area clutter-free with a DIY desk organizer. Use cardboard or recycled containers to create compartments for pens, papers, and other supplies.

**7. Personalized Mug Rack**

Turn a simple mug rack into a statement piece by painting or decorating it. Hang mugs, keys, or even small plants for a functional and stylish display.

**8. String Lights**

Add a cozy ambiance with string lights. Drape them around your bed frame, along the wall, or across your ceiling for a warm and inviting glow.

**9. Photo Wall Collage**

Create a photo wall collage with your favorite memories. Use washi tape or decorative clips to hang photos, postcards, or artwork on a large board or directly on the wall.

**10. DIY Bulletin Board**

Make a custom bulletin board with cork tiles or a wooden frame. Cover it with fabric or decorative paper, and use it to pin up important notes and photos.

**11. Accent Rug**

Add color and texture to your floor with an accent rug. Choose a pattern or color that complements your room’s decor, and look for budget-friendly options at discount stores.

**12. Repurposed Furniture**

Give old furniture a new life with a fresh coat of paint or new hardware. An old dresser or chair can be transformed into a stylish and functional piece.

**13. DIY Bed Canopy**

Create a dreamy bed canopy using sheer fabric or a lightweight curtain. Hang it from the ceiling with adhesive hooks or a decorative rod for a touch of elegance.

**14. Custom Lampshade**

Update your lamp with a custom lampshade. Use fabric or paint to create a design that matches your room’s theme. It’s an easy way to add a personal touch.

**15. DIY Planters**

Bring some greenery into your dorm with DIY planters. Use mason jars, tin cans, or even old cups to create charming containers for your favorite plants.

**16. Personalized Doormat**

Welcome guests with a personalized doormat. Use stencils or paint to add your name or a fun design to a basic doormat for a unique touch.

**17. Desk Lamp Revamp**

Refresh an old desk lamp with a new shade or a coat of paint. Add decorative elements like washi tape or fabric for a custom look.

**18. Decorative Storage Bins**

Keep your room organized with decorative storage bins. Choose patterns and colors that match your decor, and use them to store everything from clothes to school supplies.

**19. DIY Bedside Caddy**

Create a bedside caddy to keep your essentials within reach. Use fabric and a few sewing skills to make pockets for your phone, books, and other items.

**20. Customized Wall Decals**

Add some flair to your walls with custom wall decals. Use removable vinyl or contact paper to create shapes, quotes, or patterns that can be easily changed.

**21. DIY Jewelry Organizer**

Keep your jewelry organized with a DIY organizer. Use a wooden board or picture frame, and add hooks or pegs to display your necklaces, bracelets, and earrings.

**22. Fabric Wall Panels**

Cover large wall areas with fabric panels for a stylish and soft look. Attach the fabric to the wall with adhesive or thumbtacks for a budget-friendly solution.

**23. DIY Vanity Mirror**

Update your mirror with a DIY frame. Use decorative paper, paint, or washi tape to add a custom touch to a plain mirror.

**24. Upcycled Curtain Rods**

Turn old curtain rods into a stylish storage solution. Use them to hang scarves, hats, or even plants, and add a decorative touch to your room.

**25. DIY Chalkboard Wall**

Create a chalkboard wall with chalkboard paint. It’s perfect for jotting down reminders, to-do lists, or even drawing fun designs.

**26. Colorful Bedspread**

Refresh your bed with a colorful bedspread or duvet cover. Look for budget-friendly options at discount stores or thrift shops.

**27. DIY Fabric Wall Art**

Make fabric wall art by framing pieces of patterned fabric. It’s an easy way to add color and texture to your walls without breaking the bank.

**28. Repurposed Shoe Racks**

Use repurposed shoe racks to organize small items or create additional storage space. Hang them on the back of your door or in your closet.

**29. DIY Drawer Pulls**

Update your dresser or desk with custom drawer pulls. Use paint, washi tape, or decorative knobs to give your furniture a fresh look.

**30. Handmade Bunting**

Add a festive touch with handmade bunting. Use fabric or paper triangles, and string them together to hang across your room or above your bed.

**31. Painted Wooden Crates**

Turn wooden crates into stylish storage solutions with a coat of paint. Use them to store books, shoes, or other items in an organized and attractive way.

**32. DIY Magnetic Board**

Create a magnetic board using a metal sheet or old frame. Paint it with a fun color or pattern, and use magnets to display photos, notes, or artwork.

**33. DIY Paper Lanterns**

Brighten up your space with DIY paper lanterns. Use colorful paper or tissue paper to create lanterns that can be hung from the ceiling or placed on your desk.

**34. Personalized Bedside Table**

Make your bedside table unique with DIY decor. Add decorative elements like a lamp, a small plant, or a framed photo to create a personalized space.

**35. DIY Bookends**

Create custom bookends using items like bricks, painted cans, or decorative boxes. They’ll keep your books organized while adding a touch of style.

**36. Customized Pillowcases**

Update your pillowcases with custom designs. Use fabric paint or iron-on transfers to add patterns or quotes that reflect your personality.

**37. DIY Pegboard Organizer**

Use a pegboard to create a versatile organizer for your desk or wall. Hang hooks, baskets, or shelves to keep your items neatly arranged.

**38. Decorative Wall Hooks**

Add decorative wall hooks for both function and style. Use them to hang bags, hats, or scarves, and choose designs that match your room’s decor.

**39. DIY Desk Accessories**

Make your desk area more functional and stylish with DIY accessories. Create pen holders, drawer organizers, or mouse pads with materials you already have.

**40. Seasonal Decor Swaps**

Keep your room fresh and exciting by swapping out seasonal decor. Use budget-friendly items to change the look of your space throughout the year.

These 40+ budget-friendly dorm room ideas will help you create a stylish and cozy space without breaking the bank. With a little creativity and some DIY magic, you can turn your dorm room into a personalized haven that reflects your unique style.

🛏️🎨 #dormroomdecor #budgetfriendlydiy #stylishspaces #diywithmyguy

image
Respect!
Kommentar
Delen
Scarletts Style Journey
1 y ·Vertalen

**Autumn Delight: Quick One-Hour Crafts for DIY Home Decor**

Embrace the cozy charm of autumn with these quick and easy DIY crafts that you can complete in just one hour. Perfect for adding a seasonal touch to your home, these projects are designed to be simple yet stunning, transforming your space into a fall haven with minimal time and effort. Here’s a collection of delightful crafts to make your autumn decor pop:

**1. Pumpkin Centerpieces**

Create charming pumpkin centerpieces using small pumpkins, a bit of paint, and some autumn leaves. Simply paint the pumpkins in your favorite fall colors, then arrange them with fresh or faux leaves in a decorative bowl or basket for an eye-catching centerpiece.

**2. Autumn Wreath**

Craft a festive fall wreath by decorating a foam or wire wreath base with faux leaves, berries, and ribbon. Use hot glue to secure the elements, and hang it on your front door for a warm welcome.

**3. Mason Jar Vases**

Turn mason jars into rustic fall vases by wrapping them with burlap or twine and adding autumn-themed embellishments like mini pumpkins or acorns. Fill them with fresh flowers or dried wheat for a seasonal touch.

**4. Leaf Garland**

Make a beautiful leaf garland by cutting out leaf shapes from colorful construction paper or felt. String them together with twine or ribbon, and drape them across your mantel or window for a festive fall display.

**5. Cozy Candle Holders**

Transform plain glass candle holders into cozy autumn decorations by painting them with fall colors or adding a touch of glitter. Place a scented candle inside to fill your space with the aroma of the season.

**6. Fall-Themed Table Runner**

Create a simple fall-themed table runner using a piece of burlap or fabric. Decorate it with stenciled pumpkins, leaves, or other autumn motifs using fabric paint for an easy way to dress up your dining table.

**7. Pumpkin Garland**

String together mini faux pumpkins to create a festive garland. Hang it across your fireplace, staircase, or mantel to add a touch of autumn charm to your space.

**8. Autumn Leaf Coasters**

Craft custom coasters using fall leaves and a clear acrylic coating. Press the leaves between two pieces of clear contact paper or mod podge them onto cork coasters for a functional and decorative touch.

**9. Rustic Fall Sign**

Create a rustic fall sign using a piece of wood or a canvas. Paint a simple autumn message like “Welcome Fall” or “Harvest Time” and decorate with leaves or small pumpkins for a personalized touch.

**10. DIY Acorn Decorations**

Turn acorns into charming fall decorations by painting them in metallic colors or wrapping them with twine. Use them as table scatter or attach them to a wreath for added texture.

These one-hour crafts are perfect for getting into the autumn spirit and adding a cozy, seasonal touch to your home. With just a few materials and a bit of creativity, you can create beautiful fall decor that will make your space feel warm and inviting.

🍁🎨 #autumncrafts #quickdiy #homedecor #fallprojects #cozyhome

image
Respect!
Kommentar
Delen
Scarletts Style Journey
1 y ·Vertalen

**34 Spooky Halloween Crafts That Are Surprisingly Simple to Create**

Get ready to add a dose of frightful fun to your Halloween celebrations with these 34 easy and eerie crafts! Perfect for crafters of all skill levels, these DIY projects will help you transform your home into a haunted haven with minimal effort. Whether you're decorating for a party or just looking to embrace the Halloween spirit, these crafts are sure to inspire.

**1. Ghostly Garlands**

Create a spooky garland by cutting out ghost shapes from white paper or fabric. String them together with twine or ribbon to hang across your mantel or porch for an instantly eerie effect.

**2. Creepy Candle Holders**

Turn simple glass jars into chilling candle holders. Wrap them in black lace or paint them with glow-in-the-dark paint. Add a battery-operated tea light inside to cast a spooky glow.

**3. Pumpkin Balloons**

Decorate your space with festive pumpkin balloons. Draw jack-o’-lantern faces on orange balloons and scatter them around for a playful touch.

**4. Haunted House Wreath**

Craft a Halloween-themed wreath using a foam ring, fake cobwebs, and mini plastic spiders. Add a spooky sign for a front door that makes a frightening first impression.

**5. Mummy Jars**

Wrap empty jars in white gauze or fabric strips to create mummy jars. Add googly eyes for a fun and creepy effect, perfect for holding treats or candles.

**6. Spider Web Tablecloth**

Transform a plain tablecloth into a spider web with black and white yarn or cotton batting. Top it with plastic spiders for a ghoulishly good table setting.

**7. Bat Silhouettes**

Cut out bat shapes from black construction paper or foam sheets. Stick them to your walls or windows to create a flying bat effect that adds to the Halloween ambiance.

**8. DIY Tombstones**

Craft your own spooky tombstones using foam board or cardboard. Paint them gray and write eerie messages or names to set up a mini graveyard in your yard.

**9. Ghost Lanterns**

Make ghostly lanterns by decorating empty milk jugs or jars with ghostly faces. Place a battery-operated light inside for an eerie glow that illuminates the night.

**10. Scarecrow Stickers**

Use scarecrow-themed stickers to decorate your front door or windows. Pair them with hay bales for a charming Halloween display.

**11. Witch’s Broomstick**

Create a witch’s broomstick by bundling sticks or dowels together with twine. Add a spooky sign or decoration to the handle for a whimsical touch.

**12. Spooky String Lights**

Add Halloween flair to your string lights by attaching themed cutouts like bats or ghosts. Use clips or tape to secure them for a festive and fun display.

**13. Ghoulish Planters**

Turn small pumpkins into planters by cutting off the tops and scooping out the insides. Fill them with autumn flowers or succulents for a seasonal touch.

**14. Floating Ghosts**

Create floating ghosts by hanging white balloons or fabric in a ghostly shape. Use string or clear fishing line to suspend them in your yard or porch area.

**15. Spooky Window Clings**

Apply Halloween-themed window clings to your windows for a quick and easy spooky touch. They’re removable and repositionable, making them perfect for seasonal decorating.

**16. Sinister Silhouettes**

Cut out silhouettes of witches, ghosts, or skeletons from black poster board. Tape them to windows or walls to create haunting shadows.

**17. Pumpkin Centerpieces**

Make festive centerpieces by decorating small pumpkins with paint, glitter, or stickers. Arrange them in bowls or baskets for a charming display.

**18. Spider Web Wreath**

Craft a spider web wreath by wrapping a foam ring in black yarn. Add plastic spiders and a spooky bow to complete the look.

**19. Creepy Cups**

Decorate plastic cups with Halloween-themed stickers or paint to create creepy drinking cups for your party.

**20. Haunted Lanterns**

Turn old jars into haunted lanterns by painting them with spooky designs and adding battery-operated candles inside.

**21. Mummy Wrapping**

Wrap empty boxes or containers in white gauze to create mummies. Add eyes or spooky faces for a fun and simple decoration.

**22. Eerie Shadows**

Use black construction paper to cut out Halloween shapes. Place them against a light source to cast eerie shadows on your walls.

**23. Monster Wreath**

Make a monster-themed wreath by adding googly eyes, colorful yarn, and foam shapes to a foam ring. Hang it on your door for a playful welcome.

**24. Ghost Balloons**

Create ghost balloons by drawing spooky faces on white balloons. Inflate them and hang them around your home for a fun and festive touch.

**25. Pumpkin Jars**

Decorate jars with pumpkin faces using orange paint and black markers. Use them to store Halloween candy or as spooky lanterns.

**26. Witch Hats**

Craft witch hats using black construction paper. Decorate them with glitter or spooky embellishments and place them around your home.

**27. Spooky Centerpieces**

Create centerpieces for your table by combining Halloween-themed items like plastic spiders, faux cobwebs, and small pumpkins in a decorative bowl.

**28. Scary Signs**

Make your own Halloween signs using foam board or cardboard. Paint them with spooky messages and place them around your yard or porch.

**29. Monster Eyes**

Create monster eyes using plastic cups, paint, and googly eyes. Place them around your yard to create a creepy effect.

**30. Ghost Lanterns**

Decorate white lanterns with spooky ghost faces using markers or paint. Add LED candles inside for a ghostly glow.

**31. Spooky Garland**

Craft a garland by stringing together Halloween-themed shapes cut from felt or paper. Hang it across your mantel or along your porch.

**32. Mummy Pumpkins**

Wrap pumpkins in white gauze or strips of fabric to create mummies. Add googly eyes for a fun and spooky decoration.

**33. Haunted Mirror**

Turn an old mirror into a haunted decoration by adding spooky decals or paint. Use it to create a chilling focal point in your home.

**34. Pumpkin Stencils**

Use pumpkin stencils to carve or paint festive designs on pumpkins. Place them around your home for a classic Halloween touch.

These 34 easy and spooky Halloween crafts are perfect for adding festive flair to your home without breaking the bank. With just a few materials and a little creativity, you can create a hauntingly beautiful Halloween display that will delight guests and trick-or-treaters alike.

🎃👻 #halloweencrafts #easydiy #spookydecor #craftyhalloween #simplecrafts

image
Respect!
Kommentar
Delen
Showing 7511 out of 10971
  • 7507
  • 7508
  • 7509
  • 7510
  • 7511
  • 7512
  • 7513
  • 7514
  • 7515
  • 7516
  • 7517
  • 7518
  • 7519
  • 7520
  • 7521
  • 7522
  • 7523
  • 7524
  • 7525
  • 7526

Aanbieding bewerken

Voeg tier toe


Selecteer een afbeelding
Verwijder je tier
Weet je zeker dat je deze tier wilt verwijderen?

beoordelingen

Om uw inhoud en berichten te verkopen, begint u met het maken van een paar pakketten. Inkomsten genereren

Betaal per portemonnee

Betalingswaarschuwing

Je staat op het punt om de items te kopen, wil je doorgaan?

Vraag een terugbetaling