Good and Bad People Good and Bad People
    #socialmedia #usa #uk #contentwriter #ai
    avancerad sökning
  • Logga in
  • Registrera

  • Nattläge
  • © 2025 Good and Bad People
    Handla om • Katalog • Kontakta oss • Utvecklare • Integritetspolicy • Villkor • Återbetalning • Referral Terms • Acceptable Use Policy • Community Guidelines • Write for Us

    Välj Språk

  • Arabic
  • Bengali
  • Chinese
  • Croatian
  • Danish
  • Dutch
  • English
  • Filipino
  • French
  • German
  • Hebrew
  • Hindi
  • Indonesian
  • Italian
  • Japanese
  • Korean
  • Persian
  • Portuguese
  • Russian
  • Spanish
  • Swedish
  • Turkish
  • Urdu
  • Vietnamese

Kolla på

Kolla på Rullar

evenemang

Bläddra bland evenemang Mina händelser

Blogg

Bläddra bland artiklar

Marknadsföra

Senaste produkterna

Sidor

Mina sidor Gillade sidor

Mer

Utforska populära inlägg Jobb Erbjudanden Finansiering
Rullar Kolla på evenemang Marknadsföra Blogg Mina sidor Se allt

Upptäck inlägg

Posts

Användare

Sidor

Grupp

Blogg

Marknadsföra

evenemang

Jobb

Finansiering

Ashley Aesthetic Avenue
1 Y ·Översätt

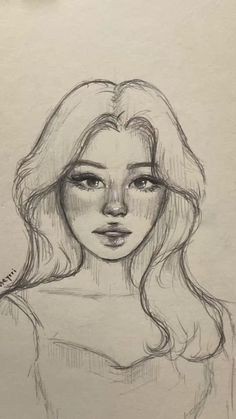
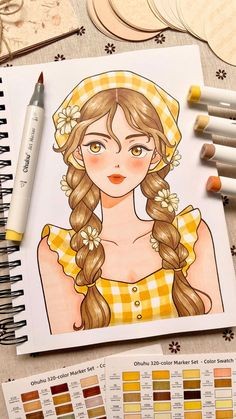
How to Draw a Beautiful Girl: A Step-by-Step Guide

Drawing a beautiful girl involves capturing both aesthetic qualities and personality. Whether you're aiming for a realistic portrait or a stylized character, here’s a comprehensive guide to help you create a stunning and expressive drawing.

Step 1: Sketching the Basic Shape

Outline the Head and Body

Head Shape: Start with an oval or a slightly rounded shape for the head. Place guidelines to help with facial features; a vertical line down the center and a horizontal line halfway down the oval.

Body Structure: Sketch a simple, proportional figure for the body. Use basic shapes like circles and ovals to represent the torso, arms, and legs.

Add Guidelines

Facial Features: Draw horizontal lines where the eyes, nose, and mouth will go. The eyes are typically located halfway down the face, the nose a little below the center line, and the mouth between the nose and chin.

Step 2: Drawing Facial Features

Eyes

Shape and Placement: Draw the eyes along the horizontal guideline. Use almond or round shapes, depending on your style. Ensure they are symmetrical and well-spaced.

Details: Add the irises, pupils, and highlights. Include eyelashes and eyebrows to enhance expression and beauty.

Nose and Mouth

Nose: Sketch a small, elegant nose that suits the overall style of your drawing. It can be a simple curve or a more detailed shape.

Mouth: Draw a gentle smile or a neutral expression, depending on the desired look. Ensure the lips are proportionate and add subtle curves for realism.

Hair

Style and Flow: Outline the hairstyle with fluid lines, considering how the hair frames the face. Draw the major sections and add texture with wavy or straight lines.

Details: Add volume and flow by varying line thickness and direction. Include highlights and shadows to give the hair dimension.

Step 3: Refining the Face

Facial Structure

Cheekbones and Jawline: Define the cheekbones and jawline to add shape to the face. Use soft, curved lines to create a natural look.

Ears: If visible, draw the ears in proportion to the head, aligned with the eyes.

Expression

Emotion: Adjust the features to reflect the desired expression. Subtle changes in the eyebrows and mouth can convey different emotions.

Step 4: Drawing the Body

Outline the Body

Proportions: Refine the body shape, ensuring proportions are accurate. Draw the neck, shoulders, and limbs with smooth, flowing lines.

Clothing: Add details of the clothing, considering the style and fabric. Sketch in folds and creases for a realistic appearance.

Pose and Posture

Dynamic Pose: Position the figure in a natural and graceful pose. Ensure the posture complements the overall beauty of the drawing.

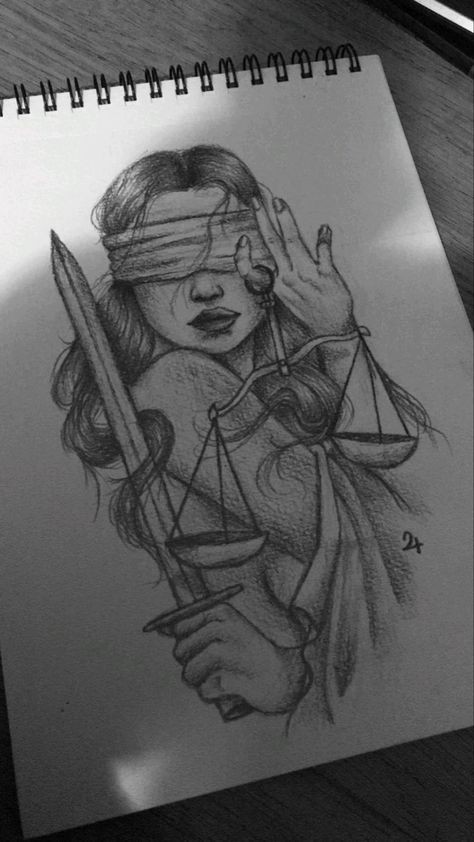
Step 5: Adding Details and Textures

Clothing Details

Patterns and Accessories: Include any patterns, accessories, or textures in the clothing. Add subtle details like buttons, lace, or jewelry to enhance the look.

Skin Texture

Shading: Use gentle shading to add depth and dimension to the skin. Focus on areas where light would naturally hit, such as the cheekbones and forehead.

Background Elements

Simple Background: Add a simple background that complements the figure without overshadowing it. A soft gradient or a few abstract shapes can work well.

Step 6: Final Touches

Outlining and Cleanup

Clean Lines: Go over your drawing with a fine liner or darker pencil to refine the outlines. Erase any unnecessary guidelines and smudges.

Highlights and Shadows

Enhance Contrast: Add final highlights and shadows to bring out the beauty of the drawing. Focus on areas like the eyes, hair, and clothing to create a polished look.

Review and Adjust

Final Review: Step back and review your drawing. Make any necessary adjustments to proportions, details, or shading to perfect the overall appearance.

Conclusion

Drawing a beautiful girl is about blending technical skill with artistic expression. By focusing on detailed features, graceful lines, and thoughtful shading, you can create a drawing that captures both beauty and personality. Whether you choose a realistic or stylized approach, the key is to practice and refine your technique to achieve the desired result. Enjoy the creative process and let your artistic vision shine! #drawing

image
Tycka om
Kommentar
Dela med sig
Ashley Aesthetic Avenue
1 Y ·Översätt

The Avengers: A Comprehensive Guide to Marvel's Iconic Superhero Team

The Avengers, a cornerstone of Marvel Comics and the Marvel Cinematic Universe (MCU), are a legendary team of superheroes assembled to protect Earth from formidable threats. Here’s a deep dive into the origins, evolution, and impact of this iconic team.

Origins of the Avengers

1. Comic Book Debut

First Appearance: The Avengers made their debut in Avengers #1, published by Marvel Comics in September 1963.

Creators: Created by writer Stan Lee and artist Jack Kirby, the Avengers were conceived as a team of superheroes brought together to combat threats that no single hero could handle alone.

2. Formation and Early Members

Initial Line-Up: The original team consisted of Iron Man, Thor, Hulk, Ant-Man (Hank Pym), and the Wasp. They were brought together to face Loki, who was plotting to conquer Earth.

Key Addition: Captain America, who was thawed from suspended animation, soon joined the team, becoming one of its central figures.

Evolution of the Avengers

1. Line-Up Changes

Dynamic Membership: Over the decades, the Avengers' roster has seen numerous changes. Members have included iconic characters such as Black Widow, Hawkeye, Spider-Man, and Black Panther, as well as newer heroes like Ms. Marvel and the Vision.

Roster Shifts: The team’s membership often reflects the changing dynamics of the Marvel Universe, with various heroes joining and leaving based on storyline developments.

2. Major Story Arcs

Infinity Gauntlet: One of the most significant storylines involving the Avengers is the "Infinity Gauntlet" saga, where the team battles the powerful cosmic entity Thanos, who wields the Infinity Gauntlet.

Secret Wars: Another notable arc is "Secret Wars," where the Avengers are transported to a distant planet and must confront various villains in a battle for survival.

3. Influence on Marvel Cinematic Universe (MCU)

Film Debut: The Avengers were brought to the big screen with The Avengers (2012), directed by Joss Whedon. This film marked the culmination of Marvel Studios' Phase One and introduced audiences to the concept of a shared cinematic universe.

Success: The film was a critical and commercial success, leading to sequels like Avengers: Age of Ultron (2015), Avengers: Infinity War (2018), and Avengers: Endgame (2019). The latter two films, in particular, were monumental in concluding the Infinity Saga and shaping the future of the MCU.

Key Members of the Avengers

1. Iron Man (Tony Stark)

Portrayed By: Robert Downey Jr.

Role: A genius billionaire with a high-tech suit of armor, Tony Stark is known for his leadership, intelligence, and philanthropy.

2. Captain America (Steve Rogers)

Portrayed By: Chris Evans

Role: A super-soldier with a nearly indestructible shield, Captain America is the moral compass of the team and a symbol of bravery and honor.

3. Thor

Portrayed By: Chris Hemsworth

Role: The Norse God of Thunder, Thor wields the enchanted hammer Mjölnir and possesses immense strength and control over lightning.

4. Black Widow (Natasha Romanoff)

Portrayed By: Scarlett Johansson

Role: A skilled spy and combatant, Black Widow brings her expertise in espionage and hand-to-hand combat to the team.

5. Hawkeye (Clint Barton)

Portrayed By: Jeremy Renner

Role: An expert archer with exceptional marksmanship, Hawkeye is known for his tactical skills and unwavering loyalty.

6. The Hulk (Bruce Banner)

Portrayed By: Edward Norton (2008), Mark Ruffalo (2012–present)

Role: A brilliant scientist with a powerful alter ego, the Hulk, whose immense strength and rage make him a formidable ally.

7. Vision

Portrayed By: Paul Bettany

Role: An android with synthetic vibranium body and the Mind Stone embedded in his forehead, Vision is both an advanced AI and a powerful superhero.

8. Spider-Man (Peter Parker)

Portrayed By: Tom Holland

Role: A young hero with spider-like abilities and a sharp wit, Spider-Man adds a youthful energy and agility to the team.

9. Black Panther (T’Challa)

Portrayed By: Chadwick Boseman

Role: The king of Wakanda with enhanced strength, speed, and agility, Black Panther is a strategic leader and protector of his nation.

Impact and Legacy

1. Cultural Impact

Influence: The Avengers have become cultural icons, representing ideals of teamwork, courage, and resilience. Their stories resonate with audiences across the globe and have influenced various media, including television, video games, and merchandise.

Representation: The diverse roster of characters has allowed for broader representation and inclusion in superhero narratives, reflecting different backgrounds, cultures, and perspectives.

2. Box Office Success

Financial Milestones: The Avengers films have achieved significant commercial success, with Avengers: Endgame becoming one of the highest-grossing films of all time. The financial success has solidified the Avengers’ place in popular culture and continues to drive interest in superhero films.

3. Continued Evolution

Future Projects: The Avengers will continue to evolve with future Marvel projects. New heroes and storylines are introduced in phases of the MCU, promising exciting developments and new dynamics for the team.

Conclusion

The Avengers are more than just a team of superheroes—they are a symbol of unity, strength, and resilience. Their journey from comic book pages to blockbuster films has left a lasting impact on pop culture and continues to inspire fans around the world. As the Marvel Universe expands, the Avengers will remain a central and beloved part of the superhero legacy.


#drawing

image
Tycka om
Kommentar
Dela med sig
Chloe Cozy Corners
Chloe Cozy Corners
1 Y ·Översätt

**Monday Makeover: Stylish Outfits to Start Your Week Right**

Mondays can set the tone for the entire week, so why not start off on the right foot with a fabulous outfit? Whether you're heading to the office, meeting friends for brunch, or running errands, a stylish and well-thought-out outfit can boost your confidence and kickstart your week with positive energy. Here are some chic and versatile outfit ideas to ensure you look and feel your best on Mondays.

### 1. **Power Dressing for the Office**

Start your week with a commanding presence in the office by opting for a power outfit. A tailored blazer paired with high-waisted trousers or a pencil skirt creates a sophisticated and professional look. Choose classic colors like navy, grey, or black, and accessorize with a sleek pair of pumps and a structured handbag. This ensemble will have you feeling confident and ready to tackle any challenges the week may bring.

### 2. **Effortless Chic for Casual Meetings**

If your Monday involves casual meetings or lunch with friends, go for an effortlessly chic outfit. A stylish pair of jeans combined with a flowy blouse or a chic sweater creates a relaxed yet fashionable look. Add a pair of ankle boots or loafers and accessorize with minimal jewelry for a look that’s both comfortable and on-trend. This outfit strikes the perfect balance between casual and polished.

### 3. **Cozy Comfort for a Relaxed Start**

For a more laid-back Monday, prioritize comfort without sacrificing style. Opt for a cozy knit sweater paired with leggings or joggers. Layer with a lightweight puffer vest or cardigan for added warmth and style. Complete the look with trendy sneakers or cozy slippers. This outfit is perfect for a day spent working from home or running errands around town.

### 4. **Trendy Layers for a Stylish Look**

Layering is key to a stylish Monday look, especially as the weather can be unpredictable. Combine a sleek turtleneck with a chic blazer or a denim jacket, and pair it with tailored trousers or a midi skirt. Finish with knee-high boots or loafers and a statement handbag. This layered approach allows you to mix and match pieces to create a fashionable outfit that can easily transition from day to night.

### 5. **Bold Prints and Patterns**

Start your week with a pop of personality by incorporating bold prints and patterns into your outfit. A floral dress or a geometric-patterned blouse paired with neutral trousers or a skirt makes a statement while remaining chic and polished. Accessorize with complementary jewelry and a pair of heeled boots or flats to complete your look. Bold prints are a great way to add excitement and vibrancy to your Monday ensemble.

### 6. **Sophisticated Monochrome**

A monochrome outfit creates a sleek and modern look that's perfect for making a strong impression. Choose a single color and build your outfit around it, incorporating different shades and textures. For example, an all-white outfit with varying fabric textures can be both elegant and fresh. Monochrome looks are versatile and can be dressed up or down depending on your day’s agenda.

### 7. **Smart-Casual Fusion**

Blend smart and casual elements for a versatile Monday outfit that can take you from a business meeting to a casual outing. Pair a crisp button-down shirt with tailored chinos or a high-waisted skirt. Add a blazer or cardigan for a polished touch, and finish with loafers or sleek sneakers. This fusion of smart and casual pieces ensures you're prepared for whatever your Monday throws your way.

### 8. **Chic Dress for Effortless Style**

A well-chosen dress can be a game-changer for your Monday look. Opt for a midi or wrap dress in a flattering cut and vibrant color or print. Pair with heeled boots or ballet flats and a structured bag for a complete and stylish outfit. Dresses are perfect for making a statement with minimal effort, making your Monday morning routine quick and easy.

### 9. **Sporty Elegance**

Combine sporty elements with elegant touches for a modern and stylish Monday outfit. A sleek tracksuit set or jogger pants paired with a stylish bomber jacket and high-top sneakers creates a chic yet comfortable look. Add a crossbody bag and simple accessories to complete the ensemble. This sporty-elegance fusion is perfect for a day filled with activities or meetings.

### 10. **Playful Accessories**

Elevate any outfit with playful accessories to add a personal touch to your Monday look. Consider statement earrings, a bold scarf, or a trendy hat to bring your outfit to life. Accessories are a great way to express your style and make even the simplest outfits stand out. Experiment with different pieces to find what complements your look and enhances your confidence.

### Conclusion

Starting your week off with style can have a positive impact on your mood and productivity. By choosing outfits that make you feel confident and comfortable, you’ll be ready to tackle Monday with flair. From power dressing and trendy layers to cozy comfort and playful accessories, these stylish ideas will help you create a wardrobe that sets the tone for a successful week ahead. Embrace these Monday makeover ideas and let your outfit reflect your unique style and readiness for the week.

image
Tycka om
Kommentar
Dela med sig
Hoodrich Official
Hoodrich Official
1 Y ·Översätt

Hoodrich officials - Hoodrich Officials - United Kingdom
Discover Hoodrich – your destination for premium streetwear From tracksuits to hoodies, find the perfect outfit to elevate your style Sale live At UK

image
Tycka om
Kommentar
Dela med sig
Ashley Aesthetic Avenue
1 Y ·Översätt

How to Draw a Cute Yellow-Themed Girl: A Step-by-Step Guide to Creating a Sunny Character

Drawing a cute girl with a yellow theme is a fun and creative project that can bring a sense of joy and warmth to your artwork. Whether you're a beginner or an experienced artist, this guide will walk you through the process of designing a charming character, from concept to final touches. Let's dive into the steps and tips for creating your own "Sunny Delight."

Step 1: Concept and Character Design

Before you begin drawing, take some time to develop your character’s concept. Think about her personality, style, and the mood you want to convey. In this case, we're focusing on a cheerful and sunny theme, so your character should reflect positivity and warmth.

Personality: Imagine your character as a bright and bubbly girl who loves sunny days, flowers, and all things yellow. She might be the type who enjoys picnics in the park, playing with friends, or exploring nature.

Appearance: To complement her sunny personality, give her features that radiate cuteness and charm. Consider big, expressive eyes that sparkle with joy, a small button nose, and a gentle smile. Her hair could be styled in loose waves, pigtails, or even short and curly, with a yellow ribbon or bow as a playful accessory.

Step 2: Outlining the Basic Shape

Start by sketching the basic shapes that will form your character. Use light lines so you can easily make adjustments as you go.

Head and Face: Begin with an oval or round shape for the head. Position the head slightly tilted for a more dynamic and lively pose. Add guidelines for the eyes, nose, and mouth. Place the eyes slightly below the horizontal center of the head, with enough space between them to add that cute, wide-eyed look.

Body: For a cute and youthful appearance, draw the body with simple, rounded shapes. A smaller, slightly chubby body often adds to the cuteness. Keep the limbs short and rounded, with the hands and feet relatively small. Sketch her in a playful pose, such as skipping or holding a sunflower.

Step 3: Adding Details to the Face

The face is the focal point of your character, so take your time to add details that will bring her personality to life.

Eyes: Draw large, round eyes with thick eyelashes to emphasize their size and expressiveness. Add highlights to the eyes to create a sparkling effect. You can experiment with different eye shapes and expressions, but a cheerful, wide-eyed look is perfect for this theme.

Nose and Mouth: Keep the nose small and simple, just a tiny curve or dot. For the mouth, a small, gentle smile works well to convey happiness. You can add a little blush to her cheeks for an extra touch of cuteness.

Hair: Choose a hairstyle that suits her personality. Whether it's long and wavy, short and curly, or styled in pigtails, make sure it complements her overall look. Add a yellow ribbon, bow, or flower to tie in the yellow theme.

Step 4: Designing the Outfit

Her outfit should be playful, cute, and full of yellow. Here are some ideas to consider:

Dress: A yellow sundress with ruffles, a floral pattern, or polka dots is a great choice. The dress should be simple yet charming, with a flowing or slightly puffed skirt to enhance the playful vibe.

Accessories: Add matching yellow shoes or sandals. You can also include a small yellow handbag or a flower crown made of daisies to accentuate the sunny theme. If you want to add a bit more detail, consider a yellow cardigan or a pair of cute socks.

Patterns and Textures: While the primary color is yellow, you can incorporate other complementary colors, such as white, light orange, or pastel pink. Use these colors sparingly to add depth to her outfit. For instance, a white collar or orange trim on her dress can make the design more interesting.

Step 5: Posing and Composition

Now that you have the basic design and details, it's time to finalize her pose and composition. The pose should reflect her cheerful and carefree personality.

Pose: A dynamic pose, such as skipping, twirling, or holding a sunflower, can make the character more lively. Ensure the pose is natural and fluid, avoiding stiff or overly rigid lines. If she's holding an object, like a sunflower, make sure her hands and fingers are positioned realistically.

Background: A simple background can enhance the overall feel without taking attention away from the character. Consider a sunny, clear sky with a few fluffy clouds, or perhaps a field of flowers. The background should be light and airy, using soft colors that complement the yellow theme.

Step 6: Coloring and Shading

Coloring is where your character truly comes to life. Since yellow is the dominant color, you'll want to use different shades and tones to add depth and dimension.

Base Colors: Start with a base layer of color, filling in the main areas such as her dress, hair ribbon, and shoes. Use a bright, cheerful yellow for her outfit, and a slightly softer yellow for accessories. For her skin, choose a light, natural tone that contrasts well with the yellow.

Shading: Add shading to give the drawing a sense of volume and depth. Use a slightly darker yellow or light orange for the shaded areas of her dress and accessories. For her skin, use a soft, warm brown or peach tone to create gentle shadows on her face and limbs.

Highlights: To emphasize the sunny theme, add highlights to her hair, eyes, and outfit. Use a bright white or light yellow for the highlights, placing them on areas where light would naturally hit, such as the top of her head, the folds of her dress, and the tips of her shoes.

Step 7: Final Touches

After coloring and shading, it's time for the final touches. These small details can make a big difference in the overall appearance of your drawing.

Outlining: Go over the outlines of your character with a darker color or black to make her stand out. Use thin lines for delicate areas like her facial features and thicker lines for the edges of her dress and accessories.

Texture and Patterns: Add any additional textures or patterns to her outfit, such as the texture of fabric or small details like embroidery. These can be subtle but will add realism and interest to the design.

Background Enhancements: If you've added a background, consider adding a few more details, like floating petals, a gentle breeze, or soft rays of sunlight. These elements can enhance the atmosphere without overpowering the main character.

Conclusion: Bringing Your Yellow-Themed Girl to Life

Drawing a cute yellow-themed girl is not just about following steps but also about infusing your own creativity and personality into the character. Whether she becomes the centerpiece of a larger work or a standalone illustration, your "Sunny Delight" will radiate warmth and joy. Remember, the key is to have fun and let your imagination guide you. With practice, your drawings will not only improve in technique but also in the depth of expression and storytelling they convey. So, grab your pencils and colors, and start bringing your bright and cheerful character to life!

#drawing

image
Tycka om
Kommentar
Dela med sig
Marigold Marvelous Dreams
1 Y ·Översätt

Get Glam with 24 Pcs Sparkly Wine Red French Press-On Nails – Short Almond Shape for Stunning Nail Art

If you're seeking a way to instantly elevate your nail style without the hassle of a salon appointment, the 24 Pcs Sparkly Wine Red French Press-On Nails might just be your new favorite beauty secret. Combining elegance with ease, these press-on nails offer a sophisticated, glamorous look in minutes. Here's everything you need to know about this stunning nail set and why it's a must-have for your beauty collection.

Why Press-On Nails?

Press-on nails have revolutionized the nail care industry by providing an easy, affordable, and stylish alternative to traditional manicures. They offer a quick solution for achieving a salon-quality look at home, making them perfect for those who want beautiful nails without the time and cost associated with frequent salon visits.

Advantages of Press-On Nails:

Quick and Convenient: Press-on nails can be applied in minutes, offering a professional finish without the need for lengthy salon appointments.

Cost-Effective: They provide a high-quality manicure at a fraction of the cost of salon services, making them a budget-friendly option for nail enthusiasts.

Versatility: With numerous designs, shapes, and finishes available, you can easily find press-on nails that suit any occasion or personal style.

Why Choose Sparkly Wine Red French Press-On Nails?

The 24 Pcs Sparkly Wine Red French Press-On Nails stand out for several reasons:

Elegant French Design: The French manicure is a classic style that never goes out of fashion. The sparkly wine red variation adds a modern twist to this timeless design, offering a blend of sophistication and sparkle. The combination of the rich wine red base with a subtle French tip creates a polished and elegant look that's perfect for any occasion.

Sparkly Finish: The glittery wine red hue is ideal for those who love a bit of bling. The sparkle catches the light beautifully, adding a glamorous touch to your nails. This eye-catching finish is perfect for making a statement at parties, special events, or simply adding some flair to your everyday style.

Short Almond Shape: The short almond shape is a practical and stylish choice. It provides a refined look without being too long or cumbersome. This shape is flattering for various hand types and offers a chic, modern aesthetic that complements both casual and formal outfits. It’s also a great choice for those who prefer a shorter nail length but still want to maintain a polished appearance.

How to Apply Your Press-On Nails

Applying press-on nails is a simple process that requires minimal effort. Follow these steps to achieve a flawless manicure with your sparkly wine red French press-ons:

Prepare Your Natural Nails: Start by cleaning your natural nails thoroughly. Remove any old polish and ensure your nails are free from oils and residue. Trim and file your nails to create a smooth, even surface. Pushing back your cuticles will also help create a clean base for the press-ons.

Select the Right Size: Choose the press-on nails that best fit your natural nails. Most sets come with a variety of sizes to ensure a perfect fit for each finger. Proper sizing is crucial for achieving a natural look and ensuring the press-ons adhere well.

Apply Adhesive: Use the adhesive provided in the set, or a high-quality nail glue if not included. Apply a thin layer of glue to both your natural nails and the back of each press-on nail. Be careful not to use too much glue, as excess can cause spillage and affect adhesion.

Press and Hold: Align each press-on nail with your natural nail, then press it down firmly. Hold it in place for about 10-15 seconds to ensure a strong bond. Repeat this process for all fingers.

Finishing Touches: After all the press-ons are applied, use a nail file to smooth out any rough edges or adjust the shape if needed. This step helps ensure that your nails look perfectly polished and natural.

Why You'll Love These Nails

Effortless Glamour: The combination of the French manicure design with the sparkly wine red finish offers an effortless way to add glamour to your look. These press-ons are perfect for those who want to make a stylish statement without spending hours at a salon.

Durability: With proper application and care, these press-on nails can last for several days to a week. They are designed to withstand everyday activities while maintaining their stunning appearance.

Versatility: The chic French design and sparkling finish make these nails suitable for a wide range of occasions. Whether you're heading to a formal event, a casual outing, or just want to add a touch of elegance to your daily routine, these press-ons have you covered.

Care and Maintenance

To ensure that your press-on nails stay looking fabulous and to protect your natural nails, follow these care tips:

Avoid Prolonged Water Exposure: Minimize exposure to water to prevent weakening the adhesive. When doing activities that involve water, such as washing dishes, consider wearing gloves.

Handle with Care: Use your nails gently to avoid any damage. Avoid using them as tools to prevent breakage or loosening.

Proper Removal: When it's time to remove your press-on nails, soak them in warm, soapy water to loosen the glue. Gently peel off the nails without using excessive force. If needed, use a nail buffer to remove any residual adhesive.

Conclusion

The 24 Pcs Sparkly Wine Red French Press-On Nails are the perfect choice for anyone looking to add a touch of sophistication and glamour to their nail routine. With their elegant French design, dazzling sparkly finish, and chic short almond shape, these press-on nails offer a stylish, easy-to-achieve manicure that’s perfect for any occasion.

So why wait? Transform your nails with these stunning press-ons and enjoy a flawless, glamorous look that’s sure to turn heads!

#pressonnails #frenchmanicure #sparklynails #nailart #glamnails #naildesigns #beautytrends #fashionnails #manicuremagic #nailinspo

image
Tycka om
Kommentar
Dela med sig
Hoodrich Official
Hoodrich Official  ändrade sin profilbild
1 Y

image
Tycka om
Kommentar
Dela med sig
Hoodrich Official
Hoodrich Official
1 Y

image
Tycka om
Kommentar
Dela med sig
Marigold Marvelous Dreams
1 Y ·Översätt

Get Stunning with 24 Pcs Glossy Gradient Almond Press-On Nails – Pink & White with Rhinestones

In the world of nail art, press-on nails have become a game-changer for those seeking salon-quality results with minimal effort. One design that’s currently making waves is the 24 Pcs Glossy Gradient Almond Press-On Nails in Pink & White with Rhinestones. This stunning set combines elegance and sparkle, offering a chic and sophisticated look that's perfect for any occasion. Here’s everything you need to know about these fabulous press-on nails and why they should be your next beauty essential.

Why Press-On Nails?

Press-on nails have revolutionized the nail care industry by providing an easy, affordable, and time-efficient alternative to traditional manicures. They’re perfect for anyone who loves to change up their look frequently or simply prefers the convenience of at-home beauty treatments.

Benefits of Press-On Nails:

Instant Glamour: Achieve a flawless, professional-looking manicure in minutes without the need for a salon appointment.

Affordability: Enjoy salon-quality nails at a fraction of the cost. Press-on nails are a budget-friendly option that doesn’t compromise on style.

Variety: With countless designs, shapes, and finishes available, you can easily find press-on nails that match any style or occasion.

Why Choose the Glossy Gradient Almond Press-On Nails?

The 24 Pcs Glossy Gradient Almond Press-On Nails in Pink & White with Rhinestones are a standout choice for several reasons:

Glossy Gradient Finish: This design features a beautiful gradient effect, blending soft pink into pristine white. The glossy finish adds a sophisticated sheen, making your nails look like they’ve been freshly manicured. The gradient effect creates a smooth transition between colors, adding depth and visual interest to your nails.

Almond Shape: Almond-shaped nails are a timeless choice known for their elegance and elongating effect. This shape complements various hand types and makes your fingers appear slimmer and more refined. The almond shape is also versatile, suitable for both everyday wear and special occasions.

Rhinestone Accents: The addition of rhinestones provides a touch of sparkle and luxury. These eye-catching details catch the light and add a glam factor to your look. The rhinestones are strategically placed to enhance the gradient design without overwhelming it, ensuring a balanced and polished appearance.

Application Tips for Press-On Nails

Applying press-on nails is a straightforward process, making it easy to achieve a professional look at home. Here’s a step-by-step guide to applying your glossy gradient almond press-on nails:

Prepare Your Natural Nails: Begin by cleaning your nails thoroughly. Remove any old polish and ensure your nails are dry and free of oils. Trim and file your natural nails to a suitable length and shape. Push back your cuticles to create a smooth surface.

Choose the Right Size: Select the press-on nails that best fit your natural nail size. Most sets come with various sizes to ensure a perfect fit for each finger.

Apply Adhesive: Use the provided nail glue or adhesive tabs. Apply a thin layer of glue to your natural nails and to the back of each press-on nail. Be careful not to use too much glue, as it can cause excess spillage and affect adhesion.

Press and Hold: Align the press-on nail with your natural nail and press it down firmly. Hold it in place for about 10-15 seconds to ensure a strong bond. Repeat this process for each nail.

Final Touches: Once all the press-on nails are applied, you can use a nail file to smooth out any rough edges or adjust the shape if necessary. This step ensures that the nails look perfectly finished and seamless.

Why You'll Love These Nails

Effortless Elegance: The glossy gradient design with rhinestones adds an elegant touch to any look. Whether you’re dressing up for a special event or simply want to add a bit of sparkle to your everyday style, these nails offer a sophisticated and glamorous finish.

Long-Lasting Wear: With proper application and care, press-on nails can last for several days to a week. They’re designed to withstand daily activities while maintaining their stunning appearance.

Versatility: The combination of pink and white with rhinestones makes these nails suitable for a wide range of occasions. From weddings and parties to casual outings, these press-on nails will enhance your style effortlessly.

Care and Maintenance

To ensure that your press-on nails stay looking fabulous and to protect your natural nails, follow these care tips:

Avoid Excessive Water: Limit prolonged exposure to water to prevent weakening the adhesive. Wear gloves while doing dishes or cleaning to keep your nails in top condition.

Handle with Care: Use your nails gently to avoid any damage. Try to avoid using them as tools to prevent breakage or loosening.

Proper Removal: When it’s time to remove your press-on nails, soak them in warm, soapy water to loosen the glue. Gently peel off the nails without using excessive force. If needed, use a nail buffer to remove any residual adhesive.

Conclusion

The 24 Pcs Glossy Gradient Almond Press-On Nails in Pink & White with Rhinestones offer an effortless way to achieve a stunning, salon-quality manicure at home. With their elegant gradient design, flattering almond shape, and glamorous rhinestone accents, these press-on nails are perfect for anyone looking to add a touch of sparkle and sophistication to their look.

So, why wait? Transform your nails with this beautiful press-on set and enjoy an instant style upgrade. Whether for a special occasion or just to add a bit of everyday glamour, these nails are sure to make you shine.

#pressonnails #nailart #gradientnails #rhinestonenails #glamnails #naildesigns #beautytrends #fashionnails #manicure #instantglam

image
Tycka om
Kommentar
Dela med sig
Ahmer Seo
Ahmer Seo
1 Y

image
Tycka om
Kommentar
Dela med sig
Showing 8624 out of 11829
  • 8620
  • 8621
  • 8622
  • 8623
  • 8624
  • 8625
  • 8626
  • 8627
  • 8628
  • 8629
  • 8630
  • 8631
  • 8632
  • 8633
  • 8634
  • 8635
  • 8636
  • 8637
  • 8638
  • 8639

Redigera erbjudande

Lägg till nivå


Välj en bild
Ta bort din nivå
Är du säker på att du vill ta bort den här nivån?

Recensioner

För att sälja ditt innehåll och dina inlägg, börja med att skapa några paket. Intäktsgenerering

Betala med plånbok

Betalningslarm

Du är på väg att köpa varorna, vill du fortsätta?

Begära återbetalning