Good and Bad People Good and Bad People
    #socialmedia #usa #uk #contentwriter #casino
    Pencarian Lanjutan
  • Gabung
  • Daftar

  • Modus siang
  • © {tanggal} {nama_situs}
    Tentang • Direktori • Hubungi kami • Pengembang • Kebijakan pribadi • Syarat Penggunaan • Pengembalian dana • Referral Terms • Acceptable Use Policy • Community Guidelines • Write for Us

    Pilih Bahasa

  • Arabic
  • Bengali
  • Chinese
  • Croatian
  • Danish
  • Dutch
  • English
  • Filipino
  • French
  • German
  • Hebrew
  • Hindi
  • Indonesian
  • Italian
  • Japanese
  • Korean
  • Persian
  • Portuguese
  • Russian
  • Spanish
  • Swedish
  • Turkish
  • Urdu
  • Vietnamese

Jam tangan

Jam tangan Gulungan

Acara

Jelajahi Acara Acara saya

Blog

Jelajahi artikel

Pasar

Produk Terbaru

halaman

Halaman Saya Halaman yang Disukai

Lagi

Mengeksplorasi postingan populer Pekerjaan Penawaran Pendanaan
Gulungan Jam tangan Acara Pasar Blog Halaman Saya Lihat semua

Menemukan posting

Posts

Pengguna

halaman

Kelompok

Blog

Pasar

Acara

Pekerjaan

Pendanaan

Sofias Travel USA
Sofias Travel USA
1 kamu ·Menerjemahkan

Cool Bedroom Ideas for a Stylish Makeover

Your bedroom should be a reflection of your personality and style—a place where you can relax and feel inspired. If you're looking to give your room a modern makeover, these cool bedroom ideas are perfect for creating a space that's both stylish and functional. Whether you're into bold colors, unique furniture, or trendy decor, there's something here for everyone.

1. Go Bold with a Statement Wall

Why It Works:

A statement wall is a simple way to add a wow factor to your room, making it instantly more stylish and personalized.

How to Style:

Choose one wall to be the focal point of your room and paint it in a bold color or cover it with patterned wallpaper. You can also create a mural or use peel-and-stick decals for a customized look. This feature wall will set the tone for the rest of your room’s design.

2. Incorporate Multi-Functional Furniture

Why It Works:

Multi-functional furniture helps you maximize your space while adding a touch of modernity to your room.

How to Style:

Look for pieces like a bed with built-in storage, a fold-out desk, or an ottoman that doubles as storage. These pieces are not only practical but also add a sleek, contemporary feel to your space.

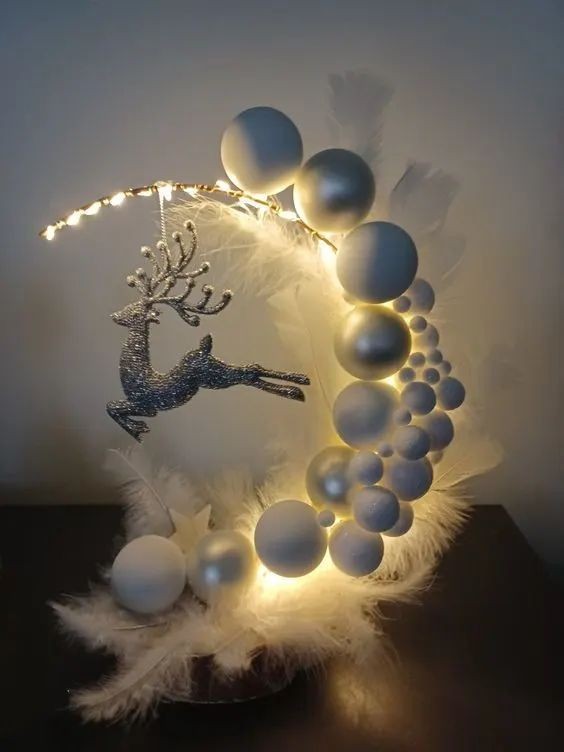
3. Play with Lighting

Why It Works:

Lighting can dramatically change the mood of your room, making it feel more inviting and stylish.

How to Style:

Incorporate a variety of lighting sources, such as string lights, floor lamps, and bedside lamps, to create a layered lighting effect. Consider adding LED strips behind your headboard or along your shelves for a cool, modern glow. Dimmable lights are also a great option for adjusting the ambiance to suit your mood.

4. Embrace Minimalism with a Modern Touch

Why It Works:

A minimalist approach to design creates a clean, clutter-free environment that’s perfect for relaxing and recharging.

How to Style:

Choose furniture with clean lines and neutral colors, and keep decor simple. Incorporate a few statement pieces, such as a geometric rug or abstract wall art, to add interest without overwhelming the space. This approach is ideal for those who prefer a sleek, modern aesthetic.

5. Add a Personal Touch with DIY Decor

Why It Works:

DIY decor adds a unique, personalized element to your room, making it truly your own.

How to Style:

Create your own artwork, customize your furniture with paint or decals, or craft decorative items like hanging planters or photo displays. These DIY projects will not only save you money but also give your room a one-of-a-kind look.

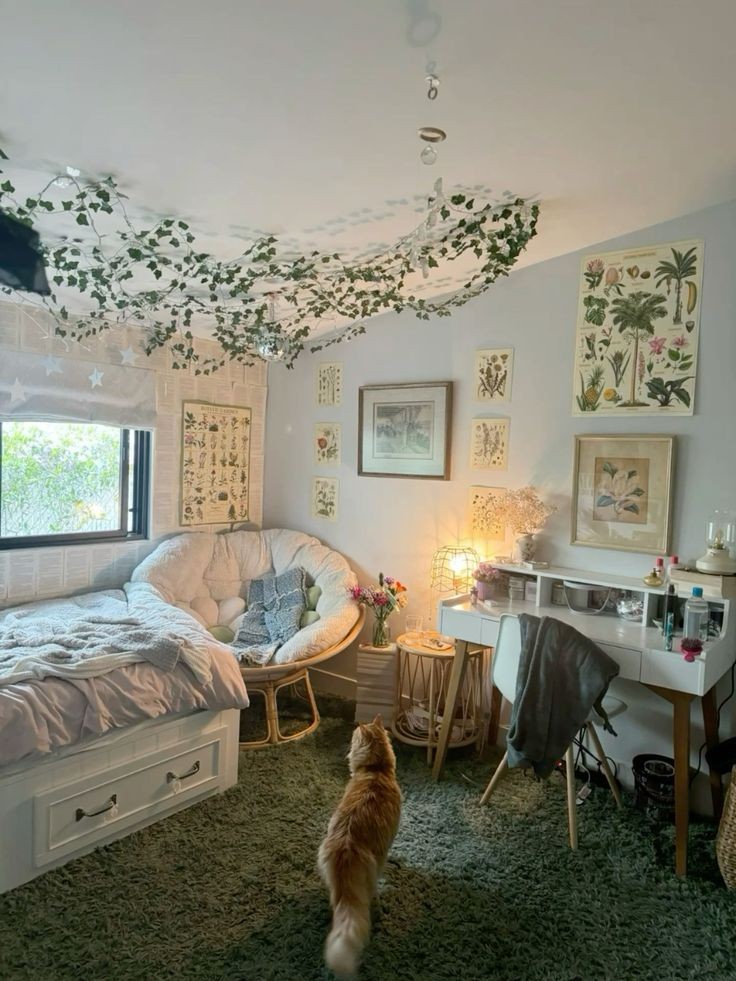
6. Incorporate Natural Elements

Why It Works:

Bringing natural elements into your room adds warmth and texture, creating a cozy and inviting atmosphere.

How to Style:

Use materials like wood, rattan, and linen to add natural textures to your space. Incorporate indoor plants for a fresh, organic feel. A wooden headboard, woven baskets, or a jute rug can all contribute to a nature-inspired, relaxed vibe.

7. Use Mirrors to Create Space

Why It Works:

Mirrors can make a room feel larger and brighter by reflecting light and opening up the space.

How to Style:

Hang a large mirror above your dresser or on one wall to create the illusion of more space. For a modern touch, choose mirrors with interesting shapes or frames. Mirrors can also be used as decorative elements when placed strategically around the room.

8. Create a Cozy Nook

Why It Works:

A cozy nook gives you a dedicated space to relax, read, or unwind, making your room feel more comfortable and personal.

How to Style:

Set up a small corner with a comfy chair, some throw pillows, and a blanket. Add a small side table for your books or a cup of tea. This little nook will become your favorite spot in the room, perfect for unwinding after a long day.

Conclusion: Make Your Room Reflect Your Style

These cool bedroom ideas are all about making your space uniquely yours while staying on-trend. Whether you’re going for a bold statement wall, a minimalist vibe, or a cozy nook, there are endless ways to refresh your room and make it a place you love to spend time in. Start with one or two of these ideas, and watch how your room transforms into a stylish haven that reflects your personality.

#bedroomideas #roommakeover #homedecor #coolrooms #stylishbedrooms #moderndecor #diydecor #cozynook #interiordesign

image
Suka
Komentar
Membagikan
Pennys Pretty Projects
1 kamu ·Menerjemahkan

80+ Stunning DIY Cozy Winter Decor Ideas for Christmas and Beyond

As winter approaches, the desire to transform our homes into warm, inviting spaces grows stronger. With the holiday season just around the corner, it’s the perfect time to embrace the spirit of Christmas while creating a cozy atmosphere that lasts through the chilly months. Here are over 80 stunning DIY winter decor ideas that will bring warmth and joy to your home this holiday season and beyond.

1. Create a Cozy Atmosphere with Textiles

1.1 Warm Throws and Pillows

Invest in soft, warm throws and pillows in rich colors like deep reds, greens, and creams. You can sew your own pillow covers with festive fabrics, or repurpose old sweaters into unique pillowcases for a rustic touch.

1.2 Knitted or Crocheted Decor

If you have knitting or crocheting skills, create your own blankets, table runners, or even wall hangings. The handmade touch adds a personal element to your winter decor.

2. Adorn Your Walls

2.1 Winter-Themed Wall Art

Craft your own wall art using canvases, paints, and winter motifs. Consider snowflakes, evergreen trees, or cozy cabin scenes. These pieces can be displayed year after year.

2.2 Wreaths for All Seasons

While traditional holiday wreaths are beautiful, consider making a wreath that can transition into winter. Use natural elements like pinecones, eucalyptus, and twigs to create a fresh, evergreen look.

3. Festive Centerpieces

3.1 Candle Arrangements

Create stunning centerpieces by arranging candles of varying heights on a wooden tray or in a decorative bowl. Surround them with pinecones, holly, or seasonal fruits for added charm.

3.2 Rustic Table Settings

Use burlap or plaid fabric as a table runner and complement it with mason jar vases filled with seasonal flowers. Add small ornaments or pine branches for a wintery touch.

4. Brighten Up with Lights

4.1 String Lights

Hang string lights in unexpected places, such as around windows, door frames, or along shelves. This adds a twinkling warmth to your space, making it feel magical.

4.2 DIY Lanterns

Create your own lanterns using jars, paint, and battery-operated tea lights. These can be placed on tables or hung from trees or hooks to create a cozy ambiance.

5. Incorporate Nature

5.1 Pinecone Accents

Collect pinecones from your yard or a local park and incorporate them into your decor. They can be used in wreaths, as table decorations, or even painted and turned into ornaments.

5.2 Fresh Greenery

Use fresh pine, cedar, or fir branches to create garlands, centerpieces, or to adorn doorways. The natural scent will remind you of the great outdoors and bring a refreshing feel to your home.

6. Embrace the Seasonal Scents

6.1 Scented Candles

Make your own scented candles using essential oils. Scents like cinnamon, clove, and pine can evoke feelings of warmth and comfort during the winter months.

6.2 Simmering Spices

Simmer a pot of water with cinnamon sticks, cloves, and orange peels on the stove to fill your home with delightful holiday aromas.

7. DIY Ornaments and Tree Decor

7.1 Handmade Ornaments

Craft ornaments from salt dough, paper, or felt. Personalize them with names, dates, or special memories to hang on your tree.

7.2 Eco-Friendly Decor

Use recycled materials such as old book pages or fabric scraps to create unique, eco-friendly ornaments. This adds character to your tree while being environmentally conscious.

8. Personalize Your Space

8.1 Family Photo Displays

Create a gallery wall featuring family photos from past holidays. Use fun frames and seasonal decorations to enhance the display.

8.2 Customized Name Tags

Design personalized name tags for your family members and friends, which can be placed on gifts, dining settings, or even on the tree as decorations.

9. Fun and Festive Craft Projects

9.1 DIY Snow Globes

Use jars, glitter, and small figurines to create charming snow globes that can be displayed on shelves or given as gifts.

9.2 Festive Garland

Make a garland from felt, paper, or fabric in shapes like stars, snowflakes, or hearts. Drape it over mantels, doorways, or windows for a festive touch.

10. Create Cozy Nooks

10.1 Reading Corner

Set up a cozy reading nook with a comfortable chair, blankets, and a small bookshelf. Add fairy lights for an enchanting touch.

10.2 Hot Chocolate Station

Create a hot chocolate bar with different toppings, mugs, and a variety of hot chocolate mixes. This not only adds decor but also encourages warm gatherings with family and friends.

11. Seasonal Kitchen Decor

11.1 Winter-Themed Dishware

Invest in seasonal dishware or make your own by painting plain dishes with winter designs. This will make your kitchen feel festive and inviting.

11.2 Decorative Jars

Fill clear jars with layers of dried fruits, spices, or colored sugar to create beautiful displays. These can also double as gifts for friends and family.

12. Outdoor Winter Decor

12.1 Porch Display

Create a welcoming entry with a festive porch display. Use potted evergreens, colorful ornaments, and a cozy welcome mat to invite guests in.

12.2 Winter Yard Art

Craft DIY yard decorations, such as painted wooden signs or whimsical figures, to brighten up your outdoor space during the colder months.

13. Upcycled Winter Decor

13.1 Repurposed Items

Transform old items around your house into winter decor. For example, use old wooden crates as a base for a table or stack vintage suitcases for a unique display.

13.2 Bottle Centerpieces

Use empty glass bottles as vases for winter branches or flowers. Paint or wrap them in twine for a rustic look.

Conclusion

Creating a cozy winter decor for Christmas and beyond doesn't have to be expensive or time-consuming. With a little creativity and effort, you can craft stunning pieces that bring warmth and charm to your home. Embrace the spirit of the season with these DIY ideas, and enjoy the joy of decorating as you prepare for the festivities. Whether it’s through textiles, nature, or personalized touches, each element will contribute to a warm and inviting atmosphere that celebrates the beauty of winter.

image
Suka
Komentar
Membagikan
Pennys Pretty Projects
1 kamu ·Menerjemahkan

Easy DIY Christmas Ornaments That Look Store-Bought

The holiday season is a time for joy, togetherness, and creativity. As we deck the halls and trim the tree, many of us seek to add a personal touch to our decorations. DIY Christmas ornaments offer a wonderful opportunity to express your creativity while saving money and creating cherished memories with family and friends. This article will guide you through several easy DIY ornament ideas that look professional and store-bought, ensuring your tree shines bright this Christmas.

1. Painted Pine Cones

Materials Needed:

Pine cones

Acrylic paint (various colors)

Paintbrushes

Glitter (optional)

Ribbon or twine for hanging

Instructions:

Collect pine cones from your yard or local park, ensuring they are clean and dry.

Choose your favorite colors of acrylic paint and apply a base coat to each pine cone.

Allow the paint to dry completely before adding a second coat if needed.

For a festive touch, sprinkle glitter over the wet paint or use a spray adhesive to attach glitter after the paint dries.

Attach a ribbon or twine to the top of each pine cone for hanging.

These painted pine cone ornaments add a rustic charm to your tree and can be customized in any color scheme to match your holiday decor.

2. Salt Dough Ornaments

Materials Needed:

2 cups all-purpose flour

1 cup salt

1 cup water

Cookie cutters

Rolling pin

Acrylic paint or markers

Ribbon for hanging

Instructions:

Preheat your oven to 250°F (120°C).

In a mixing bowl, combine flour and salt, then gradually add water, mixing until it forms a dough.

Roll out the dough to about 1/4 inch thick and use cookie cutters to create various shapes.

Use a straw to make a hole at the top of each ornament for hanging.

Bake the ornaments on a baking sheet for about 2 hours or until hard.

Once cooled, paint or decorate the ornaments with markers.

String a ribbon through the hole for hanging.

Salt dough ornaments are not only easy to make but also allow for endless creativity. Personalize them with names, dates, or festive designs.

3. Clear Ornament Fillers

Materials Needed:

Clear plastic or glass ornaments

Fake snow, glitter, or small ornaments

Ribbon or string for hanging

Instructions:

Carefully remove the top of the clear ornaments.

Fill each ornament with your choice of fake snow, glitter, or small decorative items like mini pine cones, berries, or sequins.

Replace the top of the ornament securely.

Add a decorative ribbon or string to the top for hanging.

These clear ornaments can be filled with anything that inspires you, creating a beautiful display that showcases your personal style.

4. Personalized Photo Ornaments

Materials Needed:

Clear plastic or glass ornaments

Printed photos (small enough to fit inside the ornaments)

Ribbon or string for hanging

Craft glue or Mod Podge (optional)

Instructions:

Print your favorite holiday photos on thin paper.

Carefully remove the top of the ornament.

Roll the photo and insert it into the ornament. Use craft glue or Mod Podge to secure the photo inside if desired.

Replace the top and add a ribbon or string for hanging.

These personalized photo ornaments make wonderful gifts for family and friends, capturing special memories from the year.

5. Beaded Ornaments

Materials Needed:

Assorted beads (in holiday colors)

Wire or sturdy string

Wire cutters (if using wire)

Instructions:

Cut a length of wire or string, about 12 inches long.

String beads onto the wire or string, alternating colors and shapes as desired.

Once you've filled the wire or string, twist or tie the ends securely to form a loop.

Create a loop at the top for hanging.

Beaded ornaments add a touch of elegance and sparkle to your tree and can be customized in countless ways.

6. Fabric Scrap Ornaments

Materials Needed:

Scrap fabric (in holiday colors or patterns)

Scissors

Hot glue gun

Cardboard or felt for backing

Ribbon for hanging

Instructions:

Cut your fabric scraps into festive shapes such as stars, trees, or hearts.

Cut a piece of cardboard or felt slightly larger than the fabric shape to use as a backing.

Use a hot glue gun to attach the fabric shape to the cardboard or felt.

Cut a small piece of ribbon and glue it to the back for hanging.

These fabric scrap ornaments are not only eco-friendly but also add a cozy, homemade feel to your holiday decor.

7. Dried Fruit Ornaments

Materials Needed:

Oranges, lemons, or apple slices

Oven or dehydrator

Ribbon or twine for hanging

Instructions:

Preheat your oven to 200°F (93°C).

Slice the fruit into thin, even pieces (about 1/4 inch thick).

Place the slices on a baking sheet and bake for 2-3 hours, flipping occasionally, until dried and slightly shriveled.

Once cooled, use a ribbon or twine to hang the dried fruit slices.

Dried fruit ornaments not only look beautiful but also emit a delightful scent, adding to the festive atmosphere.

Conclusion

Creating DIY Christmas ornaments is a fantastic way to celebrate the holiday season while adding a personal touch to your decor. Whether you choose to paint pine cones, create salt dough shapes, or fill clear ornaments with cherished memories, these crafts can be both simple and elegant. Not only do they save money, but they also foster creativity and family bonding. So gather your supplies, invite your loved ones, and start crafting these beautiful ornaments that will make your tree look store-bought without the hefty price tag. Happy crafting and Merry Christmas!

image
Suka
Komentar
Membagikan
Pennys Pretty Projects
1 kamu ·Menerjemahkan

40 Christmas Craft Projects in 15 Minutes or Less

The holiday season is a wonderful time for creativity and crafting. Whether you’re looking to decorate your home, create personalized gifts, or keep the kids entertained, there are plenty of quick and easy Christmas craft projects you can complete in 15 minutes or less. Here’s a list of 40 festive ideas to inspire your holiday crafting.

1. Paper Snowflakes

Materials Needed: White paper, scissors.

Instructions: Fold a square piece of paper into quarters and cut shapes along the edges. Unfold to reveal a beautiful snowflake.

2. Christmas Cards

Materials Needed: Cardstock, markers, stickers.

Instructions: Fold cardstock in half and decorate the front with drawings, messages, or stickers to create personalized holiday cards.

3. Holiday Gift Tags

Materials Needed: Cardstock, hole punch, ribbon.

Instructions: Cut cardstock into small rectangles, decorate, punch a hole, and tie with ribbon to create gift tags.

4. Candy Cane Reindeer

Materials Needed: Candy canes, googly eyes, red pom-poms, hot glue.

Instructions: Glue googly eyes and a pom-pom nose to the candy cane, and add pipe cleaner antlers for a cute reindeer.

5. Ornaments from Old Christmas Cards

Materials Needed: Old Christmas cards, scissors, string.

Instructions: Cut out shapes from old cards, punch a hole, and attach a string for a unique ornament.

6. Pinecone Christmas Trees

Materials Needed: Pinecones, green paint, glitter.

Instructions: Paint pinecones green and sprinkle with glitter for a festive decoration.

7. Snowman from Socks

Materials Needed: White socks, rice, buttons, ribbon.

Instructions: Fill a sock with rice, tie off, and decorate as a snowman with buttons and ribbon.

8. Christmas Wreaths

Materials Needed: Paper plates, green construction paper, decorations.

Instructions: Cut out the center of a paper plate, decorate the outer edge with green paper, and add festive decorations.

9. Jingle Bell Bracelets

Materials Needed: Jingle bells, elastic string.

Instructions: Thread jingle bells onto elastic string and tie off for a festive bracelet.

10. Simple Candle Holders

Materials Needed: Mason jars, Epsom salt, tea lights.

Instructions: Fill jars with Epsom salt and place a tea light on top for a cozy candle holder.

11. Button Christmas Tree

Materials Needed: Buttons, cardboard, glue.

Instructions: Glue buttons onto a cardboard triangle to create a simple Christmas tree.

12. Glitter Pinecones

Materials Needed: Pinecones, glue, glitter.

Instructions: Brush pinecones with glue and sprinkle with glitter for a sparkly decoration.

13. Recycled Bottle Snowmen

Materials Needed: Empty plastic bottles, white paint, markers.

Instructions: Paint bottles white and use markers to create snowman faces.

14. Mini Gift Boxes

Materials Needed: Colored paper, scissors, tape.

Instructions: Cut and fold paper into small boxes for gift-giving.

15. Snowy Mason Jar

Materials Needed: Mason jar, cotton balls, battery-operated tea light.

Instructions: Fill a mason jar with cotton balls and place a tea light inside for a snowy effect.

16. Festive Paper Straws

Materials Needed: Straws, washi tape.

Instructions: Wrap washi tape around straws to create festive drink stirrers.

17. Egg Carton Angels

Materials Needed: Egg cartons, paint, glitter.

Instructions: Cut egg cartons into individual cups, paint them, and add glitter for angel decorations.

18. Tinsel Garland

Materials Needed: Tinsel, string.

Instructions: Cut tinsel into lengths and tie them onto a string to create a simple garland.

19. Holiday Pinecone Garland

Materials Needed: Pinecones, twine.

Instructions: String pinecones along twine for a rustic holiday garland.

20. Christmas Cookie Cutters Ornaments

Materials Needed: Cookie cutters, ribbon, paint.

Instructions: Paint cookie cutters and tie with ribbon to hang as ornaments.

21. Pom-Pom Garland

Materials Needed: Yarn, scissors, needle.

Instructions: Make pom-poms from yarn and string them together to create a festive garland.

22. Holiday Centerpieces

Materials Needed: Small bowls, ornaments, faux snow.

Instructions: Fill bowls with ornaments and faux snow for a quick centerpiece.

23. Christmas Tree Cards

Materials Needed: Cardstock, washi tape, scissors.

Instructions: Cut washi tape into triangles and arrange them on cardstock to form a Christmas tree.

24. Stamped Wrapping Paper

Materials Needed: Plain paper, stamps, ink.

Instructions: Use stamps to create festive designs on plain paper for unique wrapping paper.

25. Holiday Photo Frames

Materials Needed: Cardboard, paint, decorations.

Instructions: Cut cardboard into frames, paint, and decorate for displaying holiday photos.

26. Festive Hair Clips

Materials Needed: Plain hair clips, felt, glue.

Instructions: Cut felt into holiday shapes and glue onto hair clips for festive accessories.

27. Holiday Scented Sachets

Materials Needed: Small fabric bags, cinnamon, cloves, dried oranges.

Instructions: Fill bags with spices and dried fruit for scented sachets.

28. DIY Christmas Coasters

Materials Needed: Cork coasters, paint, stencils.

Instructions: Use paint and stencils to decorate cork coasters with holiday designs.

29. Simple Paper Chains

Materials Needed: Colored paper, scissors, tape.

Instructions: Cut paper into strips and tape them into links for a festive chain.

30. Felt Christmas Ornaments

Materials Needed: Felt, scissors, thread.

Instructions: Cut out shapes from felt and sew or glue them together to create ornaments.

31. Holiday Ribbon Bookmarks

Materials Needed: Ribbon, scissors, beads.

Instructions: Cut lengths of ribbon and add beads for easy holiday bookmarks.

32. Glittery Holiday Baubles

Materials Needed: Clear ornaments, glitter, glue.

Instructions: Fill clear ornaments with glue, shake in glitter, and let dry for sparkly decorations.

33. Candy Wrapper Wreath

Materials Needed: Candy wrappers, cardboard ring, glue.

Instructions: Glue candy wrappers onto a cardboard ring to create a colorful wreath.

34. DIY Advent Calendar

Materials Needed: Brown paper bags, twine, clothespins.

Instructions: Number paper bags and hang them with clothespins on twine for a fun advent calendar.

35. Simple Felt Stockings

Materials Needed: Felt, scissors, glue.

Instructions: Cut out stocking shapes from felt and glue them together for simple stockings.

36. Handprint Reindeer

Materials Needed: Brown construction paper, scissors, googly eyes.

Instructions: Trace and cut out handprints for antlers and glue them to a paper for a reindeer face.

37. Twine-Wrapped Christmas Trees

Materials Needed: Cardboard cones, twine, hot glue.

Instructions: Wrap twine around cardboard cones and secure with hot glue for rustic trees.

38. Holiday Magnets

Materials Needed: Small wooden shapes, paint, magnets.

Instructions: Paint wooden shapes and glue magnets to the back for holiday fridge magnets.

39. Miniature Gift Boxes from Toilet Paper Rolls

Materials Needed: Toilet paper rolls, wrapping paper, tape.

Instructions: Cut rolls to size, wrap in paper, and tape to create miniature gift boxes.

40. Holiday Bookmarks

Materials Needed: Cardstock, ribbon, hole punch.

Instructions: Cut cardstock into strips, punch a hole, and add ribbon for festive bookmarks.

These 40 Christmas craft projects are perfect for getting into the holiday spirit without spending too much time. Whether you’re crafting alone, with friends, or with family, these quick projects can enhance your holiday season with creativity and joy. Happy crafting!

image
Suka
Komentar
Membagikan
Pennys Pretty Projects
1 kamu ·Menerjemahkan

Creative and Budget-Friendly Ideas for Dollar Tree Bowls

When it comes to home decor and organization, Dollar Tree is a treasure trove of affordable and versatile items. Among their best offerings are bowls, which can be transformed into stunning decor pieces, functional organizers, or personalized gifts. Here are some creative ideas for using Dollar Tree bowls that can enhance your home while keeping your budget intact.

1. Decorative Centerpieces
Transform a simple Dollar Tree bowl into an eye-catching centerpiece for your dining table or coffee table. Here’s how:

Fill with Seasonal Items: Use bowls to create seasonal displays. In the fall, fill a bowl with mini pumpkins, pinecones, and leaves. For winter, consider using ornaments, artificial snow, or pine branches. In the spring, you can fill bowls with faux flowers or pastel-colored eggs.

Candle Displays: Arrange pillar candles of varying heights in a bowl, adding decorative sand, pebbles, or seashells around the base. This can create a warm ambiance and serve as a beautiful focal point.

Fruit Bowl: Use a larger bowl to display fresh fruits. Not only is this functional, but it also adds color and vibrancy to your kitchen or dining area.

2. Organizational Solutions
Bowls from Dollar Tree can help keep your space tidy and organized. Here are some ideas for utilizing them in various rooms:

Bathroom Storage: Use small bowls to hold cotton balls, swabs, and other bathroom essentials. You can even paint or decorate the bowls to match your bathroom decor.

Office Organizer: Group small bowls on your desk to store paper clips, push pins, rubber bands, and other office supplies. Label each bowl for easy identification.

Kitchen Helper: Keep spices, small kitchen gadgets, or snack items organized in bowls. This can help reduce clutter and make it easier to find what you need while cooking.

3. DIY Craft Projects
Dollar Tree bowls can also be incorporated into various craft projects. Here are a few ideas to inspire your creativity:

Mosaic Bowls: Use small pieces of colorful paper, tile, or glass to create a mosaic effect on the outside of a bowl. Mod Podge can help secure the pieces and create a cohesive look. This project can be tailored to fit any color scheme or theme.

Painted Bowls: Give your bowls a fresh look by painting them. Use acrylic paints or spray paint to add a pop of color. You can also stencil designs or use washi tape to create patterns.

Upcycled Bird Feeders: Transform a bowl into a bird feeder by attaching it to a wooden post or hanging it from a tree with rope. Fill it with birdseed and enjoy watching the birds flock to your yard.

4. Themed Gift Ideas
Dollar Tree bowls can be used as unique containers for gift-giving. Here are some themed ideas:

Self-Care Kit: Fill a bowl with self-care items like bath bombs, lotions, and scented candles. Wrap it in cellophane for a lovely presentation.

Movie Night Package: Create a fun movie night gift by filling a bowl with popcorn, candy, and a few classic DVDs. You can even include a cozy blanket for a complete package.

Kitchen Starter Set: Fill a bowl with essential kitchen gadgets like spatulas, measuring cups, and a recipe book for a thoughtful housewarming gift.

5. Seasonal Decor
Seasonal decorations can be easily created with Dollar Tree bowls to celebrate holidays throughout the year:

Halloween Bowls: Fill bowls with fake spiders, eyeballs, or candy for a spooky display. You can also paint bowls in Halloween colors and display them as decorative pieces.

Thanksgiving Centerpiece: Create a bowl filled with faux fall leaves, gourds, and a candle in the center. This can serve as a stunning focal point for your Thanksgiving dinner table.

Christmas Ornaments: Fill a bowl with Christmas ornaments, pine branches, and twinkling lights for a festive decoration. You can even personalize ornaments for a special touch.

6. Pet Bowls
Transform Dollar Tree bowls into stylish pet feeding stations:

Decorative Pet Bowls: Use bowls to create a designated feeding area for your pets. You can decorate them with pet-safe paint and personalize them with your pet's name.

Treat Containers: Use small bowls to store your pet's treats. This not only keeps the treats organized but also allows for easy access when it's time for a snack.

7. Party Favors and Decorations
If you’re planning a party or event, Dollar Tree bowls can serve multiple purposes:

Candy Stations: Fill bowls with an assortment of candies and snacks for guests to enjoy. This works well for birthday parties, weddings, or holiday gatherings.

Themed Party Favors: Create themed party favors by filling small bowls with goodies that match your event's theme. For example, for a beach-themed party, fill bowls with seashells, sand, and beach-related items.

Table Settings: Use bowls as unique table settings by placing individual bowls of salad, soup, or snacks at each place setting for an interactive dining experience.

Conclusion
Dollar Tree bowls are not only affordable but also incredibly versatile, making them perfect for various home decor, organization, and crafting projects. With a little creativity, these simple bowls can be transformed into beautiful centerpieces, effective organizers, thoughtful gifts, and so much more. Whether you’re decorating for a holiday, organizing your home, or creating unique gifts, the possibilities with Dollar Tree bowls are endless. So next time you’re at Dollar Tree, don’t overlook these simple items—they could become the stars of your home decor!

image
Suka
Komentar
Membagikan
Pennys Pretty Projects
1 kamu ·Menerjemahkan

Easy Hair Drawing: An Art Tutorial

Drawing hair can often be one of the most challenging aspects of portraiture and figure drawing. However, understanding a few fundamental techniques can simplify the process and make it enjoyable. This tutorial will guide you through easy methods for drawing hair, suitable for beginners and those looking to refine their skills.

Understanding Hair Structure
Before diving into the drawing process, it’s essential to understand the structure of hair. Hair consists of strands that can vary in thickness, texture, and style. Here are some key points to consider:

Strands vs. Volume: Hair is made up of many strands that can fall in various directions. It’s important to represent both the strands and the overall volume of hair.

Light and Shadow: Hair has a natural shine and can reflect light, creating highlights and shadows. Understanding how light interacts with hair can enhance the realism of your drawings.

Textures: Hair can be straight, wavy, or curly, and each texture has its own characteristics. Observing and practicing different textures will help you create more dynamic hair drawings.

Materials Needed
To get started, gather the following materials:

Pencils: A range of graphite pencils (2H to 6 for different shading and detailing.
Eraser: A kneaded eraser is ideal for subtle corrections.
Paper: Smooth drawing paper or sketch paper.
Blending Stumps: For smoothing out pencil strokes.
Reference Images: Photos or illustrations of hair for practice.
Step-by-Step Tutorial
Step 1: Sketch the Basic Shape
Start by lightly sketching the basic shape of the head and hair. Use simple shapes to define the outline:

Draw an oval for the head.
Add guidelines for the face to help position the features accurately.
Outline the shape of the hair, considering the hairstyle. Remember that hair typically extends beyond the skull.
Step 2: Divide the Hair into Sections
To make the hair drawing more manageable, divide it into sections:

Identify the main sections of hair (e.g., bangs, sides, back).
Use light lines to mark these sections, as they will guide your drawing.
Step 3: Draw the Hair Strands
Now, it’s time to focus on drawing individual hair strands:

Use Curved Lines: Hair strands are rarely straight. Use gentle, curved lines to represent the flow of hair. Vary the direction of the curves to create a natural look.

Start with the Roots: Begin at the roots and draw outward. This technique helps to maintain the hair's volume and flow.

Overlap Strands: To add depth, overlap some strands over others. This technique creates the illusion of layers.

Step 4: Add Texture and Detail
Next, you’ll want to add texture and detail to the hair:

Vary Line Thickness: Use different pencil pressures to create thicker and thinner lines. Thicker lines can represent darker areas or shadow, while thinner lines can depict lighter strands.

Create Highlights and Shadows: Use an eraser to lift some graphite from areas where light hits the hair, creating highlights. Darken other areas to represent shadows, giving your drawing more depth.

Blend: If you’re using graphite pencils, blend the hair using a blending stump or your finger. This step will soften any harsh lines and give a more realistic appearance.

Step 5: Final Touches
Once you’re satisfied with the hair, it’s time for the final touches:

Refine Details: Go back and refine any areas that need more definition. This could include darkening shadows or adding more strands.

Review the Overall Composition: Step back and look at your drawing as a whole. Ensure the hair looks natural and complements the face.

Clean Up: Erase any unnecessary guidelines or smudges, and ensure your drawing looks clean.

Step 6: Practice Different Styles
To become proficient at drawing hair, practice various hairstyles and textures:

Straight Hair: Focus on smooth, flowing lines. Use fewer curves to represent the sleekness.
Curly Hair: Emphasize the spirals and volume. Curly hair often has more overlapping strands.
Wavy Hair: Use soft, undulating lines to convey the relaxed texture of wavy hair.
Experiment with different styles to build confidence and versatility in your hair drawing skills.

Additional Tips for Drawing Hair
Study Real Hair: Spend time observing real hair and how it behaves in different lighting conditions. Take photos or create studies to understand the nuances better.
Use References: Reference images are invaluable for understanding how hair looks in various styles and lighting. Use them to guide your drawings.
Practice Regularly: The more you practice, the better you’ll become. Set aside time each week to focus specifically on drawing hair.
Be Patient: Drawing hair can be time-consuming, especially when aiming for realism. Don’t rush the process; take your time to achieve the desired results.

Conclusion

Drawing hair doesn’t have to be intimidating. By breaking the process down into manageable steps and practicing various techniques, you can create beautiful and realistic hair in your art. Remember that practice is key, so keep experimenting with different styles and textures. With time and dedication, you’ll develop your unique approach to hair drawing, enhancing your overall artistic skills. Happy drawing!

image
Suka
Komentar
Membagikan
Sofias Travel USA
Sofias Travel USA
1 kamu ·Menerjemahkan

Cool Bedroom Ideas for a Stylish Space Cool Bedroom Ideas for a Stylish Space
Your bedroom is more than just a place to sleep; it's a personal sanctuary where you can express your style and relax. If you're looking to upgrade your space, these cool bedroom ideas will inspire you to create a room that’s both functional and stylish. From modern designs to creative DIY projects, here’s how you can make your bedroom the ultimate cool hangout.

1. Go Minimalist with a Modern Touch
Why It Works:
Minimalist designs offer a clean, uncluttered look that creates a calm and sophisticated environment.

How to Style:
Stick to a neutral color palette with shades of white, gray, or beige. Incorporate sleek, modern furniture with clean lines, and keep decor to a minimum. Use geometric patterns in your bedding or artwork to add subtle visual interest without overwhelming the space.

2. Create a Statement Wall
Why It Works:
A statement wall is a simple way to add drama and focus to your bedroom without overhauling the entire room.

How to Style:
Choose a bold paint color, patterned wallpaper, or a mural for one wall in your bedroom. This wall can serve as a backdrop for your bed or a reading nook. You can also use textured materials like brick, wood, or fabric to create an interesting and dynamic look.

3. Incorporate Industrial Elements
Why It Works:
Industrial design brings a raw, edgy vibe to your room, combining functionality with a cool aesthetic.

How to Style:
Use materials like metal, wood, and exposed brick to achieve an industrial look. Choose furniture with a mix of wood and metal, such as a bed frame with a metal headboard or a reclaimed wood nightstand. Add in vintage or factory-style lighting fixtures to complete the look.

4. Add a Pop of Color
Why It Works:
A pop of color can instantly brighten your room and add personality without overwhelming the space.

How to Style:
Choose one or two bold colors to incorporate through accent pieces like throw pillows, rugs, or artwork. Bright shades of blue, yellow, or red can add energy, while pastel tones offer a more calming effect. Balance these with neutral tones to keep the overall look cohesive.

5. Make It Cozy with Layers
Why It Works:
Layering different textures and fabrics adds depth and warmth, making your bedroom feel inviting and comfortable.

How to Style:
Start with your bedding, layering soft sheets, a cozy duvet, and plenty of throw blankets and pillows. Use a mix of textures like knits, faux fur, and velvet to create a rich, tactile environment. Add a plush rug underfoot and hang heavy curtains for an extra cozy touch.

6. Design a Multi-Functional Space
Why It Works:
In a small bedroom, making your space multi-functional allows you to maximize its use without sacrificing style.

How to Style:
Incorporate furniture that serves multiple purposes, like a bed with built-in storage drawers or a desk that doubles as a vanity. Use vertical space with shelves or wall-mounted organizers to keep your room tidy. Create distinct areas for sleeping, studying, and lounging to make the most of your space.

7. Bring the Outdoors In with Plants
Why It Works:
Plants add life and freshness to any room, creating a calming atmosphere and improving air quality.

How to Style:
Choose easy-to-care-for plants like succulents, ferns, or snake plants that thrive indoors. Place them on windowsills, shelves, or hang them from the ceiling in stylish planters. Use a variety of plant sizes and shapes to create visual interest and a lush, green vibe.

8. Personalize with DIY Decor
Why It Works:
DIY decor projects allow you to customize your space and make it truly your own.

How to Style:
Create custom wall art, paint your own furniture, or craft decorative items like personalized photo frames or dream catchers. This not only saves money but also adds a unique, personal touch to your room.

Conclusion: Create Your Dream Bedroom
With these cool bedroom ideas, you can transform your space into a stylish and functional haven. Whether you’re drawn to minimalist designs, industrial elements, or cozy layers, there’s a look here that will help you create a bedroom that reflects your personal style and meets your needs. Start experimenting with these ideas and turn your bedroom into the coolest room in the house!

#bedroomideas #roomdecor #diybedroom #modernbedroom #stylishspace #coolrooms #homedecor #interiordesign #bedroommakeover

Suka
Komentar
Membagikan
Pennys Pretty Projects
1 kamu ·Menerjemahkan

The Art of Drawing Stunning Scenery: A Comprehensive Guide for Aspiring Artists

Drawing stunning scenery is a captivating and rewarding aspect of art that allows artists to express their creativity and appreciation for the natural world. From majestic mountains and serene lakes to lush forests and vibrant sunsets, the ability to capture the beauty of landscapes on paper or canvas is a skill that can be developed through practice, observation, and understanding of artistic techniques. In this article, we will explore the fundamentals of drawing scenery, essential techniques, tips for improvement, and how to find inspiration in the world around us.

Understanding the Fundamentals of Landscape Drawing

Before diving into the techniques, it’s important to understand the basic elements that make up stunning scenery. Here are some fundamental concepts to consider:

1. Composition

Composition is the arrangement of elements within a drawing. A well-composed landscape drawing guides the viewer's eye through the scene and creates a sense of balance and harmony. Key components of composition include:

Rule of Thirds: Divide your canvas into thirds both horizontally and vertically. Place the main elements of your scenery along these lines or at their intersections to create a more dynamic composition.

Leading Lines: Use natural lines in the landscape, such as rivers, paths, or fences, to lead the viewer's eye into the drawing.

Framing: Incorporate elements in the foreground, such as trees or rocks, to frame the main subject, adding depth to the drawing.

2. Perspective

Perspective is crucial in creating a sense of depth and realism in your drawings. There are two main types of perspective to consider:

One-Point Perspective: This occurs when all lines converge at a single vanishing point on the horizon. It’s often used in scenes where the viewer is looking straight down a road or railway.

Two-Point Perspective: This involves two vanishing points on the horizon and is commonly used for depicting buildings or structures at an angle.

3. Light and Shadow

Understanding light and shadow is essential for creating three-dimensionality in your drawings. Observe how light interacts with objects in nature, and use shading techniques to depict depth. Pay attention to:

Light Source: Identify the direction of the light and how it affects the colors and shadows in your scenery.

Value: Use a range of values (light to dark) to create contrast and define shapes. This can enhance the realism of your drawing.

Techniques for Drawing Stunning Scenery

Once you grasp the fundamentals, you can explore various techniques to enhance your landscape drawings:

1. Sketching

Begin with light pencil sketches to outline your composition. Focus on the placement of key elements without worrying too much about details. This is the time to experiment with different layouts before committing to a final drawing.

2. Blocking In

After sketching, block in the major shapes and colors of the scenery. Use broad strokes to establish the overall form of the landscape. This technique helps you visualize how different elements fit together.

3. Layering

Incorporate layering to build depth and texture. Start with lighter colors and gradually add darker tones to create contrast. This technique works well with mediums such as watercolors, pastels, and acrylics.

4. Detailing

Once the base layers are complete, add details to enhance realism. Pay attention to textures, such as the roughness of tree bark, the smoothness of water, or the softness of clouds. Use fine brushes or pencils for intricate work.

5. Color Theory

Understanding color theory can elevate your landscape drawings. Consider the following:

Complementary Colors: Use colors opposite each other on the color wheel to create vibrant contrasts.

Analogous Colors: Colors that are next to each other on the wheel create harmony and are great for depicting natural scenery.

Atmospheric Perspective: Distant objects often appear lighter and less saturated. Use this technique to create depth by softening colors as they recede into the background.

Tips for Improvement

To refine your landscape drawing skills, consider the following tips:

1. Study Nature

Spend time outdoors observing different landscapes. Take note of how light, color, and form change throughout the day and in different weather conditions. Sketch from life as much as possible to improve your observational skills.

2. Analyze Masterworks

Study the works of renowned landscape artists, such as Claude Monet, Vincent van Gogh, or John Constable. Analyze their techniques, compositions, and use of color. This can provide valuable insights and inspire your own style.

3. Practice Regularly

Consistent practice is key to improvement. Set aside time each week to draw landscapes, experimenting with various techniques and styles. Don’t be discouraged by initial results; growth comes with persistence.

4. Seek Feedback

Share your work with fellow artists or join an art community. Constructive feedback can help you identify areas for improvement and inspire new ideas.

5. Embrace Mistakes

Mistakes are an essential part of the learning process. Rather than becoming frustrated, view them as opportunities for growth. Analyze what went wrong and how you can adjust your approach next time.

Finding Inspiration

Inspiration for landscape drawing can come from various sources. Here are some ideas to spark your creativity:

1. Nature Walks

Take regular walks in nature, bringing along a sketchbook to capture scenes that resonate with you. Whether it’s a vast mountain range or a quiet stream, the world is full of beautiful scenery waiting to be drawn.

2. Travel

Traveling to new locations can provide fresh perspectives and unique landscapes. Document your experiences through sketches, and use these as references for larger works.

3. Photography

Utilize photography as a tool for inspiration. Capture images of landscapes that intrigue you, and use them as references for your drawings. Be sure to add your own artistic interpretation.

4. Art Challenges

Participate in online art challenges or prompts that encourage landscape drawing. These can provide structure and motivation, pushing you to explore new subjects and styles.

5. Art Books and Magazines

Browse art books and magazines focused on landscape art. These can provide insight into different techniques and styles, as well as inspiration for your own work.

Conclusion

Drawing stunning scenery is an enriching artistic endeavor that invites you to explore the beauty of the natural world. By understanding the fundamentals of composition, perspective, and light, mastering various techniques, and consistently practicing your craft, you can create captivating landscape drawings. Remember to find inspiration in your surroundings, analyze the work of masters, and embrace the journey of artistic growth. With dedication and creativity, you can develop your unique style and express your vision of the stunning landscapes that inspire you. Happy drawing!

image
Suka
Komentar
Membagikan
Grace's Gorgeous Pins
1 kamu ·Menerjemahkan

23+ Date Night Beauty Ideas to Enhance Your Natural Glow

Planning a memorable date night often involves a little extra effort to look and feel your best. While elaborate makeup and hairdos can be fun, enhancing your natural glow with some simple yet effective beauty ideas can be even more impactful. Here’s a comprehensive guide to help you shine on your next date night:

1. Hydrate for Radiance

Drinking plenty of water is the simplest and most effective way to keep your skin hydrated and glowing. Aim for at least eight glasses a day, and add a hydrating face mask to your routine a day before the date.

2. Exfoliate Gently

Exfoliating your skin removes dead cells and reveals a fresh, glowing complexion. Use a gentle scrub or a chemical exfoliant with ingredients like glycolic acid or salicylic acid. Don’t over-exfoliate—once or twice a week is enough.

3. Moisturize with Care

Apply a rich moisturizer that suits your skin type. For an added glow, consider a moisturizer with illuminating particles or a subtle shimmer.

4. Prime for Perfection

A good primer smooths the skin and helps your makeup last longer. Choose one with a dewy finish to enhance your natural glow without looking greasy.

5. Opt for a Lightweight Foundation

Instead of a heavy foundation, go for a lightweight, luminous formula. BB creams or tinted moisturizers can provide coverage while allowing your natural skin texture to shine through.

6. Illuminate with Highlighter

Apply a highlighter on the high points of your face—cheekbones, brow bones, and the bridge of your nose. Cream or liquid highlighters tend to blend seamlessly and offer a more natural-looking glow.

7. Embrace the Dewy Look

Mix a few drops of liquid highlighter into your foundation for an all-over dewy effect. This technique can create a fresh and glowing appearance without a heavy makeup application.

8. Use a Setting Spray

A hydrating setting spray not only locks your makeup in place but also gives your skin a dewy finish. Opt for one with a glow-enhancing formula.

9. Focus on Groomed Brows

Well-groomed brows frame your face and can enhance your overall appearance. Use a brow gel to keep them in place and add a bit of color if needed.

10. Subtle Smoky Eyes

A soft smoky eye can add depth and drama without overpowering your natural beauty. Stick to neutral tones and blend well for a seamless look.

11. Define Your Lashes

Curl your lashes and apply a coat or two of mascara. For a more dramatic effect, use a volumizing mascara to make your lashes stand out.

12. Natural Lip Color

Choose a lip color that complements your natural shade. Tinted lip balms or glosses offer a hint of color while keeping your lips hydrated and soft.

13. Blush for a Healthy Glow

Apply blush to the apples of your cheeks for a natural flush. Cream blushes tend to blend better and give a more natural finish compared to powder blushes.

14. Healthy Hair Habits

Before your date, ensure your hair is clean and styled. A touch of hair oil or a shine spray can add luster without weighing your hair down.

15. Glow with a Body Oil

For a head-to-toe glow, apply a light body oil or shimmer lotion. Focus on areas like your shoulders, collarbones, and legs for a radiant look.

16. Nail Care

Well-maintained nails can enhance your overall appearance. Opt for a clear or subtle nude polish to keep things elegant and understated.

17. Fresh Fragrance

A light, fresh fragrance can be uplifting and add to your overall allure. Choose a scent that isn’t overpowering but complements your natural scent.

18. Healthy Skin from Within

Incorporate foods rich in antioxidants, vitamins, and minerals into your diet. Berries, nuts, and leafy greens can contribute to a healthy, glowing complexion.

19. Relax and De-Stress

Stress can affect your appearance. Take some time to relax before your date—whether it’s through a soothing bath, meditation, or a good book.

20. Professional Treatments

Consider a professional facial or skin treatment a few days before your date. Treatments like microdermabrasion or light peels can refresh your skin and enhance its glow.

21. Sleep Well

A good night’s sleep can work wonders for your appearance. Aim for 7-8 hours of restful sleep to ensure your skin looks refreshed and radiant.

22. Smile Brightly

Your smile is your best accessory. Maintain good oral hygiene and consider a whitening toothpaste or treatment if you want a brighter smile.

23. Confidence is Key

Finally, the best way to enhance your natural glow is to exude confidence. Feeling good about yourself will naturally make you look and feel more radiant.

Bonus Tip: Customize Your Routine

Everyone’s skin and style are unique. Experiment with these ideas to find what works best for you and tailor your routine to suit your personal preferences.

image
Suka
Komentar
Membagikan
Pennys Pretty Projects
1 kamu ·Menerjemahkan

Mastering the Art of Drawing Realistic 3D Water Drops 💧

Drawing realistic water drops can elevate your artwork, adding a touch of realism and dimension. This article will guide you through the essential techniques and tips for creating stunning, lifelike water drops that appear three-dimensional. Whether you’re a beginner or an experienced artist, mastering this skill can enhance your artistic repertoire.

Understanding the Nature of Water Drops
Before you start drawing, it’s crucial to understand the characteristics of water drops. Here are some key features:

Refraction: Water drops bend light, causing objects behind them to appear distorted.
Reflection: Light reflects off the surface of the drop, creating highlights.
Translucency: Water is transparent, allowing some light to pass through while absorbing others.
Surface Tension: Water drops maintain a rounded shape due to surface tension, which creates a smooth and shiny appearance.
Observing Real Water Drops
To effectively draw water drops, spend time observing them in real life. Look for various forms, sizes, and reflections in different lighting conditions. Take note of how they interact with surfaces, how light reflects and refracts through them, and how their shapes can change based on the surrounding environment.

Tools and Materials
To achieve realistic water drops in your drawings, gather the following tools:

Pencils: A range of pencils (H, HB, 2B, 4B, etc.) for different shading techniques.
Erasers: A kneaded eraser for highlights and a regular eraser for mistakes.
Paper: Smooth drawing paper or watercolor paper for better blending.
Blending Tools: Blending stumps, cotton swabs, or your fingers for smooth gradients.
Colored Pencils or Watercolors: For adding color to your drops, if desired.
Step-by-Step Guide to Drawing Realistic Water Drops
Step 1: Basic Shapes
Start by sketching the basic shape of the water drop. Use light pencil strokes to create an oval or teardrop shape, depending on the perspective. The drop should be wider at the bottom and taper towards the top.

Step 2: Adding Reflections
Next, consider the source of light in your drawing. Use a white or light-colored pencil to indicate where the light reflects off the drop. This is typically found on the upper part of the drop. Make sure the reflection is curved to follow the shape of the drop.

Step 3: Creating Depth with Shadows
To give your water drop a 3D effect, add shadows on the opposite side of the light source. Use a darker pencil (like 4 to create soft shadows around the edges. Blend the shadow gently into the drop’s body to maintain a smooth surface.

Step 4: Adding Color (Optional)
If you want to add color to your water drop, use colored pencils or watercolors. Lightly apply color around the edges of the drop, and gradually blend it towards the center. Remember, the color should be subtle, as water drops are generally transparent.

Step 5: Enhancing Details
Use a fine-tipped pencil or a white gel pen to add intricate details, such as tiny highlights or reflections from nearby objects. These details can enhance the realism of your water drop and create a sense of depth.

Step 6: Final Touches
Review your drawing and make any necessary adjustments. Darken the shadows or enhance the highlights as needed. This final pass will help unify the drawing and make the water drop appear more lifelike.

Tips for Drawing Realistic Water Drops
Practice Different Sizes: Experiment with various sizes of water drops to understand how reflections and shadows change.
Use Reference Images: Look for photographs of water drops to guide your drawings. Study the details in each image.
Experiment with Light: Practice drawing water drops under different lighting conditions to see how shadows and reflections vary.
Layer Your Work: Build up layers of shading gradually to create a smooth, realistic appearance.
Stay Patient: Realistic drawing takes time and practice. Don’t rush the process—allow yourself to refine your technique over time.
Common Mistakes to Avoid
Overdoing the Highlights: While highlights are essential, too much can make the drop look unnatural. Keep them subtle and well-placed.
Neglecting Shadows: Shadows provide depth and realism. Don’t skip this step; ensure you have a good balance of light and shadow.
Ignoring the Background: Consider how the water drop interacts with its background. A simple blurred background can enhance the drop's prominence.
Rushing the Process: Take your time with each step. Quality over speed is crucial in creating realistic art.

Conclusion

Drawing realistic 3D water drops can be a rewarding endeavor, enhancing your artistic skills and adding depth to your work. By understanding the nature of water drops, using the right tools, and following the step-by-step process, you can create stunning and lifelike representations. Remember, practice is key, so keep experimenting and refining your techniques. With patience and dedication, you’ll master the art of drawing water drops in no time!

image
Suka
Komentar
Membagikan
Showing 8809 out of 11894
  • 8805
  • 8806
  • 8807
  • 8808
  • 8809
  • 8810
  • 8811
  • 8812
  • 8813
  • 8814
  • 8815
  • 8816
  • 8817
  • 8818
  • 8819
  • 8820
  • 8821
  • 8822
  • 8823
  • 8824

Sunting Penawaran

Tambahkan tingkat


Pilih gambar
Hapus tingkat Anda
Anda yakin ingin menghapus tingkat ini?

Ulasan

Untuk menjual konten dan postingan Anda, mulailah dengan membuat beberapa paket. Monetisasi

Bayar Dengan Dompet

Peringatan Pembayaran

Anda akan membeli item, apakah Anda ingin melanjutkan?

Minta Pengembalian Dana