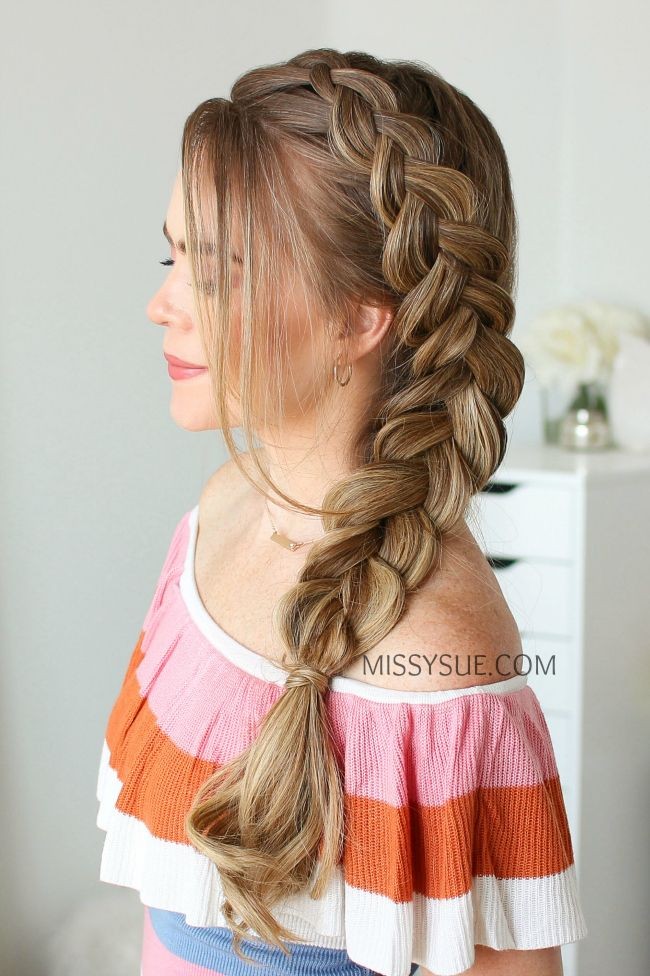
Unlock the Secret to the Perfect Dutch Side Braid with These Stunning Tips from MISSY SUE
Dutch side braids are a chic and sophisticated way to elevate your hairstyle game. With their three-dimensional, braided texture that pops off the scalp, Dutch braids offer a unique twist on traditional braiding techniques. If you’re looking to master the Dutch side braid and make it look flawless every time, you’re in the right place. We’ve gathered stunning tips and tricks from the renowned hairstylist MISSY SUE to help you unlock the secret to the perfect Dutch side braid.
#### **1. Start with Clean, Dry Hair**
For the best results, begin with clean, dry hair. Freshly washed hair can sometimes be too slippery, so it's often better to braid hair that's been allowed to air dry or lightly styled with a texturizing spray. This will give your braid better grip and prevent it from slipping out of place.
#### **2. Prep with Texture**
Adding a bit of texture to your hair can make braiding easier and more effective. Use a lightweight mousse or texturizing spray to add volume and grip. This helps each strand stay in place and makes the braid look fuller and more defined.
#### **3. Divide Your Hair Correctly**
For a Dutch side braid, you’ll want to start by parting your hair on the side where you want the braid to begin. Gather a section of hair from the top and divide it into three equal sections. Make sure to secure the rest of your hair to avoid interference while braiding.
#### **4. Master the Dutch Braid Technique**
Unlike the French braid, the Dutch braid involves braiding under rather than over. Start by crossing the right section under the middle section, then the left section under the new middle section. As you braid, incorporate hair from the sides into each section to add dimension and keep the braid tight and close to your scalp.
#### **5. Angle the Braid to the Side**
To achieve a side braid, angle the braid towards the side of your head as you work. This will ensure the braid drapes beautifully across your shoulder or back, rather than hanging straight down. Keep the braid angled as you incorporate new sections of hair.
#### **6. Secure with Hair Ties**
Once you’ve braided your hair all the way to the end, secure the braid with a small, clear hair elastic. If you want to add extra hold, you can use a light hairspray to keep the braid in place. Make sure the elastic is tight enough to keep the braid secure but not so tight that it creates a bump.
#### **7. Tug for Volume**
For a more voluminous look, gently tug on the sides of the braid to loosen it slightly. This creates a fuller, more textured appearance and helps the braid stand out. Be careful not to pull too hard, as this can make the braid look messy.
#### **8. Finish with Accessories**
Enhance your Dutch side braid with accessories for a polished finish. Consider adding decorative bobby pins, hair clips, or even a small floral accessory to make the braid stand out. This adds a personal touch and elevates your hairstyle for special occasions.
#### **9. Tame Flyaways**
To keep your braid looking neat and tidy, use a small amount of hair gel or pomade to smooth down any flyaways. Apply it sparingly to avoid weighing down your braid or making it look greasy.
#### **10. Practice Makes Perfect**
Perfecting the Dutch side braid takes practice, so don’t get discouraged if your first few attempts aren’t perfect. Keep practicing the technique, and experiment with different angles and tightness levels to find what works best for you.
### **Bonus Tip: Use a Braiding Tool**
If you're new to braiding or want to ensure even sections, consider using a braiding tool or silicone bands to help you section your hair neatly. These tools can make the process easier and more consistent, especially for beginners.
### **Conclusion**
The Dutch side braid is a versatile and stunning hairstyle that can add a touch of elegance and sophistication to any look. With these expert tips from MISSY SUE, you can master the technique and achieve a flawless braid every time. From prepping your hair to adding the finishing touches, these steps will help you unlock the secret to creating a Dutch side braid that’s both beautiful and enduring. So grab your hair tools, follow these tips, and enjoy the compliments that come with your perfectly styled Dutch side braid!


