## How to Create a Pull-Through Braid: A Step-by-Step Guide to Achieve Gorgeous, Voluminous Hair 💜
Pull-through braids are a fantastic hairstyle choice if you're looking for a chic, voluminous look without the complexity of traditional braiding techniques. This hairstyle is both trendy and versatile, perfect for casual outings, formal events, or even a fun day out. Whether you’re a braiding novice or a seasoned pro, this guide will walk you through the process of creating a pull-through braid, ensuring your hair looks gorgeous and full of life.
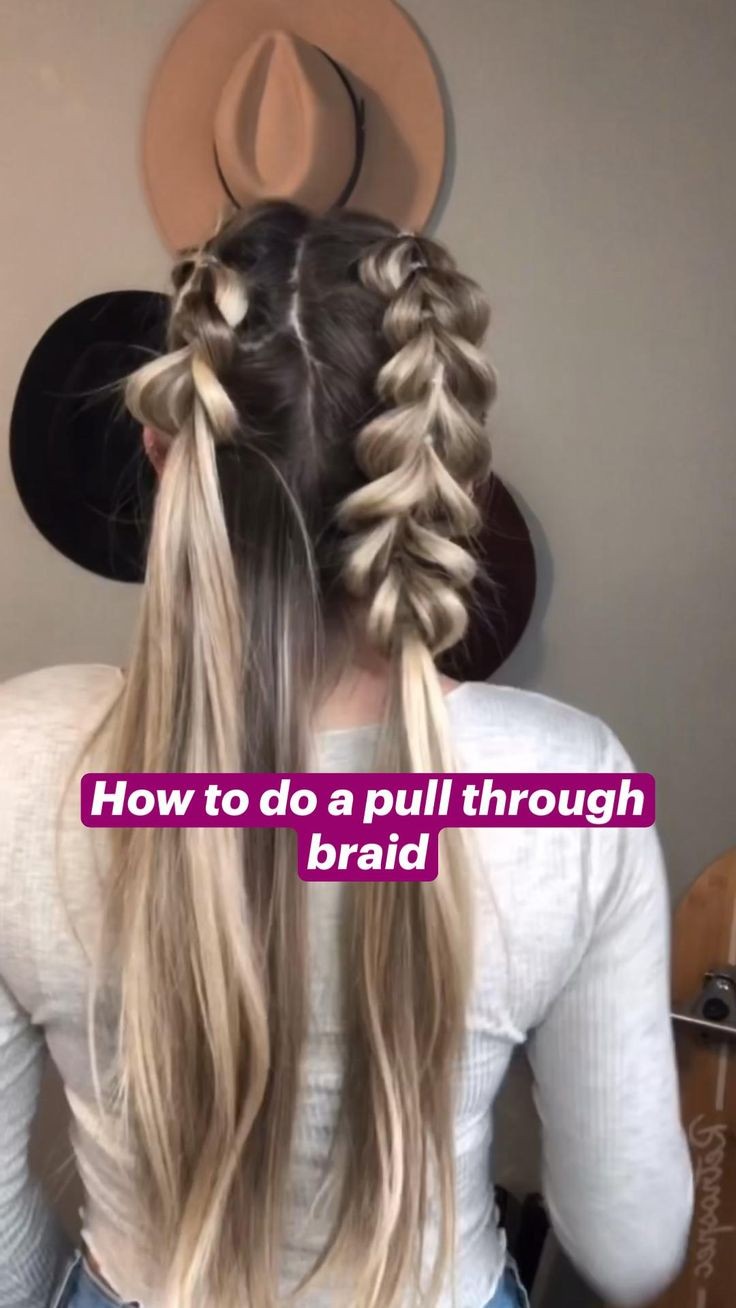
### **What Is a Pull-Through Braid?**
A pull-through braid is a modern twist on the classic braid. Instead of weaving three sections of hair together, this style involves creating a series of loops and pulls that give the appearance of a braid with a voluminous, textured finish. The pull-through braid is relatively easy to master and can be customized to suit different hair lengths and types.
### **Step-by-Step Guide to Creating a Pull-Through Braid**
#### **Step 1: Prepare Your Hair**
**1. Start with Clean, Dry Hair* For best results, begin with clean, dry hair. You can use a volumizing mousse or texturizing spray to add some body and texture.
**2. Brush Your Hair* Ensure your hair is free of tangles by brushing it thoroughly. This will make the braiding process smoother and more manageable.
#### **Step 2: Create a Base Ponytail**
**1. Part Your Hair* Decide on the parting of your hair—center or side part works well.
**2. Secure a High Ponytail* Gather all of your hair into a high ponytail at the desired position. Use an elastic band to secure it tightly. Make sure the ponytail is smooth and free of bumps.
#### **Step 3: Begin the Pull-Through Technique**
**1. Divide the Ponytail* Split the ponytail into two equal sections. These sections will create the loops of your braid.
**2. Create the First Loop* Take a small section of hair from the right side of the ponytail and secure it with a small elastic band, creating the first loop. Leave some hair hanging below the elastic band for added volume.
**3. Pull Through* Take the remaining hair from the left side of the ponytail and pull it through the loop you just created. Smooth the hair out and secure it with another elastic band, forming a new loop. Repeat this process, creating a series of loops by pulling hair through each one until you reach the end of the ponytail.
**4. Secure the End* Once you reach the end of the ponytail, secure the final loop with an elastic band. You can use bobby pins to tuck in any loose ends if necessary.
#### **Step 4: Adjust and Style**
**1. Loosen the Braid* Gently pull on each loop to loosen and create a fuller look. This adds a relaxed, voluminous effect to your braid.
**2. Smooth Out Any Strays* Use a small amount of hairspray or styling gel to tame any flyaways and keep the style looking polished.
**3. Add Finishing Touches* You can wrap a small section of hair around the base of the ponytail to hide the elastic band and create a seamless look. Add hair accessories or decorative clips for a personalized touch.
### **Tips for a Perfect Pull-Through Braid**
**1. **Volume and Texture* For a more voluminous braid, apply texturizing products before starting. Tease the hair slightly at the roots to enhance the fullness.
**2. **Hair Length and Type* Pull-through braids work best with medium to long hair. For shorter hair, consider using hair extensions or temporary hair pieces to achieve the desired length and volume.
**3. **Tightness and Neatness* Ensure each loop is securely fastened and adjust the tightness as needed. A well-secured braid will last longer and maintain its shape throughout the day.
**4. **Use of Accessories* Enhance your pull-through braid with hair accessories such as decorative elastics, jeweled clips, or ribbon wraps for added style.
### **Variations of the Pull-Through Braid**
**1. **Double Pull-Through Braid**
For an extra touch of flair, create two separate pull-through braids and secure them with colorful elastics. This adds a playful and eye-catching element to the traditional braid.
**2. **Side Pull-Through Braid**
Instead of a high ponytail, create a side pull-through braid for a more relaxed and casual look. This variation works well for a bohemian vibe or a laid-back day out.
**3. **Half-Up Pull-Through Braid**
Incorporate pull-through braids into the top half of your hair and leave the bottom half loose. This creates a stylish half-up, half-down look that’s perfect for both casual and formal occasions.
**4. **Pull-Through Braid with Hair Accessories**
Add decorative elements like flower crowns, glittery pins, or bow clips to your pull-through braid for a touch of glamour. This is ideal for special occasions such as weddings or parties.
### **Hairstyle Inspiration for Different Occasions**
**1. **Casual Outings**
For a relaxed day out, keep the pull-through braid simple and natural. Pair it with a casual outfit like jeans and a t-shirt for an effortless look.
**2. **Work or School**
Opt for a neater appearance by smoothing out the loops and ensuring the braid is tightly secured. Pair with professional attire for a polished and put-together look.
**3. **Special Events**
Elevate your pull-through braid with intricate braiding techniques and elegant accessories. Consider using hairspray for added shine and to keep your style in place throughout the event.
**4. **Fitness and Sports**
The pull-through braid is great for keeping your hair secure during physical activities. Ensure the braid is tightly secured and use a sweat-resistant product to maintain the style.
### **Conclusion**
The pull-through braid is a versatile and stylish choice that adds a modern twist to traditional braiding. With its ease of creation and stunning visual impact, it’s perfect for any occasion, from casual outings to special events. By following the step-by-step guide and incorporating your own creative touches, you can achieve a gorgeous, voluminous braid that will enhance your hairstyle and boost your confidence. Embrace the beauty of the pull-through braid and enjoy the endless possibilities it offers for elevating your look.