Good and Bad People Good and Bad People
    #socialmedia #usa #uk #contentwriter #ai
    البحث المتقدم
  • تسجيل الدخول
  • التسجيل

  • وضع اليوم
  • © 2025 Good and Bad People
    حول • الدليل • إتصل بنا • المطورين • سياسة الخصوصية • شروط الاستخدام • إعادة مال • Referral Terms • Acceptable Use Policy • Community Guidelines • Write for Us

    تحديد اللغة

  • Arabic
  • Bengali
  • Chinese
  • Croatian
  • Danish
  • Dutch
  • English
  • Filipino
  • French
  • German
  • Hebrew
  • Hindi
  • Indonesian
  • Italian
  • Japanese
  • Korean
  • Persian
  • Portuguese
  • Russian
  • Spanish
  • Swedish
  • Turkish
  • Urdu
  • Vietnamese

يشاهد

يشاهد بكرات

أحداث

تصفح الأحداث أحداثي

مدونة

تصفح المقالات

السوق

آخر المنتجات

الصفحات

صفحاتي صفحات أعجبتني

أكثر

إستكشاف منشورات شائعة وظائف عروض بالتمويل
بكرات يشاهد أحداث السوق مدونة صفحاتي الكل

إستكشف المشاركات

Posts

المستخدمين

الصفحات

مجموعة

مدونة

السوق

أحداث

وظائف

بالتمويل

Charlotte Chic Nomad
1 ذ ·ترجم

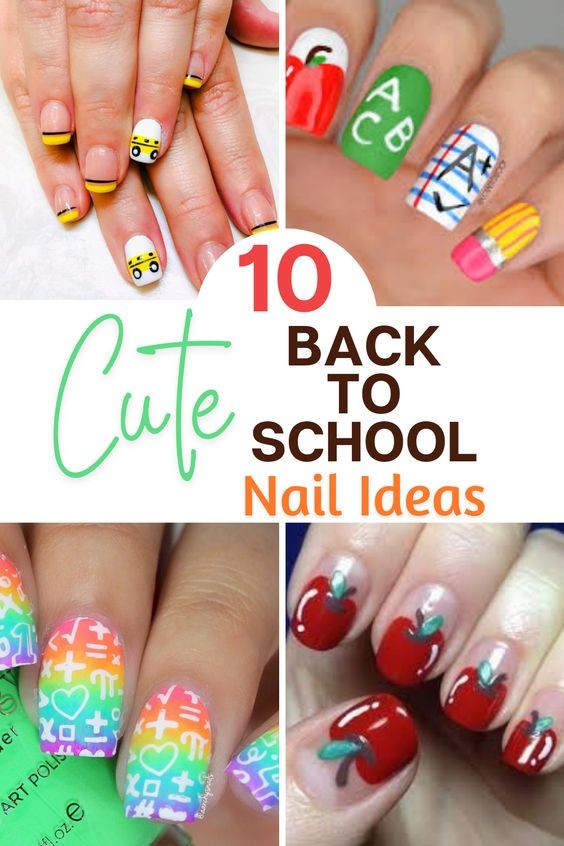
10 Creative Back-to-School Nail Designs for Moms and Teachers

As the back-to-school season rolls around, it’s not just students who are getting ready for a new chapter—moms and teachers deserve a fresh look too! Celebrate the start of the school year with stylish and creative nail designs that reflect your role and enthusiasm. Here are ten imaginative back-to-school nail designs that are perfect for both moms and teachers.


1. Classic Apple Delight

The apple is a timeless symbol of education. Embrace this icon with a design that features red and green apples on a crisp white or soft beige base. Add some tiny leaves and subtle shading to make the apples look realistic and vibrant. This design is perfect for a classic, yet charming touch.


2. Chalkboard Chic

Transform your nails into a mini chalkboard with a dark green or black base and white "chalk" designs. You can write motivational phrases or simple doodles to capture the essence of the classroom. Add some colorful chalk dust for a playful effect, and top it off with a matte finish for a realistic chalkboard look.


3. Paper & Pencil Patterns

Celebrate the essentials of school with nails decorated in paper and pencil designs. Use a pale blue or white background to mimic lined notebook paper, and add pencil motifs in yellow, pink, or blue. This design is fun and educational, making it ideal for both teachers and moms who love a creative twist.


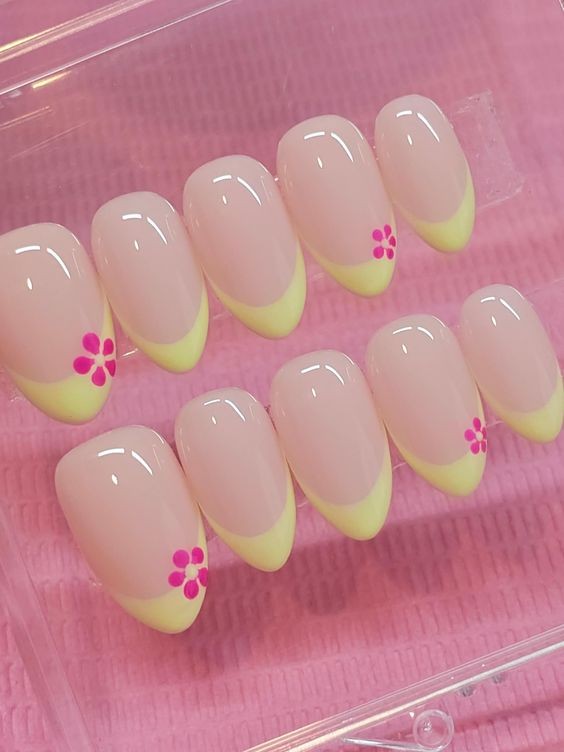
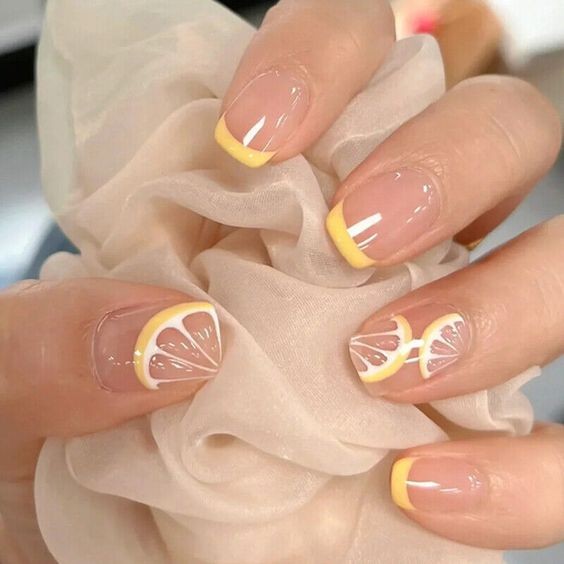
4. School Bus Yellow

Brighten up your nails with a cheerful school bus yellow. Add tiny black and white bus graphics or road signs for a whimsical touch. This vibrant color and design are perfect for making a bold statement and showing off your school spirit.


5. Book Lover’s Paradise

For a design that showcases a love for reading and learning, create nail art featuring stacked books or open book illustrations. Use various colors for the book spines and add a touch of gold or silver for an extra flair. This design is perfect for those who cherish education and want to express it through their nails.


6. ABC Alphabet Fun

Celebrate the basics of learning with nails decorated in the ABCs. Choose a neutral or pastel background and add colorful letters and numbers to each nail. This playful design is both educational and fun, making it a great choice for teachers who want to keep things light-hearted.


7. Stars and Stripes of Success

Incorporate stars and stripes into your nail design to represent achievement and progress. A navy or dark blue base with white stars and red stripes can create a patriotic and celebratory look. This design is perfect for adding a touch of sophistication while still celebrating the start of the school year.


8. Crayon Box Brights

Bring some color to your nails with a crayon-inspired design. Use vibrant colors to create a rainbow effect or mimic the look of crayon strokes on your nails. This playful and artistic design is ideal for showing off a creative flair and adding a splash of fun to your manicure.


9. Classroom Essentials

Highlight classic classroom tools with a design featuring items like rulers, pencils, erasers, and notebooks. A neutral background with detailed illustrations can capture the essence of the classroom. This design is perfect for a subtle nod to the world of education while keeping your nails stylish.


10. Motivational Quotes

Inspire yourself and others with nails that feature motivational quotes and phrases. Choose a base color that contrasts well with the text, and add uplifting messages in elegant fonts. This design not only looks great but also serves as a daily reminder of positivity and encouragement.


Tips for Achieving the Perfect Back-to-School Manicure

Prep Your Nails: Start with clean, trimmed nails. Apply a base coat to protect your natural nails and create a smooth surface.


Choose Your Design: Decide on the nail art design you want and gather the necessary supplies. Whether you're using nail polish, nail art pens, or stickers, make sure you have everything you need.


Apply Base Color: Paint your nails with a base color that complements your design. Allow the base color to dry completely before adding any details.


Add Details: Use nail art brushes or pens to add your chosen designs. Take your time to ensure precision and neatness.


Seal with a Top Coat: Apply a clear top coat to protect your nail art and add shine. This also helps to prolong the life of your manicure.


Maintain Your Manicure: To keep your nails looking fresh, apply cuticle oil and avoid activities that could chip or damage your nails.


Celebrate the back-to-school season with these creative and stylish nail designs that are perfect for moms and teachers. Whether you prefer classic symbols of education or playful, colorful patterns, these designs will help you start the new school year with flair and confidence.

image
إعجاب
علق
شارك
Charlotte Chic Nomad
1 ذ ·ترجم

2 for $16 Boutique Makeup: Black Hearts & Flowers Press-On Nails

If you’re looking to elevate your nail game with a unique and stylish twist, our Black Hearts & Flowers Press-On Nails are the perfect choice. For a limited time, get two sets for just $16 and embrace a chic, boutique look that’s both bold and playful. Here's everything you need to know about these standout press-on nails.


1. Stylish Black Hearts & Flowers Design

Our press-on nails feature a striking combination of black hearts and white flowers, creating a fashionable contrast that’s perfect for a variety of occasions. The design is both edgy and elegant, making it suitable for everyday wear or special events.


Black Hearts: The heart motif adds a touch of romance and rebellion to your nails. The deep black color provides a dramatic effect that stands out against any background.


White Flowers: The delicate white flowers add a touch of femininity and grace, balancing out the boldness of the black hearts. This combination creates a visually appealing contrast that catches the eye.


2. Color: Black/White

The black and white color scheme is a classic choice that never goes out of style. It’s versatile enough to complement any outfit, from casual jeans and a t-shirt to a sophisticated evening dress. This timeless palette is ideal for anyone looking to make a statement with their manicure.


3. One Size Fits All

Our press-on nails come in a one-size-fits-all format, designed to fit a range of nail shapes and sizes. The flexible, easy-to-apply design ensures a comfortable and secure fit for most people:


Application: Simply select the appropriate size from the set, apply adhesive tabs or glue, and press the nail onto your natural nail. For best results, follow the included instructions to ensure a perfect fit.


Adjustability: If you need to trim or file the nails to better fit your natural nail shape, you can do so easily. The press-on nails are designed to be customizable, ensuring they look great on any hand.


4. How to Achieve the Perfect Press-On Manicure

Applying press-on nails is a quick and straightforward process. Follow these steps to ensure a flawless application:


Prep Your Nails: Clean and dry your natural nails. Remove any old polish and gently push back your cuticles.


Select Sizes: Choose the press-on nails that best fit your natural nail size. The set typically includes a variety of sizes to accommodate different nail shapes.


Apply Adhesive: Use the provided adhesive tabs or nail glue. If using glue, apply a small amount to the back of the press-on nail and press it firmly onto your natural nail. Adhesive tabs are also a great option for a no-mess application.


Secure and Shape: Press down firmly for a few seconds to ensure the nail is securely attached. If necessary, file the edges for a more natural look.


Finish Up: Apply a clear top coat over the press-on nails to enhance their shine and increase their longevity.


Removal: When it’s time to switch up your style, gently remove the press-on nails. Soak your hands in warm, soapy water to loosen the adhesive before peeling off the nails.


5. Styling Tips

The Black Hearts & Flowers Press-On Nails can be styled in various ways to match different occasions:


Casual Chic: Pair these nails with a simple outfit for a chic, everyday look. The bold design will add an edge to your casual wear.


Glamorous Evening: Complement your evening wear with these press-on nails for a sophisticated and eye-catching manicure. The black and white design works well with both classic and modern styles.


Festive Fun: Use these nails for parties or special events to stand out with a unique and fashionable touch. The playful hearts and flowers make them perfect for celebrations.


6. Why Choose Boutique Makeup Press-Ons?

Boutique Makeup offers high-quality press-on nails designed to bring you both style and convenience. Here’s why our Black Hearts & Flowers Press-On Nails are a great choice:


Affordable Luxury: At just $16 for two sets, you get a boutique-quality product without breaking the bank. Enjoy premium designs at an unbeatable price.


Easy Application: No need for salon appointments—achieve a professional look right at home with minimal effort.


Versatile Style: The timeless black and white design is perfect for any occasion, making these press-on nails a versatile addition to your beauty routine.


Elevate your nail style with our Black Hearts & Flowers Press-On Nails, available now at a fantastic price. Whether you're dressing up for a special event or adding a touch of elegance to your everyday look, these nails are sure to impress. Grab your two sets for just $16 and enjoy a boutique manicure that’s both stylish and affordable.

image
إعجاب
علق
شارك
Charlotte Chic Nomad
1 ذ ·ترجم

Brown Autumn Shades: Glossy & Matte French Press-On Nails

As the crisp autumn air rolls in and the leaves turn to rich hues of gold and red, it’s the perfect time to update your nail game with some elegant and seasonal shades. This autumn, embrace the warm, inviting tones of brown with our handpainted French press-on nails, available in both glossy and matte finishes. Here’s everything you need to know about achieving the perfect fall manicure with these stylish press-on nails.

1. Embracing Brown Autumn Shades

Brown is a versatile color that exudes warmth and sophistication. For autumn, think of shades that mirror the falling leaves and cozy sweaters—deep chocolate browns, warm caramel tones, and soft beige hues. These colors are not only on-trend but also complement a variety of outfits and occasions, making them a staple for your fall wardrobe.

2. Glossy vs. Matte Finishes

When it comes to choosing between glossy and matte finishes, it’s all about personal preference and the look you’re going for:

Glossy Finish: This finish offers a shiny, reflective surface that can make your nails look freshly manicured. Glossy nails tend to look more polished and can highlight the depth of brown shades beautifully, adding a touch of glamour to your autumn look.

Matte Finish: For a more understated and sophisticated look, matte nails are the way to go. A matte finish gives a chic, velvety appearance that is both modern and elegant. Matte brown nails can add a refined edge to your style, perfect for both casual and formal occasions.

3. Handpainted Details

Our handpainted press-on nails feature intricate designs that elevate the classic French manicure. Here’s how to make the most of these detailed designs:

French Tips: The timeless French tip gets a seasonal twist with brown hues. Choose from various shades to create a gradient effect or stick with a classic beige or caramel tip for a subtle yet stylish look.

Fall-Themed Accents: Enhance your brown nails with autumn-themed handpainted accents like tiny leaves, acorns, or pumpkin motifs. These details can make your nails pop and reflect the essence of the season.

Textured Designs: Incorporate textures such as stripes or dots in different brown shades to add depth and interest to your manicure. Handpainted designs can create unique patterns that make your nails stand out.

4. Application Tips for Press-On Nails

Applying press-on nails is a straightforward process, but following these tips ensures a flawless finish:

Prep Your Natural Nails: Start by cleaning and trimming your natural nails. Push back your cuticles and remove any old nail polish. A clean surface helps the press-on nails adhere better.

Choose the Right Size: Select the press-on nails that best fit your natural nails. Each set typically comes with a variety of sizes, so pick the one that matches your nail shape and size.

Apply Adhesive: Most press-on nails come with adhesive tabs or glue. If using tabs, apply them to your natural nails before pressing on the faux nails. For glue, apply a small amount to the back of the press-on nail and press it firmly onto your natural nail.

Secure and File: Press down for a few seconds to ensure a secure fit. If needed, use a file to shape the edges and smooth any rough spots.

Finish with a Top Coat: For added durability, apply a clear top coat over the press-on nails to seal them and enhance their shine.

Remove Carefully: When you’re ready to switch styles, gently remove the press-on nails. Soak your hands in warm, soapy water to loosen the adhesive, then peel off the nails carefully.

5. Styling Your Autumn Nails

Brown autumn shades are incredibly versatile and can be styled in various ways to match your fall fashion:

Casual Wear: Pair your brown nails with cozy sweaters and jeans for a relaxed, autumnal look. Complement with earthy tones and accessories for a balanced style.

Office Ready: Opt for a classic French tip with a glossy finish for a professional and polished appearance. Stick to neutral browns for a sophisticated office look.

Festive Events: Add handpainted fall accents to your nails for holiday gatherings and seasonal events. Rich brown shades paired with gold or bronze details can create a festive and elegant look.

Embrace the beauty of autumn with our handpainted, glossy, and matte French press-on nails in stunning brown shades. Whether you prefer a shiny finish or a chic matte look, these nails are perfect for adding a touch of fall to your style. Enjoy the season with a manicure that captures the essence of autumn and complements your wardrobe effortlessly.

image
إعجاب
علق
شارك
Charlotte Chic Nomad
1 ذ ·ترجم

Back-to-School Nails: Teacher & Classroom Designs

As summer winds down and the new school year approaches, it’s time to refresh your look with some fun and stylish back-to-school nails. Whether you’re a teacher gearing up for a new semester or a student eager to make a statement, these classroom-inspired nail designs are perfect for adding a touch of personality to your daily routine.

1. Classic Chalkboard Designs

One of the most iconic symbols of the classroom is the chalkboard. For a chic nod to this staple, consider a black base with white "chalk" designs. You can add little handwritten notes or doodles, mimicking the look of a chalkboard covered in classroom content. For a bit of extra flair, incorporate some colorful chalk-like accents or even mini illustrations of apples and books.

2. Paper & Pencil Art

Celebrate the back-to-school season with nail art that features paper and pencil motifs. A white or light blue base with pencil designs can be both fun and educational. You could opt for pencils with vibrant colors or include playful elements like crumpled paper balls and lined notebook pages. These designs are perfect for a creative and whimsical touch to your nails.

3. Apple for the Teacher Nails

The apple is a classic symbol of education and appreciation. Create a sophisticated manicure by incorporating red, green, or even gold apple designs. You can place these on an accent nail or scatter them across all your nails. Add a little shine with glitter or a matte finish for a modern twist.

4. Customized Grade Nails

Why not personalize your nails with your grade or subject of interest? This design idea allows you to showcase your academic achievements or interests directly on your nails. Use bold fonts or playful scripts to write out your grade, subject, or even your favorite academic symbols. This custom touch is not only unique but also a great conversation starter.

5. Classroom Essentials

For a more subtle take, consider designs that feature classic classroom essentials like books, pencils, and rulers. A pastel or neutral base can make these designs pop without being overwhelming. This style is perfect if you prefer a more understated yet thematic look.

6. Blackboard and Book Combo

Mix and match elements from the chalkboard and book themes for a creative and eclectic look. A base of dark green or black with colorful book spines or chalk doodles creates a visually engaging design. This combination can be both elegant and playful, reflecting the dynamic nature of a classroom environment.

7. Teacher Appreciation Nails

Teachers will love nails that express appreciation for their hard work. Incorporate heartwarming phrases like “Best Teacher” or “Thanks, Teach” alongside school-related icons. Use elegant fonts and colors that reflect your personal style or the school’s colors for a thoughtful touch.

How to Achieve the Perfect Back-to-School Manicure

Choose Your Design: Decide on the theme and colors you want for your back-to-school nails. Gather inspiration from the designs mentioned above or create your own.

Gather Supplies: You’ll need nail polish in various colors, nail art brushes or pens, base and top coats, and any other tools required for your chosen design.

Prep Your Nails: Start with clean, trimmed nails. Apply a base coat to protect your natural nails and provide a smooth surface for the nail polish.

Apply Base Color: Choose a base color that complements your design. Allow it to dry completely before moving on to the next steps.

Add Your Design: Use nail art brushes or pens to create your chosen designs. Be patient and let each layer dry before adding additional details.

Finish with a Top Coat: Seal your design with a top coat to ensure longevity and a glossy finish.

Enjoy Your Nails: Show off your back-to-school nails and enjoy the compliments that are sure to come your way!

Back-to-school nails are a fantastic way to embrace the new season and show off your style. With these teacher and classroom designs, you can add a bit of fun and creativity to your manicure routine. Whether you’re preparing for a new school year or just celebrating the season, these designs are sure to make a splash!

image
إعجاب
علق
شارك
Charlotte Chic Nomad
1 ذ ·ترجم

50 Must-Try Coffin-Shaped Nail Art Ideas

If you’re searching for a chic and stylish manicure, look no further than the coffin-shaped nail. This popular nail shape, known for its tapered yet squared-off ends, provides a sleek and sophisticated look that works beautifully with various nail art designs. Whether you’re a fan of minimalistic elegance or bold, intricate patterns, the coffin shape is versatile enough to accommodate every style. Here’s a curated list of 50 must-try coffin-shaped nail art ideas to inspire your next manicure.

1. Classic French Tip

Embrace timeless elegance with a classic French tip. The coffin shape enhances the chicness of this design, offering a refined look that’s perfect for any occasion.

2. Ombre Gradient

Create a stunning gradient effect by blending two or more colors. From subtle pink to bold blue, ombre coffin nails offer a mesmerizing transition of hues.

3. Glitter Glam

Add a touch of sparkle with glittery coffin nails. Opt for full glitter coverage or just a glittery accent on one or two nails for a glamorous look.

4. Matte Finish

For a modern twist, choose a matte finish for your coffin nails. This sleek, non-shiny look pairs beautifully with bold colors and subtle designs.

5. Geometric Patterns

Inject some edge into your manicure with geometric patterns. Incorporate lines, triangles, and shapes to create a striking and contemporary look.

6. Marble Effect

Achieve a sophisticated vibe with marble effect nails. This design mimics the appearance of marble, combining elegant swirls of white, gray, and gold.

7. Floral Designs

Celebrate the beauty of nature with floral nail art. From delicate daisies to vibrant roses, floral designs add a fresh and feminine touch to your coffin-shaped nails.

8. Metallic Accents

Go bold with metallic accents. Gold, silver, or rose gold details can elevate your coffin nails, adding a luxurious and eye-catching element.

9. Abstract Art

Unleash your creativity with abstract art. Use bold brush strokes, splatters, and unconventional patterns to craft a unique and artistic manicure.

10. Negative Space

Play with negative space by leaving parts of your natural nail exposed. This minimalist design is modern and chic, perfect for a sophisticated look.

11. Marble and Gold Leaf

Combine marble effect with gold leaf for a luxurious touch. The gold adds a hint of glamour to the marble’s subtle elegance.

12. Stripes and Lines

Opt for bold stripes and lines to create a graphic, eye-catching design. Play with contrasting colors or keep it monochromatic for a sleek look.

13. Animal Print

Add a wild touch with animal print designs. Leopard spots, zebra stripes, or snake skin can give your coffin nails a fierce and fashionable edge.

14. Pastel Perfection

Soften your look with pastel shades. Soft pinks, blues, and purples create a calming and gentle design that’s perfect for a more subdued style.

15. Neon Brights

Make a statement with neon colors. Bright pinks, greens, and yellows will ensure your nails stand out, especially in summer.

16. Gradient Glitter

Combine the gradient effect with glitter for a sparkling twist. Gradually blend glitter from the base to the tips of your nails for a dazzling effect.

17. Classic Red

You can never go wrong with classic red nails. The coffin shape adds an extra layer of sophistication to this timeless color.

18. Holographic Shine

Go futuristic with holographic nail polish. The shifting colors and shiny finish add a unique and eye-catching element to your coffin nails.

19. Dotted Designs

Add playful dots to your nails. Create patterns or simple polka dots to add a touch of whimsy to your coffin-shaped manicure.

20. Elegant French Twist

Give the French manicure a modern update with colored tips or metallic finishes. This twist on the classic look adds a contemporary touch.

21. Jewel Accents

Incorporate jewel accents into your nail art for a luxurious touch. Use rhinestones or gem stickers to create a glamorous and eye-catching design.

22. Seasonal Themes

Celebrate the seasons with themed nail art. From autumn leaves to winter snowflakes, seasonal designs keep your nails stylish all year round.

23. Watercolor Effects

Create a soft, artistic look with watercolor effects. Blended colors and gentle brushstrokes mimic the beauty of watercolor paintings.

24. Chevron Patterns

Add a dynamic touch with chevron patterns. This zigzag design adds an edgy and modern feel to your coffin nails.

25. Classic Black

Keep it classic with sleek black coffin nails. This versatile color works for any occasion and can be dressed up or down.

26. Whimsical Animal Designs

Infuse some fun into your nails with whimsical animal designs. Cute creatures and playful patterns add a lighthearted touch.

27. Luxe Velvet

For a unique texture, try velvet nails. The velvety finish adds a rich, tactile quality to your coffin nails.

28. Color Blocking

Experiment with color blocking by using bold, contrasting colors. This geometric design creates a striking and modern look.

29. Soft Glitter Gradient

Combine glitter with a soft gradient for a subtle yet sparkly look. This design adds just the right amount of shimmer.

30. Beach Vibes

Bring the beach to your nails with ocean-inspired designs. Think sandy tones, ocean blues, and seashell patterns.

31. Classic Plaid

Incorporate plaid patterns for a preppy and stylish look. This design works well with fall and winter colors.

32. Minimalistic Art

Keep it simple with minimalistic art. Clean lines and subtle designs provide an elegant and refined look.

33. Layered Colors

Layer different colors for a multi-dimensional effect. This technique adds depth and interest to your coffin nails.

34. Chrome Finish

Shine bright with a chrome finish. This high-shine, reflective look adds a futuristic and sleek appearance to your nails.

35. Abstract Brush Strokes

Use abstract brush strokes to create an artistic and dynamic design. This freeform style adds a creative touch to your coffin nails.

36. Textured Nail Art

Experiment with different textures such as matte, glossy, and textured finishes. Combining textures adds depth and dimension to your manicure.

37. Ombre with Nail Art

Combine ombre gradients with detailed nail art. Adding designs over a gradient base creates a layered and intricate look.

38. Classic White

Opt for crisp white nails for a clean and classic look. This neutral color is versatile and elegant.

39. Bold Animal Print

Go bold with vibrant animal prints. Incorporate bright colors and dramatic patterns for a daring look.

40. Subtle Sparkle

Add a hint of sparkle with subtle glitter accents. This understated design adds just a touch of shimmer to your nails.

41. Tropical Designs

Celebrate summer with tropical-themed nail art. Think palm trees, sunsets, and bright, fun colors.

42. Holographic Foil

Use holographic foil for a unique and shimmering effect. This design adds an iridescent touch to your coffin nails.

43. Artistic Water Drops

Create a refreshing look with artistic water drop designs. This effect mimics the appearance of droplets on your nails.

44. Elegant Lace Patterns

Add a touch of elegance with lace patterns. This delicate design provides a sophisticated and intricate look.

45. Monochrome Magic

Stick to a single color family for a monochromatic look. This design is sleek and stylish, with varying shades of the same color.

46. Doodle Art

Get playful with doodle art. Simple drawings and sketches add a fun and whimsical touch to your coffin nails.

47. Textured Marble

Combine marble designs with textured finishes. This technique adds a tactile quality to the elegant marble look.

48. Neon Accents

Brighten your look with neon accents. Vibrant hues add a bold and exciting touch to your manicure.

49. Shimmery Ombre

Combine shimmer with ombre gradients for a sparkling transition. This design adds a glamorous and eye-catching effect.

50. Holiday Themes

Celebrate holidays with themed nail art. Whether it’s Halloween, Christmas, or Valentine’s Day, festive designs add seasonal flair.

image
إعجاب
علق
شارك
Scarletts Style Journey
1 ذ ·ترجم

**Small Bedroom Decorating Ideas with Faux Fur, Pillows, Tapestries, and Lights**

Transform your small bedroom into a stylish and cozy retreat with these creative decorating ideas. By incorporating faux fur, plush pillows, vibrant tapestries, and charming lights, you can make even the smallest space feel inviting and comfortable. Here’s how to use these elements to enhance your bedroom decor:

**1. Faux Fur Rugs**

Add a touch of luxury to your small bedroom with a faux fur rug. Place it next to your bed or in the center of the room to create a soft, cozy area that feels warm underfoot. Choose a neutral color for a versatile look or go bold with a vibrant hue to make a statement.

**2. Layered Pillows**

Elevate your bed with a variety of pillows in different textures and sizes. Mix faux fur pillows with patterned or solid-color cushions to add depth and comfort to your bed. Layering pillows not only makes your bed look inviting but also provides extra support for lounging.

**3. Statement Tapestries**

Use a colorful or patterned tapestry as a focal point on one wall. A tapestry can add visual interest and warmth to your room without taking up floor space. Choose a design that complements your color scheme and adds personality to your space.

**4. String Lights**

Create a cozy ambiance with string lights. Drape them along your headboard, around your windows, or across the ceiling. They add a soft, warm glow that’s perfect for relaxing or setting a calming mood.

**5. Faux Fur Throws**

Drape a faux fur throw over your bed or a chair to add a touch of elegance and comfort. This simple addition can instantly make your space feel more inviting and warm.

**6. Decorative Wall Art**

Incorporate wall art that matches your style, such as framed prints, quotes, or artwork. Combine this with a tapestry for a layered look. Choose pieces that reflect your personality and add a pop of color or texture to your walls.

**7. Accent Lighting**

Use accent lighting to highlight specific areas of your room. A small, stylish lamp on your bedside table or a floor lamp in a corner can provide additional light and enhance the cozy atmosphere.

**8. Cozy Bedding**

Invest in high-quality, cozy bedding to make your bed a comfortable retreat. Choose soft fabrics like flannel or brushed cotton, and layer with faux fur throws and decorative pillows for added comfort.

**9. Wall Decals**

Add wall decals or stickers for a quick and easy way to personalize your space. Opt for designs that complement your overall decor, such as floral patterns or geometric shapes.

**10. Floating Shelves**

Install floating shelves to display decorative items, such as framed photos, small plants, or candles. Shelves are a great way to utilize wall space and keep your bedroom organized while adding visual interest.

**11. Mirrored Accents**

Incorporate mirrored or metallic accents to reflect light and make your room feel larger. Consider adding a small mirrored nightstand or decorative metal accents to enhance the overall decor.

**12. Layered Textures**

Combine different textures to create a cozy and inviting atmosphere. Mix faux fur with soft fabrics, like knit throws or velvet pillows, to add warmth and visual interest.

**13. Customized Headboard**

Make a statement with a custom headboard. Use fabric, paint, or wallpaper to create a unique look that complements your room’s style. Adding a faux fur or upholstered panel can make your bed area stand out.

**14. Indoor Plants**

Incorporate small indoor plants to add a touch of nature to your space. Plants like succulents or ferns can thrive in small pots and add a fresh, green element to your decor.

**15. Creative Storage Solutions**

Use stylish storage solutions, like decorative baskets or boxes, to keep your small bedroom organized. Store extra blankets, pillows, or personal items out of sight while adding to the overall decor.

By incorporating these elements, you can create a small bedroom that’s both stylish and comfortable. Faux fur, plush pillows, vibrant tapestries, and charming lights are all you need to make your space feel cozy and inviting.

🛏️✨ #smallbedroomdecor #cozyspaces #fauxfur #goodandbad

image
إعجاب
علق
شارك
Scarletts Style Journey
1 ذ ·ترجم

**27 Dollar Store Fall Decor Ideas You Can DIY**

Transform your home for fall without breaking the bank with these 27 DIY Dollar Store decor ideas. With a little creativity and a few affordable supplies, you can create stylish and festive autumn decorations that will make your space feel warm and inviting. Here’s a collection of easy and budget-friendly projects to get you started:

**1. Autumn Wreath**

Craft a beautiful fall wreath using a foam ring, faux leaves, and decorative accents from the dollar store. Simply glue the leaves around the ring and add a bow or other embellishments for a welcoming touch on your front door.

**2. Pumpkin Centerpieces**

Create charming pumpkin centerpieces by painting or decorating foam pumpkins. Arrange them in a basket or on a tray, and add some faux autumn leaves for an extra touch of seasonal flair.

**3. DIY Leaf Garland**

Make a festive leaf garland by stringing together faux leaves with twine or ribbon. Drape it across your mantel, windows, or around your door frame for a touch of fall color.

**4. Decorative Mason Jars**

Turn mason jars into fall-themed vases or candle holders. Paint the jars in autumn colors, add some twine, and fill them with faux flowers or candles for a cozy touch.

**5. Pumpkin Planters**

Use small faux pumpkins as planters for autumn flowers or succulents. Simply cut the tops off the pumpkins, scoop out the insides, and place a small pot or floral foam inside.

**6. DIY Table Runner**

Create a fall-themed table runner using burlap or a seasonal fabric from the dollar store. Add some stenciled leaves or other fall motifs to give your dining table a festive look.

**7. Fall Scented Candles**

Enhance the autumn ambiance with DIY fall-scented candles. Use plain candles from the dollar store and add a few drops of essential oil, or wrap them in autumn-themed fabric for a decorative touch.

**8. Autumn Jar Lanterns**

Make glowing autumn lanterns by decorating mason jars with fall-themed paper or paint. Insert battery-operated tealights inside for a warm and inviting glow.

**9. DIY Tabletop Signs**

Create cute fall tabletop signs using small wooden or cardboard signs from the dollar store. Paint or write fall-themed messages like “Give Thanks” or “Harvest Time” for a seasonal touch.

**10. Leafy Table Decor**

Add a touch of fall to your table with faux leaf placemats or coasters. Simply arrange faux leaves on the table and cover them with clear adhesive to create a unique and easy table decor.

**11. Pumpkin Wall Art**

Craft a simple pumpkin-themed wall art using canvas or poster board from the dollar store. Paint or glue on pumpkin shapes and autumn leaves for a festive piece of wall decor.

**12. DIY Fall Pillows**

Update your throw pillows with fall-themed covers. Use fabric from the dollar store to sew or glue on patterns like pumpkins, leaves, or cozy fall sayings.

**13. Autumn-Themed Centerpieces**

Make a centerpiece for your dining table using a mix of faux pumpkins, pinecones, and autumn leaves arranged in a decorative bowl or tray.

**14. Pumpkin Garland**

Create a playful pumpkin garland by painting small foam pumpkins in different colors and stringing them together with twine. Hang it across your fireplace or along your walls.

**15. Fall-Themed Frames**

Decorate picture frames with fall-themed paper or paint. Add seasonal photos or autumn quotes to create custom decor that reflects the season.

**16. DIY Door Hangers**

Make seasonal door hangers using foam shapes or wooden cutouts. Decorate them with fall colors and designs like pumpkins, acorns, or leaves.

**17. Autumn Leaf Bouquets**

Assemble faux autumn leaf bouquets using dollar store flowers and leaves. Arrange them in a vase or jar for a beautiful and budget-friendly fall floral arrangement.

**18. DIY Pumpkin Garland**

Create a charming pumpkin garland by painting foam pumpkins in various shades of orange and stringing them together with twine or ribbon.

**19. Fall-Themed Coasters**

Make fall-themed coasters using cork or wooden coasters from the dollar store. Decorate them with paint or mod podge and seasonal designs.

**20. Faux Pumpkin Candles**

Transform faux pumpkins into candle holders by cutting out the tops and inserting battery-operated candles. Place them on your mantel or table for a cozy glow.

**21. Fall Tree Display**

Create a mini fall tree display using branches from the dollar store. Decorate with faux leaves, mini pumpkins, and small fall-themed ornaments.

**22. DIY Leaf Suncatchers**

Make colorful leaf suncatchers by decorating clear plastic sheets or old CD cases with faux leaves and fall-colored markers. Hang them in your windows for a vibrant fall display.

**23. Pumpkin Votive Holders**

Transform small pumpkins into votive candle holders by hollowing them out and placing candles inside. Use these as table centerpieces or around your home.

**24. Fall-Themed Banners**

Craft fall-themed banners using burlap or felt from the dollar store. Add stenciled or painted letters and designs to create festive banners for your home.

**25. DIY Fall Vase Fillers**

Fill vases with a mix of faux autumn leaves, acorns, and small pumpkins. These make great decorations for tables, mantels, or shelves.

**26. Seasonal Wall Decals**

Decorate your walls with seasonal wall decals from the dollar store. Choose designs like pumpkins, leaves, or fall sayings to add a touch of autumn to any room.

**27. Fall-Themed Picture Collage**

Create a fall-themed picture collage by decorating a bulletin board or corkboard with autumn-colored paper and adding photos or seasonal printables.

These 27 DIY Dollar Store fall decoration ideas are perfect for adding festive touches to your home on a budget. With a bit of creativity and some affordable materials, you can create a warm and inviting fall atmosphere that reflects the season’s charm.

🍁🎨 #dollarstoredecor #falldiy #budgetfriendly #goodandbad

image
إعجاب
علق
شارك
Scarletts Style Journey
1 ذ ·ترجم

**20 DIY Bedroom Projects to Create a Cozy and Comfy Retreat – Craftsonfire**

Transform your bedroom into a relaxing haven with these 20 DIY projects that add both style and comfort. Whether you’re looking to refresh your decor or create a more inviting space, these projects are designed to make your room feel like a true sanctuary. Dive into these creative ideas and get inspired to enhance your bedroom with a personal touch.

**1. DIY Upholstered Headboard**

Craft a custom upholstered headboard to add a touch of luxury to your bed. Use foam, fabric, and a wooden frame to create a headboard that matches your style and adds comfort.

**2. Cozy Knit Throw Blanket**

Create a plush knit throw blanket using chunky yarn and simple knitting techniques. This project adds warmth and texture to your bed or seating area.

**3. Personalized Wall Art**

Design your own wall art with paint, canvas, and stencils. Create abstract patterns, motivational quotes, or nature-inspired designs to personalize your space.

**4. DIY Decorative Pillows**

Sew or embellish decorative pillows to complement your bedroom decor. Use fabric scraps, iron-on transfers, or embroidery to create unique designs.

**5. Floating Nightstands**

Install floating nightstands for a sleek and modern look. Use wall-mounted shelves or custom-built units to keep essentials within easy reach while saving floor space.

**6. Handmade Bedside Lamps**

Upgrade your bedside lighting with handmade lamps. Customize lamp bases with paint, fabric, or decorative elements, and add a stylish lampshade for a personal touch.

**7. Macramé Wall Hanging**

Add texture and style to your walls with a DIY macramé wall hanging. Use cotton cord and simple knots to create intricate patterns that bring a bohemian vibe to your room.

**8. DIY Fabric Storage Bins**

Organize your space with DIY fabric storage bins. Use fabric, a sewing machine, and cardboard to create bins that match your decor and keep your items neatly stored.

**9. Customized Curtain Panels**

Refresh your windows with customized curtain panels. Choose fabric that complements your room and use a sewing machine or fabric glue to create panels that add style and privacy.

**10. DIY Bed Skirt**

Make a bed skirt to hide under-bed storage and add a finished look to your bed. Use fabric that coordinates with your bedding and attach it with velcro or fabric tape.

**11. Upcycled Furniture**

Give old furniture a new lease on life with a fresh coat of paint or new hardware. Transform dressers, nightstands, or chairs to fit your bedroom’s style.

**12. DIY Wall Sconces**

Create your own wall sconces to add ambiance to your room. Use wood, metal, or glass to craft sconces that hold candles or LED lights for a warm glow.

**13. Decorative Bed Tray**

Craft a decorative bed tray to use for breakfast in bed or as a stylish accessory. Use wood or acrylic and add a custom paint job or decorative handles.

**14. DIY String Light Canopy**

Enhance your bed with a DIY string light canopy. Drape string lights over a curtain rod or ceiling hooks to create a magical and cozy atmosphere.

**15. Fabric Headboard Panels**

Create fabric-covered headboard panels to add a touch of elegance. Use batting and fabric to cover wooden or foam panels and mount them behind your bed.

**16. Personalized Photo Display**

Showcase your favorite memories with a DIY photo display. Use wire, clips, and decorative elements to create a unique gallery wall for your photos.

**17. DIY Rug**

Make your own rug using fabric scraps or yarn. Create a braided rug, a woven mat, or even a painted rug to add color and comfort to your floor.

**18. Wall-Mounted Jewelry Organizer**

Keep your jewelry organized and accessible with a wall-mounted organizer. Use frames, hooks, and fabric to create a stylish display for your accessories.

**19. DIY Cozy Reading Nook**

Design a cozy reading nook with a comfortable chair, plush pillows, and a DIY bookshelf. Add soft lighting and a blanket for a perfect spot to unwind.

**20. DIY Headboard Shelf**

Add functionality to your headboard with a DIY shelf. Use wood or metal to create a shelf that attaches to your headboard, providing space for books, plants, or decorative items.

These 20 DIY bedroom projects are perfect for creating a space that’s both cozy and stylish. With a bit of creativity and some hands-on crafting, you can transform your bedroom into a comfortable retreat that reflects your personal taste.

🛏️🖼️ #cozybedroom #diyprojects #homecomfort #craftsonfire

image
إعجاب
علق
شارك
Charlotte Chic Nomad
1 ذ ·ترجم

Neon Lime Green & Pink Floral Press-On Nails: The Ultimate Summer Trend

Ready to elevate your summer style with a burst of vibrant color? Look no further than our Neon Lime Green & Pink Floral Press-On Nails. These eye-catching press-ons combine bold neon hues with playful floral designs to deliver a manicure that's perfect for the sunny season. Here’s why these press-on nails are the must-have accessory for your summer look.

Why You’ll Love These Neon Floral Press-Ons

**1. Vibrant Neon Colors

Stand out with the dazzling neon lime green and pink hues that are perfect for summer. These bright colors are designed to make a statement and complement your sun-kissed skin. Whether you're heading to the beach or attending a summer party, these nails are sure to catch eyes and garner compliments.

**2. Playful Floral Designs

Embrace the fun of summer with charming floral patterns. The combination of neon colors and vibrant floral prints creates a lively and festive look, adding a touch of whimsy to your manicure. These designs are perfect for those who love to incorporate a bit of fun into their style.

**3. Handmade Quality

Each set of press-on nails is meticulously handcrafted by expert nail technicians, ensuring high-quality and attention to detail. This handmade craftsmanship not only guarantees a unique look but also ensures durability and a perfect fit.

**4. On-Trend Design

Neon and floral designs are major trends for summer, making these press-ons a fashionable choice. By choosing these nails, you’re embracing the latest styles and showing off your trend-savvy side.

**5. Effortless Application

Enjoy a salon-quality manicure without the hassle of traditional nail services. These press-ons are designed for easy application—simply press them onto your natural nails for an instant upgrade. They’re perfect for those who want a stunning look with minimal effort.

**6. Versatile Use

Whether you're preparing for a summer festival, a weekend getaway, or just want to brighten up your daily look, these press-on nails are versatile enough to suit any occasion. Their bold colors and designs make them a fun accessory for any summer outfit.

How to Apply Your Press-On Nails

Prep Your Nails: Start with clean, dry nails. Remove any old polish and ensure your nails are free from oils and residue. Lightly buff your natural nails for the best adhesion.

Select the Right Size: Choose the press-on nails that best fit your natural nails. The set includes a variety of sizes to ensure a perfect match.

Apply the Press-Ons: Peel off the backing from each nail and press it firmly onto your natural nail. Hold in place for a few seconds to ensure a secure fit.

Enjoy Your Look: Once applied, your nails are ready to shine! Enjoy a vibrant, summer-ready manicure that’s sure to turn heads.

Removal: When you’re ready for a change, gently peel off the press-on nails. If needed, use a nail remover to ensure no residue is left behind.

Final Thoughts

Our Neon Lime Green & Pink Floral Press-On Nails are the perfect way to add a splash of color and fun to your summer style. With their vibrant hues, playful designs, and expert craftsmanship, these press-ons offer an easy and fashionable solution for achieving a stunning manicure. Whether you’re embracing the latest trends or just want to brighten up your look, these press-on nails are a must-have for your summer beauty routine. Embrace the season with a bold, beautiful manicure that’s sure to make a statement.

image
إعجاب
علق
شارك
Charlotte Chic Nomad
1 ذ ·ترجم

24-Piece Long Coffin Ballerina Press-On Nail Set: Full-Cover French Fake Nails

Elevate your nail game with the 24-piece Long Coffin Ballerina Press-On Nail Set. Designed for effortless style and stunning results, this set features full-cover French fake nails in a sleek long coffin shape. Perfect for anyone looking to achieve a glamorous manicure without the hassle of salon appointments, here’s why this press-on nail set is a must-have for your beauty routine.

Why You'll Love This Press-On Nail Set

1. Sleek Long Coffin Shape

The long coffin (or ballerina) shape is one of the most sought-after nail styles. Its tapered, square-ended design provides a sophisticated and elongated look, making your fingers appear slimmer and more elegant. This shape is perfect for those who love a bold yet refined manicure.

2. Full-Cover French Design

The classic French manicure is given a modern twist with these full-cover press-on nails. The clean, white tips combined with a natural base offer a timeless and chic look that’s perfect for any occasion, from everyday wear to special events.

3. Easy Application

Achieve a professional-quality manicure at home with ease. These press-on nails are designed for quick and simple application. Just peel off the backing and press each nail onto your natural nails. No mess, no fuss—just flawless nails in minutes!

4. Durable and Long-Lasting

Crafted from high-quality materials, these press-on nails are built to last. They offer a strong, secure fit that withstands daily wear and tear, ensuring your manicure remains pristine and beautiful for days.

5. Versatile Style

Whether you’re preparing for a formal event, a night out, or simply want to add a touch of elegance to your everyday look, these nails provide the perfect solution. Their versatile French design complements a wide range of outfits and styles.

6. Complete Set

This set includes 24 press-on nails in various sizes, ensuring a perfect fit for every nail. The variety of sizes allows for customization, so you can find the ideal nail for each finger, ensuring a seamless and natural look.

How to Apply Your Press-On Nails

Prep Your Natural Nails: Start with clean, dry nails. Remove any old polish and ensure your nails are free from oils or residue. For best results, lightly buff your natural nails to create a smooth surface.

Select the Right Size: Choose the press-on nails that best fit your natural nails. The set includes multiple sizes to ensure a perfect fit.

Apply the Press-On Nails: Peel off the backing from each press-on nail and press it firmly onto your natural nail. Hold in place for a few seconds to ensure a secure bond.

Finishing Touches: Once applied, check for any adjustments needed. Your nails are now ready to shine!

Removal: When it’s time for a new look, gently peel off the press-on nails. If necessary, use a nail remover to ensure no residue is left behind.

Final Thoughts

The 24-piece Long Coffin Ballerina Press-On Nail Set offers a perfect blend of style, convenience, and durability. With its elegant coffin shape and classic French design, this set provides an effortless way to achieve a sophisticated and polished manicure at home. Whether for a special occasion or everyday elegance, these press-on nails are designed to enhance your style with minimal effort. Embrace the ease of press-on nails and enjoy a flawless, salon-quality look that’s always ready to impress.

image
إعجاب
علق
شارك
Showing 8282 out of 11742
  • 8278
  • 8279
  • 8280
  • 8281
  • 8282
  • 8283
  • 8284
  • 8285
  • 8286
  • 8287
  • 8288
  • 8289
  • 8290
  • 8291
  • 8292
  • 8293
  • 8294
  • 8295
  • 8296
  • 8297

تعديل العرض

إضافة المستوى


حدد صورة
حذف المستوى الخاص بك
هل أنت متأكد من أنك تريد حذف هذا المستوى؟

التعليقات

من أجل بيع المحتوى الخاص بك ومنشوراتك، ابدأ بإنشاء بعض الحزم. تحقيق الدخل

الدفع عن طريق المحفظة

تنبيه الدفع

أنت على وشك شراء العناصر، هل تريد المتابعة؟

طلب استرداد