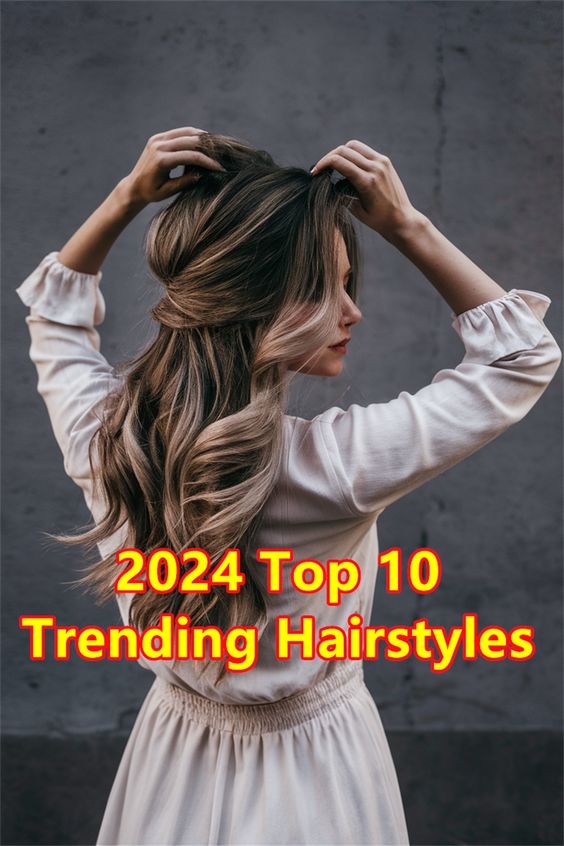
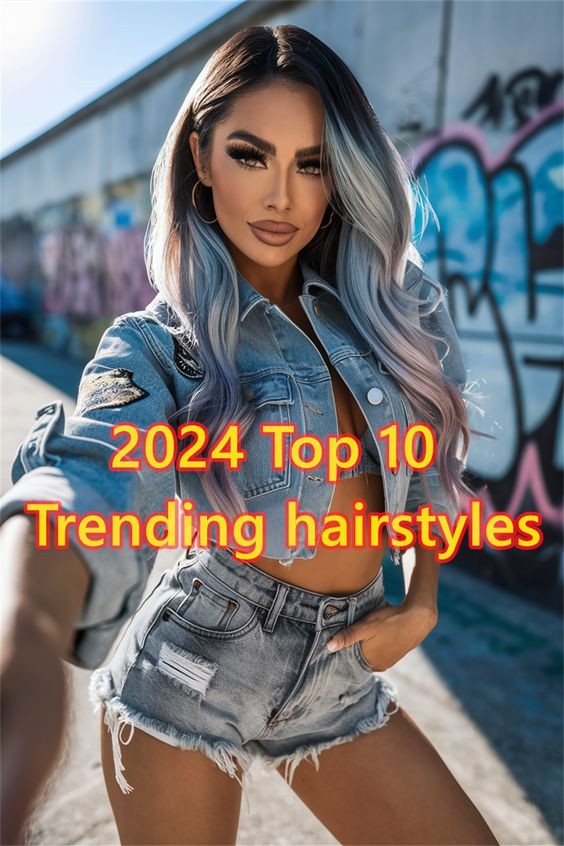
Good and Bad People Good and Bad People
    #socialmedia #usa #uk #contentwriter #ai
    tìm kiếm nâng cao
  • Đăng nhập
  • Đăng ký

  • Chế độ ban đêm
  • © 2025 Good and Bad People
    Về • Danh mục • Liên hệ chúng tôi • Nhà phát triển • Chính sách bảo mật • Điều khoản sử dụng • Đền bù • Referral Terms • Acceptable Use Policy • Community Guidelines • Write for Us

    Lựa chọn Ngôn ngữ

  • Arabic
  • Bengali
  • Chinese
  • Croatian
  • Danish
  • Dutch
  • English
  • Filipino
  • French
  • German
  • Hebrew
  • Hindi
  • Indonesian
  • Italian
  • Japanese
  • Korean
  • Persian
  • Portuguese
  • Russian
  • Spanish
  • Swedish
  • Turkish
  • Urdu
  • Vietnamese

Đồng hồ

Đồng hồ cuộn phim

Sự kiện

Duyệt qua các sự kiện Sự kiện của tôi

Blog

Duyệt các bài báo

Thị trường

Sản phẩm mới nhất

Các trang

Trang của tôi Các trang được yêu thích

Hơn

Khám phá Bài viết phổ biến Việc làm Ưu đãi Kinh phí
cuộn phim Đồng hồ Sự kiện Thị trường Blog Trang của tôi Nhìn thấy tất cả

Phát hiện bài viết

Posts

Người dùng

Các trang

Tập đoàn

Blog

Thị trường

Sự kiện

Việc làm

Kinh phí

Sofias Travel USA
Sofias Travel USA
1 Y ·Dịch

The Ultimate Secret to Beautiful Nails The Ultimate Secret to Beautiful Nails

When it comes to achieving beautiful nails, it’s easy to get overwhelmed by the endless products and tips out there. But what if we told you there’s only one thing that truly works to keep your nails looking flawless? Whether you're dealing with breakage, chips, or simply want stronger, healthier nails, this ultimate secret is your key to success.

1. Consistent Nail Care Routine

The foundation of beautiful nails lies in a consistent nail care routine. Regularly trimming, filing, and moisturizing your nails and cuticles helps prevent breakage and keeps your nails strong and healthy. Invest in a good quality nail file and a nourishing cuticle oil, and make it a habit to care for your nails at least once a week. This simple routine is the cornerstone of maintaining beautiful nails.

2. Proper Hydration

Hydration is key not only for your skin but also for your nails. Dry, brittle nails are more prone to breaking and chipping, so keeping them hydrated is essential. Drink plenty of water throughout the day and apply a hand cream that also nourishes your nails. You can even use natural oils like coconut or almond oil to massage into your nails and cuticles for an added boost of moisture.

3. Avoid Harsh Chemicals

One of the biggest culprits of damaged nails is exposure to harsh chemicals. Whether it’s household cleaning products or acetone-based nail polish removers, these chemicals can weaken your nails over time. Whenever possible, wear gloves when cleaning and opt for acetone-free nail polish removers. This small change can make a big difference in the health and appearance of your nails.

4. Balanced Diet

Your nails reflect your overall health, so what you eat plays a crucial role in their appearance. A balanced diet rich in vitamins and minerals, especially biotin, zinc, and vitamin E, can help promote strong and beautiful nails. Incorporate foods like eggs, nuts, leafy greens, and fish into your diet to give your nails the nutrients they need to thrive.

5. Regular Nail Breaks

While it’s tempting to keep your nails polished 24/7, giving them a break every now and then is essential for their health. Regularly removing nail polish and letting your nails breathe helps prevent discoloration and damage. Use this time to focus on nourishing your nails with oils and creams, ensuring they stay strong and beautiful even without polish.

Conclusion

Achieving beautiful nails doesn’t have to be complicated. By focusing on a consistent nail care routine, staying hydrated, avoiding harsh chemicals, eating a balanced diet, and giving your nails regular breaks, you can keep your nails looking their best all year round. Remember, the secret to beautiful nails is simple: care for them from the inside out, and they’ll reward you with strength, shine, and natural beauty.

#beautifulnails #nailcare #nailinspo #healthynails #nailtips #nailgoals #nailtrends2024 #nailhealth #nailroutine

Giống
Bình luận
Đăng lại
Grace's Gorgeous Pins
1 Y ·Dịch

Illuminate Your Outdoor Space: The Ultimate Guide to the 8x10 ft Waterproof Outdoor Rug with LED Strip Lights

Transform your outdoor living area into a cozy, stylish haven with the versatile 8x10 ft Waterproof Outdoor Rug featuring LED Strip Lights. This mat combines practicality with a touch of magic, making it perfect for patios, RV camping, picnics, and more. Here’s everything you need to know about this innovative outdoor rug that’s taking outdoor decor to the next level.

Why Choose an Outdoor Rug with LED Strip Lights?

1. Versatile Design: The 8x10 ft size is ideal for various outdoor settings, offering ample coverage for your patio, deck, or camping area. Its reversible design adds functionality, allowing you to switch up the look whenever you want while maintaining a fresh appearance.

2. Durable and Waterproof: Crafted from lightweight plastic straw material, this rug is built to withstand the elements. It’s waterproof, making it a perfect choice for any weather conditions. Rain, spills, or splashes are no problem for this durable mat, ensuring your outdoor area stays clean and dry.

3. Illuminating LED Strip Lights: What sets this rug apart is its integrated LED strip lights. These lights are strategically placed around the edges to provide a soft, ambient glow that enhances your outdoor space’s atmosphere. Perfect for evening gatherings, the LED lights create a warm, inviting environment that makes your patio the place to be.

4. Easy Maintenance: Cleaning this rug is a breeze. The plastic straw material is easy to wipe down and resistant to stains. Simply hose it off or use a mild detergent for a quick refresh, and it will look as good as new.

5. Lightweight and Portable: Despite its large size, the rug is surprisingly lightweight, making it easy to move and store. Whether you’re setting up for a picnic or heading out on a camping trip, you can conveniently pack and transport it without hassle.

6. Boho Chic Aesthetic: With its stylish design, this rug adds a touch of bohemian flair to your outdoor decor. The intricate patterns and colors complement various design themes, blending seamlessly with your existing furniture and accessories.

How to Style Your Outdoor Rug

1. Patio Perfection: Place the rug in the center of your patio to anchor your seating area. Pair it with comfortable outdoor furniture and accent with throw pillows and blankets for a cozy, stylish setup.

2. RV Campground Chic: Lay the rug outside your RV to create a welcoming outdoor space. The LED lights are perfect for evening relaxation, and the waterproof feature ensures it remains in top condition despite constant use.

3. Picnic Ready: Bring the rug along for picnics and outdoor events. Its lightweight design and easy maintenance make it ideal for spreading out on the grass or sand, while the LED lights add a touch of glamour to your gatherings.

4. Backyard Oasis: Use the rug to define a specific area of your backyard. Whether it’s a dining nook or a lounging zone, the rug will enhance your space’s functionality and aesthetic appeal.

Conclusion

The 8x10 ft Waterproof Outdoor Rug with LED Strip Lights is more than just a mat; it’s an upgrade to your outdoor living experience. With its blend of durability, style, and functionality, it’s an excellent investment for anyone looking to elevate their patio, RV, or picnic area. Embrace the perfect combination of practicality and ambiance, and let your outdoor space shine with this remarkable rug.

image
Giống
Bình luận
Đăng lại
Sofias Travel USA
Sofias Travel USA
1 Y ·Dịch

Perfect School Nails: Cute and Trendy Ideas for the Classroom Perfect School Nails: Cute and Trendy Ideas for the Classroom

Heading back to school is the perfect time to refresh your look, and your nails are no exception! Whether you’re looking for something simple and understated or a bit more fun and colorful, these nail ideas are perfect for keeping your style on point while staying school-appropriate. Here are some cute and trendy nail designs that are perfect for the classroom.

1. Subtle French Tips

French tips are a classic choice that never goes out of style. For a school-friendly twist, opt for a subtle, thin white tip instead of the traditional thick line. You can also experiment with different colors for the tip, like a soft pink or a light blue, for a fun and modern look. This design is simple yet elegant, making it perfect for everyday wear.

2. Pastel Perfection

Pastel shades are perfect for school nails because they’re soft, subtle, and stylish. Choose from colors like lavender, mint green, or baby blue to give your nails a fresh and airy feel. Pastels are versatile and go with just about any outfit, making them a great choice for the school year. Add a matte top coat for a trendy, modern finish.

3. Minimalist Dots and Stripes

If you prefer a minimalist style, dots and stripes are a great way to add a little something extra to your nails without going overboard. A single dot in the center of each nail or a thin stripe down the middle can make a big impact while still being understated. Choose neutral colors like white, beige, or soft pink for a look that’s simple and chic.

4. Fun and Playful Designs

For those who like to add a bit of personality to their nails, fun and playful designs are the way to go. Think tiny hearts, stars, or even a little smiley face on one or two accent nails. These designs add a touch of whimsy to your manicure and are sure to make you smile every time you look at them. Just be sure to keep the overall look balanced by pairing the designs with a neutral base color.

5. Glitter Accent Nails

If you love a bit of sparkle, glitter accent nails are a great way to add some shine without being too flashy for school. Choose one or two nails to cover in glitter while keeping the rest of your nails in a neutral or pastel shade. This look is both fun and sophisticated, perfect for making a subtle statement in the classroom.

6. Neutral Nudes

For a more understated look, nude nails are always a safe bet. Choose a shade that matches your skin tone for a clean, polished look that’s perfect for school. Nude nails are versatile and go with any outfit, making them a great choice for busy school days. Plus, they’re low-maintenance and don’t show chips as easily as darker colors.

7. Conclusion

Your nails are a great way to express your personal style, even at school. Whether you prefer something simple and chic or a bit more playful, these nail ideas are perfect for keeping your look fresh and trendy all school year long. So go ahead and experiment with different designs and colors to find the perfect school nails that make you feel confident and ready to take on the day!

#schoolnails #nailinspo #backtoschool #cutenails #nail

Giống
Bình luận
Đăng lại
Grace's Gorgeous Pins
1 Y ·Dịch

DIY Lattice Ideas to Elevate Your Home's Aesthetic

Lattice designs have long been celebrated for their versatility and charm, adding a touch of elegance and functionality to any home. From enhancing garden spaces to creating stylish interior accents, DIY lattice projects can transform your home in no time. Here's a guide to some creative and quick DIY lattice ideas that will help you elevate your home’s aesthetic.

1. Garden Privacy Screen

Transform your garden with a DIY lattice privacy screen. This project is perfect for creating secluded areas in your outdoor space. Simply frame a piece of lattice with wood, and anchor it into the ground or attach it to an existing fence. To add a personal touch, paint or stain the lattice to match your garden theme. For added privacy and beauty, consider climbing plants like ivy or jasmine, which will grow through the lattice, creating a lush green wall.

2. Lattice Wall Art

Bring a touch of sophistication indoors with lattice wall art. Cut a piece of lattice to your desired size and shape, then paint it in a color that complements your decor. Hang it on a wall or place it in a frame for a chic, custom piece. You can also use this technique to create a striking backdrop for photos, mirrors, or even a statement light fixture.

3. Decorative Lattice Shelving

Upgrade your storage solutions with decorative lattice shelving. By attaching lattice panels to a wall and adding floating shelves, you create a stylish and functional display area. This setup works well in kitchens, bathrooms, or any space where you want both storage and visual appeal. Paint or stain the lattice to match your existing furniture or decor for a cohesive look.

4. Lattice Planter Box

Add a bit of greenery to your outdoor space with a lattice planter box. Construct a simple box from wood, and attach lattice panels to the sides. This design not only provides ample space for plants but also serves as a trellis for climbing vines. Place the planter box on your porch, patio, or balcony for a charming and practical garden feature.

5. Lattice Curtain

For an easy and stylish way to divide spaces or add a decorative touch, consider a lattice curtain. Attach a lattice frame to a ceiling or wall, then hang fabric or a curtain from it. This setup is ideal for creating a cozy reading nook, separating a dining area, or adding texture to a plain wall. Choose fabrics that complement your room's color scheme for a cohesive look.

6. Lattice Entryway Trellis

Make a welcoming statement with a lattice entryway trellis. Position lattice panels on either side of your front door, and decorate them with hanging baskets of flowers or climbing plants. This not only adds curb appeal but also creates a beautiful focal point for your entrance. Enhance the effect by adding lighting to highlight the lattice and plants at night.

7. Lattice Headboard

For a quick bedroom makeover, try a lattice headboard. Attach lattice panels to the wall behind your bed, and paint or stain them to match your bedroom decor. This DIY project adds a unique touch to your sleeping space and can be customized to fit any size bed. Add fairy lights or fabric to the lattice for a cozy, inviting atmosphere.

Quick Tips for DIY Lattice Projects

Choose Quality Materials: Opt for durable wood or composite materials to ensure your lattice projects last.

Measure Carefully: Accurate measurements are crucial for a seamless fit, whether you're making a screen, planter, or headboard.

Use Outdoor Paint: For outdoor projects, use weather-resistant paint or stain to protect the lattice from the elements.

Get Creative: Personalize your lattice projects with paint, fabric, or embellishments to match your home's style.

Lattice designs are a fantastic way to enhance your home's beauty and functionality with minimal effort. Whether you're adding privacy to your garden, creating stylish wall art, or upgrading your storage solutions, these DIY lattice ideas will make a noticeable impact. Dive into these projects and enjoy the charm and versatility that lattice can bring to your home!

image
Giống
Bình luận
Đăng lại
Tamsin Haute Hues
Tamsin Haute Hues
1 Y ·Dịch

**25 Realistic Cat Drawing Ideas and Tutorials for Every Skill Level**

Are you a cat lover with a passion for drawing? Whether you're just starting out or looking to refine your skills, realistic cat drawing offers a delightful way to capture the charm and elegance of our feline friends. With our curated list of 25 drawing ideas and tutorials, you can explore various techniques and styles to bring your cat portraits to life. Here’s a comprehensive guide to help you master the art of drawing realistic cats.

### **Why Draw Realistic Cats?**

Drawing realistic cats is more than just capturing their physical features; it’s about conveying their unique personalities and emotions. Realistic cat drawings can:

1. **Enhance Your Artistic Skills**: Working on realistic drawings improves your attention to detail, shading techniques, and overall drawing ability.

2. **Bring Joy and Relaxation**: Drawing cats can be a therapeutic and enjoyable activity, offering a break from daily routines.

3. **Create Meaningful Art**: Realistic cat drawings make for cherished keepsakes and thoughtful gifts for fellow cat enthusiasts.

### **Top 25 Realistic Cat Drawing Ideas and Tutorials**

1. **Basic Cat Anatomy**: Start with the fundamentals by learning about the basic structure and proportions of a cat’s body.

2. **Expressive Cat Faces**: Practice drawing different facial expressions to capture the personality of various cat breeds.

3. **Detailed Fur Texture**: Master the art of rendering realistic fur with various shading techniques and pencil strokes.

4. **Playful Kittens**: Draw adorable kittens in various playful poses to capture their energy and cuteness.

5. **Sleeping Cats**: Create serene and peaceful images of cats napping, focusing on relaxed body positions and soft textures.

6. **Realistic Cat Eyes**: Learn how to draw expressive and lifelike cat eyes, which are crucial for capturing their emotional depth.

7. **Cat Breeds**: Explore tutorials for drawing specific cat breeds, such as Siamese, Persian, Maine Coon, and Bengal.

8. **Cat Paws and Claws**: Focus on the details of cat paws, claws, and their intricate features.

9. **Whiskers and Noses**: Perfect the details of whiskers and noses to add realism to your drawings.

10. **Cats in Motion**: Draw cats in various action poses, such as jumping or playing, to capture their dynamic movements.

11. **Cat Portraits**: Create detailed portraits that emphasize the unique features and expressions of individual cats.

12. **Cats with Accessories**: Experiment with drawing cats wearing accessories like collars, hats, or bows.

13. **Stylized Realism**: Combine realistic techniques with a touch of stylization for a unique artistic interpretation.

14. **Black and White vs. Color**: Practice drawing cats in both black and white as well as in color to explore different effects.

15. **Cat Silhouettes**: Use silhouettes to highlight the form and posture of cats in a minimalist style.

16. **Cat in Various Textures**: Experiment with different backgrounds and textures to complement your cat drawings.

17. **Multi-Cat Scenes**: Draw scenes featuring multiple cats interacting with each other for added complexity.

18. **Famous Cat Figures**: Try drawing famous cats from popular culture or social media to challenge your skills.

19. **Mixed Media**: Combine drawing with other media, like watercolor or digital tools, for a mixed-media approach.

20. **Realistic Cat Features**: Focus on specific features such as the cat’s nose, ears, or fur patterns.

21. **Cat in Different Lighting**: Practice drawing cats under various lighting conditions to understand how light affects fur and features.

22. **Cats and Nature**: Integrate cats into natural settings or landscapes to create a harmonious and realistic scene.

23. **Cartoon vs. Realistic**: Compare and contrast cartoon-style and realistic cat drawings to see how different styles impact the portrayal.

24. **Personal Cat Portraits**: Create detailed portraits of your own cats or those of friends and family for a personal touch.

25. **Cat Sketchbook Projects**: Compile a sketchbook of various cat drawings to track your progress and refine your techniques.

### **Tips for Drawing Realistic Cats**

1. **Study Real Cats**: Observe real cats or reference photos to understand their anatomy and features better.

2. **Use Quality Materials**: Invest in good-quality pencils, paper, and erasers for the best results.

3. **Practice Regularly**: The more you draw, the better you’ll become. Set aside time each week to practice and experiment.

4. **Seek Feedback**: Share your work with others and seek constructive criticism to improve your skills.

5. **Enjoy the Process**: Embrace the learning process and have fun with your art. Each drawing is a step towards mastering your craft.

### **Conclusion**

Our collection of 25 realistic cat drawing ideas and tutorials is designed to inspire and guide artists of all skill levels. From mastering fur texture to capturing expressive faces, these tutorials provide a comprehensive approach to drawing realistic cats. Dive into these ideas and tutorials to enhance your artistic abilities, create meaningful art, and enjoy the creative journey. Happy drawing!

image
Giống
Bình luận
Đăng lại
Grace's Gorgeous Pins
1 Y ·Dịch

Spook Up Your Space: Creepy Halloween Outdoor Decoration Ideas

Halloween is the perfect time to transform your outdoor space into a haunted haven, and with a bit of creativity, you can make your yard the talk of the neighborhood. Whether you're aiming for a subtle spook or full-blown fright fest, these creepy outdoor decoration ideas will elevate your Halloween game and give trick-or-treaters a memorable experience.

1. Graveyard Setup

Create a chilling cemetery scene with tombstones, skeletons, and eerie fog. Use foam or plastic tombstones for an easy and cost-effective setup. Add some fake cobwebs, skeletal remains, and dim lighting to enhance the haunted atmosphere. Don’t forget to place some motion-activated sound effects for added spookiness!

2. Ghostly Figures

Hang ghostly figures around your yard to give the impression of wandering spirits. Use white sheets or fabric draped over wire frames to create ghost shapes. Light them from below with a soft, green or blue light to give an eerie glow. For extra fright, use wind chimes to make them sway in the breeze.

3. Creepy Spider Invasion

Transform your yard into a spider’s lair with oversized fake spiders and webbing. Stretch spider webs between trees, bushes, and outdoor furniture, and place large spiders strategically throughout. You can even use motion sensors to make the spiders’ legs move or light up for an added scare.

4. Sinister Pumpkins

Go beyond traditional jack-o’-lanterns by carving or painting pumpkins with sinister faces, or using pre-made creepy pumpkin decorations. Arrange them in a spooky pattern, and light them with flickering LED candles for an unsettling glow. Try using different colors and textures to give your pumpkin display an extra edge.

5. Hanging Bats and Witches

Hang plastic bats and witches from tree branches or porch ceilings. Use fishing line to make them sway eerily in the wind. You can also add some dim, colored spotlights to make them stand out against the night sky, creating a haunting silhouette effect.

6. Eerie Pathway Lights

Guide visitors to your front door with creepy pathway lights. Use lanterns shaped like skulls or pumpkins, or place glowing orbs along the path. Add some fog machines or dry ice for an extra layer of spookiness. You can also use motion-activated lights that flash or change color for a more dynamic effect.

7. Haunted Forest

Turn a section of your yard into a haunted forest with the help of some dark fabric, fake trees, and creepy props. Add strobe lights and fog machines to create a misty, otherworldly atmosphere. You can even include hidden animatronics or spooky sound effects to startle unsuspecting visitors.

8. Scary Soundtrack

Enhance your outdoor Halloween decor with a chilling soundtrack. Play creepy sound effects like howling wolves, rattling chains, or ghostly moans from hidden speakers. Make sure the volume is high enough to be heard from the street but not so loud that it becomes annoying to neighbors.

Quick Tips for Success:

Plan Ahead: Start decorating a few weeks before Halloween to ensure you have time to perfect your setup.

Safety First: Ensure all decorations are securely fastened and that pathways are clear to avoid accidents.

DIY Touches: Incorporate some homemade elements like painted mason jars or hand-drawn signs for a personalized touch.

With these creepy outdoor decoration ideas, you’ll have everything you need to make your Halloween celebrations spooktacularly memorable. So grab your props, get creative, and prepare for a frightful night of fun!

image
Giống
Bình luận
Đăng lại
Grace's Gorgeous Pins
1 Y ·Dịch

Moody Blue Vintage Flowers Wallpaper: A Timeless Elegance for Modern Spaces

When it comes to creating a space that exudes sophistication and charm, few choices rival the allure of vintage-inspired wallpaper. Among the various styles available, Moody Blue Vintage Flowers Wallpaper stands out as a perfect blend of classic elegance and contemporary cool. This wallpaper design captures the essence of timeless beauty with its rich, deep blue hues and intricate floral patterns, making it a versatile choice for any interior setting.

A Deep Dive into Moody Blue

Moody blue is a color that effortlessly combines depth with a sense of calm. It has become a favorite in interior design due to its ability to create a serene atmosphere while adding a touch of drama. The color evokes feelings of tranquility and introspection, making it an ideal backdrop for various room types, from cozy bedrooms to sophisticated living rooms.

Vintage Floral Patterns: A Nod to the Past

The vintage floral patterns incorporated in this wallpaper design are more than just decorative elements—they’re a tribute to the timeless beauty of bygone eras. These patterns often feature intricate detailing, such as ornate blossoms and delicate leaves, reminiscent of classic botanical illustrations. This vintage touch not only adds visual interest but also brings a sense of history and artistry to modern spaces.

Why Choose Moody Blue Vintage Flowers Wallpaper?

Versatility: The rich blue hue of the wallpaper complements a wide range of color schemes. Whether paired with neutral tones or more vibrant accents, it adapts seamlessly to different décor styles.

Sophisticated Ambiance: The combination of deep blue and vintage floral patterns adds a layer of sophistication to any room, making it feel both elegant and inviting.

Timeless Appeal: Unlike trends that come and go, vintage-inspired designs have a lasting charm. The moody blue floral wallpaper remains stylish across various design epochs.

Easy to Coordinate: This wallpaper works well with a variety of furniture styles and finishes. Whether your home features modern minimalism or classic elegance, it enhances the overall aesthetic.

Quick Tips for Using Moody Blue Vintage Flowers Wallpaper

Accent Walls: Consider using this wallpaper on an accent wall to create a focal point in a room. It adds depth and character without overwhelming the space.

Pairing with Neutrals: Combine the wallpaper with neutral furnishings and décor to let the rich color and intricate patterns stand out.

Lighting Matters: The moodiness of the blue can be accentuated or softened by the type of lighting in the room. Experiment with different light sources to achieve your desired effect.

Textural Contrast: To add dimension, pair the wallpaper with textured fabrics and materials like velvet cushions or woven throws.

Conclusion

Moody Blue Vintage Flowers Wallpaper offers a unique opportunity to infuse a space with both historical charm and modern sophistication. Its deep, captivating color and classic floral patterns create a backdrop that is both elegant and versatile. Whether you're redecorating a single room or giving your entire home a facelift, this wallpaper is a timeless choice that will continue to enchant for years to come.

image
Giống
Bình luận
Đăng lại
Grace's Gorgeous Pins
1 Y ·Dịch

Transform Your Bedroom with Vintage Big Flowers Wallpaper: The Ultimate Peel and Stick Boho Floral Wall Mural

Are you looking to refresh your bedroom with a touch of vintage charm and boho flair? Look no further than the stunning Vintage Big Flowers Wallpaper—a peel and stick, removable wall mural that’s perfect for creating a unique and stylish space.

Why Choose Vintage Big Flowers Wallpaper?

Vintage Big Flowers Wallpaper stands out for its captivating design and practicality. The wallpaper features bold, oversized floral prints reminiscent of classic designs with a modern twist. These large, intricate blooms bring a sense of elegance and nostalgia to your bedroom, creating a warm and inviting atmosphere.

Effortless Application

One of the greatest advantages of this wallpaper is its peel-and-stick functionality. Traditional wallpaper application can be a time-consuming and messy task, but with peel-and-stick wallpaper, the process is simplified. Simply peel off the backing, stick the wallpaper onto your walls, and smooth out any bubbles with a soft cloth or squeegee. No need for glue or paste—making it perfect for DIY enthusiasts and busy individuals alike.

Removable and Reusable

Another key feature is the removable nature of the wallpaper. If you’re someone who loves to change up their decor frequently, or if you’re renting and need to avoid permanent changes, this wallpaper is ideal. It can be easily removed without damaging your walls or leaving behind any sticky residue. Plus, if you need to reposition it, simply peel it off and stick it back on until you achieve the perfect look.

Boho Floral Design

The boho floral design adds a trendy and artistic touch to your bedroom. The vintage-inspired flowers come in a variety of colors, allowing you to choose a palette that complements your existing decor. Whether you prefer soft pastels, vibrant hues, or muted tones, there’s a floral pattern to suit your taste. The design can make a statement as a feature wall or be used to cover an entire room for a cohesive look.

Enhance Your Bedroom Aesthetics

Incorporating Vintage Big Flowers Wallpaper into your bedroom decor can instantly elevate the space. It pairs beautifully with minimalist furniture, giving your room a bohemian edge without overwhelming the senses. For a serene and stylish bedroom, combine the floral wallpaper with neutral bedding, wooden accents, and plants for a harmonious and inviting environment.

Conclusion

Vintage Big Flowers Wallpaper is more than just a wall covering—it’s a transformative decor element that combines beauty and practicality. With its easy application and removal process, coupled with its stunning boho floral design, it’s the perfect choice for anyone looking to add a touch of vintage elegance and modern convenience to their bedroom. Embrace the charm and create a bedroom that reflects your personal style with this trendy, removable wall mural.

image
Giống
Bình luận
Đăng lại
Tamsin Haute Hues
Tamsin Haute Hues
1 Y ·Dịch

**34 Realistic Woman Coloring Pages – Instant Download for All Ages**

Are you looking for a creative and relaxing way to spend your free time? Dive into the world of art with our collection of 34 realistic woman coloring pages, available for instant download. Whether you're an adult seeking a calming activity or a parent looking for engaging content for your child, these grayscale illustrations offer something for everyone. Here’s why these coloring pages are perfect for all ages and how they can enhance your creative experience.

### **Why Choose Realistic Woman Coloring Pages?**

1. **Artistic Depth**: Realistic coloring pages provide a depth of detail that allows you to explore shading, textures, and intricate designs. This helps in developing fine motor skills and artistic techniques.

2. **Stress Relief**: Coloring is well-known for its therapeutic benefits. The detailed and realistic designs can help you relax, reduce stress, and improve your focus.

3. **Creative Freedom**: With realistic illustrations, you have the freedom to experiment with different color schemes, blending techniques, and artistic styles.

4. **Engaging for All Ages**: These coloring pages cater to both adults and kids. Adults will appreciate the sophisticated designs, while kids will enjoy the lifelike portrayals of women.

5. **Educational Value**: For children, coloring realistic figures can be an educational experience, helping them learn about human anatomy, expressions, and fashion.

### **What’s Included in the Collection?**

Our collection features 34 beautifully designed realistic woman coloring pages. Here’s a sneak peek at what you can expect:

1. **Detailed Portraits**: Each page features lifelike portraits of women with intricate details, offering a rich coloring experience.

2. **Fall Mandala Floral Designs**: Some pages include fall-themed mandalas and floral patterns, blending realism with seasonal motifs.

3. **Diverse Styles**: The collection encompasses a variety of styles, from elegant fashion illustrations to casual, everyday scenes.

4. **Grayscale Art**: The grayscale format provides a foundation for shading and coloring, allowing you to add depth and dimension to your work.

### **How to Use the Coloring Pages**

Getting started with your coloring pages is easy and fun! Here’s how you can make the most of them:

1. **Instant Download**: Purchase and download the pages instantly, and print them on your preferred paper. You can also use digital devices for coloring if you prefer.

2. **Select Your Medium**: Choose from colored pencils, markers, or even digital tools to bring your pages to life. The grayscale designs are versatile and work well with various coloring materials.

3. **Experiment with Techniques**: Try different coloring techniques such as blending, shading, and adding highlights to enhance the realism of your work.

4. **Share and Enjoy**: Once you’ve completed your masterpieces, share them with friends, family, or on social media. Join coloring communities to connect with others and gain inspiration.

5. **Use as Gifts**: These coloring pages make thoughtful gifts. Print and frame your completed pages or create a personalized coloring book for someone special.

### **Tips for a Great Coloring Experience**

1. **Use Quality Materials**: Invest in good-quality coloring tools to achieve the best results and enjoy a smoother coloring experience.

2. **Take Your Time**: Don’t rush through your coloring. Enjoy the process and take your time to add intricate details.

3. **Create a Relaxing Environment**: Set up a cozy and quiet space for coloring. Soft lighting and a comfortable chair can enhance your relaxation and focus.

4. **Practice Regularly**: Regular practice with realistic designs will improve your skills and confidence as an artist.

5. **Be Creative**: While realistic coloring is the goal, feel free to add your own artistic touches and experiment with colors.

### **Conclusion**

Our collection of 34 realistic woman coloring pages is designed to offer a delightful and enriching artistic experience for all ages. With instant downloads and a variety of detailed, grayscale illustrations, you’ll have everything you need to unleash your creativity and enjoy the many benefits of coloring. Whether for relaxation, skill development, or fun, these coloring pages are sure to provide hours of enjoyment and artistic fulfillment. Start coloring today and let your imagination take flight!

image
Giống
Bình luận
Đăng lại
Sophia Fashion Fusion
1 Y

image
Giống
Bình luận
Đăng lại
Showing 8299 out of 11794
  • 8295
  • 8296
  • 8297
  • 8298
  • 8299
  • 8300
  • 8301
  • 8302
  • 8303
  • 8304
  • 8305
  • 8306
  • 8307
  • 8308
  • 8309
  • 8310
  • 8311
  • 8312
  • 8313
  • 8314

Chỉnh sửa phiếu mua hàng

Thêm bậc


Chọn một hình ảnh
Xóa bậc của bạn
Bạn có chắc chắn muốn xóa tầng này không?

Nhận xét

Để bán nội dung và bài đăng của bạn, hãy bắt đầu bằng cách tạo một vài gói. Kiếm tiền

Thanh toán bằng ví

Thông báo Thanh toán

Bạn sắp mua các mặt hàng, bạn có muốn tiếp tục không?

Yêu cầu hoàn lại