Good and Bad People Good and Bad People
    #socialmedia #usa #uk #contentwriter #ai
    고급 검색
  • 로그인
  • 등록하다

  • 야간 모드
  • © {날짜} {사이트 이름}
    에 대한 • 예배 규칙서 • 문의하기 • 개발자 • 개인 정보 정책 • 이용약관 • 환불금 • Referral Terms • Acceptable Use Policy • Community Guidelines • Write for Us

    고르다 언어

  • Arabic
  • Bengali
  • Chinese
  • Croatian
  • Danish
  • Dutch
  • English
  • Filipino
  • French
  • German
  • Hebrew
  • Hindi
  • Indonesian
  • Italian
  • Japanese
  • Korean
  • Persian
  • Portuguese
  • Russian
  • Spanish
  • Swedish
  • Turkish
  • Urdu
  • Vietnamese

보다

보다 릴

이벤트

이벤트 찾아보기 내 이벤트

블로그

기사 찾아보기

시장

신규 품목

페이지

내 페이지 좋아요를 누른 페이지

더

탐구하다 인기 글 채용 정보 제안 자금
릴 보다 이벤트 시장 블로그 내 페이지 모두 보기

발견하다 게시물

Posts

사용자

페이지

그룹

블로그

시장

이벤트

채용 정보

자금

Seren's Urban Elegance
1 와이 ·번역하다

Milky French Nails: Exclusive Lumière Styles to Rock This Season

As the beauty world continues to evolve, classic styles are getting a sophisticated upgrade, and the Milky French manicure is a prime example. This season, the Milky French nails are taking the spotlight with exclusive Lumière styles that add a touch of elegance and modern flair to the traditional French manicure. Here’s everything you need to know about this chic trend and how to rock it this season.

What Are Milky French Nails?

The Milky French manicure is a fresh twist on the classic French nail design. Instead of the traditional white tips, this style features a soft, milky white or off-white base that creates a more understated, refined look. The result is a manicure that exudes elegance and simplicity while maintaining a modern edge.

Why Lumière Styles?

The term “Lumière” refers to a luminous or glowing effect, and this is exactly what you’ll get with Lumière styles. Lumière styles often incorporate shimmer, pearlescent finishes, or subtle metallic accents that add a touch of light and brilliance to your nails. These exclusive styles are designed to capture light and create an eye-catching, ethereal effect that’s perfect for any occasion.

Trending Lumière Styles for Milky French Nails

1. Classic Milky Base with Lumière Tips

One of the most popular Lumière styles involves pairing a classic milky base with shimmering or iridescent tips. This combination offers a subtle yet striking contrast, making your nails look effortlessly chic and sophisticated.

Tip: Use a pearlescent top coat to add a soft glow to your tips, enhancing the overall luminous effect.

2. Ombre Lumière French Nails

For a more dramatic look, try an ombre effect with Lumière finishes. This style blends a milky base into a shimmering, gradient tip, creating a smooth transition from understated elegance to sparkling brilliance.

Tip: Use a makeup sponge to blend the colors seamlessly and achieve a professional-looking gradient.
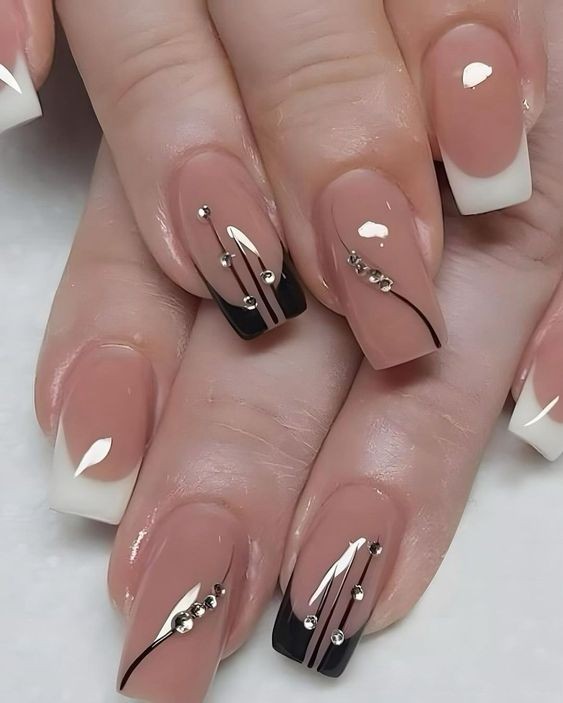
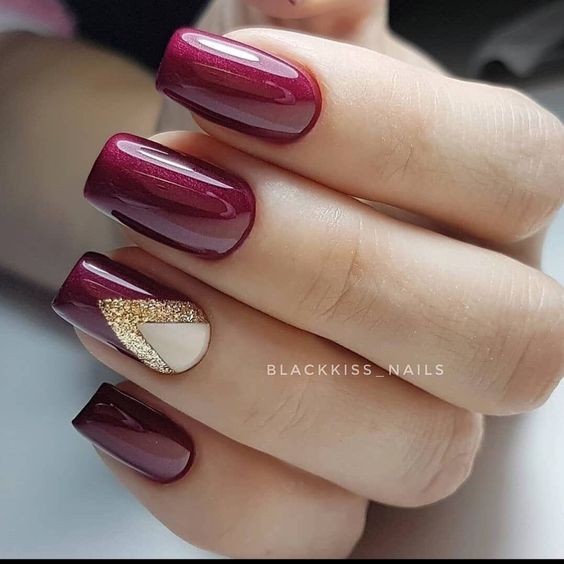
3. Metallic Accents

Incorporate metallic accents into your Milky French manicure for a touch of glamour. Silver or gold foils, flakes, or thin lines can be added to the tips or as accent designs, giving your nails a modern, high-fashion finish.

Tip: Apply metallic accents sparingly to keep the look elegant and refined.

4. Subtle Glitter Infusion

Add a touch of sparkle with a subtle glitter infusion. This style involves incorporating fine glitter into the milky base or tips, creating a soft, shimmering effect that’s perfect for both everyday wear and special occasions.

Tip: Opt for a fine glitter that won’t overwhelm the milky base, keeping the overall look delicate and sophisticated.

5. Iridescent Shimmer

Iridescent shimmer adds a unique, multidimensional quality to your Milky French nails. This style uses iridescent powders or polishes that change color depending on the angle of the light, giving your nails a magical, otherworldly appearance.

Tip: Apply iridescent shimmer over the entire nail or just on the tips for a mesmerizing effect.

How to Achieve the Perfect Milky French Nails with Lumière Styles

1. Nail Preparation

Clean and Shape: Start by cleaning your nails and shaping them to your desired length and style. Ensure your nails are free of any old polish or residue.

Buff and Smooth: Buff your nails to create a smooth surface for polish application.

2. Base Coat

Apply a Base Coat: Use a clear base coat to protect your nails and create a smooth foundation for your Milky French manicure.

3. Applying the Milky Base

Choose Your Shade: Select a milky white or off-white polish that complements your skin tone.

Apply Evenly: Apply two coats of the milky base polish, ensuring each layer is even and smooth. Allow the polish to dry completely between coats.

4. Adding Lumière Elements

Apply Lumière Styles: Depending on your chosen style (e.g., Lumière tips, metallic accents, or iridescent shimmer), carefully apply the additional elements to your nails. Use a fine brush or nail art tools for precise application.

Blend and Finish: For ombre or gradient effects, blend colors using a sponge or brush. For glitter or metallic accents, apply with a gentle touch to maintain elegance.

5. Top Coat

Seal the Design: Finish with a clear top coat to seal in your design and add shine. This will also help to protect your manicure and extend its longevity.

Tips for Maintaining Your Milky French Nails

Regular Touch-ups: Keep your manicure looking fresh by touching up any chips or wear promptly.

Avoid Harsh Chemicals: Protect your nails by avoiding exposure to harsh chemicals or cleaning agents.

Hydrate: Keep your cuticles and nails hydrated with a nourishing cuticle oil or hand cream.

Conclusion

Milky French nails with exclusive Lumière styles are the perfect way to embrace the elegance and sophistication of spring and beyond. With 888+ stunning designs to choose from, you can find the perfect look to suit any occasion or personal style. From shimmering tips to iridescent finishes, these designs offer a modern twist on a classic manicure, ensuring your nails will be the highlight of any ensemble. Get ready to rock this season with Milky French nails that capture the essence of timeless beauty and contemporary flair. 💅🌟✨

image
처럼
논평
공유하다
Seren's Urban Elegance
1 와이 ·번역하다

888+ Stunning Nail Ideas to Get You Ready for Spring

Spring is just around the corner, and it’s the perfect time to refresh your look with some vibrant and stylish nail designs. With so many fresh trends and creative ideas to choose from, your nails can become a canvas for springtime beauty. Whether you’re preparing for sunny days, blooming flowers, or festive celebrations, these 888+ stunning nail ideas will help you step into the new season with confidence and flair. Here’s a comprehensive guide to get your nails spring-ready!

1. Floral Fantasies

Spring and flowers go hand in hand, so why not incorporate floral designs into your manicure? Opt for delicate daisies, bold roses, or intricate orchids. These floral patterns can be painted by hand or applied as decals for a charming touch.

Tips: Combine different flower types for a garden-inspired look, or keep it simple with a single floral accent nail.

2. Pastel Perfection

Pastel colors are a quintessential choice for spring. Think soft pinks, lavender, mint green, and baby blue. These muted shades create a serene and elegant look that’s perfect for the season.

Tips: Try an ombre effect using pastel colors for a smooth gradient or mix and match pastel shades for a playful design.

3. Geometric Joy

Add a modern twist to your spring manicure with geometric patterns. Bold lines, triangles, and shapes in bright or muted colors can create a sleek and sophisticated look.

Tips: Use tape or stencils to achieve precise geometric designs, or go freehand for a more artistic feel.

4. Bright Citrus Hues

Embrace the vibrancy of spring with bright citrus colors like zesty oranges, lemon yellows, and tangy limes. These eye-catching hues add a fun and energetic vibe to your nails.

Tips: Pair citrus colors with simple designs like stripes or dots to keep the look fresh and clean.

5. Springtime Stripes

Stripes are always in style, and spring is the perfect time to experiment with this classic pattern. Try alternating stripes in pastel or bright colors for a chic and dynamic design.

Tips: Use a striping tape for perfectly straight lines, or go for a freehand approach for a more relaxed look.

6. Elegant Metallics

Metallics can add a touch of glamour to your spring manicure. Choose from shimmering gold, silver, or rose gold for a sophisticated finish. These metallic shades are great for accent nails or full coverage.

Tips: Combine metallics with soft pastels for a balanced and elegant design.

7. Tropical Vibes

Bring a bit of the tropics to your nails with palm leaves, pineapples, or flamingos. These playful designs are perfect for capturing the spirit of spring and summer.

Tips: Use bright, bold colors to make your tropical designs pop, or keep it subtle with pastel tropical prints.

8. Abstract Art

Get creative with abstract nail art that combines various shapes, colors, and textures. This style is perfect for those who want a unique and personalized look.

Tips: Experiment with different color combinations and techniques like splatter painting or marbling for a truly one-of-a-kind manicure.

9. Classic French Twist

Update the classic French manicure with a spring twist. Use pastel or bright colors for the tips, or add floral or geometric accents for a modern take.

Tips: For a more elegant look, use a sheer pink base with white or pastel tips.

10. Colorful Dots

Polka dots are playful and versatile, making them a great choice for spring. Choose contrasting or complementary colors to create a fun and lively design.

Tips: Use a dotting tool or a toothpick for perfect dot placement, and experiment with different sizes and patterns.

11. Butterfly Beauty

Butterflies are a symbol of transformation and beauty, making them a perfect spring design. Use delicate butterfly decals or hand-painted designs to capture the essence of the season.

Tips: Pair butterfly designs with pastel or bright backgrounds for a vibrant look.

12. Watercolor Wonders

Create a dreamy watercolor effect with soft, blended colors. This technique mimics the look of watercolor paintings and adds an artistic touch to your nails.

Tips: Use a sponge or brush to blend colors gently and achieve a smooth gradient.

13. Minimalist Magic

If you prefer a more understated look, minimalist designs are a great choice. Simple lines, negative space, and subtle accents can create a chic and modern manicure.

Tips: Choose one or two colors and keep the design simple for an elegant finish.

14. Rainbow Delight

Celebrate the colors of spring with a rainbow manicure. Use vibrant shades to create a gradient or stripe pattern that captures the essence of the season.

Tips: Apply a base coat and use a sponge or brush to blend colors for a seamless rainbow effect.

15. Cute Critters

Add a touch of whimsy to your manicure with cute critter designs like bunnies, bees, or ladybugs. These fun and playful designs are perfect for springtime.

Tips: Use bright colors and small decals for adorable critter designs that are sure to make you smile.

16. Glitter Glam

Sparkle and shine with glittery nail designs. Add glitter accents to a pastel or bold base for a dazzling finish that’s perfect for any spring event.

Tips: Apply glitter to the tips or as an accent nail for a touch of glamour without overwhelming the design.

17. Elegant Ombre

Create a sophisticated ombre effect using shades of pink, purple, or blue. This design offers a smooth gradient that transitions from light to dark for a refined and elegant look.

Tips: Use a makeup sponge to blend colors and achieve a seamless gradient effect.

18. Spring Blossoms

Incorporate blooming flowers into your nail art with hand-painted designs or decals. Choose from cherry blossoms, tulips, or any other spring flowers to add a touch of nature to your manicure.

Tips: Combine floral designs with pastel backgrounds for a soft and romantic look.

19. Tropical Fruits

Embrace the flavors of spring with tropical fruit designs like watermelon, kiwi, or coconut. These fruity designs add a fun and refreshing touch to your nails.

Tips: Use bright, vibrant colors and detailed designs to make your tropical fruit nails stand out.

20. Classic Polka Dots

Add a timeless touch to your manicure with classic polka dots in various sizes and colors. This design is simple yet stylish, perfect for any spring occasion.

Tips: Experiment with color combinations and dot sizes for a playful and eye-catching look.

21. Artistic Swirls

Create a unique look with swirling patterns and abstract designs. Use a combination of colors and shapes to achieve a visually stunning manicure.

Tips: Experiment with different techniques like marbling or water decals for a creative and personalized design.

Tips for Achieving the Perfect Spring Manicure

1. Nail Preparation

Clean and Shape: Start by cleaning and shaping your nails. File them to your desired length and shape, and use a buffer to create a smooth surface.

2. Base and Top Coats

Base Coat: Apply a clear base coat to protect your nails and provide a smooth foundation for polish.

Top Coat: Finish with a top coat to seal in your design and add shine. This also helps extend the life of your manicure.

3. Nail Art Tools

Quality Tools: Invest in good-quality brushes, dotting tools, and nail decals for precise and professional-looking designs.

4. Application Techniques

Layering: Allow each layer of polish to dry completely before applying additional coats or designs to prevent smudging.

Precision: Use nail art brushes or decals for detailed designs.

Conclusion

Spring is the perfect time to experiment with vibrant and creative nail designs. With these 888+ stunning nail ideas, you have endless options to refresh your look and embrace the beauty of the season. Whether you opt for floral patterns, pastel hues, or playful designs, these nail ideas will help you step into spring with style and confidence. Get ready to show off your fabulous spring manicure and enjoy the season with nails that truly shine! 💅🏼🌸✨

image
처럼
논평
공유하다
Seren's Urban Elegance
1 와이 ·번역하다

21 Eye-Catching Orange Nail Designs to Energize Your Look

Orange is a bold and energetic color that can bring a vibrant touch to any look. Whether you’re aiming to add a pop of color to your everyday style or you’re preparing for a special event, orange nail designs can make a striking statement. From fiery hues to playful patterns, these eye-catching orange nail designs will elevate your manicure and energize your overall look. Here are 21 fantastic ideas to inspire your next nail art adventure.

1. Classic Tangerine Glow

A classic tangerine polish is a timeless choice. Its bright, cheerful hue instantly lifts your mood and adds a fresh burst of color to your nails. Perfect for everyday wear or a casual outing.

2. Sunset Ombre

Capture the beauty of a sunset with an ombre effect that transitions from deep orange at the base to a lighter, almost yellow hue at the tips. This gradient look is both stunning and versatile.

3. Neon Orange Pop

Go bold with neon orange for a look that’s impossible to ignore. This high-impact color is perfect for summer festivals or nights out when you want your nails to stand out.

4. Citrus Splatter

Add a fun twist with a citrus splatter design. Use a sponge to create a splattered effect with various shades of orange and a touch of white for a playful, abstract look.

5. Geometric Orange

Incorporate geometric patterns with bold orange as the base color. Use contrasting shades or metallic accents to create striking lines, triangles, or squares.

6. Orange and Gold Glam

Pair vibrant orange with glittering gold for a glamorous and festive look. This combination is perfect for special occasions and adds a touch of luxury to your nails.

7. Tropical Floral

Embrace a tropical vibe with floral designs in shades of orange. Bright hibiscus or dainty marigolds can add a refreshing, summery touch to your manicure.

8. Abstract Orange Art

Get creative with abstract nail art featuring swirling patterns and shapes in varying shades of orange. This artistic design adds a unique and modern twist to your look.

9. Orange Tips French Twist

Give the classic French manicure a vibrant update with orange tips. This modern twist on a timeless design adds a fresh and lively touch to your nails.

10. Orange with Black Dots

Add a touch of contrast with black polka dots on an orange base. This playful design is perfect for adding a bit of fun to your manicure while keeping it stylish.

11. Citrus Gradient

Create a citrus-inspired gradient with shades of orange, lemon yellow, and lime green. This colorful design evokes the feeling of a tropical fruit punch and is perfect for summer.

12. Matte Orange Finish

Opt for a matte finish in a bold orange shade for a sophisticated yet eye-catching look. Matte polish offers a modern touch and can be enhanced with glossy top coats for added shine.

13. Orange Marble

Achieve a chic and elegant look with orange marble nail art. Use a marbleizing technique to blend orange with white or gold for a sophisticated and refined design.

14. Bold Stripes

Create a dynamic look with bold, horizontal or vertical orange stripes. Use contrasting colors like white or black to make the stripes stand out and add visual interest.

15. Pumpkin Spice

For a seasonal touch, embrace a pumpkin spice theme with rich, warm orange tones. This design is perfect for fall and adds a cozy, festive feel to your manicure.

16. Orange and Blue Duo

Pair vibrant orange with cool blue for a striking contrast. This combination is perfect for making a bold statement and adds a fun, energetic vibe to your nails.

17. Glitter Gradient

Combine glitter with orange polish for a sparkling gradient effect. Start with a solid orange base and blend glitter into the tips for a dazzling, eye-catching look.

18. Neon Ombre

Create a vibrant neon ombre with different shades of orange. This design transitions from bright, neon shades to softer tones for a dynamic and playful look.

19. Tropical Leaves

Incorporate tropical leaf designs in green or gold over an orange base. This design adds a touch of exotic flair and pairs perfectly with summer outfits.

20. Orange Animal Print

Add some wild flair with animal print designs in shades of orange. Whether it’s leopard spots or zebra stripes, this design adds a fun and fierce touch to your manicure.

21. Confetti Nails

Celebrate with a confetti-inspired design. Use small pieces of glitter or multi-colored dots over an orange base for a festive, party-ready look.

How to Achieve Your Perfect Orange Nail Design

1. Nail Preparation

Clean and Shape: Start by cleaning and shaping your nails to your desired length and style. Use a nail file to smooth out any rough edges.

Buff and Smooth: Buff your nails to ensure a smooth surface for polish application.

2. Base and Top Coats

Apply Base Coat: Use a clear base coat to protect your nails and help the polish adhere better.

Finish with Top Coat: Apply a top coat to seal in your design and add a glossy finish.

3. Nail Art Tools

Quality Tools: Invest in good-quality brushes, dotting tools, and nail tape for precise and professional-looking designs.

4. Application Techniques

Layering: Allow each layer of polish to dry completely before applying additional coats or designs to prevent smudging.

Precision: Use nail art brushes or decals for detailed designs.

Conclusion

Orange nail designs offer a vibrant and energetic way to brighten your look and make a bold statement. From classic tangerine glows to neon pops and tropical themes, these 21 eye-catching designs are perfect for adding a splash of color to any occasion. Embrace the playful and dynamic nature of orange with these stunning nail ideas and let your nails become a highlight of your style. Get ready to energize your look and make every day a little brighter with these fabulous orange nail designs! 💅🏼✨🍊

image
처럼
논평
공유하다
Seren's Urban Elegance
1 와이 ·번역하다

17 Hot and Fun Valentine’s Day Nail Ideas You'll Totally Love

Valentine’s Day is the perfect occasion to express your love and creativity, and what better way to do that than with a stunning manicure? This year, let your nails be the centerpiece of your Valentine’s celebration with these 17 hot and fun nail ideas. Whether you're gearing up for a romantic date, a girls’ night out, or just want to spread some love, these nail designs will help you show off your style in the most charming way. Let’s dive into these creative and eye-catching Valentine’s Day nail ideas that you’ll absolutely adore!

1. Classic Red with Heart Accents

Red nails are a timeless choice for Valentine’s Day, and adding heart accents takes them to the next level. Opt for a bold red base with tiny heart decals or hand-painted designs to capture the essence of romance.

2. Pink and Gold Glam

Combine soft pink with shimmering gold for a glamorous look that’s perfect for Valentine’s Day. A pink base with gold glitter tips or gold heart embellishments creates a chic and elegant manicure.

3. Love Letters

Channel your inner romantic with a love letter-themed design. Use white polish to paint small love letters or messages on a pastel background for a sweet and personal touch.

4. Heartfelt Ombre

Create a soft, ombre effect using shades of pink and red, and finish with small heart designs scattered across your nails. This look is both romantic and visually stunning.

5. Rose Gold Elegance

Rose gold is a perfect choice for a sophisticated Valentine’s Day look. Apply a rose gold polish as a base and add delicate heart or lace patterns for an elegant and refined finish.

6. Playful Polka Dots

Polka dots are fun and versatile, making them a great choice for Valentine’s Day. Use red and white or pink and gold dots to create a playful and eye-catching design that’s full of charm.

7. Glittering Hearts

Add some sparkle to your Valentine’s manicure with glittering hearts. Use a glittery polish or apply glitter accents to heart-shaped designs for a dazzling, festive look.

8. XO Designs

Celebrate love with playful “X” and “O” designs. These simple yet meaningful symbols are perfect for adding a touch of Valentine’s spirit to your nails.

9. Cupid’s Arrow

Incorporate Cupid’s arrows into your nail art with a design featuring arrows and hearts. This fun and creative look is sure to make your manicure stand out.

10. Romantic Floral Patterns

Floral designs add a touch of romance and elegance to your nails. Choose delicate roses or vibrant tulips in shades of pink and red to create a beautiful and feminine look.

11. Heart-Shaped French Tips

Give the classic French manicure a Valentine’s twist by incorporating heart-shaped tips. Use a light pink base with heart-shaped white tips or vice versa for a sweet and stylish design.

12. Sweet Candy Stripes

Opt for candy-inspired stripes in shades of pink, red, and white. This design adds a fun, festive touch to your nails that’s perfect for celebrating Valentine’s Day.

13. Elegant Black and Red

For a more dramatic look, combine black and red polish. Use black as a base and add red heart or lace accents for a striking and sophisticated design.

14. Watercolor Hearts

Create a dreamy effect with watercolor hearts. Use soft, blended colors in shades of pink and red to create a beautiful and artistic nail design.

15. Sweetheart Accent Nails

Keep it simple with a classic color base and add sweetheart accents to one or two nails. Choose heart-shaped decals or hand-paint small hearts for a cute and understated look.

16. Romantic Ombre with Hearts

Combine a romantic ombre effect with heart accents for a beautiful and dreamy design. This look blends soft colors and adds a touch of love with heart embellishments.

17. 3D Love Embellishments

For a truly eye-catching design, add 3D embellishments like small heart charms or pearl accents. These details bring an extra dimension to your manicure and make your Valentine’s nails stand out.

How to Achieve the Perfect Valentine’s Day Manicure

1. Nail Preparation

Clean and Shape: Start by cleaning and shaping your nails. File them to your desired length and shape for a neat base.

Buff and Smooth: Gently buff the surface of your nails to remove any ridges and ensure a smooth application of polish.

2. Base and Top Coats

Apply Base Coat: Use a clear base coat to protect your nails and help the polish adhere better.

Top Coat for Shine: Finish with a top coat to seal in your design and add a glossy shine. This also helps extend the life of your manicure.

3. Nail Art Tools

Use Quality Tools: Invest in good-quality brushes, dotting tools, and nail decals to achieve precise and professional-looking designs.

4. Drying Time

Allow Proper Drying: Ensure each layer of polish is completely dry before applying additional coats or designs. This prevents smudging and ensures a clean finish.

5. Nail Care

Moisturize Regularly: Keep your cuticles and hands moisturized to maintain healthy nails and enhance the appearance of your manicure.

Conclusion

This Valentine’s Day, let your nails be a celebration of love and creativity with these 17 hot and fun nail ideas. From classic red hearts to playful polka dots and elegant floral patterns, there’s a design to suit every style and occasion. Whether you’re aiming for a romantic, glamorous, or fun look, these nail art ideas will help you achieve a standout manicure that’s sure to make you feel special. Embrace the spirit of the season and let your nails shine with these gorgeous Valentine’s Day designs! 💅🏼💖🌟

image
처럼
논평
공유하다
Seren's Urban Elegance
1 와이 ·번역하다

Show-Stopping Nail Design Ideas for Your Next Manicure

In the world of beauty, your nails are a powerful canvas for self-expression. A well-designed manicure can transform your look, add a touch of glamour, and make you stand out from the crowd. Whether you’re preparing for a special event, looking to refresh your everyday style, or simply want to indulge in a bit of creativity, show-stopping nail designs are your ticket to a standout manicure. Here’s a guide to some of the most stunning nail design ideas that will make your next manicure truly unforgettable.

1. Glitter Galore

Glitter nails are always a show-stopper. Whether you opt for a full glitter manicure or just accent nails, the sparkle and shine will make your nails shine like stars. For a chic look, try a gradient glitter effect, where the glitter fades from your cuticle to the tip. Alternatively, go bold with full coverage for maximum impact.

2. Marble Magic

Marble nails are a sophisticated choice that combines elegance with a touch of artistry. This design mimics the look of marble stone with swirls of contrasting colors like white and gray or even bold hues. The result is a luxurious and modern manicure that’s perfect for any occasion.

3. Geometric Glam

Geometric patterns are perfect for those who love a sleek, contemporary look. Think clean lines, triangles, and squares in bold colors or metallics. You can mix and match geometric shapes to create a unique design that’s both edgy and stylish.

4. Abstract Art

Embrace your inner artist with abstract nail art. Use a variety of colors and brush strokes to create an expressive and artistic look. Abstract designs can be as simple or complex as you like, allowing for endless creativity and customization.

5. Classic French Twist

Update the classic French manicure with a modern twist. Instead of traditional white tips, experiment with vibrant colors, glitter, or even patterns. This fresh take on a classic design adds a contemporary edge while still maintaining a timeless elegance.

6. Floral Fantasy

Floral designs bring a touch of nature and romance to your nails. Choose from delicate daisies, bold roses, or intricate botanical patterns. Whether painted by hand or applied as decals, floral designs add a charming and feminine touch to your manicure.

7. Metallic Marvels

Metallic nails are perfect for making a bold statement. Opt for chrome, gold, or silver to add a futuristic and glamorous touch to your look. Metallic finishes can be used as a full manicure or as accents to enhance other designs.

8. Neon Lights

Bright, neon colors are perfect for making your nails pop. Neon designs are playful and vibrant, making them ideal for summer parties, festivals, or any time you want to stand out. Combine neon shades with black or white for a striking contrast.

9. Ombre Elegance

Ombre nails offer a smooth gradient effect that transitions from one color to another. This design can range from subtle shades of the same color to bold contrasts between different hues. Ombre is a versatile look that can be tailored to suit any style or occasion.

10. 3D Accents

For a truly eye-catching manicure, add 3D elements like rhinestones, pearls, or textured designs. These accents can add depth and dimension to your nails, making them stand out with added flair and glamour.

11. Animal Prints

Animal print designs, such as leopard spots or zebra stripes, add a fun and fierce touch to your nails. These prints can be done in classic colors or with a twist, using vibrant shades or metallics for a more adventurous look.

12. Retro Vibes

Channel vintage vibes with retro-inspired nail designs. From classic polka dots and checkered patterns to bold color blocking, retro styles offer a nostalgic charm that’s both playful and stylish.

13. Minimalist Magic

If you prefer a more understated look, minimalist nail art is the way to go. Simple lines, negative space, and subtle designs can create a sophisticated and elegant manicure that’s perfect for any occasion.

14. Jewel Tones

Deep, rich jewel tones like emerald, sapphire, and ruby can add a touch of luxury to your nails. These colors are perfect for fall and winter and can be paired with gold or silver accents for extra glamour.

15. Cosmic Nails

For a manicure that’s out of this world, try cosmic designs featuring stars, galaxies, and celestial elements. Dark backgrounds with starry details create a mesmerizing look that’s perfect for stargazers and dreamers alike.

How to Achieve Show-Stopping Nails

1. Start with Preparation

Clean and Shape: Begin by cleaning your nails and shaping them to your desired length and style. Use a nail buffer to create a smooth surface.

2. Choose Quality Products

High-Quality Polish: Invest in good-quality nail polishes and tools to ensure a professional finish.

Base and Top Coats: Apply a base coat to protect your nails and a top coat to seal in your design and add shine.

3. Application Techniques

Precision: Use nail art brushes or dotting tools for precise designs. For intricate patterns, consider using nail tape or stencils.

Drying Time: Allow each layer to dry completely before applying additional layers or top coats.

4. Maintenance

Regular Care: Keep your nails healthy by moisturizing your cuticles and avoiding harsh chemicals. Regular maintenance will help keep your manicure looking fresh and flawless.

Conclusion

Your next manicure is an opportunity to showcase your style and creativity with show-stopping designs that will turn heads and make a statement. Whether you opt for bold glitter, elegant marble, or playful animal prints, these nail design ideas offer endless possibilities for expressing yourself. With a little creativity and the right techniques, you can achieve a stunning manicure that’s perfect for any occasion. Dive into these design ideas and let your nails become the ultimate accessory for your next look! 💅🏼✨🌟

image
처럼
논평
공유하다
Seren's Urban Elegance
1 와이 ·번역하다

Romantic Nail Wraps with Rhinestones: Transparent, Sparkling Valentine’s Day Nail Strips

Valentine’s Day is the perfect occasion to indulge in a bit of glamour and romance, and what better way to celebrate than with stunning nail wraps? This season, transparent nail strips adorned with rhinestones are taking center stage, offering a dazzling way to elevate your manicure. Whether you're planning a romantic dinner, a festive party, or simply want to add a touch of sparkle to your everyday look, these romantic nail wraps are a fabulous choice. In this article, we’ll explore why these nail wraps are a must-have for Valentine’s Day, how to apply them, and why they’re perfect for creating a flawless, sparkling manicure.

Why Choose Romantic Nail Wraps with Rhinestones?

1. Effortless Glamour

Nail wraps with rhinestones offer a quick and easy way to achieve a glamorous look without the need for complex nail art techniques. They provide an instant upgrade to your nails with minimal effort, making them ideal for busy individuals who still want to look chic.

2. Sparkling Elegance

The rhinestones embedded in these wraps add a touch of sparkle that catches the light beautifully, creating an elegant and eye-catching effect. This added bling is perfect for special occasions like Valentine’s Day, where a bit of extra shimmer can enhance your overall look.

3. Versatile Design

Transparent nail wraps are versatile and can complement a wide range of outfit colors and styles. The subtle transparency allows for a sophisticated appearance, while the rhinestones provide just the right amount of flair.

4. Long-Lasting Wear

High-quality nail wraps are designed to last, ensuring that your manicure stays beautiful throughout your Valentine’s Day celebrations and beyond. They are resistant to chipping and peeling, making them a reliable choice for a flawless finish.

How to Apply Romantic Nail Wraps with Rhinestones

Applying nail wraps is a straightforward process that can be done at home. Here’s a step-by-step guide to achieving a perfect manicure with these sparkling wraps:

1. Prepare Your Nails

Clean and Shape: Begin by removing any old polish and shaping your nails to your desired length and form.

Buff the Surface: Gently buff the surface of your nails to create a smooth base for the wraps.

2. Apply a Base Coat

Protect and Prep: Apply a clear base coat to protect your natural nails and help the wraps adhere better. Let it dry completely before proceeding.

3. Choose the Right Size

Select Your Wraps: Choose nail wraps that fit your nails. Most sets come with a variety of sizes to ensure a perfect fit for different nail shapes and sizes.

4. Apply the Nail Wraps

Peel and Place: Carefully peel the nail wrap from its backing and place it onto your nail. Start from the cuticle and smooth it out to the tip.

Smooth and Trim: Use a cuticle pusher or your fingers to smooth out any air bubbles and ensure the wrap adheres properly. Trim any excess wrap using a nail file or clippers.

5. Seal the Design

Apply Top Coat: Finish with a clear top coat to seal the wraps and add extra shine. This also helps extend the life of your manicure.

6. Enjoy Your Sparkling Nails

Show Off: Once everything is dry, your sparkling Valentine’s Day nails are ready to shine. Enjoy your effortlessly elegant manicure!

Tips for a Flawless Finish

Avoid Water: Try to avoid soaking your nails in water for the first few hours after application to ensure the wraps adhere properly.

Use a Nail File: If you encounter any rough edges or excess wrap, gently file them down to create a smooth finish.

Store Properly: Keep unused wraps in a cool, dry place to maintain their quality and prevent them from becoming brittle.

Conclusion

Romantic nail wraps with rhinestones offer a perfect blend of elegance and convenience, making them an excellent choice for Valentine’s Day. With their transparent base and sparkling embellishments, these wraps can transform your manicure into a dazzling display of romance and glamour. Easy to apply and long-lasting, they provide an effortless way to achieve a polished and festive look. Embrace the spirit of Valentine’s Day with these stunning nail wraps and let your nails become a highlight of your celebration. 💅🏼💖🌟

image
처럼
논평
공유하다
Seren's Urban Elegance
1 와이 ·번역하다

25 Stunning August Nail Designs You'll Adore This Season!

August is the perfect month to embrace the vibrant energy of summer while starting to transition into the fall season. Your nails can be a fantastic canvas to showcase this shift, offering a mix of bright, bold colors and more subdued, sophisticated designs. Whether you’re gearing up for a vacation, a special event, or just want to update your everyday look, these 25 stunning nail designs are sure to inspire you. Dive into this curated catalog of August nail designs and find your new favorite manicure for the season!

1. Tropical Sunset

Capture the essence of summer with a tropical sunset design. Blend warm hues like orange, pink, and yellow to create a gradient that mimics a beautiful sunset. Add palm tree silhouettes for an extra touch of paradise.

2. Ocean Waves

Embrace the beach vibes with ocean-inspired nails. Use shades of blue and white to create wave patterns, and add a touch of glitter to mimic the sparkle of the sun on the water.

3. Vibrant Floral Patterns

Floral designs are a timeless choice. For August, opt for vibrant, tropical flowers like hibiscus or plumeria. Bright pinks, reds, and greens will make your nails pop and keep your look fresh and lively.

4. Sunset Ombre

Create a stunning sunset ombre effect using shades of pink, orange, and purple. This design is perfect for those who want a subtle yet eye-catching manicure that reflects the season’s colors.

5. Lemon Yellow Delight

Brighten up your August with a bold lemon yellow polish. Add a touch of fun with small lemon or citrus decals to enhance the summery feel.

6. Pastel Beach Vibes

For a softer look, opt for pastel shades of blue, pink, and sand. This design gives a nod to the beach without being too bright, perfect for transitioning from summer to fall.

7. Tropical Fruits

Incorporate tropical fruits like pineapples, watermelons, and coconuts into your nail art. These playful designs are perfect for those who want a fun and fruity touch to their nails.

8. Glittering Coral

Use a coral base and top it with a layer of glitter for a sparkling, beach-inspired look. This design is ideal for adding a bit of sparkle to your summer outings.

9. Bold Stripes

Stripes in bold colors can make a statement. Choose contrasting colors or complementary shades to create eye-catching designs that are both stylish and playful.

10. Boho Chic

Embrace the bohemian trend with intricate patterns and earthy tones. Incorporate designs like dreamcatchers, feathers, or geometric shapes in warm, rich colors.

11. Classic Polka Dots

Polka dots are a fun and timeless design. For August, choose bright, summery colors like turquoise, pink, or sunny yellow to create a playful and cheerful manicure.

12. Abstract Art

Experiment with abstract art by using bold colors and shapes. This design allows you to get creative and express your individuality with unique patterns and color combinations.

13. Starry Night

Capture the magic of a summer night sky with a starry design. Use deep blues and purples as your base and add silver or gold stars for a celestial touch.

14. Watercolor Effect

Create a watercolor effect using soft, blended colors. This design is perfect for a more delicate and artistic look that transitions well from summer to fall.

15. Elegant Nude with Gold Accents

For a more sophisticated look, go for a nude base with gold accents. This design is elegant and versatile, making it suitable for both casual and formal events.

16. Colorful Confetti

Celebrate August with a fun confetti design. Use bright, multi-colored dots on a neutral or pastel base for a festive and cheerful manicure.

17. Nautical Theme

Embrace a nautical theme with designs featuring anchors, stripes, and navy blue. This design is perfect for those who love the sea and want to keep the summer vibes going.

18. Soft Lavender Dreams

Opt for a soft lavender polish for a calming and elegant look. Add delicate white or silver designs for a touch of sophistication and subtle sparkle.

19. Edgy Metallics

Experiment with metallic shades like rose gold or silver for a bold and edgy look. Metallics are perfect for those who want to make a statement and add some shine to their nails.

20. Neon Pop

Bright neon colors are perfect for making your nails stand out. Choose vibrant hues like neon pink, green, or blue for a fun and energetic look.

21. Tropical Leaves

Incorporate tropical leaves like monstera or palm into your nail art. Use a combination of green tones and bold accents to create a lush, jungle-inspired design.

22. Classic Red with a Twist

Update the classic red manicure with a twist. Add gold or silver stripes, dots, or accents to give your red nails a modern and sophisticated edge.

23. Subtle Glitter Accent

Add a touch of glamour with subtle glitter accents. Choose a neutral or pastel base and apply glitter to the tips or as an accent on one or two nails.

24. Artistic Splashes

Create an artistic look with splashes of different colors. This abstract design is perfect for showcasing your creativity and adding a splash of fun to your manicure.

25. Gradient Blues

Blend different shades of blue to create a gradient effect. This design mimics the colors of the ocean and sky, making it perfect for the summer-to-fall transition.

Tips for Perfecting Your August Nail Designs

Prep Your Nails: Start with clean, shaped nails and apply a base coat to protect your nails and enhance polish adhesion.

Use Quality Products: Choose high-quality nail polishes and tools for the best results.

Experiment with Techniques: Don’t be afraid to try new techniques, such as ombre blending or nail art stamping, to achieve your desired look.

Finish with a Top Coat: Apply a top coat to seal in your design, add shine, and extend the life of your manicure.

Maintenance: Keep your nails healthy and your manicure looking fresh by regularly moisturizing your hands and avoiding harsh chemicals.

Conclusion

August is the perfect time to experiment with vibrant and stunning nail designs that capture the essence of summer while transitioning into fall. From tropical sunsets to elegant metallics, these 25 nail designs offer something for every style and occasion. Embrace the season’s energy with a manicure that reflects your personality and makes a statement. Dive into these designs and find your new favorite look for an unforgettable August! 💅🏼🌟

image
처럼
논평
공유하다
Amelia's Stylish Spaces
1 와이 ·번역하다

### **Petal Perfection: Embrace the Latest Spring Makeup Trends**

As the first blooms of spring appear, it's the perfect time to refresh your makeup routine with the season's latest trends. This year, **Petal Perfection** takes center stage, celebrating the fresh, vibrant, and rejuvenating beauty of spring. From blooming floral hues to dewy finishes that capture the essence of springtime, this article explores the must-try spring makeup trends that will elevate your beauty game and keep you looking radiant all season long.

---

### **1. The Essence of Petal Perfection**

**1.1 What Is Petal Perfection?**

Petal Perfection is all about embracing the light, airy, and natural beauty of spring. It draws inspiration from blooming flowers, soft pastels, and a fresh, dewy complexion. This trend focuses on creating a look that is effortlessly beautiful and reminiscent of the season's vibrant flora.

**1.2 Why Embrace Spring Makeup Trends?**

Spring is a time of renewal and transformation. Embracing seasonal makeup trends allows you to:

- **Refresh Your Look* Update your makeup routine with the latest trends for a fresh, modern appearance.

- **Celebrate the Season* Capture the essence of spring with colors and techniques that reflect the beauty of the season.

- **Boost Your Confidence* A new makeup look can enhance your features and boost your confidence, making you feel vibrant and rejuvenated.

---

### **2. Top Spring Makeup Trends for Petal Perfection**

**2.1 Dewy, Glowing Skin**

**The Trend* This spring, the emphasis is on achieving a radiant, dewy complexion that glows from within.

**How to Achieve It*

- **Hydrating Primer* Start with a hydrating primer to create a smooth, luminous base.

- **Lightweight Foundation* Opt for a lightweight, dewy foundation that enhances your natural glow without feeling heavy.

- **Highlighter* Apply a cream or liquid highlighter to the high points of your face, such as the cheekbones, brow bones, and the bridge of your nose, for a subtle, radiant shine.

**2.2 Soft, Pastel Eyes**

**The Trend* Soft pastel shades are perfect for spring, adding a touch of whimsy and elegance to your eye makeup.

**How to Achieve It*

- **Eyeshadow* Choose pastel shades like soft pinks, lilacs, or mint greens for your eyeshadow. Apply a light wash of color across the lids and blend seamlessly.

- **Eyeliner* For a playful twist, try a pastel eyeliner or a subtle flick with a bright, fresh hue.

- **Mascara* Use a volumizing mascara to enhance your lashes without overpowering the soft pastel tones.

**2.3 Rosy Cheeks**

**The Trend* Rosy cheeks are a classic spring look, bringing a natural flush of color to your face.

**How to Achieve It*

- **Blush* Choose a cream or powder blush in shades of pink or peach. Apply to the apples of your cheeks and blend outwards for a natural, youthful glow.

- **Technique* For a fresh, dewy effect, apply blush with your fingers or a damp sponge, which helps blend the product seamlessly into your skin.

**2.4 Subtle Floral Lips**

**The Trend* Lips inspired by blooming flowers are a standout trend this spring, with soft, petal-like shades and textures.

**How to Achieve It*

- **Lip Color* Opt for lipsticks or glosses in soft pinks, corals, or nudes. These shades mimic the natural hues of spring flowers.

- **Application* For a more natural look, apply lip color with your fingertip or use a lip stain for a subtle, lasting tint.

- **Gloss* Add a touch of clear or lightly tinted gloss for a plump, petal-perfect finish.

**2.5 Minimalist Makeup**

**The Trend* Minimalist makeup celebrates simplicity and enhances natural beauty with just a few key products.

**How to Achieve It*

- **Base* Use a tinted moisturizer or BB cream for light coverage and a natural finish.

- **Brows* Groom and fill in your brows with a brow gel or pencil for a defined yet natural look.

- **Lips and Cheeks* Opt for multi-use products, such as a lip and cheek tint, to streamline your routine and achieve a cohesive look.

---

### **3. How to Incorporate Petal Perfection into Your Routine**

**3.1 Experiment with New Products**

Spring is an excellent time to try new makeup products that align with the Petal Perfection trend. Explore new brands, textures, and shades to find what works best for you.

**3.2 Personalize Your Look**

While trends provide inspiration, it's important to personalize your makeup look to suit your unique style and features. Experiment with different shades and techniques to find what enhances your natural beauty.

**3.3 Stay Hydrated and Healthy**

Healthy, radiant skin is the perfect canvas for Petal Perfection makeup. Ensure you're drinking plenty of water, eating a balanced diet, and getting adequate sleep to support your skin's natural glow.

---

### **4. Conclusion**

Embracing the **Petal Perfection** trend this spring allows you to celebrate the season's beauty with a fresh, radiant makeup look. From dewy skin and pastel eyes to rosy cheeks and subtle floral lips, these trends offer a range of options to enhance your natural beauty. By incorporating these spring makeup trends into your routine, you can enjoy a rejuvenated look that captures the essence of springtime elegance. Refresh your beauty game and bloom with confidence as you embrace the latest in spring makeup trends!

#datenightbeauty

image
처럼
논평
공유하다
Seren's Urban Elegance
1 와이 ·번역하다

49 Gorgeous Prom Sky Blue Nail Designs for 2024

Prom season is the perfect opportunity to showcase your style and make a memorable impression, and one of the best ways to do this is through your nails. For 2024, sky blue is a standout color choice that promises elegance, sophistication, and a touch of whimsy. Whether you’re aiming for a classic look or something more daring, sky blue nail designs can perfectly complement your prom outfit and make your hands sparkle under the dance floor lights. Here’s a guide to 49 stunning sky blue nail designs that are sure to inspire your prom manicure.

Why Choose Sky Blue for Prom?

Sky blue is an incredibly versatile color that offers a refreshing and calming vibe. It pairs beautifully with a range of prom dresses, from pastel to bold hues, and its cool tones can add a sophisticated yet playful touch to your overall look. Here’s why sky blue is a fantastic choice for prom:

Elegance with a Twist: Sky blue is a color that conveys both grace and uniqueness. It’s ideal for those who want to stand out while maintaining a sense of elegance.

Versatility: This shade works well with various dress colors and styles, making it a safe yet stylish choice for many prom looks.

Modern Appeal: Sky blue is on-trend for 2024, offering a contemporary twist to classic nail designs.

Top 49 Sky Blue Nail Designs for Prom 2024

Here are 49 eye-catching sky blue nail designs to consider for your prom night:

1. Classic Sky Blue Gloss

A single coat of glossy sky blue polish provides a sleek and timeless look that’s both elegant and understated.

2. Sparkling Ombre

Create a gradient effect from dark to light sky blue, adding a touch of glitter at the tips for a dreamy ombre effect.

3. Metallic Blue Accents

Pair sky blue nails with metallic silver or gold accents to add a touch of glamour and shine.

4. Sky Blue French Tips

Revamp the classic French manicure with sky blue tips for a modern and chic twist.

5. Glittery Sky Blue

Cover your sky blue base with a layer of fine glitter to make your nails shimmer and sparkle under the prom lights.

6. Floral Patterns

Hand-paint delicate white or silver flowers over a sky blue base for a feminine and elegant look.

7. Blue Marble Design

Create a marble effect using sky blue and white polish for a sophisticated, high-fashion look.

8. Starry Night

Add tiny star-shaped embellishments or decals to your sky blue nails for a celestial-themed manicure.

9. Abstract Art

Experiment with abstract patterns using sky blue, white, and silver to create a unique and artistic nail design.

10. Sky Blue and Pearls

Incorporate pearl accents into your sky blue manicure for a luxurious and refined look.

11. Geometric Patterns

Use tape or stamping techniques to create geometric patterns in varying shades of blue and silver.

12. Ombre Glitter Tips

Blend sky blue into glittery silver or white tips for a chic and sparkly finish.

13. Nautical Stripes

Pair sky blue with white stripes for a nautical-inspired design that’s both stylish and fun.

14. 3D Floral Embellishments

Add 3D floral decorations to your sky blue nails for a glamorous, textured look.

15. Blue Rhinestones

Accent your sky blue nails with blue or silver rhinestones for added sparkle and sophistication.

16. Dotted Designs

Use a dotting tool to create polka dots or abstract patterns in sky blue and white for a playful look.

17. Watercolor Effect

Achieve a watercolor effect by blending sky blue with soft white or pink shades for a dreamy, ethereal look.

18. Sky Blue and Gold Foil

Add gold foil flakes to your sky blue base for a luxurious and eye-catching design.

19. Striking Chevron Patterns

Create bold chevron patterns using sky blue and contrasting colors like white or silver.

20. Classic Blue and Silver

Combine sky blue with silver stripes or accents for a timeless, elegant manicure.

21. Blue Glitter Gradient

Apply a gradient of blue glitter over a sky blue base for a sparkly and glamorous effect.

22. Pastel Blue Florals

Use soft pastel shades to paint delicate floral designs over your sky blue nails.

23. Blue and White Swirls

Design swirling patterns using sky blue and white for a whimsical and fluid design.

24. Polished Matte

Opt for a matte sky blue finish for a contemporary and sophisticated appearance.

25. Blue and Black Art

Create dramatic nail art by pairing sky blue with black for a striking contrast.

26. Glittery Blue Accent Nails

Choose one or two accent nails with glitter to add sparkle and dimension to your sky blue manicure.

27. Holographic Effects

Incorporate holographic polish or topcoat to give your sky blue nails an iridescent glow.

28. Blue Foil Tips

Apply blue foil to the tips of your nails for a trendy and eye-catching design.

29. Starry Blue Sky

Paint tiny stars and moons on a sky blue base for a celestial theme.

30. Lush Blue Florals

Add intricate floral designs in contrasting colors like white or pink over a sky blue base.

31. Shimmering Blue Accents

Highlight portions of your sky blue nails with shimmering accents for added sparkle.

32. Blue and Gold Abstracts

Experiment with abstract designs combining sky blue and gold for a chic and sophisticated look.

33. Blue and Silver Stripes

Create bold vertical or horizontal stripes in sky blue and silver for a fashionable design.

34. Soft Blue Ombré

Blend soft shades of sky blue for a subtle and elegant ombré effect.

35. Sky Blue French Tips with Glitter

Combine sky blue French tips with a touch of glitter for a stylish twist on a classic look.

36. Sparkling Blue Gradient

Apply a gradient of sky blue to white glitter for a dazzling, sparkly manicure.

37. Artistic Blue Waves

Paint flowing, wave-like patterns in sky blue for a unique and artistic design.

38. Blue and White Marble

Create a marble effect using sky blue and white for a sophisticated and trendy look.

39. Abstract Blue Designs

Use a mix of sky blue and other shades to create abstract designs and patterns.

40. Elegant Blue Florals

Hand-paint elegant floral designs in complementary colors on a sky blue base.

41. Glittered Blue Ombre

Blend sky blue with glitter for an ombré effect that transitions from sparkly to smooth.

42. Blue and Gold Swirls

Incorporate gold swirls into your sky blue nails for a luxurious and stylish look.

43. Soft Blue Sparkles

Add subtle sparkles to a soft sky blue base for a gentle, elegant shine.

44. Blue and White Checkerboard

Create a playful checkerboard pattern in sky blue and white for a fun, trendy design.

45. Blue and Pink Florals

Combine sky blue with soft pink floral designs for a charming and feminine look.

46. Shiny Blue Accent Nails

Use shiny sky blue as an accent color against a contrasting base for a chic design.

47. Blue and Silver Dots

Add silver dots to your sky blue nails for a touch of sparkle and visual interest.

48. Elegant Blue Feathers

Incorporate feather-like designs in sky blue for a graceful and elegant look.

49. Starry Blue Sky

Create a starry night effect with sky blue and tiny white star decals for a whimsical touch.

How to Achieve the Perfect Sky Blue Prom Nails

1. Preparation

Clean and Shape: Begin with clean, shaped nails. Remove any old polish and ensure your nails are well-prepped.

Apply Base Coat: Protect your nails with a clear base coat to improve adhesion and durability.

2. Base Color

Choose Your Shade: Select a sky blue polish that complements your prom dress. Apply a base coat of sky blue and let it dry completely.

3. Add Designs

Detail Work: Use fine brushes, dotting tools, or nail art stickers to add your chosen designs. Layer colors carefully and allow each layer to dry before adding more details.

4. Top Coat

Seal the Design: Finish with a clear top coat to seal in your design and add shine. This will also help prevent chipping and extend the life of your manicure.

Conclusion

Sky blue nails are a beautiful choice for prom 2024, offering a mix of elegance, versatility, and trendiness. With 49 gorgeous designs to choose from, you’re sure to find the perfect style to complement your prom outfit and make a lasting impression. Whether you opt for a simple gloss or an intricate hand-painted design, sky blue nails can elevate your prom look and add a touch of magic to your special night. 🌌💙💅🏼

image
처럼
논평
공유하다
Lunas Luxe Travel
Lunas Luxe Travel
1 와이 ·번역하다

Simple Garlic Chicken Gnocchi

When you’re in need of a comforting, flavorful meal that doesn’t require hours in the kitchen, look no further than Simple Garlic Chicken Gnocchi. This dish brings together tender chicken, fluffy gnocchi, and a rich garlic sauce in a delightful combination that’s perfect for a quick weeknight dinner. With its easy preparation and mouthwatering taste, this recipe is sure to become a go-to favorite.

Why This Recipe is a Winner

Simple Garlic Chicken Gnocchi offers a blend of simplicity and indulgence, making it ideal for busy weeknights or a cozy weekend meal. Here’s what makes this dish stand out:

Quick and Easy: Ready in just 30 minutes, it’s perfect for when you need a fast, delicious meal.

Flavorful Sauce: The garlic sauce adds a rich, savory depth to the dish.

Comforting and Satisfying: Tender chicken and soft gnocchi make for a hearty, comforting meal.

Family-Friendly: This dish appeals to both adults and kids, making it a great choice for family dinners.

Ingredients You’ll Need

To prepare Simple Garlic Chicken Gnocchi, you will need the following ingredients:

1 tablespoon olive oil

1 pound (450 g) boneless, skinless chicken breasts or thighs, cut into bite-sized pieces

Salt and black pepper, to taste

4 cloves garlic, minced

1 cup chicken broth

1/2 cup heavy cream

1 cup grated Parmesan cheese

12 oz (340 g) potato gnocchi (store-bought or homemade)

1/4 cup chopped fresh parsley (optional)

1/2 teaspoon dried thyme or Italian seasoning (optional)

Step-by-Step Instructions

Step 1: Cook the Chicken

Heat olive oil in a large skillet over medium heat. Season the chicken pieces with salt and black pepper. Add the chicken to the skillet and cook for 5-7 minutes, or until the chicken is browned and cooked through. Remove the chicken from the skillet and set aside.

Step 2: Prepare the Garlic Sauce

In the same skillet, add minced garlic and cook for about 1 minute, until fragrant. Be careful not to burn it.

Step 3: Make the Sauce

Pour in the chicken broth and bring to a simmer, scraping up any browned bits from the bottom of the pan. Stir in the heavy cream and bring the mixture back to a simmer.

Step 4: Cook the Gnocchi

Add the gnocchi to the skillet and cook according to package instructions, typically for 2-4 minutes, or until they float to the top and are tender.

Step 5: Combine and Finish

Return the cooked chicken to the skillet and stir to combine. Cook for another 1-2 minutes to heat everything through. Stir in the grated Parmesan cheese until melted and the sauce is creamy. If desired, add dried thyme or Italian seasoning for extra flavor.

Step 6: Garnish and Serve

Garnish with chopped fresh parsley if desired. Serve the Garlic Chicken Gnocchi hot and enjoy!

Serving Suggestions

Side Salad: Pair with a fresh green salad or a side of steamed vegetables for a well-rounded meal.

Garlic Bread: Serve with garlic bread or a crusty roll to soak up the delicious sauce.

Wine Pairing: Complement with a crisp white wine or a light red wine to enhance the meal experience.

Tips for Perfect Garlic Chicken Gnocchi

Gnocchi Texture: If using store-bought gnocchi, be sure not to overcook it; it should be tender but not mushy.

Creaminess: Adjust the amount of heavy cream based on your preference for a richer or lighter sauce.

Garlic Flavor: For a milder garlic flavor, sauté the garlic for a shorter time; for a more intense flavor, cook it slightly longer but watch carefully.

Final Thoughts

Simple Garlic Chicken Gnocchi is a delightful recipe that brings together ease of preparation with comforting, rich flavors. In just 30 minutes, you can have a meal that’s both satisfying and impressive. Ideal for busy weeknights or a casual dinner with friends, this dish is sure to become a staple in your recipe collection. Try it out and savor the creamy, garlicky goodness tonight!

image
처럼
논평
공유하다
Showing 8764 out of 11864
  • 8760
  • 8761
  • 8762
  • 8763
  • 8764
  • 8765
  • 8766
  • 8767
  • 8768
  • 8769
  • 8770
  • 8771
  • 8772
  • 8773
  • 8774
  • 8775
  • 8776
  • 8777
  • 8778
  • 8779

제안 수정

계층 추가


이미지 선택
계층 삭제
이 계층을 삭제하시겠습니까?

리뷰

콘텐츠와 게시물을 판매하려면 몇 가지 패키지를 만드는 것부터 시작하세요. 수익화

지갑으로 지불

결제 알림

항목을 구매하려고 합니다. 계속하시겠습니까?

환불 요청