Good and Bad People Good and Bad People
    #socialmedia #usa #uk #contentwriter #ai
    উন্নত অনুসন্ধান
  • প্রবেশ করুন
  • নিবন্ধন

  • দিনের মোড
  • © {তারিখ} Good and Bad People
    সম্পর্কিত • ডিরেক্টরি • যোগাযোগ করুন • বিকাশকারীরা • গোপনীয়তা নীতি • ব্যবহারের শর্তাবলী • ফেরত • Referral Terms • Acceptable Use Policy • Community Guidelines • Write for Us

    নির্বাচন করুন ভাষা

  • Arabic
  • Bengali
  • Chinese
  • Croatian
  • Danish
  • Dutch
  • English
  • Filipino
  • French
  • German
  • Hebrew
  • Hindi
  • Indonesian
  • Italian
  • Japanese
  • Korean
  • Persian
  • Portuguese
  • Russian
  • Spanish
  • Swedish
  • Turkish
  • Urdu
  • Vietnamese

ঘড়ি

ঘড়ি রিল

ঘটনা

ইভেন্ট ব্রাউজ করুন আমার ঘটনা

ব্লগ

নিবন্ধ ব্রাউজ করুন

বাজার

সাম্প্রতিক পণ্যসমূহ

পাতা

আমার পাতা লাইক পেজ

আরও

অন্বেষণ জনপ্রিয় পোস্ট চাকরি অফার তহবিল
রিল ঘড়ি ঘটনা বাজার ব্লগ আমার পাতা সবগুলো দেখ

আবিষ্কার করুন পোস্ট

Posts

ব্যবহারকারীদের

পাতা

গ্রুপ

ব্লগ

বাজার

ঘটনা

চাকরি

তহবিল

Chloe Cozy Corners
Chloe Cozy Corners
1 Y ·অনুবাদ করা

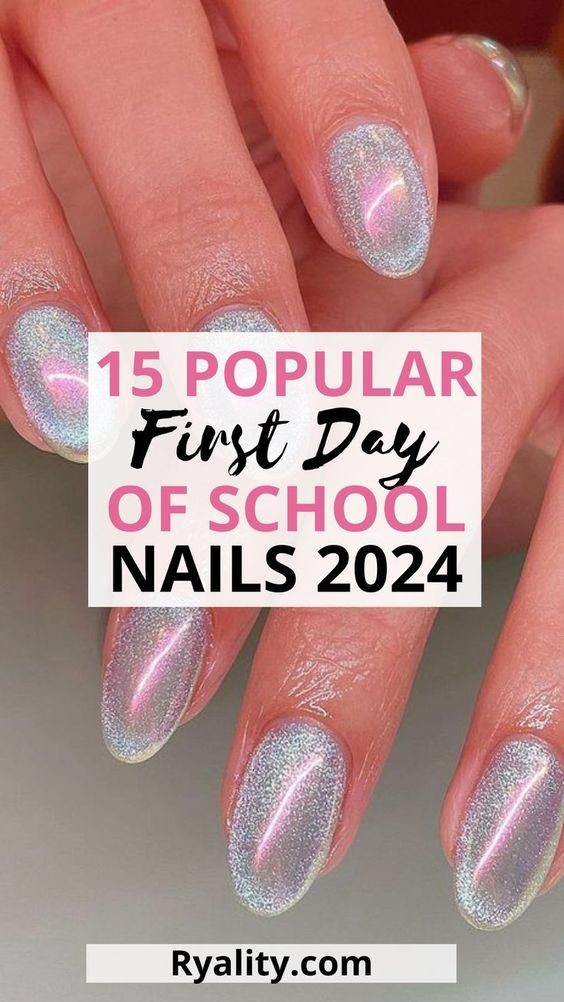
10 Fabulous Back-to-School Nail Designs You'll Fall in Love With!

As the new school year approaches, it's the perfect time to revamp your look and make a stylish statement with your nails. Whether you’re a student eager to show off your style or a teacher wanting a touch of elegance, these 10 fabulous back-to-school nail designs are sure to make you fall in love. From playful patterns to chic finishes, here’s a guide to the most eye-catching nail designs to start your school year off right!

#### **1. Playful Polka Dots**
Polka dots are a timeless and fun nail design that adds a touch of whimsy to your look. Whether you go for classic black and white or vibrant colors, polka dots are perfect for a playful back-to-school vibe.

**How to Create It*
- **Dotting Tools* Use a dotting tool or a pin to create evenly spaced dots.
- **Color Combinations* Mix and match colors for a fun and dynamic look.

#### **2. Elegant Stripes**
Stripes are a classic design that never goes out of style. Choose from bold, contrasting colors or subtle pastels for a look that’s both sophisticated and trendy.

**Creating Striped Nails*
- **Nail Tape* Use nail tape to create clean, straight lines.
- **Color Choices* Opt for classic color combinations like black and white or go for bold contrasts.

#### **3. Chic Geometric Patterns**
Geometric patterns are modern and stylish, making them perfect for a fresh school year. From triangles to chevrons, these designs are both trendy and versatile.

**How to Achieve Geometric Patterns*
- **Stencils* Use stencils or tape to create sharp, geometric shapes.
- **Color Blocking* Combine different colors for a striking visual effect.
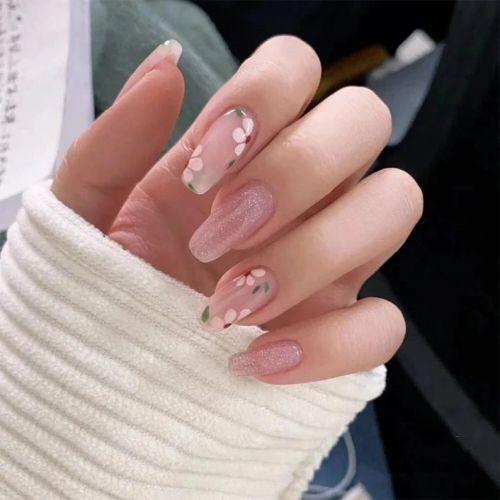
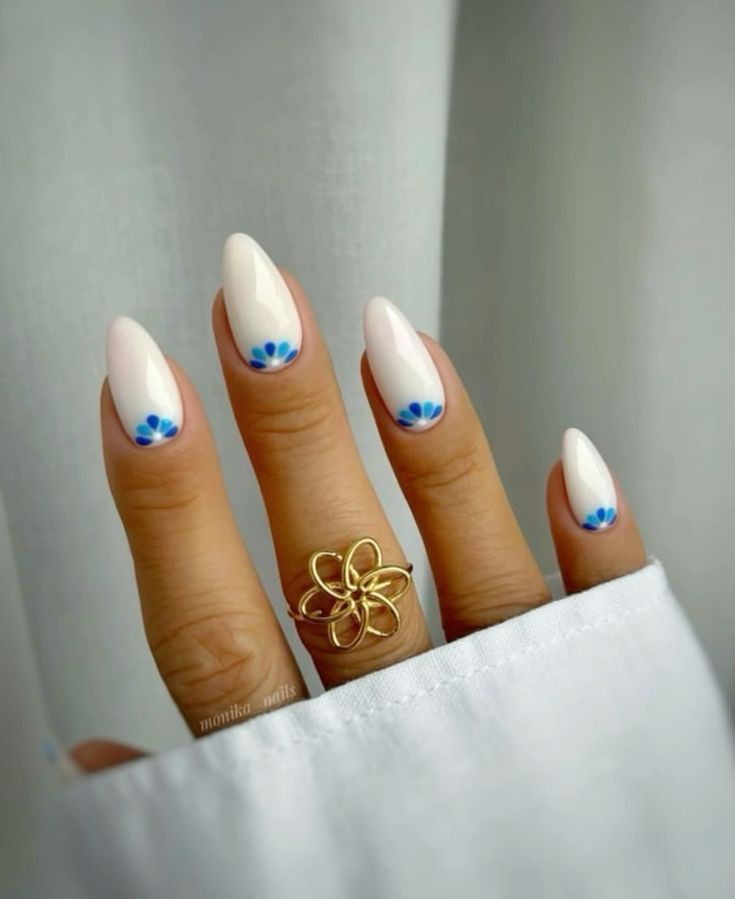
#### **4. Floral Fantasies**
Floral designs are always in bloom, making them a lovely choice for back-to-school nails. Whether you opt for delicate roses or bold sunflowers, floral nails add a touch of elegance.

**Creating Floral Nails*
- **Hand-Painted Flowers* Use a fine brush to paint intricate floral details.
- **Floral Stickers* For a quicker application, use floral nail stickers or decals.

#### **5. Sparkling Glitter Accents**
Add a touch of glam with glittery accents. Whether you go for full glitter coverage or just a hint of sparkle, glittery nails are perfect for making a statement.

**Tips for Glitter Nails*
- **Layering* Apply multiple coats of glitter polish for a dazzling effect.
- **Accent Nails* Consider using glitter on just one or two accent nails for a balanced look.

#### **6. Ombre Magic**
Ombre nails are a stunning way to blend colors seamlessly. This design is perfect for a gradient effect that transitions smoothly from one color to another.

**Creating Ombre Nails*
- **Sponge Technique* Use a makeup sponge to blend colors on your nails.
- **Choose Your Colors* Pick colors that complement each other for a beautiful gradient.

#### **7. Minimalist Elegance**
If you prefer a more understated look, minimalist designs can be incredibly chic. Simple lines, tiny dots, or geometric shapes on a neutral base can make a stylish statement.

**Minimalist Design Tips*
- **Neutral Base* Start with a neutral or nude base color.
- **Simple Accents* Add minimalistic accents for a refined look.

#### **8. Fun Fruit Designs**
Fruit-themed nails are playful and vibrant, perfect for adding a splash of summer to your back-to-school look. From watermelon slices to citrus fruits, these designs are both fun and fresh.

**Creating Fruit Nails*
- **Bright Colors* Use bright, bold colors to mimic different fruits.
- **Detailing* Add small details with a fine brush to capture the essence of each fruit.

#### **9. Nautical Themes**
Nautical designs are a classic choice that’s perfect for a preppy back-to-school look. Think anchors, stripes, and sailor hats for a stylish and nautical-inspired manicure.

**How to Achieve Nautical Nails*
- **Nail Art Pens* Use nail art pens for precise nautical details.
- **Color Scheme* Opt for traditional navy, white, and red for a classic nautical feel.

#### **10. Galaxy Nails**
For a more out-of-this-world look, galaxy nails are a stunning choice. This design features a cosmic blend of colors and sparkling stars, creating a dreamy, celestial effect.

**Creating Galaxy Nails*
- **Sponging Technique* Apply different shades of polish using a sponge for a blended, galaxy look.
- **Star Details* Add tiny stars with a dotting tool or brush for a celestial touch.

### **Nail Care Tips for a Fresh Look**
To keep your fabulous back-to-school nails looking their best, follow these care tips:
- **Apply a Base Coat* Protect your nails and enhance your design’s longevity with a base coat.
- **Use a Top Coat* Seal your design with a clear top coat to prevent chipping and add shine.
- **Hydrate Your Nails* Regularly apply cuticle oil and hand cream to keep your nails and skin healthy.

### **Conclusion**
With these 10 fabulous back-to-school nail designs, you’ll be ready to make a stylish entrance into the new school year. From playful polka dots and chic stripes to vibrant floral designs and sparkling glitter, there’s a perfect nail art idea for everyone. So grab your nail polish and get creative—these designs are sure to make your first day back both fun and fabulous!

#backtoschool #naildesigns #nailart #trendynails #schoolstyle #manicureinspo #cutenails #teennails #nailgoals

image
লাইক
মন্তব্য করুন
শেয়ার করুন
Pennys Pretty Projects
1 Y ·অনুবাদ করা

Drawing a face can be a rewarding and creative endeavor, whether you're a beginner or an experienced artist. Faces convey emotion, personality, and character, making them a captivating subject. This article will guide you through the process of drawing a face step by step, providing tips and techniques to help you create a realistic and proportionate portrait.

Materials You Will Need

Before you start, gather the following materials:

Pencil: A good quality pencil (HB or 2 for sketching.

Eraser: For correcting mistakes.

Paper: Any sketch paper or drawing pad will work.

Ruler: To help with measuring proportions (optional).

Fine-liner or pen: For inking your final drawing (optional).

Colored pencils or markers: If you want to add color to your drawing.

Step 1: Basic Shape of the Head

Draw an Oval: Start by sketching a light oval shape. This will be the basic structure of the head. The oval should be slightly wider at the top and taper towards the chin.

Divide the Oval: Draw a vertical line down the center of the oval and a horizontal line across the middle. This will help you align the facial features later.

Step 2: Guidelines for Facial Features

Mark the Eyes: Divide the lower half of the oval into two equal parts by drawing another horizontal line. This line represents where the eyes will be located. The eyes are typically one eye-width apart.

Position the Nose: The bottom of the nose is usually located about halfway between the eyes and the chin. Draw a small horizontal line to mark this point.

Add the Mouth: The mouth usually sits about one-third of the way down from the nose to the chin. Draw another horizontal line to represent the mouth's position.

Step 3: Outline the Face

Refine the Shape: Using the guidelines, start shaping the face. Add cheekbones and define the jawline. You can make adjustments based on the face shape you want to depict (e.g., round, square, oval).

Draw the Hairline: Sketch a light line to indicate where the hair will begin. The hairline varies from person to person, so feel free to experiment with different styles.

Step 4: Draw the Eyes

Shape the Eyes: Start by drawing the almond shape of the eyes along the eye line. Remember that the outer corners should be slightly higher than the inner corners.

Add Eyelids and Iris: Outline the eyelids and add circles for the irises. You can draw smaller circles within the irises for the pupils.

Details: Add eyelashes and any desired details like eyebrows above the eyes. Eyebrows typically follow the shape of the eye and can vary in thickness and style.

Step 5: Draw the Nose

Outline the Nose: Using the guideline you created, start shaping the nose. A simple way to draw a nose is to create a triangular shape for the bridge and round off the tip.

Add Nostrils: Draw two small curves at the base of the nose for the nostrils. Ensure that they are proportionate to the rest of the face.

Step 6: Draw the Mouth

Shape the Lips: Start with a light line to outline the center of the lips. Draw the upper lip, which is generally thinner than the lower lip, and then draw the lower lip.

Details: Add definition to the lips by sketching subtle curves. Remember that lips have shadows and highlights, which you can emphasize later.

Step 7: Add the Ears

Position the Ears: The top of the ears typically aligns with the eyes, while the bottom aligns with the nose. Draw a curve on each side of the head for the ears.

Details: Add inner ear details by drawing additional curves and shapes within the outline of the ears.

Step 8: Define the Hair

Sketch the Hair: Start by outlining the shape of the hair based on your desired hairstyle. Use flowing lines to mimic the natural fall of hair.

Add Texture: Include details such as individual strands or clumps of hair to give it volume and movement. Pay attention to light and shadow to create depth.

Step 9: Refine and Add Details

Clean Up Guidelines: Erase any unnecessary guidelines and sketch marks, keeping only the final outlines of the face and features.

Shading: Add shading to create depth. Use a pencil to shade areas under the chin, around the nose, and beneath the eyebrows. Lightly shade the cheeks and forehead for a more three-dimensional look.

Step 10: Final Touches

Inking (Optional): If you want to finalize your drawing, go over the outlines with a fine-liner or pen. Be careful not to smudge the pencil beneath.

Color (Optional): If you choose to add color, use colored pencils or markers to fill in the skin tone, hair, and features. Blend colors for a smooth finish.

Additional Tips

Practice Regularly: The more you practice drawing faces, the better you'll become. Experiment with different angles, expressions, and styles.

Study References: Look at photographs or artwork for inspiration. Pay attention to proportions, angles, and light.

Use Different Tools: Try using charcoal, pastels, or digital tools for a different drawing experience.

Be Patient: Drawing a face takes time and practice. Don't be discouraged by initial attempts. Keep refining your skills.

Conclusion

Drawing a face step by step is an enjoyable process that combines observation, technique, and creativity. By following these steps and practicing regularly, you'll be able to capture the uniqueness and beauty of human expressions in your artwork. Remember to be patient and enjoy the journey of artistic growth!

image
লাইক
মন্তব্য করুন
শেয়ার করুন
Grace's Gorgeous Pins
1 Y ·অনুবাদ করা

Next Date Night, Try Wearing THIS!

Are you planning a special date night and wondering what to wear to make a lasting impression? Whether you're heading to a fancy restaurant, a cozy café, or an exciting event, the right outfit can elevate your evening and boost your confidence. Here’s a guide to help you pick the perfect look for your next date night.

1. Embrace Classic Elegance

For a timeless look that never fails, consider classic elegance. For women, a little black dress is a go-to choice that exudes sophistication and grace. Pair it with understated jewelry and classic heels to create a polished, refined appearance. Men can opt for a well-fitted blazer and dress shirt combination. Add a pair of tailored trousers and leather shoes for a look that’s both stylish and versatile. This ensemble works well for upscale dinners and evening events, ensuring you look effortlessly chic.

2. Go for a Trendy Twist

If you’re aiming for something more contemporary, incorporating current fashion trends can be a fun way to show off your style. Women might choose a trendy jumpsuit or a stylish wrap dress. Accessorize with statement pieces like bold earrings or a chic clutch. For men, a fashionable bomber jacket or a patterned button-down shirt can make a statement when paired with jeans or chinos. Trendy outfits are perfect for a night out at a trendy restaurant or a lively bar.

3. Opt for Casual Cool

Not every date night requires formal attire. For a more relaxed but still stylish look, go for casual cool. Women can wear a stylish blouse with high-waisted jeans and ankle boots. Add a touch of sophistication with a tailored jacket or a cozy cardigan. Men can choose a casual shirt with well-fitted jeans or chinos. Complete the look with loafers or clean sneakers for a laid-back yet put-together appearance. This outfit is ideal for a casual dinner or a fun activity like mini-golf or a movie night.

4. Consider Seasonal Styles

Seasonal fashion can add a touch of thematic flair to your date night ensemble. In the spring and summer, light fabrics and bright colors are great choices. Women can wear a flowy sundress with strappy sandals, while men might opt for a short-sleeve button-down shirt and lightweight trousers. For fall and winter, layer up with cozy sweaters, stylish scarves, and knee-high boots. Women might choose a chic sweater dress, while men can go for a sweater and dark jeans combination. Seasonal outfits add a touch of festivity and are perfect for dates that align with the time of year.

5. Prioritize Comfort and Confidence

No matter what you choose to wear, comfort and confidence should be your top priorities. The best outfit is one that makes you feel good and allows you to enjoy your date without any wardrobe distractions. Make sure your clothes fit well and complement your body type. Comfort translates to confidence, and confidence is always the most attractive accessory.

6. Personalize Your Look

Lastly, personalize your outfit to reflect your personality and style. Adding a personal touch, whether it’s a favorite piece of jewelry, a unique accessory, or a pop of color, can make your outfit feel more “you.” This personal flair can also spark conversations and make your date night even more memorable.

Conclusion

Choosing the right outfit for date night can set the tone for a fantastic evening. Whether you’re aiming for classic elegance, trendy twists, casual cool, or seasonal styles, the key is to choose something that makes you feel both comfortable and confident. Remember, the best accessory is your smile and the genuine connection you share with your date. So, next time you plan a special evening, let your outfit reflect your style and enjoy every moment of your night out.

image
লাইক
মন্তব্য করুন
শেয়ার করুন
Chloe Cozy Corners
Chloe Cozy Corners
1 Y ·অনুবাদ করা

Floral Blue Back-to-School Nails: Trendy Summer Designs for Teens and Teachers!

As the summer winds down and the new school year approaches, it's the perfect time to refresh your look with some chic and trendy nail designs. Floral blue nails are the ideal way to blend the vibrant hues of summer with the fresh energy of a new school year. Whether you're a teen looking to make a stylish statement or a teacher aiming for a touch of elegance, these floral blue nail designs are sure to make you shine. Here’s your guide to creating the most fabulous back-to-school nails with a floral blue twist!

#### **1. Classic Blue Florals**
Start the school year with a timeless look by opting for classic blue floral designs. This style features beautiful blue flowers set against a subtle background, combining elegance with a touch of fun.

**How to Create It*
- **Choose Your Shades* Pick a few shades of blue for depth and variety in your floral design.
- **Hand-Painted Flowers* Use a fine brush to paint delicate blue flowers or consider using floral nail stickers for a quicker application.

#### **2. Blue Ombre with Floral Accents**
A blue ombre base with floral accents offers a sophisticated yet playful look. The gradient effect creates a seamless transition of color, while the floral accents add a charming touch.

**Creating the Look*
- **Ombre Technique* Use a makeup sponge to apply blue polish in a gradient from light to dark.
- **Add Florals* Once the ombre is dry, use a small brush to add floral designs on top. Consider using white or gold for contrast.

#### **3. Tropical Blue Blossoms**
Bring a touch of the tropics to your nails with vibrant blue blossoms. This design is perfect for capturing the essence of summer and can be both fun and refreshing.

**Tips for Tropical Blossoms*
- **Bright Blues* Use bright and bold blue shades to mimic tropical flowers like hibiscus.
- **Layering* Layer different shades and use a dotting tool to create the texture of tropical blooms.

#### **4. Abstract Blue Florals**
For a modern twist, go for abstract blue floral designs. This approach involves using geometric shapes and splashes of blue to create a unique and eye-catching look.

**How to Achieve It*
- **Geometric Patterns* Use tape or stencils to create abstract shapes and fill them with varying shades of blue.
- **Add Details* Incorporate abstract floral elements with a fine brush or nail art pen for a creative finish.

#### **5. Subtle Blue Floral French Tips**
For a more understated look, opt for subtle blue floral French tips. This design combines the classic French manicure with a hint of blue floral detail for a refined yet stylish appearance.

**Creating Subtle French Tips*
- **Classic Base* Start with a nude or light pink base for a classic French manicure.
- **Blue Tips* Use a fine brush or striping tape to apply blue polish to the tips, adding small floral accents for a delicate touch.

#### **6. Blue Floral Watercolor Effect**
The watercolor effect gives your nails a dreamy, artistic look, perfect for those who love a bit of whimsy. This design blends different shades of blue in a soft, flowing manner with floral elements.

**How to Create the Effect*
- **Watercolor Technique* Apply different shades of blue using a sponge or brush, blending them for a watercolor look.
- **Add Florals* Paint or stamp floral designs over the watercolor base for a beautiful and cohesive look.

#### **7. Elegant Blue Floral Accent Nails**
If you prefer a simpler design, consider adding blue floral accents to one or two accent nails. This minimalist approach allows you to showcase the floral design while keeping the rest of your nails sleek and elegant.

**Accent Nail Tips*
- **Choose a Base Color* Use a neutral or light blue base color for the main nails.
- **Floral Accents* Apply a floral design on one or two accent nails using a contrasting shade of blue.

### **Nail Care Tips for Long-Lasting Designs**
To keep your floral blue nails looking fresh throughout the school year, follow these care tips:
- **Apply a Base Coat* Protect your natural nails and enhance the longevity of your design with a base coat.
- **Use a Top Coat* Seal your design with a clear top coat to prevent chipping and add shine.
- **Hydrate Your Hands* Regularly apply cuticle oil and hand cream to keep your nails and skin healthy.

### **Conclusion**
Floral blue back-to-school nails are a fabulous way to celebrate the new school year with style and sophistication. Whether you choose classic blue florals, abstract designs, or tropical blossoms, these trendy summer ideas will make sure you step into the new year with confidence and flair. So grab your nail polish and get ready to flaunt these adorable designs on your first day back!

#backtoschool #floralnails #bluenails #naildesigns #summernails #trendynails #teenstyle #teachernails #nailinspo

image
লাইক
মন্তব্য করুন
শেয়ার করুন
Pennys Pretty Projects
1 Y ·অনুবাদ করা

Aesthetic Drawing Ideas: A Comprehensive Guide to Creative Inspiration

Art is a universal language that allows us to express our emotions, ideas, and perspectives. In recent years, "aesthetic" has become a buzzword in the world of art and design, often associated with a particular style that is visually pleasing, harmonious, and evocative. Aesthetic drawing combines artistic techniques with a focus on beauty and emotional impact, resulting in artworks that resonate with viewers on a deep level. Whether you're an aspiring artist or a seasoned creator, exploring aesthetic drawing ideas can inspire your next masterpiece.

1. Minimalist Line Art

Minimalism is a powerful aesthetic that emphasizes simplicity and clarity. In minimalist line art, the focus is on using as few lines as possible to convey an idea or image. This style can be both challenging and rewarding, as it forces you to distill your subject to its most essential elements.

Ideas to Explore:

Silhouettes: Create silhouettes of people, animals, or objects using continuous lines. The challenge is to capture the essence of the subject with minimal detail.

Abstract Faces: Draw abstract human faces using single, unbroken lines. Experiment with different expressions and emotions conveyed through the positioning of the features.

Botanical Elements: Depict plants, leaves, or flowers with delicate, flowing lines. Focus on the natural curves and shapes, creating a sense of grace and elegance.

2. Dreamy Pastel Landscapes

Pastel colors evoke a sense of calm and nostalgia, making them perfect for creating dreamy landscapes. Aesthetic drawings in this style often feature soft gradients, gentle brushstrokes, and a serene atmosphere.

Ideas to Explore:

Sunset Over Water: Capture the beauty of a sunset reflected on a calm body of water. Use pastel shades of pink, purple, and orange to create a tranquil scene.

Misty Mountains: Draw a mountain range shrouded in mist, with layers of color fading into the distance. The soft edges and muted tones create a peaceful, otherworldly effect.

Fantasy Forest: Imagine a magical forest bathed in the glow of twilight. Incorporate pastel hues with touches of light to evoke a sense of wonder and mystery.

3. Vintage-Inspired Collages

Vintage aesthetics are all about nostalgia and the charm of the past. Creating a vintage-inspired collage allows you to combine various elements, such as old photographs, text, and illustrations, into a cohesive and visually appealing artwork.

Ideas to Explore:

Retro Posters: Design a poster inspired by vintage advertisements or movie posters. Incorporate bold typography, retro colors, and iconic imagery from the era you're emulating.

Mixed Media Collages: Combine vintage photographs, botanical illustrations, and handwritten text to create a layered, textured artwork. Experiment with different compositions and materials.

Fashion Illustrations: Draw fashion figures dressed in styles from the 1920s, 1950s, or 1970s. Pay attention to the details of the clothing, accessories, and hairstyles that define each era.

4. Surreal Dreamscapes

Surrealism is an artistic movement that explores the unconscious mind and dreams, often resulting in bizarre and fantastical imagery. Aesthetic drawings in this style challenge the boundaries of reality, inviting viewers into a world of imagination.

Ideas to Explore:

Floating Objects: Draw everyday objects floating in the sky or surrounded by clouds. Play with the scale and placement to create a surreal, dreamlike effect.

Impossible Architecture: Design buildings or structures that defy the laws of physics. Imagine staircases leading nowhere, doors opening into the sky, or buildings merging with natural elements.

Merging Worlds: Combine two different scenes or environments into one cohesive drawing. For example, depict a cityscape seamlessly transitioning into an underwater world or a forest merging with the night sky.

5. Celestial and Cosmic Themes

The universe is a vast and mysterious place, full of beauty and wonder. Celestial and cosmic themes are perfect for creating aesthetic drawings that evoke a sense of awe and exploration.

Ideas to Explore:

Starry Skies: Draw a night sky filled with stars, planets, and constellations. Experiment with different colors and textures to create a sense of depth and movement.

Galaxy Portraits: Create a portrait where the subject's hair or clothing blends into a swirling galaxy. This idea allows for a creative fusion of realism and abstraction.

Moon Phases: Illustrate the phases of the moon in a visually pleasing arrangement. Use gradients and soft shading to convey the subtle changes in light and shadow.

6. Botanical Illustrations

Nature is a timeless source of inspiration for artists, and botanical illustrations are a beautiful way to explore the aesthetic appeal of plants and flowers. These drawings can range from highly detailed scientific studies to more stylized, artistic interpretations.

Ideas to Explore:

Detailed Florals: Draw detailed, close-up studies of flowers, capturing every petal, leaf, and stamen. Focus on the intricate patterns and textures that make each plant unique.

Herbarium Sheets: Create a series of botanical illustrations that mimic the style of herbarium sheets, where plants are pressed and preserved. Add handwritten labels and scientific names for an authentic touch.

Tropical Foliage: Illustrate large, bold leaves from tropical plants like monstera, banana, or palm trees. Use vibrant greens and rich shading to bring out the lush, exotic feel.

image
লাইক
মন্তব্য করুন
শেয়ার করুন
Grace's Gorgeous Pins
1 Y ·অনুবাদ করা

9 Next-Level Date Night Beauty Tips for an Amazing Night

Date nights are the perfect opportunity to step up your beauty game and make a lasting impression. Whether you're heading out for a romantic dinner or a fun night on the town, these nine beauty tips will ensure you look and feel your best, all while keeping things quick and manageable.

Prep Your Skin with a Hydrating Face Mask

Start your date night beauty routine by giving your skin a quick hydration boost. Apply a hydrating face mask while you prepare for your evening. Choose a mask with ingredients like hyaluronic acid or aloe vera for a fresh, dewy look. Let it sit for about 10-15 minutes, then remove it and follow up with a light moisturizer to lock in the hydration.

Opt for a Long-Lasting Foundation

Choose a foundation with long-wearing properties to keep your look intact throughout the night. Look for formulas that are both lightweight and buildable. A foundation with a satin or matte finish can help control shine and keep your makeup looking fresh.

Enhance Your Eyes with a Smudge-Proof Eyeliner

A date night calls for eye makeup that lasts. Opt for a smudge-proof, waterproof eyeliner to define your eyes without worrying about touch-ups. A classic winged liner or a subtle tightline can make your eyes pop and give you that sultry look.

Go for a Flirty Mascara

Elevate your eye makeup with a volumizing mascara. Apply two coats for added length and volume, focusing on the outer lashes for a flirty, wide-eyed effect. If you're aiming for extra drama, consider using an eyelash curler before applying mascara.

Choose a Bold Lip Color

A bold lip can be a game-changer for your date night look. Opt for a long-lasting lipstick or lip stain in a shade that complements your outfit and skin tone. Red, berry, or deep plum shades can add a touch of sophistication and confidence to your appearance.

Set Your Makeup with a Finishing Spray

To ensure your makeup stays put all night long, set it with a makeup setting spray. Choose a formula that suits your skin type, whether it’s mattifying, hydrating, or a combination. A few spritzes will help lock in your look and keep it looking fresh.

Glow Up with Highlighter

Add a touch of radiance to your face with a highlighter. Apply it to the high points of your cheeks, the bridge of your nose, and your cupid’s bow. A soft, luminous glow will enhance your features and give your complexion a beautiful, healthy sheen.

Tame Flyaways with a Hair Serum

Perfectly styled hair can make a big difference. Use a lightweight hair serum to tame any flyaways and add a sleek finish to your hairstyle. This quick step will help keep your hair looking polished and picture-perfect throughout the evening.

Complete Your Look with a Fragrance

Finish off your date night beauty routine with a signature fragrance. Choose a scent that makes you feel confident and sophisticated. A spritz of your favorite perfume or eau de toilette will leave a lasting impression and add an extra layer of allure to your overall look.

By incorporating these next-level beauty tips into your date night preparation, you'll be ready to enjoy an amazing evening with confidence and style. From glowing skin to a flawless finish, these quick and effective tips will ensure you look and feel fabulous all night long.

image
লাইক
মন্তব্য করুন
শেয়ার করুন
Pennys Pretty Projects
1 Y ·অনুবাদ করা

How to Draw an Owl: An Easy Step-by-Step Guide

Drawing an owl can seem like a daunting task, especially with its intricate feathers and large, expressive eyes. However, with the right approach, you can create a simple yet realistic owl drawing that captures the essence of this majestic bird. Whether you're a beginner or looking to refine your skills, this step-by-step guide will walk you through the process of drawing an owl, breaking it down into manageable steps.

Materials You'll Need:
Paper: Any drawing paper will do, but a smooth surface is best for sketching.
Pencil: A simple HB pencil is ideal for sketching.
Eraser: A kneaded eraser is perfect for removing unwanted lines.
Optional: Colored pencils, markers, or paints if you want to add color to your drawing.
Step 1: Draw the Basic Shapes
Begin by sketching the basic shapes that make up the owl’s body. These shapes will serve as a foundation for the rest of your drawing.

Head: Start with a large circle near the top of your paper. This will be the owl’s head.
Body: Below the head, draw an oval shape that’s slightly wider at the bottom. This will be the owl's body.
Guidelines: Draw a vertical line down the center of the head and body to help keep the drawing symmetrical. Add a horizontal line across the head circle where you want the eyes to be.
Step 2: Outline the Owl’s Head and Body
Now that you have the basic shapes, you can begin to refine the outline of the owl’s head and body.

Head Shape: Starting at the top of the circle, draw two small curves extending from each side of the head, representing the tufts of feathers (often mistaken for ears). Then, round out the circle slightly, adding a bit of width to give the head a more realistic shape.
Body Shape: Use the oval as a guide to refine the body’s shape. Make the top of the body slightly narrower where it connects with the head, and gently curve the sides to give the owl a plump, rounded appearance.
Step 3: Add the Eyes and Beak
The eyes and beak are the most distinctive features of an owl, so take your time with this step.

Eyes: On the horizontal guideline, draw two large circles for the eyes, one on each side of the vertical line. Inside each eye, add a smaller circle for the pupil. You can add a tiny white circle within the pupil to represent the reflection of light, giving the eyes a lively appearance.
Beak: Draw a small triangle or diamond shape just below the eyes, right on the vertical line. This will be the owl’s beak.
Step 4: Draw the Wings and Feet
Now that the head and body are in place, it’s time to add the wings and feet.

Wings: On each side of the body, starting just below the head, draw a long, curved line that follows the shape of the body for the wing. The wings should taper to a point near the bottom of the body. You can add a few curved lines within the wings to suggest feathers.
Feet: At the bottom of the body, draw two short, curved lines extending downward for the legs. Then, add three small ovals or teardrop shapes at the end of each leg for the talons.
Step 5: Add Details to the Face and Feathers
Details are what bring your owl drawing to life. Let’s start with the face.

Facial Disk: Draw a circle around each eye, connecting them across the forehead. This represents the facial disk, a feature common in many owl species.
Feather Texture: Add short, curved lines around the wings and body to suggest feathers. These lines don’t have to be perfect; just aim to create a textured look. You can also add some lines radiating outward from the beak to represent the small feathers on the face.
Step 6: Draw the Tail and Finalize the Outline
Your owl is almost complete! Let’s finish up by adding the tail and refining the overall outline.

Tail: Draw a few long, slightly curved lines extending downward from the bottom of the body to form the tail. The tail should fan out slightly, and you can add a few horizontal lines across it to suggest individual feathers.
Refine Outline: Go over your entire drawing, darkening the lines that you want to keep and erasing any unnecessary guidelines. This is your chance to refine the shape of the owl and make any adjustments to the proportions.
Step 7: Add Shading and Texture
To make your owl drawing more realistic, add some shading and texture.

Shading: Lightly shade the areas of the owl that would be in shadow, such as under the wings, around the eyes, and beneath the body. Use a softer pencil or adjust the pressure on your pencil to create a gradient effect.
Texture: Add more short, curved lines within the wings, tail, and body to enhance the feather texture. The more detailed you make these lines, the more realistic your owl will appear.
Step 8: Optional - Add Color
If you’d like to add color to your owl, now is the time! You can use colored pencils, markers, or paints.

Color the Eyes: Owls often have bright yellow or orange eyes. Color the irises, leaving the pupils black and the tiny white reflection spot uncolored.
Feather Colors: Owls can be a variety of colors, from browns and grays to whites. Choose your colors and lightly fill in the feathers, adding darker shades where you’ve already added shading.
Beak and Talons: Typically, these are yellow or gray, so use appropriate colors to fill them in.

Final Thoughts

Drawing an owl can be a fun and rewarding experience. By breaking the process down into simple steps, you can create a charming owl drawing, even if you’re new to drawing. Remember that practice makes perfect, so don’t be afraid to try this tutorial a few times to refine your skills. With each attempt, you’ll notice improvements in your technique and confidence in drawing owls. Happy drawing!

image
লাইক
মন্তব্য করুন
শেয়ার করুন
Grace's Gorgeous Pins
1 Y ·অনুবাদ করা

50 Date Night Beauty Tips To Leave Your Date Speechless!

Date night is the perfect opportunity to put your best foot forward and make a lasting impression. Whether you’re heading out for a fancy dinner, a cozy movie night, or a spontaneous adventure, these 50 beauty tips will ensure you look and feel fabulous, leaving your date completely mesmerized.

1. Pre-Date Skincare Routine

Exfoliate: Smooth out your skin by gently exfoliating to remove dead cells and reveal a fresh, glowing complexion.

Hydrate: Apply a rich moisturizer to keep your skin plump and dewy.

Face Mask: Use a hydrating or brightening mask to boost your skin’s radiance.

2. Perfect Your Base

Primer: Start with a primer to create a smooth canvas and make your makeup last longer.

Foundation: Choose a foundation that matches your skin tone perfectly for a flawless finish.

Concealer: Use concealer to hide any blemishes or dark circles.

3. Flawless Eye Makeup

Neutral Eyeshadow: Opt for neutral shades that enhance your eyes without being overpowering.

Eyeliner: Apply eyeliner to define your eyes. A classic wing can add a touch of drama.

Mascara: Curl your lashes and apply a volumizing mascara for a wide-eyed look.

4. Glamorous Brows

Shape: Keep your brows well-groomed and shaped.

Fill In: Use a brow pencil or powder to fill in any sparse areas and define your brows.

5. Luscious Lips

Exfoliate: Gently exfoliate your lips to remove any dryness.

Lip Balm: Apply a hydrating lip balm to keep your lips soft.

Lip Color: Choose a lip color that complements your outfit and mood, whether it’s a bold red or a subtle nude.

6. Gorgeous Hair

Style: Choose a hairstyle that makes you feel confident. Soft waves, sleek straight hair, or a chic updo can all work wonders.

Volume: Use a volumizing spray or dry shampoo to give your hair extra body.

7. Glow From Within

Highlighter: Apply highlighter to the high points of your face (cheekbones, brow bones, and down the bridge of your nose) for a radiant glow.

Blush: Add a touch of blush to your cheeks for a natural, youthful flush.

8. Scent-Sational

Fragrance: Choose a signature scent that is subtle but memorable. Apply it to your pulse points for a lasting impression.

9. Mani-Pedi Perfection

Nails: Keep your nails clean and well-groomed. Choose a nail polish color that complements your outfit or opt for a classic nude.

10. Comfortable Confidence

Outfit: Wear something that makes you feel good and confident. Comfort is key to feeling relaxed and at ease.

11. Flawless Finish

Setting Spray: Use a setting spray to lock in your makeup and ensure it stays fresh throughout the evening.

12. Bright Eyes

Eye Drops: If your eyes are feeling tired or dry, use eye drops to refresh and brighten them.

13. Glamorous Accessories

Jewelry: Select accessories that enhance your outfit without overpowering your look. A statement necklace or elegant earrings can add a touch of glamour.

14. Confidence Boost

Smile: A genuine smile is your best accessory. It radiates confidence and warmth.

15. Elegant Etiquette

Posture: Maintain good posture to exude confidence and poise.

16. Fresh Breath

Minty Freshness: Ensure your breath is fresh with a minty gum or breath spray.

17. Soothing Scented Lotion

Moisturize: Apply a scented body lotion to keep your skin soft and subtly fragrant.

18. Subtle Shimmer

Body Oil: A light body oil can add a subtle shimmer to your skin, perfect for a special evening.

19. Elegant Nails

Nail Care: Keep your nails trimmed and shaped, and apply a clear or neutral polish for a polished look.

20. Perfectly Matched Accessories

Coordinate: Match your accessories to your outfit and makeup for a cohesive look.

21. Relax and Unwind

Stress-Free: Take a few moments to relax and unwind before your date. Stress can affect your appearance and mood.

22. Hygiene First

Clean and Fresh: Ensure you’re clean and fresh, from hair to toes.

23. Touch-Up Kit

Essentials: Carry a small touch-up kit with your lipstick, powder, and any other essentials for quick fixes throughout the evening.

24. Stay Hydrated

Water: Drink plenty of water leading up to your date to keep your skin hydrated and healthy.

25. Gentle Fragrance

Subtle Scent: Choose a fragrance that is soft and not overpowering, to make a lasting yet gentle impression.

26. Chic Glasses

Stylish Specs: If you wear glasses, choose a stylish pair that complements your look.

27. Well-Groomed Eyebrows

Tweezed: Keep your eyebrows well-groomed and neatly shaped.

28. Healthy Glow

Diet: Eat a healthy meal before your date to help maintain a healthy glow.

29. Smooth Skin

Body Scrub: Use a body scrub to exfoliate and smooth out your skin.

30. Relaxed Hair

Avoid Over-Styling: Opt for a relaxed, manageable hairstyle that feels natural and comfortable.

31. Enhance Your Eyes

Eyeshadow Primer: Apply an eyeshadow primer to ensure your eye makeup stays vibrant and in place.

32. Accentuate Your Best Features

Highlight: Focus your makeup on accentuating your favorite features, whether it’s your eyes, lips, or cheekbones.

33. Pampered Feet

Foot Care: If wearing open-toe shoes, make sure your feet are well-groomed and pampered.

34. Soft Hands

Hand Cream: Apply hand cream to keep your hands soft and smooth.

35. Glossy Finish

Lip Gloss: Add a touch of gloss over your lipstick for a plumper, shinier look.

36. Cool Down

Face Mist: Use a refreshing face mist to cool down and revive your skin.

37. Elegant Touches

Subtle Sparkle: Add a hint of sparkle to your eye makeup or nails for a touch of glam.

38. Mindful Makeup

Minimalism: Go for a minimal makeup look if that suits your style, focusing on enhancing your natural beauty.

39. Hydrate Hair

Leave-In Conditioner: Use a leave-in conditioner to keep your hair hydrated and smooth.

40. Beautifully Blended

Blend Well: Ensure your makeup is well-blended for a seamless and natural look.

41. Luxurious Body Oil

Glow: Apply a light body oil for a subtle, glowing finish.

42. Cooling Eye Masks

Refresh: Use cooling eye masks to reduce puffiness and refresh your eyes.

43. Elegant Fragrance

Light Spritz: Apply a light spritz of your favorite fragrance for a lingering, pleasant scent.

image
লাইক
মন্তব্য করুন
শেয়ার করুন
Chloe Cozy Corners
Chloe Cozy Corners
1 Y ·অনুবাদ করা

Adorable Back-to-School Nail Designs You'll Want to Try!

The start of a new school year is the perfect opportunity to express your unique style and make a memorable first impression. What better way to do that than with a set of adorable back-to-school nails? Whether you’re into vibrant colors, playful patterns, or sleek designs, there’s a perfect nail art idea to fit every taste. Here’s a guide to some of the cutest nail designs you’ll want to try for a stylish start to the school year.

#### **1. Playful Polka Dots**
Polka dots are a classic nail design that never goes out of style. They’re easy to create and perfect for adding a touch of fun to your manicure. Choose a bright base color and add contrasting polka dots for a playful, eye-catching look.

**How to Create It*
- **Dotting Tools* Use a dotting tool or the end of a pin to place your dots evenly.
- **Mix and Match* Try different sizes and colors for a quirky and fun pattern.

#### **2. Cute Animal Prints**
Animal prints are always a hit, and they can be as cute or as fierce as you like. From adorable cats to playful pandas, animal-themed nails are perfect for showcasing your personality.

**Tips for Animal Prints*
- **Simple Stencils* Use animal print stencils or stickers for an easy application.
- **Accent Nails* Feature the animal print on one or two accent nails to keep it chic.

#### **3. Colorful Rainbow Stripes**
Rainbow stripes are vibrant and full of energy, making them a great choice for the new school year. You can customize this design with your favorite colors or your school’s colors to show your school spirit.

**Creating Rainbow Stripes*
- **Nail Tape* Use nail tape to ensure straight, clean lines between colors.
- **Blend Colors* Apply colors in layers and use a sponge to blend them for a smooth transition.

#### **4. Sweet Fruit Designs**
Fruit-inspired nails are not only cute but also add a touch of summer fun to your look. Think colorful slices of watermelon, juicy lemons, or sweet strawberries.

**Fruit Nail Art Tips*
- **Use Bright Colors* Bright shades will make the fruit designs pop.
- **Detailing Brushes* Use a fine brush for intricate details like seeds and textures.

#### **5. Chic Minimalist Accents**
For those who prefer a more subtle approach, minimalist designs can still be incredibly cute. Simple shapes like tiny hearts, stars, or geometric patterns on a neutral base can be both stylish and sophisticated.

**Minimalist Design Tips*
- **Keep It Simple* Choose one or two accents per nail to avoid overwhelming the design.
- **Neutral Base* Opt for a neutral base color to let the accents stand out.

#### **6. Fun School Themes**
Celebrate the back-to-school season with nail designs that feature school-themed elements. Think notebook lines, pencils, or apples to show off your school spirit in a fun and creative way.

**School Theme Design Tips*
- **Nail Art Pens* Use nail art pens for precise details like pencil tips and notebook lines.
- **Mix Patterns* Combine different school elements for a creative and unique design.

#### **7. Sparkling Glitter Nails**
Add some sparkle to your school year with glittery nails. Whether you go for full-on glitter or just a touch of shimmer, this design is perfect for making your nails shine.

**How to Achieve Glittery Nails*
- **Layering* Apply multiple coats of glitter polish for a dazzling effect.
- **Accent Nails* Consider applying glitter to just one or two accent nails to keep it chic.

#### **8. Galaxy Nails**
If you’re dreaming of something out-of-this-world, galaxy nails are the way to go. This design features a cosmic blend of dark blues, purples, and sparkling stars for a truly mesmerizing look.

**Creating Galaxy Nails*
- **Sponge Technique* Use a makeup sponge to apply different shades for a blended galaxy effect.
- **Star Details* Add tiny stars with a dotting tool or a fine brush to complete the look.

### **Nail Care Tips for a Fresh Look**
To ensure your adorable back-to-school nails stay looking their best, follow these care tips:
- **Hydrate Your Nails* Regularly apply cuticle oil and hand cream to keep your nails and skin moisturized.
- **Avoid Harsh Chemicals* Protect your nails from damage by wearing gloves when using harsh cleaning products.
- **Regular Touch-Ups* Keep a small bottle of polish for quick touch-ups to maintain your nail design throughout the school year.

### **Conclusion**
Starting the school year with a fresh, fun manicure is a great way to express your style and boost your confidence. From playful polka dots and cute animal prints to chic minimalist designs and sparkling glitter, there’s a nail art idea for every personality. So grab your favorite nail polish and get creative with these adorable designs to make a stylish statement on your first day back!

#backtoschool #nailart #cutenails #teennails #nailinspo #trendynails #schoolstyle #manicuremagic

image
লাইক
মন্তব্য করুন
শেয়ার করুন
Pennys Pretty Projects
1 Y ·অনুবাদ করা

The Art of Time: Exploring the Beauty of Stunning Clock Sketch Art

Clock sketch art is a captivating fusion of precision and creativity that transcends mere timekeeping. It is an artistic expression that captures the intricate mechanics of clocks and the passage of time, intertwining them with the imagination of the artist. This unique genre of art has gained popularity for its ability to evoke nostalgia, admiration, and a deep appreciation for the craftsmanship of timepieces. In this article, we will delve into the world of clock sketch art, exploring its history, techniques, and the reasons behind its enduring appeal.

A Brief History of Clocks in Art
The depiction of clocks in art is not a new phenomenon. Throughout history, clocks have been symbols of human ingenuity, mortality, and the relentless march of time. The earliest clocks, such as sundials and water clocks, were often depicted in ancient artworks and manuscripts as symbols of wisdom and divine order.

With the advent of mechanical clocks in the Middle Ages, these devices became more than just timekeepers; they were masterpieces of craftsmanship and engineering. Artists of the Renaissance, such as Albrecht Dürer, began to include detailed clockwork mechanisms in their sketches and engravings, highlighting the beauty of these intricate machines.

As time progressed, the Baroque and Rococo periods saw clocks becoming central decorative elements in art and architecture. The clock sketch art of these eras often featured elaborate designs, with flowing lines and ornate details that mirrored the grandeur of the period's architecture and interior design.

The Modern Renaissance of Clock Sketch Art
In the 21st century, clock sketch art has experienced a resurgence in popularity. This revival can be attributed to a growing appreciation for vintage and steampunk aesthetics, as well as a renewed interest in hand-drawn art forms in an increasingly digital world. Artists today are drawn to the challenge of capturing the mechanical complexity and timeless elegance of clocks through the medium of sketching.

image
লাইক
মন্তব্য করুন
শেয়ার করুন
মন্তব্যগুলি Pennys Pretty Projects দ্বারা নিষ্ক্রিয় করা হয়েছে৷
Showing 8790 out of 11874
  • 8786
  • 8787
  • 8788
  • 8789
  • 8790
  • 8791
  • 8792
  • 8793
  • 8794
  • 8795
  • 8796
  • 8797
  • 8798
  • 8799
  • 8800
  • 8801
  • 8802
  • 8803
  • 8804
  • 8805

অফার সম্পাদনা করুন

স্তর যোগ করুন


একটি ছবি নির্বাচন করুন
আপনার স্তর মুছুন
আপনি কি এই স্তরটি মুছতে চান?

রিভিউ

আপনার সামগ্রী এবং পোস্ট বিক্রি করার জন্য, কয়েকটি প্যাকেজ তৈরি করে শুরু করুন। নগদীকরণ

ওয়ালেট দ্বারা অর্থ প্রদান করুন

পেমেন্ট সতর্কতা

আপনি আইটেমগুলি ক্রয় করতে চলেছেন, আপনি কি এগিয়ে যেতে চান?

ফেরত এর অনুরোধ