Good and Bad People Good and Bad People
    #socialmedia #usa #uk #contentwriter #casino
    البحث المتقدم
  • تسجيل الدخول
  • التسجيل

  • وضع اليوم
  • © 2025 Good and Bad People
    حول • الدليل • إتصل بنا • المطورين • سياسة الخصوصية • شروط الاستخدام • إعادة مال • Referral Terms • Acceptable Use Policy • Community Guidelines • Write for Us

    تحديد اللغة

  • Arabic
  • Bengali
  • Chinese
  • Croatian
  • Danish
  • Dutch
  • English
  • Filipino
  • French
  • German
  • Hebrew
  • Hindi
  • Indonesian
  • Italian
  • Japanese
  • Korean
  • Persian
  • Portuguese
  • Russian
  • Spanish
  • Swedish
  • Turkish
  • Urdu
  • Vietnamese

يشاهد

يشاهد بكرات

أحداث

تصفح الأحداث أحداثي

مدونة

تصفح المقالات

السوق

آخر المنتجات

الصفحات

صفحاتي صفحات أعجبتني

أكثر

إستكشاف منشورات شائعة وظائف عروض بالتمويل
بكرات يشاهد أحداث السوق مدونة صفحاتي الكل

إستكشف المشاركات

Posts

المستخدمين

الصفحات

مجموعة

مدونة

السوق

أحداث

وظائف

بالتمويل

Pennys Pretty Projects
1 ذ ·ترجم

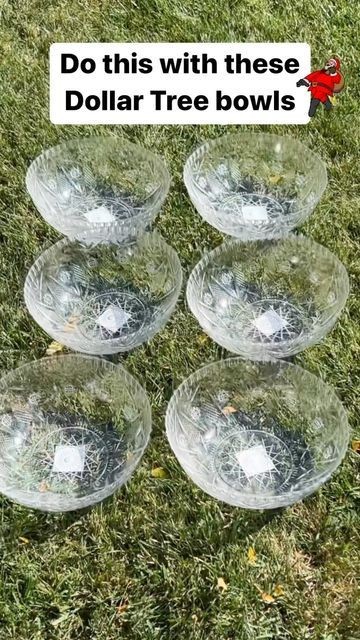
Creative and Budget-Friendly Ideas for Dollar Tree Bowls

When it comes to home decor and organization, Dollar Tree is a treasure trove of affordable and versatile items. Among their best offerings are bowls, which can be transformed into stunning decor pieces, functional organizers, or personalized gifts. Here are some creative ideas for using Dollar Tree bowls that can enhance your home while keeping your budget intact.

1. Decorative Centerpieces
Transform a simple Dollar Tree bowl into an eye-catching centerpiece for your dining table or coffee table. Here’s how:

Fill with Seasonal Items: Use bowls to create seasonal displays. In the fall, fill a bowl with mini pumpkins, pinecones, and leaves. For winter, consider using ornaments, artificial snow, or pine branches. In the spring, you can fill bowls with faux flowers or pastel-colored eggs.

Candle Displays: Arrange pillar candles of varying heights in a bowl, adding decorative sand, pebbles, or seashells around the base. This can create a warm ambiance and serve as a beautiful focal point.

Fruit Bowl: Use a larger bowl to display fresh fruits. Not only is this functional, but it also adds color and vibrancy to your kitchen or dining area.

2. Organizational Solutions
Bowls from Dollar Tree can help keep your space tidy and organized. Here are some ideas for utilizing them in various rooms:

Bathroom Storage: Use small bowls to hold cotton balls, swabs, and other bathroom essentials. You can even paint or decorate the bowls to match your bathroom decor.

Office Organizer: Group small bowls on your desk to store paper clips, push pins, rubber bands, and other office supplies. Label each bowl for easy identification.

Kitchen Helper: Keep spices, small kitchen gadgets, or snack items organized in bowls. This can help reduce clutter and make it easier to find what you need while cooking.

3. DIY Craft Projects
Dollar Tree bowls can also be incorporated into various craft projects. Here are a few ideas to inspire your creativity:

Mosaic Bowls: Use small pieces of colorful paper, tile, or glass to create a mosaic effect on the outside of a bowl. Mod Podge can help secure the pieces and create a cohesive look. This project can be tailored to fit any color scheme or theme.

Painted Bowls: Give your bowls a fresh look by painting them. Use acrylic paints or spray paint to add a pop of color. You can also stencil designs or use washi tape to create patterns.

Upcycled Bird Feeders: Transform a bowl into a bird feeder by attaching it to a wooden post or hanging it from a tree with rope. Fill it with birdseed and enjoy watching the birds flock to your yard.

4. Themed Gift Ideas
Dollar Tree bowls can be used as unique containers for gift-giving. Here are some themed ideas:

Self-Care Kit: Fill a bowl with self-care items like bath bombs, lotions, and scented candles. Wrap it in cellophane for a lovely presentation.

Movie Night Package: Create a fun movie night gift by filling a bowl with popcorn, candy, and a few classic DVDs. You can even include a cozy blanket for a complete package.

Kitchen Starter Set: Fill a bowl with essential kitchen gadgets like spatulas, measuring cups, and a recipe book for a thoughtful housewarming gift.

5. Seasonal Decor
Seasonal decorations can be easily created with Dollar Tree bowls to celebrate holidays throughout the year:

Halloween Bowls: Fill bowls with fake spiders, eyeballs, or candy for a spooky display. You can also paint bowls in Halloween colors and display them as decorative pieces.

Thanksgiving Centerpiece: Create a bowl filled with faux fall leaves, gourds, and a candle in the center. This can serve as a stunning focal point for your Thanksgiving dinner table.

Christmas Ornaments: Fill a bowl with Christmas ornaments, pine branches, and twinkling lights for a festive decoration. You can even personalize ornaments for a special touch.

6. Pet Bowls
Transform Dollar Tree bowls into stylish pet feeding stations:

Decorative Pet Bowls: Use bowls to create a designated feeding area for your pets. You can decorate them with pet-safe paint and personalize them with your pet's name.

Treat Containers: Use small bowls to store your pet's treats. This not only keeps the treats organized but also allows for easy access when it's time for a snack.

7. Party Favors and Decorations
If you’re planning a party or event, Dollar Tree bowls can serve multiple purposes:

Candy Stations: Fill bowls with an assortment of candies and snacks for guests to enjoy. This works well for birthday parties, weddings, or holiday gatherings.

Themed Party Favors: Create themed party favors by filling small bowls with goodies that match your event's theme. For example, for a beach-themed party, fill bowls with seashells, sand, and beach-related items.

Table Settings: Use bowls as unique table settings by placing individual bowls of salad, soup, or snacks at each place setting for an interactive dining experience.

Conclusion
Dollar Tree bowls are not only affordable but also incredibly versatile, making them perfect for various home decor, organization, and crafting projects. With a little creativity, these simple bowls can be transformed into beautiful centerpieces, effective organizers, thoughtful gifts, and so much more. Whether you’re decorating for a holiday, organizing your home, or creating unique gifts, the possibilities with Dollar Tree bowls are endless. So next time you’re at Dollar Tree, don’t overlook these simple items—they could become the stars of your home decor!

image
إعجاب
علق
شارك
Pennys Pretty Projects
1 ذ ·ترجم

Easy Hair Drawing: An Art Tutorial

Drawing hair can often be one of the most challenging aspects of portraiture and figure drawing. However, understanding a few fundamental techniques can simplify the process and make it enjoyable. This tutorial will guide you through easy methods for drawing hair, suitable for beginners and those looking to refine their skills.

Understanding Hair Structure
Before diving into the drawing process, it’s essential to understand the structure of hair. Hair consists of strands that can vary in thickness, texture, and style. Here are some key points to consider:

Strands vs. Volume: Hair is made up of many strands that can fall in various directions. It’s important to represent both the strands and the overall volume of hair.

Light and Shadow: Hair has a natural shine and can reflect light, creating highlights and shadows. Understanding how light interacts with hair can enhance the realism of your drawings.

Textures: Hair can be straight, wavy, or curly, and each texture has its own characteristics. Observing and practicing different textures will help you create more dynamic hair drawings.

Materials Needed
To get started, gather the following materials:

Pencils: A range of graphite pencils (2H to 6 for different shading and detailing.
Eraser: A kneaded eraser is ideal for subtle corrections.
Paper: Smooth drawing paper or sketch paper.
Blending Stumps: For smoothing out pencil strokes.
Reference Images: Photos or illustrations of hair for practice.
Step-by-Step Tutorial
Step 1: Sketch the Basic Shape
Start by lightly sketching the basic shape of the head and hair. Use simple shapes to define the outline:

Draw an oval for the head.
Add guidelines for the face to help position the features accurately.
Outline the shape of the hair, considering the hairstyle. Remember that hair typically extends beyond the skull.
Step 2: Divide the Hair into Sections
To make the hair drawing more manageable, divide it into sections:

Identify the main sections of hair (e.g., bangs, sides, back).
Use light lines to mark these sections, as they will guide your drawing.
Step 3: Draw the Hair Strands
Now, it’s time to focus on drawing individual hair strands:

Use Curved Lines: Hair strands are rarely straight. Use gentle, curved lines to represent the flow of hair. Vary the direction of the curves to create a natural look.

Start with the Roots: Begin at the roots and draw outward. This technique helps to maintain the hair's volume and flow.

Overlap Strands: To add depth, overlap some strands over others. This technique creates the illusion of layers.

Step 4: Add Texture and Detail
Next, you’ll want to add texture and detail to the hair:

Vary Line Thickness: Use different pencil pressures to create thicker and thinner lines. Thicker lines can represent darker areas or shadow, while thinner lines can depict lighter strands.

Create Highlights and Shadows: Use an eraser to lift some graphite from areas where light hits the hair, creating highlights. Darken other areas to represent shadows, giving your drawing more depth.

Blend: If you’re using graphite pencils, blend the hair using a blending stump or your finger. This step will soften any harsh lines and give a more realistic appearance.

Step 5: Final Touches
Once you’re satisfied with the hair, it’s time for the final touches:

Refine Details: Go back and refine any areas that need more definition. This could include darkening shadows or adding more strands.

Review the Overall Composition: Step back and look at your drawing as a whole. Ensure the hair looks natural and complements the face.

Clean Up: Erase any unnecessary guidelines or smudges, and ensure your drawing looks clean.

Step 6: Practice Different Styles
To become proficient at drawing hair, practice various hairstyles and textures:

Straight Hair: Focus on smooth, flowing lines. Use fewer curves to represent the sleekness.
Curly Hair: Emphasize the spirals and volume. Curly hair often has more overlapping strands.
Wavy Hair: Use soft, undulating lines to convey the relaxed texture of wavy hair.
Experiment with different styles to build confidence and versatility in your hair drawing skills.

Additional Tips for Drawing Hair
Study Real Hair: Spend time observing real hair and how it behaves in different lighting conditions. Take photos or create studies to understand the nuances better.
Use References: Reference images are invaluable for understanding how hair looks in various styles and lighting. Use them to guide your drawings.
Practice Regularly: The more you practice, the better you’ll become. Set aside time each week to focus specifically on drawing hair.
Be Patient: Drawing hair can be time-consuming, especially when aiming for realism. Don’t rush the process; take your time to achieve the desired results.

Conclusion

Drawing hair doesn’t have to be intimidating. By breaking the process down into manageable steps and practicing various techniques, you can create beautiful and realistic hair in your art. Remember that practice is key, so keep experimenting with different styles and textures. With time and dedication, you’ll develop your unique approach to hair drawing, enhancing your overall artistic skills. Happy drawing!

image
إعجاب
علق
شارك
Sofias Travel USA
Sofias Travel USA
1 ذ ·ترجم

Cool Bedroom Ideas for a Stylish Space Cool Bedroom Ideas for a Stylish Space
Your bedroom is more than just a place to sleep; it's a personal sanctuary where you can express your style and relax. If you're looking to upgrade your space, these cool bedroom ideas will inspire you to create a room that’s both functional and stylish. From modern designs to creative DIY projects, here’s how you can make your bedroom the ultimate cool hangout.

1. Go Minimalist with a Modern Touch
Why It Works:
Minimalist designs offer a clean, uncluttered look that creates a calm and sophisticated environment.

How to Style:
Stick to a neutral color palette with shades of white, gray, or beige. Incorporate sleek, modern furniture with clean lines, and keep decor to a minimum. Use geometric patterns in your bedding or artwork to add subtle visual interest without overwhelming the space.

2. Create a Statement Wall
Why It Works:
A statement wall is a simple way to add drama and focus to your bedroom without overhauling the entire room.

How to Style:
Choose a bold paint color, patterned wallpaper, or a mural for one wall in your bedroom. This wall can serve as a backdrop for your bed or a reading nook. You can also use textured materials like brick, wood, or fabric to create an interesting and dynamic look.

3. Incorporate Industrial Elements
Why It Works:
Industrial design brings a raw, edgy vibe to your room, combining functionality with a cool aesthetic.

How to Style:
Use materials like metal, wood, and exposed brick to achieve an industrial look. Choose furniture with a mix of wood and metal, such as a bed frame with a metal headboard or a reclaimed wood nightstand. Add in vintage or factory-style lighting fixtures to complete the look.

4. Add a Pop of Color
Why It Works:
A pop of color can instantly brighten your room and add personality without overwhelming the space.

How to Style:
Choose one or two bold colors to incorporate through accent pieces like throw pillows, rugs, or artwork. Bright shades of blue, yellow, or red can add energy, while pastel tones offer a more calming effect. Balance these with neutral tones to keep the overall look cohesive.

5. Make It Cozy with Layers
Why It Works:
Layering different textures and fabrics adds depth and warmth, making your bedroom feel inviting and comfortable.

How to Style:
Start with your bedding, layering soft sheets, a cozy duvet, and plenty of throw blankets and pillows. Use a mix of textures like knits, faux fur, and velvet to create a rich, tactile environment. Add a plush rug underfoot and hang heavy curtains for an extra cozy touch.

6. Design a Multi-Functional Space
Why It Works:
In a small bedroom, making your space multi-functional allows you to maximize its use without sacrificing style.

How to Style:
Incorporate furniture that serves multiple purposes, like a bed with built-in storage drawers or a desk that doubles as a vanity. Use vertical space with shelves or wall-mounted organizers to keep your room tidy. Create distinct areas for sleeping, studying, and lounging to make the most of your space.

7. Bring the Outdoors In with Plants
Why It Works:
Plants add life and freshness to any room, creating a calming atmosphere and improving air quality.

How to Style:
Choose easy-to-care-for plants like succulents, ferns, or snake plants that thrive indoors. Place them on windowsills, shelves, or hang them from the ceiling in stylish planters. Use a variety of plant sizes and shapes to create visual interest and a lush, green vibe.

8. Personalize with DIY Decor
Why It Works:
DIY decor projects allow you to customize your space and make it truly your own.

How to Style:
Create custom wall art, paint your own furniture, or craft decorative items like personalized photo frames or dream catchers. This not only saves money but also adds a unique, personal touch to your room.

Conclusion: Create Your Dream Bedroom
With these cool bedroom ideas, you can transform your space into a stylish and functional haven. Whether you’re drawn to minimalist designs, industrial elements, or cozy layers, there’s a look here that will help you create a bedroom that reflects your personal style and meets your needs. Start experimenting with these ideas and turn your bedroom into the coolest room in the house!

#bedroomideas #roomdecor #diybedroom #modernbedroom #stylishspace #coolrooms #homedecor #interiordesign #bedroommakeover

إعجاب
علق
شارك
Pennys Pretty Projects
1 ذ ·ترجم

The Art of Drawing Stunning Scenery: A Comprehensive Guide for Aspiring Artists

Drawing stunning scenery is a captivating and rewarding aspect of art that allows artists to express their creativity and appreciation for the natural world. From majestic mountains and serene lakes to lush forests and vibrant sunsets, the ability to capture the beauty of landscapes on paper or canvas is a skill that can be developed through practice, observation, and understanding of artistic techniques. In this article, we will explore the fundamentals of drawing scenery, essential techniques, tips for improvement, and how to find inspiration in the world around us.

Understanding the Fundamentals of Landscape Drawing

Before diving into the techniques, it’s important to understand the basic elements that make up stunning scenery. Here are some fundamental concepts to consider:

1. Composition

Composition is the arrangement of elements within a drawing. A well-composed landscape drawing guides the viewer's eye through the scene and creates a sense of balance and harmony. Key components of composition include:

Rule of Thirds: Divide your canvas into thirds both horizontally and vertically. Place the main elements of your scenery along these lines or at their intersections to create a more dynamic composition.

Leading Lines: Use natural lines in the landscape, such as rivers, paths, or fences, to lead the viewer's eye into the drawing.

Framing: Incorporate elements in the foreground, such as trees or rocks, to frame the main subject, adding depth to the drawing.

2. Perspective

Perspective is crucial in creating a sense of depth and realism in your drawings. There are two main types of perspective to consider:

One-Point Perspective: This occurs when all lines converge at a single vanishing point on the horizon. It’s often used in scenes where the viewer is looking straight down a road or railway.

Two-Point Perspective: This involves two vanishing points on the horizon and is commonly used for depicting buildings or structures at an angle.

3. Light and Shadow

Understanding light and shadow is essential for creating three-dimensionality in your drawings. Observe how light interacts with objects in nature, and use shading techniques to depict depth. Pay attention to:

Light Source: Identify the direction of the light and how it affects the colors and shadows in your scenery.

Value: Use a range of values (light to dark) to create contrast and define shapes. This can enhance the realism of your drawing.

Techniques for Drawing Stunning Scenery

Once you grasp the fundamentals, you can explore various techniques to enhance your landscape drawings:

1. Sketching

Begin with light pencil sketches to outline your composition. Focus on the placement of key elements without worrying too much about details. This is the time to experiment with different layouts before committing to a final drawing.

2. Blocking In

After sketching, block in the major shapes and colors of the scenery. Use broad strokes to establish the overall form of the landscape. This technique helps you visualize how different elements fit together.

3. Layering

Incorporate layering to build depth and texture. Start with lighter colors and gradually add darker tones to create contrast. This technique works well with mediums such as watercolors, pastels, and acrylics.

4. Detailing

Once the base layers are complete, add details to enhance realism. Pay attention to textures, such as the roughness of tree bark, the smoothness of water, or the softness of clouds. Use fine brushes or pencils for intricate work.

5. Color Theory

Understanding color theory can elevate your landscape drawings. Consider the following:

Complementary Colors: Use colors opposite each other on the color wheel to create vibrant contrasts.

Analogous Colors: Colors that are next to each other on the wheel create harmony and are great for depicting natural scenery.

Atmospheric Perspective: Distant objects often appear lighter and less saturated. Use this technique to create depth by softening colors as they recede into the background.

Tips for Improvement

To refine your landscape drawing skills, consider the following tips:

1. Study Nature

Spend time outdoors observing different landscapes. Take note of how light, color, and form change throughout the day and in different weather conditions. Sketch from life as much as possible to improve your observational skills.

2. Analyze Masterworks

Study the works of renowned landscape artists, such as Claude Monet, Vincent van Gogh, or John Constable. Analyze their techniques, compositions, and use of color. This can provide valuable insights and inspire your own style.

3. Practice Regularly

Consistent practice is key to improvement. Set aside time each week to draw landscapes, experimenting with various techniques and styles. Don’t be discouraged by initial results; growth comes with persistence.

4. Seek Feedback

Share your work with fellow artists or join an art community. Constructive feedback can help you identify areas for improvement and inspire new ideas.

5. Embrace Mistakes

Mistakes are an essential part of the learning process. Rather than becoming frustrated, view them as opportunities for growth. Analyze what went wrong and how you can adjust your approach next time.

Finding Inspiration

Inspiration for landscape drawing can come from various sources. Here are some ideas to spark your creativity:

1. Nature Walks

Take regular walks in nature, bringing along a sketchbook to capture scenes that resonate with you. Whether it’s a vast mountain range or a quiet stream, the world is full of beautiful scenery waiting to be drawn.

2. Travel

Traveling to new locations can provide fresh perspectives and unique landscapes. Document your experiences through sketches, and use these as references for larger works.

3. Photography

Utilize photography as a tool for inspiration. Capture images of landscapes that intrigue you, and use them as references for your drawings. Be sure to add your own artistic interpretation.

4. Art Challenges

Participate in online art challenges or prompts that encourage landscape drawing. These can provide structure and motivation, pushing you to explore new subjects and styles.

5. Art Books and Magazines

Browse art books and magazines focused on landscape art. These can provide insight into different techniques and styles, as well as inspiration for your own work.

Conclusion

Drawing stunning scenery is an enriching artistic endeavor that invites you to explore the beauty of the natural world. By understanding the fundamentals of composition, perspective, and light, mastering various techniques, and consistently practicing your craft, you can create captivating landscape drawings. Remember to find inspiration in your surroundings, analyze the work of masters, and embrace the journey of artistic growth. With dedication and creativity, you can develop your unique style and express your vision of the stunning landscapes that inspire you. Happy drawing!

image
إعجاب
علق
شارك
Grace's Gorgeous Pins
1 ذ ·ترجم

23+ Date Night Beauty Ideas to Enhance Your Natural Glow

Planning a memorable date night often involves a little extra effort to look and feel your best. While elaborate makeup and hairdos can be fun, enhancing your natural glow with some simple yet effective beauty ideas can be even more impactful. Here’s a comprehensive guide to help you shine on your next date night:

1. Hydrate for Radiance

Drinking plenty of water is the simplest and most effective way to keep your skin hydrated and glowing. Aim for at least eight glasses a day, and add a hydrating face mask to your routine a day before the date.

2. Exfoliate Gently

Exfoliating your skin removes dead cells and reveals a fresh, glowing complexion. Use a gentle scrub or a chemical exfoliant with ingredients like glycolic acid or salicylic acid. Don’t over-exfoliate—once or twice a week is enough.

3. Moisturize with Care

Apply a rich moisturizer that suits your skin type. For an added glow, consider a moisturizer with illuminating particles or a subtle shimmer.

4. Prime for Perfection

A good primer smooths the skin and helps your makeup last longer. Choose one with a dewy finish to enhance your natural glow without looking greasy.

5. Opt for a Lightweight Foundation

Instead of a heavy foundation, go for a lightweight, luminous formula. BB creams or tinted moisturizers can provide coverage while allowing your natural skin texture to shine through.

6. Illuminate with Highlighter

Apply a highlighter on the high points of your face—cheekbones, brow bones, and the bridge of your nose. Cream or liquid highlighters tend to blend seamlessly and offer a more natural-looking glow.

7. Embrace the Dewy Look

Mix a few drops of liquid highlighter into your foundation for an all-over dewy effect. This technique can create a fresh and glowing appearance without a heavy makeup application.

8. Use a Setting Spray

A hydrating setting spray not only locks your makeup in place but also gives your skin a dewy finish. Opt for one with a glow-enhancing formula.

9. Focus on Groomed Brows

Well-groomed brows frame your face and can enhance your overall appearance. Use a brow gel to keep them in place and add a bit of color if needed.

10. Subtle Smoky Eyes

A soft smoky eye can add depth and drama without overpowering your natural beauty. Stick to neutral tones and blend well for a seamless look.

11. Define Your Lashes

Curl your lashes and apply a coat or two of mascara. For a more dramatic effect, use a volumizing mascara to make your lashes stand out.

12. Natural Lip Color

Choose a lip color that complements your natural shade. Tinted lip balms or glosses offer a hint of color while keeping your lips hydrated and soft.

13. Blush for a Healthy Glow

Apply blush to the apples of your cheeks for a natural flush. Cream blushes tend to blend better and give a more natural finish compared to powder blushes.

14. Healthy Hair Habits

Before your date, ensure your hair is clean and styled. A touch of hair oil or a shine spray can add luster without weighing your hair down.

15. Glow with a Body Oil

For a head-to-toe glow, apply a light body oil or shimmer lotion. Focus on areas like your shoulders, collarbones, and legs for a radiant look.

16. Nail Care

Well-maintained nails can enhance your overall appearance. Opt for a clear or subtle nude polish to keep things elegant and understated.

17. Fresh Fragrance

A light, fresh fragrance can be uplifting and add to your overall allure. Choose a scent that isn’t overpowering but complements your natural scent.

18. Healthy Skin from Within

Incorporate foods rich in antioxidants, vitamins, and minerals into your diet. Berries, nuts, and leafy greens can contribute to a healthy, glowing complexion.

19. Relax and De-Stress

Stress can affect your appearance. Take some time to relax before your date—whether it’s through a soothing bath, meditation, or a good book.

20. Professional Treatments

Consider a professional facial or skin treatment a few days before your date. Treatments like microdermabrasion or light peels can refresh your skin and enhance its glow.

21. Sleep Well

A good night’s sleep can work wonders for your appearance. Aim for 7-8 hours of restful sleep to ensure your skin looks refreshed and radiant.

22. Smile Brightly

Your smile is your best accessory. Maintain good oral hygiene and consider a whitening toothpaste or treatment if you want a brighter smile.

23. Confidence is Key

Finally, the best way to enhance your natural glow is to exude confidence. Feeling good about yourself will naturally make you look and feel more radiant.

Bonus Tip: Customize Your Routine

Everyone’s skin and style are unique. Experiment with these ideas to find what works best for you and tailor your routine to suit your personal preferences.

image
إعجاب
علق
شارك
Pennys Pretty Projects
1 ذ ·ترجم

Mastering the Art of Drawing Realistic 3D Water Drops 💧

Drawing realistic water drops can elevate your artwork, adding a touch of realism and dimension. This article will guide you through the essential techniques and tips for creating stunning, lifelike water drops that appear three-dimensional. Whether you’re a beginner or an experienced artist, mastering this skill can enhance your artistic repertoire.

Understanding the Nature of Water Drops
Before you start drawing, it’s crucial to understand the characteristics of water drops. Here are some key features:

Refraction: Water drops bend light, causing objects behind them to appear distorted.
Reflection: Light reflects off the surface of the drop, creating highlights.
Translucency: Water is transparent, allowing some light to pass through while absorbing others.
Surface Tension: Water drops maintain a rounded shape due to surface tension, which creates a smooth and shiny appearance.
Observing Real Water Drops
To effectively draw water drops, spend time observing them in real life. Look for various forms, sizes, and reflections in different lighting conditions. Take note of how they interact with surfaces, how light reflects and refracts through them, and how their shapes can change based on the surrounding environment.

Tools and Materials
To achieve realistic water drops in your drawings, gather the following tools:

Pencils: A range of pencils (H, HB, 2B, 4B, etc.) for different shading techniques.
Erasers: A kneaded eraser for highlights and a regular eraser for mistakes.
Paper: Smooth drawing paper or watercolor paper for better blending.
Blending Tools: Blending stumps, cotton swabs, or your fingers for smooth gradients.
Colored Pencils or Watercolors: For adding color to your drops, if desired.
Step-by-Step Guide to Drawing Realistic Water Drops
Step 1: Basic Shapes
Start by sketching the basic shape of the water drop. Use light pencil strokes to create an oval or teardrop shape, depending on the perspective. The drop should be wider at the bottom and taper towards the top.

Step 2: Adding Reflections
Next, consider the source of light in your drawing. Use a white or light-colored pencil to indicate where the light reflects off the drop. This is typically found on the upper part of the drop. Make sure the reflection is curved to follow the shape of the drop.

Step 3: Creating Depth with Shadows
To give your water drop a 3D effect, add shadows on the opposite side of the light source. Use a darker pencil (like 4 to create soft shadows around the edges. Blend the shadow gently into the drop’s body to maintain a smooth surface.

Step 4: Adding Color (Optional)
If you want to add color to your water drop, use colored pencils or watercolors. Lightly apply color around the edges of the drop, and gradually blend it towards the center. Remember, the color should be subtle, as water drops are generally transparent.

Step 5: Enhancing Details
Use a fine-tipped pencil or a white gel pen to add intricate details, such as tiny highlights or reflections from nearby objects. These details can enhance the realism of your water drop and create a sense of depth.

Step 6: Final Touches
Review your drawing and make any necessary adjustments. Darken the shadows or enhance the highlights as needed. This final pass will help unify the drawing and make the water drop appear more lifelike.

Tips for Drawing Realistic Water Drops
Practice Different Sizes: Experiment with various sizes of water drops to understand how reflections and shadows change.
Use Reference Images: Look for photographs of water drops to guide your drawings. Study the details in each image.
Experiment with Light: Practice drawing water drops under different lighting conditions to see how shadows and reflections vary.
Layer Your Work: Build up layers of shading gradually to create a smooth, realistic appearance.
Stay Patient: Realistic drawing takes time and practice. Don’t rush the process—allow yourself to refine your technique over time.
Common Mistakes to Avoid
Overdoing the Highlights: While highlights are essential, too much can make the drop look unnatural. Keep them subtle and well-placed.
Neglecting Shadows: Shadows provide depth and realism. Don’t skip this step; ensure you have a good balance of light and shadow.
Ignoring the Background: Consider how the water drop interacts with its background. A simple blurred background can enhance the drop's prominence.
Rushing the Process: Take your time with each step. Quality over speed is crucial in creating realistic art.

Conclusion

Drawing realistic 3D water drops can be a rewarding endeavor, enhancing your artistic skills and adding depth to your work. By understanding the nature of water drops, using the right tools, and following the step-by-step process, you can create stunning and lifelike representations. Remember, practice is key, so keep experimenting and refining your techniques. With patience and dedication, you’ll master the art of drawing water drops in no time!

image
إعجاب
علق
شارك
Sofias Travel USA
Sofias Travel USA
1 ذ ·ترجم

8 Cute Ways To Give Your Bedroom A Makeover For Teen Girls

Your bedroom is more than just a place to sleep—it's a reflection of your style and personality. If you're ready to refresh your space, these 8 cute makeover ideas are perfect for teen girls looking to create a room that’s stylish, cozy, and uniquely theirs. With a few simple changes, you can transform your bedroom into a space you’ll love to spend time in.

1. Add a Splash of Color with Accent Walls

Why It Works:

An accent wall can instantly change the vibe of your room, adding depth and personality with minimal effort.

How to Style:

Choose a bold color or patterned wallpaper that complements the rest of your room. If you’re into DIY, try painting a mural or using wall decals for a custom look. This is a great way to highlight your bed or study area and make your room feel more vibrant.

2. Cozy Up with String Lights

Why It Works:

String lights add a warm, cozy ambiance to any room, perfect for creating a relaxing environment.

How to Style:

Drape fairy lights around your bed frame, along the walls, or across your ceiling. You can also create a photo wall by clipping pictures to the lights with small clothespins. This will give your room a dreamy, personalized touch.

3. Update Your Bedding with Fun Prints

Why It Works:

Your bed is the focal point of your room, so updating your bedding is an easy way to make a big impact.

How to Style:

Choose bedding in bright colors or playful patterns that reflect your personality. Layer with throw blankets and decorative pillows to add texture and comfort. Whether you love florals, geometric designs, or pastel hues, fresh bedding will make your room feel new again.

4. Create a DIY Vanity Area

Why It Works:

A dedicated vanity space is both functional and stylish, giving you a spot to get ready and organize your beauty essentials.

How to Style:

Set up a small table or desk with a mirror, and add organizers for your makeup, jewelry, and hair accessories. Personalize the area with cute containers, a comfy chair, and a few decorative items like candles or small plants.

5. Add Personality with Wall Art

Why It Works:

Wall art is an easy way to express your style and make your room feel more personalized and unique.

How to Style:

Create a gallery wall with a mix of posters, framed prints, and DIY art. You can also hang tapestries, dream catchers, or inspirational quotes. Choose pieces that inspire you and make you happy every time you walk into your room.

6. Maximize Space with Smart Storage Solutions

Why It Works:

Keeping your room organized is key to creating a space that feels calm and inviting, and smart storage solutions can help you make the most of your space.

How to Style:

Use under-bed storage boxes, floating shelves, and multi-functional furniture like storage ottomans or a bed with built-in drawers. This will help you keep your room clutter-free while also giving you a place to display your favorite items.

7. Add a Pop of Green with Indoor Plants

Why It Works:

Indoor plants bring life and color into your room, creating a fresh and lively atmosphere.

How to Style:

Choose low-maintenance plants like succulents, snake plants, or pothos that are easy to care for. Place them on your windowsill, desk, or in hanging planters. If you’re not into real plants, faux plants can also add a natural touch without the upkeep.

8. Personalize with DIY Decor

Why It Works:

DIY decor is a great way to add personal touches to your room while showcasing your creativity.

How to Style:

Create your own photo frames, paint your own artwork, or craft decorative items like customized candles or bulletin boards. These personal touches will make your room feel uniquely yours and give it a one-of-a-kind look.

Conclusion: Make Your Bedroom Truly Yours

Giving your bedroom a makeover doesn’t have to be complicated or expensive. With these 8 cute and easy ideas, you can create a space that’s stylish, comfortable, and completely tailored to your tastes. Whether you’re adding color, updating your bedding, or creating your own DIY decor, these tips will help you turn your room into a perfect haven that reflects who you are.

#bedroommakeover #teenbedroomideas #roomdecor #diybedroom #teenstyle #homedecor #cozybedroom #personalizedspace

image
إعجاب
علق
شارك
Grace's Gorgeous Pins
1 ذ ·ترجم

The Ultimate List of Date Ideas: 1000 Date Ideas for Couples

When it comes to keeping the spark alive in a relationship, creativity and spontaneity are key. If you're searching for fresh and exciting ways to spend time with your partner, look no further. We’ve compiled the ultimate list of date ideas—1000 to be exact—to ensure your time together is anything but ordinary. Whether you’re planning a romantic evening or a fun adventure, this comprehensive guide has something for every couple.

Romantic Dates

Candlelit Dinner at Home: Cook a gourmet meal together and set the mood with candles and soft music.

Stargazing: Lay on a blanket under the stars and enjoy the night sky.

Sunset Picnic: Pack a basket and head to a scenic spot to watch the sunset.

Wine Tasting: Visit a local vineyard or host a wine-tasting night at home.

Couples’ Massage: Book a couple’s massage at a spa or give each other massages at home.

Chocolate Making: Create homemade chocolates together and enjoy them as you go.

Romantic Getaway: Plan a weekend escape to a cozy cabin or a luxurious hotel.

Love Letters: Write heartfelt letters to each other and exchange them.

Floating Lanterns: Release floating lanterns at night for a magical experience.

Watch the Sunrise: Wake up early to watch the sunrise together from a beautiful spot.

Adventure Dates

Hiking: Explore a new trail and enjoy the beauty of nature.

Kayaking: Rent a kayak and paddle through a local lake or river.

Zip-Lining: Experience the thrill of zip-lining through the treetops.

Rock Climbing: Try indoor or outdoor rock climbing for a fun physical challenge.

Scavenger Hunt: Create a scavenger hunt around your city or neighborhood.

Bike Ride: Explore new areas on bikes, whether in the city or countryside.

Hot Air Balloon Ride: Take to the skies for a breathtaking view from a hot air balloon.

Horseback Riding: Enjoy a peaceful or adventurous ride through scenic landscapes.

Skiing or Snowboarding: Hit the slopes together for some winter fun.

Camping: Spend a night under the stars in a tent or cabin.

Creative Dates

Painting Night: Buy some canvases and paints, and have a painting night at home.

Cooking Class: Take a cooking class together and learn to make a new dish.

DIY Projects: Work on a DIY home project or craft together.

Pottery Class: Sign up for a pottery class and create something unique.

Music Jam Session: If you’re musically inclined, have a jam session together.

Photography Challenge: Go on a photo walk and capture interesting sights.

Theater Performance: Attend a play, musical, or improv show.

Film Festival: Watch a series of films with a specific theme or genre.

Bookstore Date: Browse through a bookstore and pick out books for each other.

Gardening Together: Plant a garden or tend to existing plants together.

Fun & Casual Dates

Bowling: Enjoy a friendly competition at the bowling alley.

Mini Golf: Play a round of mini-golf and enjoy some lighthearted fun.

Food Truck Hop: Sample dishes from different food trucks around town.

Amusement Park: Spend a day riding roller coasters and playing games.

Ice Cream Tasting: Visit different ice cream shops and try various flavors.

Zoo or Aquarium: Explore wildlife or marine life at a local zoo or aquarium.

Comedy Club: Enjoy a night of laughter at a comedy club.

Beach Day: Spend a day at the beach, swimming, sunbathing, and playing games.

Board Games Night: Have a fun night in playing your favorite board games.

Farmers’ Market: Explore a farmers’ market and pick out fresh produce.

Seasonal Dates

Fall Foliage Walk: Take a stroll through a park or forest to enjoy the autumn colors.

Winter Ice Skating: Go ice skating at a local rink or outdoor pond.

Spring Flower Festival: Visit a flower festival or botanical garden in spring.

Summer Barbecue: Host a barbecue and enjoy outdoor grilling with friends or family.

Holiday Lights Tour: Drive around to see festive holiday lights and decorations.

Pumpkin Patch: Visit a pumpkin patch in the fall and pick out pumpkins to carve.

Cherry Blossom Viewing: Watch the cherry blossoms bloom in spring.

Beach Bonfire: Have a bonfire on the beach with s’mores and storytelling.

Ski Resort Visit: Spend a day at a ski resort in winter.

Spring Cleaning Together: Tackle a cleaning project together to refresh your space.

Learning Experiences

Language Class: Start learning a new language together.

Dance Class: Take a dance class and learn a new style of dance.

Historical Tour: Explore local historical sites or museums.

Science Museum: Visit a science museum and engage in interactive exhibits.

Art Gallery: Spend an afternoon at an art gallery or museum.

Cooking Challenge: Compete to create the best dish using specific ingredients.

Astronomy Night: Attend an astronomy event or visit a planetarium.

Local Workshops: Sign up for local workshops or seminars on topics of interest.

Cultural Festival: Attend a cultural festival to experience new traditions and foods.

Gardening Workshop: Learn about different types of plants and gardening techniques.

Personalized Dates

Memory Lane: Visit places that are significant to your relationship.

Dream Date: Plan a date based on your partner’s dreams and interests.

Bucket List Adventure: Check off a bucket list item together.

Surprise Date: Plan a surprise date and keep the details a secret.

Favorite Childhood Activities: Revisit activities you enjoyed as kids.

Family Recipes Night: Cook family recipes and share stories about them.

Pet Day Out: Spend the day with your pet, visiting pet-friendly places.

First Date Reenactment: Recreate your first date experience.

Cultural Cuisine Exploration: Try dishes from different cultures and cuisines.

Customized Scavenger Hunt: Create a scavenger hunt with clues that are meaningful to you both.

Adventure and Relaxation

Spa Day: Pamper yourselves with a full day at the spa.

Book a Retreat: Stay at a wellness retreat for relaxation and rejuvenation.

Hot Tub Soak: Relax in a hot tub or jacuzzi.

Adventure Park: Try an adventure park with zip lines, obstacle courses, and more.

Fishing Trip: Spend a day fishing at a local lake or river.

Horse-Drawn Carriage Ride: Enjoy a romantic carriage ride through a picturesque area.

River Cruise: Take a scenic cruise along a river or lake.

Outdoor Movie Night: Watch a movie outdoors under the stars.

Glamping: Experience luxury camping with all the amenities.

Historic Hotel Stay: Book a night at a historic or unique hotel.

Games and Challenges

Escape Room: Test your problem-solving skills together in an escape room.

Trivia Night: Attend a trivia night at a local bar or café.

Puzzle Challenge: Work together to complete a challenging puzzle.

Cooking Competition: Compete to create the best dish with random ingredients.

Charity Walk/Run: Participate in a charity walk or run for a good cause.

DIY Escape Room: Create your own escape room experience at home.

Virtual Reality Gaming: Try out virtual reality games and experiences.

Karaoke Night: Sing your hearts out at a karaoke bar.

Board Game Tournament: Have a tournament with your favorite board games.

Fitness Challenge: Set a fitness goal and work towards it together.

Quiet and Intimate

Reading Aloud: Read a book aloud to each other.

Intimate Dinner: Enjoy a simple yet meaningful meal together, like breakfast in bed.

Dream Mapping: Share your dreams and goals for the future.

Meditation Session: Practice meditation or mindfulness together.

Memory Scrapbook: Create a scrapbook with photos and mementos from your time together.

Star Naming: Name a star after each other and look for it in the night sky.

Shared Journal: Start a shared journal where you write notes to each other.

Tea Ceremony: Enjoy a traditional tea ceremony or create your own.

Writing Poetry: Write poems for each other and share them.

Slow Dance: Have a slow dance in your living room to your favorite songs.

image
إعجاب
علق
شارك
Pennys Pretty Projects
1 ذ ·ترجم

How to Draw: A Comprehensive Guide to Art Drawing

Drawing is one of the most fundamental forms of artistic expression. It allows individuals to convey emotions, ideas, and narratives through lines, shapes, and forms. Whether you are a beginner looking to develop your skills or an experienced artist seeking to refine your technique, this guide will provide you with a comprehensive overview of how to draw, covering essential tools, techniques, and tips to enhance your artistic journey.

Understanding the Basics of Drawing

Before diving into the techniques, it’s essential to understand what drawing is and the basic principles that govern it. Drawing is essentially the act of marking a surface with a tool to create images or designs. The fundamental elements of drawing include:

Lines: The most basic building block of any drawing. Lines can be straight, curved, thick, thin, dark, or light. They can represent shapes, textures, and contours.

Shapes: Shapes are created by combining lines. They can be geometric (like squares and circles) or organic (like the shapes of leaves and clouds). Understanding how to create and manipulate shapes is crucial for any artist.

Forms: Forms are three-dimensional shapes. When drawing, you can give the illusion of depth and volume by shading and highlighting your forms.

Value: This refers to the lightness or darkness of a color. Value helps create contrast and depth in your drawings.

Texture: Texture gives a surface its quality and feel, whether it’s smooth, rough, shiny, or matte. You can depict texture through various line techniques and shading methods.

Composition: This is how the elements of your drawing are arranged. A good composition guides the viewer’s eye and creates balance in the artwork.

Essential Drawing Tools

Having the right tools can make a significant difference in your drawing experience. Here are some essential tools for artists:

Pencils: Graphite pencils come in different hardness levels, from 9H (hard) to 9B (soft). Softer pencils are ideal for shading, while harder pencils are great for fine lines.

Erasers: A kneaded eraser is perfect for lightening areas without damaging the paper, while a regular eraser is useful for clean corrections.

Paper: The type of paper you choose can affect the quality of your drawing. Sketch paper is excellent for practice, while drawing paper offers better texture for finished work.

Charcoal: Charcoal is great for creating rich, dark lines and textures. It can be smudged for soft shading.

Inks and Pens: Ink pens provide a different texture and permanence compared to pencils. Brush pens and fine liners are popular choices for detailed work.

Blending Tools: Blending stumps, tortillons, or your fingers can help create smooth transitions between values.

Ruler and Compass: These tools are helpful for precise measurements and geometric shapes.

Techniques for Drawing

Now that you have your tools, let’s explore various drawing techniques you can practice.

1. Contour Drawing

Contour drawing involves creating an outline of a subject. This technique helps improve your observation skills and hand-eye coordination. To practice:

Choose a simple object.

Look at the object and draw its outline without looking at your paper.

Focus on the edges and details while keeping your pencil on the paper.

2. Gesture Drawing

Gesture drawing captures the essence of a subject quickly and loosely. This technique is beneficial for drawing figures or animals in motion. To practice:

Set a timer for one to five minutes.

Draw the subject quickly, focusing on capturing the movement and energy rather than details.

Use fluid lines to convey the posture and action.

3. Shading Techniques

Shading adds depth and dimension to your drawings. Here are some common shading techniques:

Hatching: Drawing parallel lines to create a shaded effect. The closer the lines, the darker the area appears.

Cross-hatching: Layering intersecting lines to build up value.

Stippling: Using dots to create texture and shading. The density of the dots determines the darkness.

Blending: Smoothly transitioning between light and dark areas using a blending stump or your finger.

4. Perspective Drawing

Understanding perspective is crucial for creating a sense of depth in your drawings. Here’s a basic approach:

One-point perspective: Use a single vanishing point on the horizon line to draw objects receding into space.

Two-point perspective: Use two vanishing points for more complex scenes, such as buildings or streets.

Three-point perspective: This adds a third vanishing point for more dramatic views, often used in tall buildings or looking up from the ground.

5. Still Life Drawing

Drawing still life involves creating compositions from inanimate objects. This practice helps develop your skills in observation and composition. To practice:

Set up a small arrangement of objects with varying shapes, sizes, and textures.

Pay attention to how light interacts with the objects, casting shadows and highlights.

Start with simple shapes and gradually add details.

Tips for Improving Your Drawing Skills

Practice Regularly: Consistency is key. Set aside time each day or week to draw, even if it’s just for a few minutes.

Draw from Life: Observing real-life subjects will enhance your ability to capture details and proportions accurately.

Experiment with Different Styles: Try various styles and techniques to find what resonates with you. This will help you develop your unique artistic voice.

Study the Work of Other Artists: Analyze the techniques of artists you admire. This can inspire your work and provide new ideas.

Take Breaks: Step away from your work occasionally. A fresh perspective can help you see areas for improvement.

Seek Feedback: Share your work with others and be open to constructive criticism. This can provide valuable insights and encouragement.

Keep a Sketchbook: Maintain a sketchbook for practice, experimentation, and doodling. It’s a great way to track your progress.

Conclusion

Drawing is a rewarding skill that opens up endless possibilities for creative expression. By understanding the fundamental elements, practicing various techniques, and consistently honing your skills, you can develop your drawing abilities and create compelling artwork. Remember, the journey of becoming a skilled artist takes time and patience, so enjoy the process and have fun exploring your creativity!

image
إعجاب
علق
شارك
Chloe Cozy Corners
Chloe Cozy Corners
1 ذ ·ترجم

10 Fabulous Back-to-School Nail Designs You'll Fall in Love With!

As the new school year approaches, it's the perfect time to revamp your look and make a stylish statement with your nails. Whether you’re a student eager to show off your style or a teacher wanting a touch of elegance, these 10 fabulous back-to-school nail designs are sure to make you fall in love. From playful patterns to chic finishes, here’s a guide to the most eye-catching nail designs to start your school year off right!

#### **1. Playful Polka Dots**
Polka dots are a timeless and fun nail design that adds a touch of whimsy to your look. Whether you go for classic black and white or vibrant colors, polka dots are perfect for a playful back-to-school vibe.

**How to Create It*
- **Dotting Tools* Use a dotting tool or a pin to create evenly spaced dots.
- **Color Combinations* Mix and match colors for a fun and dynamic look.

#### **2. Elegant Stripes**
Stripes are a classic design that never goes out of style. Choose from bold, contrasting colors or subtle pastels for a look that’s both sophisticated and trendy.

**Creating Striped Nails*
- **Nail Tape* Use nail tape to create clean, straight lines.
- **Color Choices* Opt for classic color combinations like black and white or go for bold contrasts.

#### **3. Chic Geometric Patterns**
Geometric patterns are modern and stylish, making them perfect for a fresh school year. From triangles to chevrons, these designs are both trendy and versatile.

**How to Achieve Geometric Patterns*
- **Stencils* Use stencils or tape to create sharp, geometric shapes.
- **Color Blocking* Combine different colors for a striking visual effect.

#### **4. Floral Fantasies**
Floral designs are always in bloom, making them a lovely choice for back-to-school nails. Whether you opt for delicate roses or bold sunflowers, floral nails add a touch of elegance.

**Creating Floral Nails*
- **Hand-Painted Flowers* Use a fine brush to paint intricate floral details.
- **Floral Stickers* For a quicker application, use floral nail stickers or decals.

#### **5. Sparkling Glitter Accents**
Add a touch of glam with glittery accents. Whether you go for full glitter coverage or just a hint of sparkle, glittery nails are perfect for making a statement.

**Tips for Glitter Nails*
- **Layering* Apply multiple coats of glitter polish for a dazzling effect.
- **Accent Nails* Consider using glitter on just one or two accent nails for a balanced look.

#### **6. Ombre Magic**
Ombre nails are a stunning way to blend colors seamlessly. This design is perfect for a gradient effect that transitions smoothly from one color to another.

**Creating Ombre Nails*
- **Sponge Technique* Use a makeup sponge to blend colors on your nails.
- **Choose Your Colors* Pick colors that complement each other for a beautiful gradient.

#### **7. Minimalist Elegance**
If you prefer a more understated look, minimalist designs can be incredibly chic. Simple lines, tiny dots, or geometric shapes on a neutral base can make a stylish statement.

**Minimalist Design Tips*
- **Neutral Base* Start with a neutral or nude base color.
- **Simple Accents* Add minimalistic accents for a refined look.

#### **8. Fun Fruit Designs**
Fruit-themed nails are playful and vibrant, perfect for adding a splash of summer to your back-to-school look. From watermelon slices to citrus fruits, these designs are both fun and fresh.

**Creating Fruit Nails*
- **Bright Colors* Use bright, bold colors to mimic different fruits.
- **Detailing* Add small details with a fine brush to capture the essence of each fruit.

#### **9. Nautical Themes**
Nautical designs are a classic choice that’s perfect for a preppy back-to-school look. Think anchors, stripes, and sailor hats for a stylish and nautical-inspired manicure.

**How to Achieve Nautical Nails*
- **Nail Art Pens* Use nail art pens for precise nautical details.
- **Color Scheme* Opt for traditional navy, white, and red for a classic nautical feel.

#### **10. Galaxy Nails**
For a more out-of-this-world look, galaxy nails are a stunning choice. This design features a cosmic blend of colors and sparkling stars, creating a dreamy, celestial effect.

**Creating Galaxy Nails*
- **Sponging Technique* Apply different shades of polish using a sponge for a blended, galaxy look.
- **Star Details* Add tiny stars with a dotting tool or brush for a celestial touch.

### **Nail Care Tips for a Fresh Look**
To keep your fabulous back-to-school nails looking their best, follow these care tips:
- **Apply a Base Coat* Protect your nails and enhance your design’s longevity with a base coat.
- **Use a Top Coat* Seal your design with a clear top coat to prevent chipping and add shine.
- **Hydrate Your Nails* Regularly apply cuticle oil and hand cream to keep your nails and skin healthy.

### **Conclusion**
With these 10 fabulous back-to-school nail designs, you’ll be ready to make a stylish entrance into the new school year. From playful polka dots and chic stripes to vibrant floral designs and sparkling glitter, there’s a perfect nail art idea for everyone. So grab your nail polish and get creative—these designs are sure to make your first day back both fun and fabulous!

#backtoschool #naildesigns #nailart #trendynails #schoolstyle #manicureinspo #cutenails #teennails #nailgoals

image
إعجاب
علق
شارك
Showing 8796 out of 11881
  • 8792
  • 8793
  • 8794
  • 8795
  • 8796
  • 8797
  • 8798
  • 8799
  • 8800
  • 8801
  • 8802
  • 8803
  • 8804
  • 8805
  • 8806
  • 8807
  • 8808
  • 8809
  • 8810
  • 8811

تعديل العرض

إضافة المستوى


حدد صورة
حذف المستوى الخاص بك
هل أنت متأكد من أنك تريد حذف هذا المستوى؟

التعليقات

من أجل بيع المحتوى الخاص بك ومنشوراتك، ابدأ بإنشاء بعض الحزم. تحقيق الدخل

الدفع عن طريق المحفظة

تنبيه الدفع

أنت على وشك شراء العناصر، هل تريد المتابعة؟

طلب استرداد